
Pending Orders — How To Guide
Purpose
This guide explains how to review, validate, create, verify, print, upload, bulk-process, and report on orders in the Pending Orders tab before they move to downstream operational workflows.
Overview
The Pending Orders section displays all orders that have been created but are not yet processed or moved to the next operational stage.
It acts as a central control and review hub, where operational teams can validate, edit, filter, and take actions on orders before they proceed to assignment, courier booking, or fulfillment stages.
This section ensures that all orders are properly verified and corrected (if required) before entering downstream workflows.
How to Access Pending Orders (Step-by-Step)
Navigate to Pending Orders
Go to:
Home → Orders → Order Management → Pending Orders
View Order List
Once opened:
-
All pending orders are displayed in a structured table
-
Each order includes key details
-
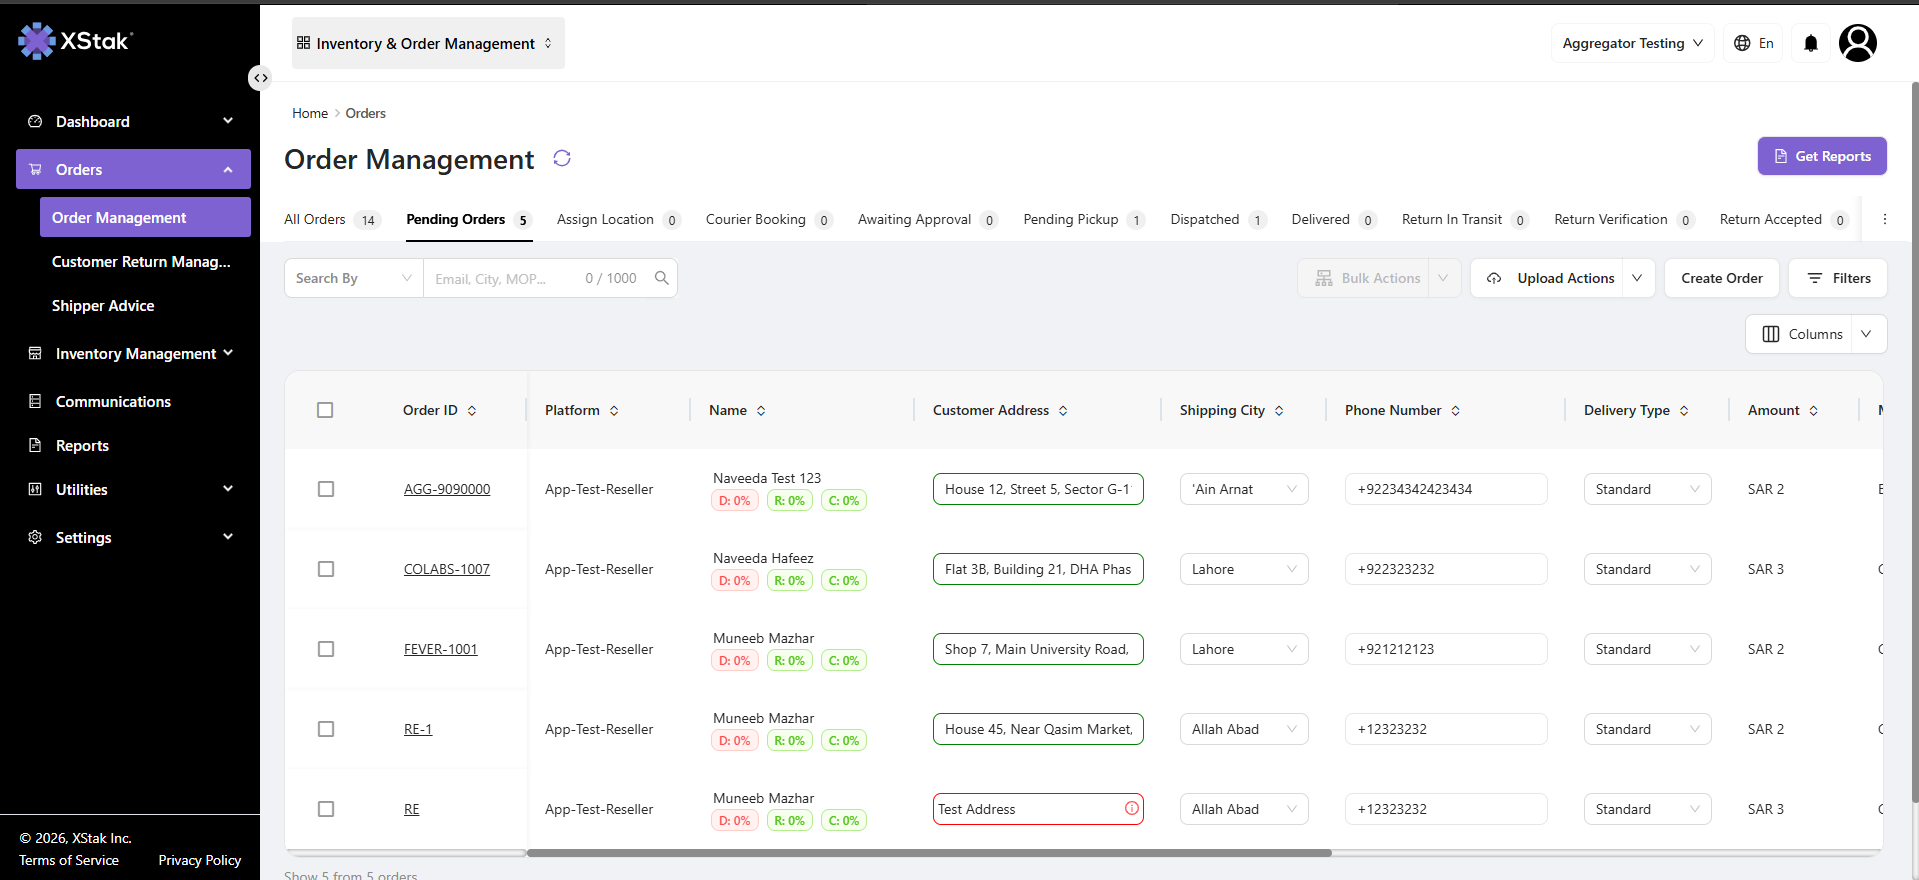
Search and Filter Orders
Use the search bar or filter options to refine results based on:
Click here to know: How Filtering Works in Order Management
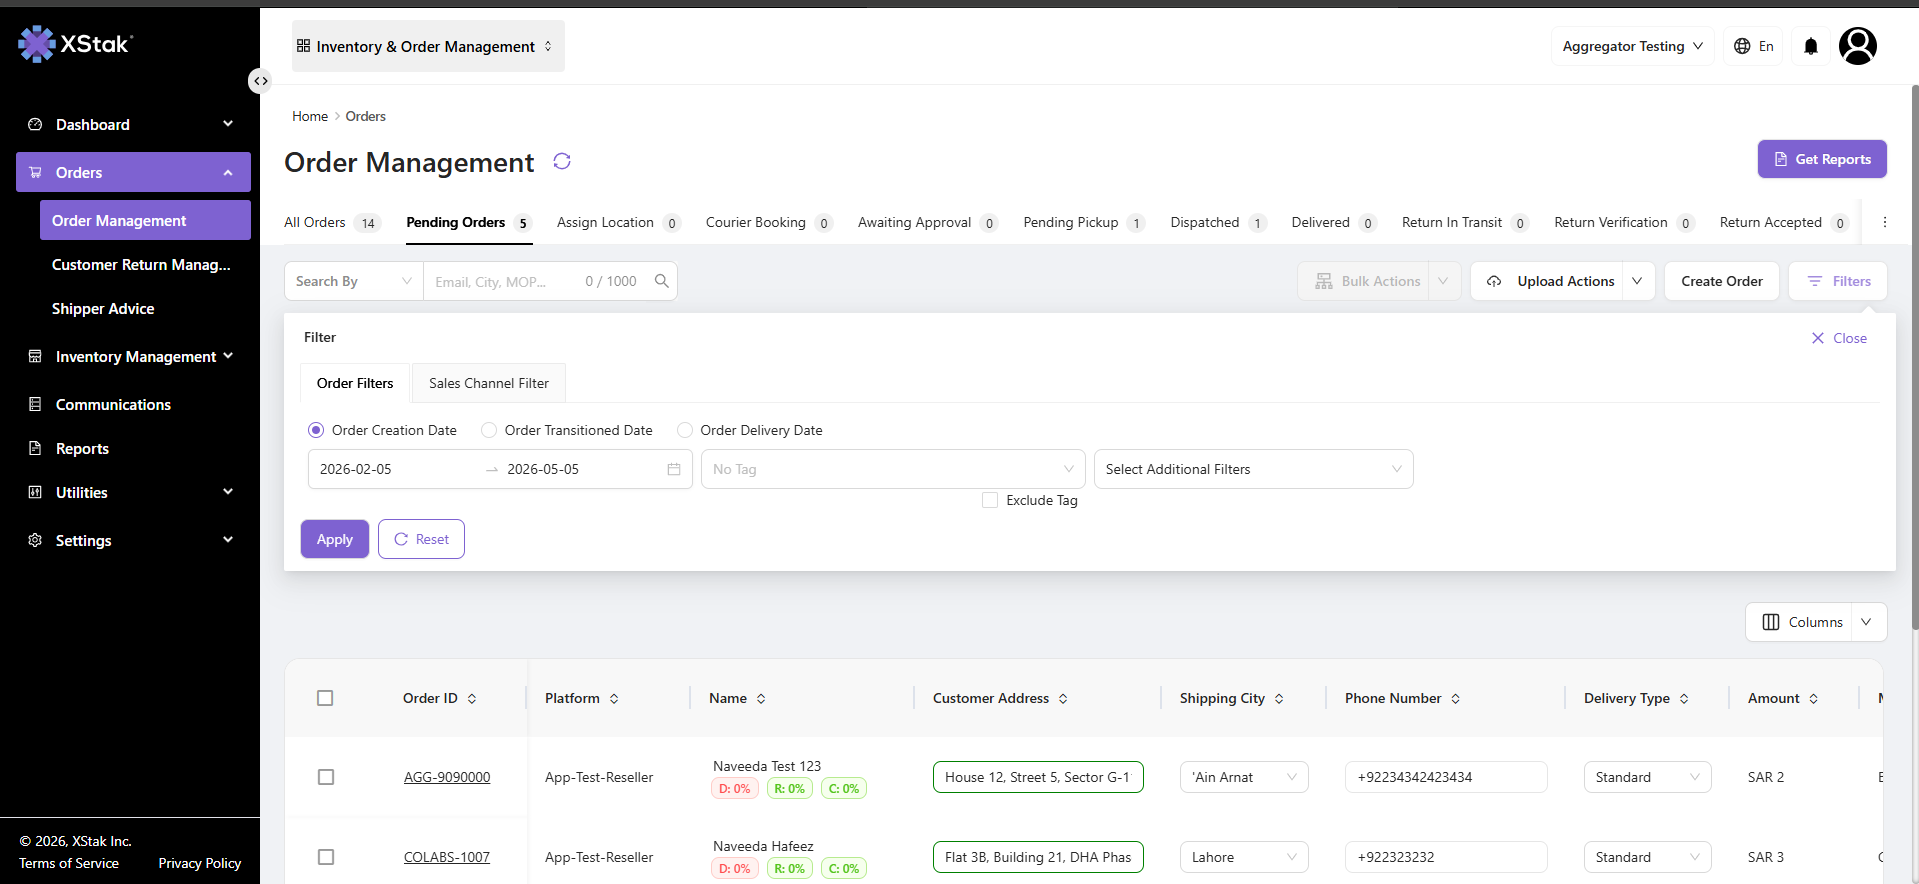
This helps in quickly identifying specific orders from large datasets.
How to Create Manual Orders from Pending Orders Tab (Step-by-Step)
The OMS allows users to create manual orders directly from the Pending Orders tab, enabling quick order entry without relying on external channels.
Step 1: Navigate to Pending Orders
Go to:
Orders → Order Management → Pending Orders
Step 2: Click on Create Order
At the top right of the Pending Orders screen:
-
Click on the Create Order button
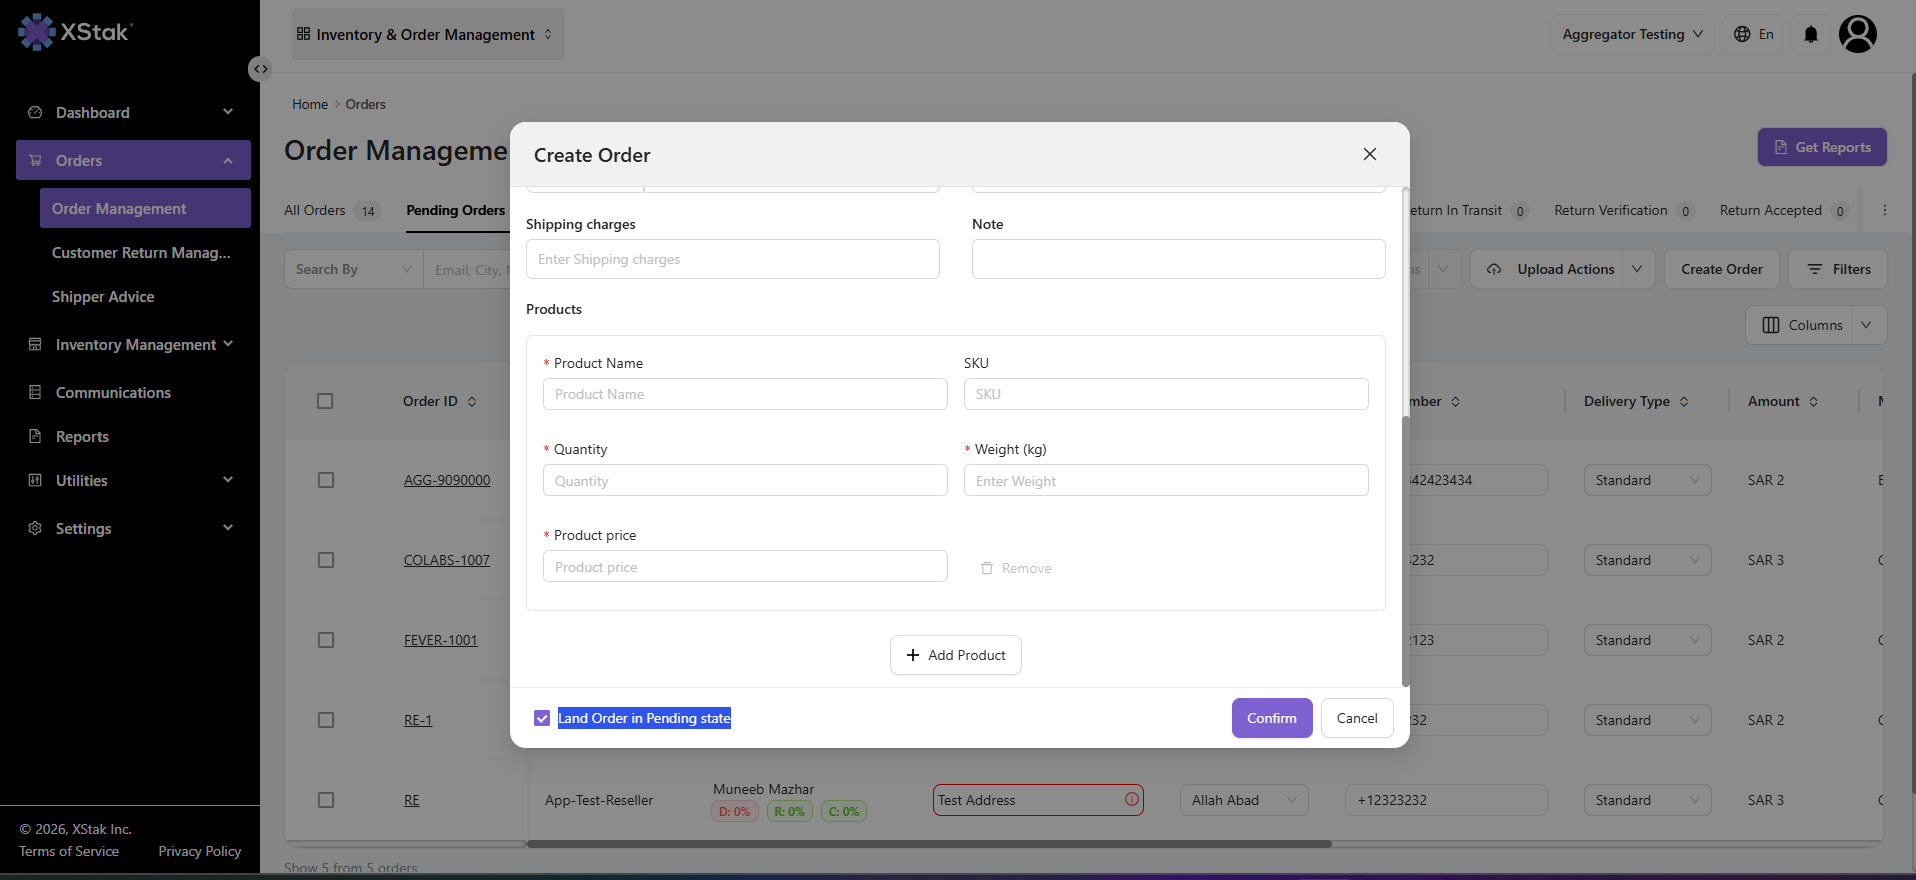
Step 3: Open Order Form
-
A structured Order Creation Form will open
-
This form is used to capture all required order and customer details
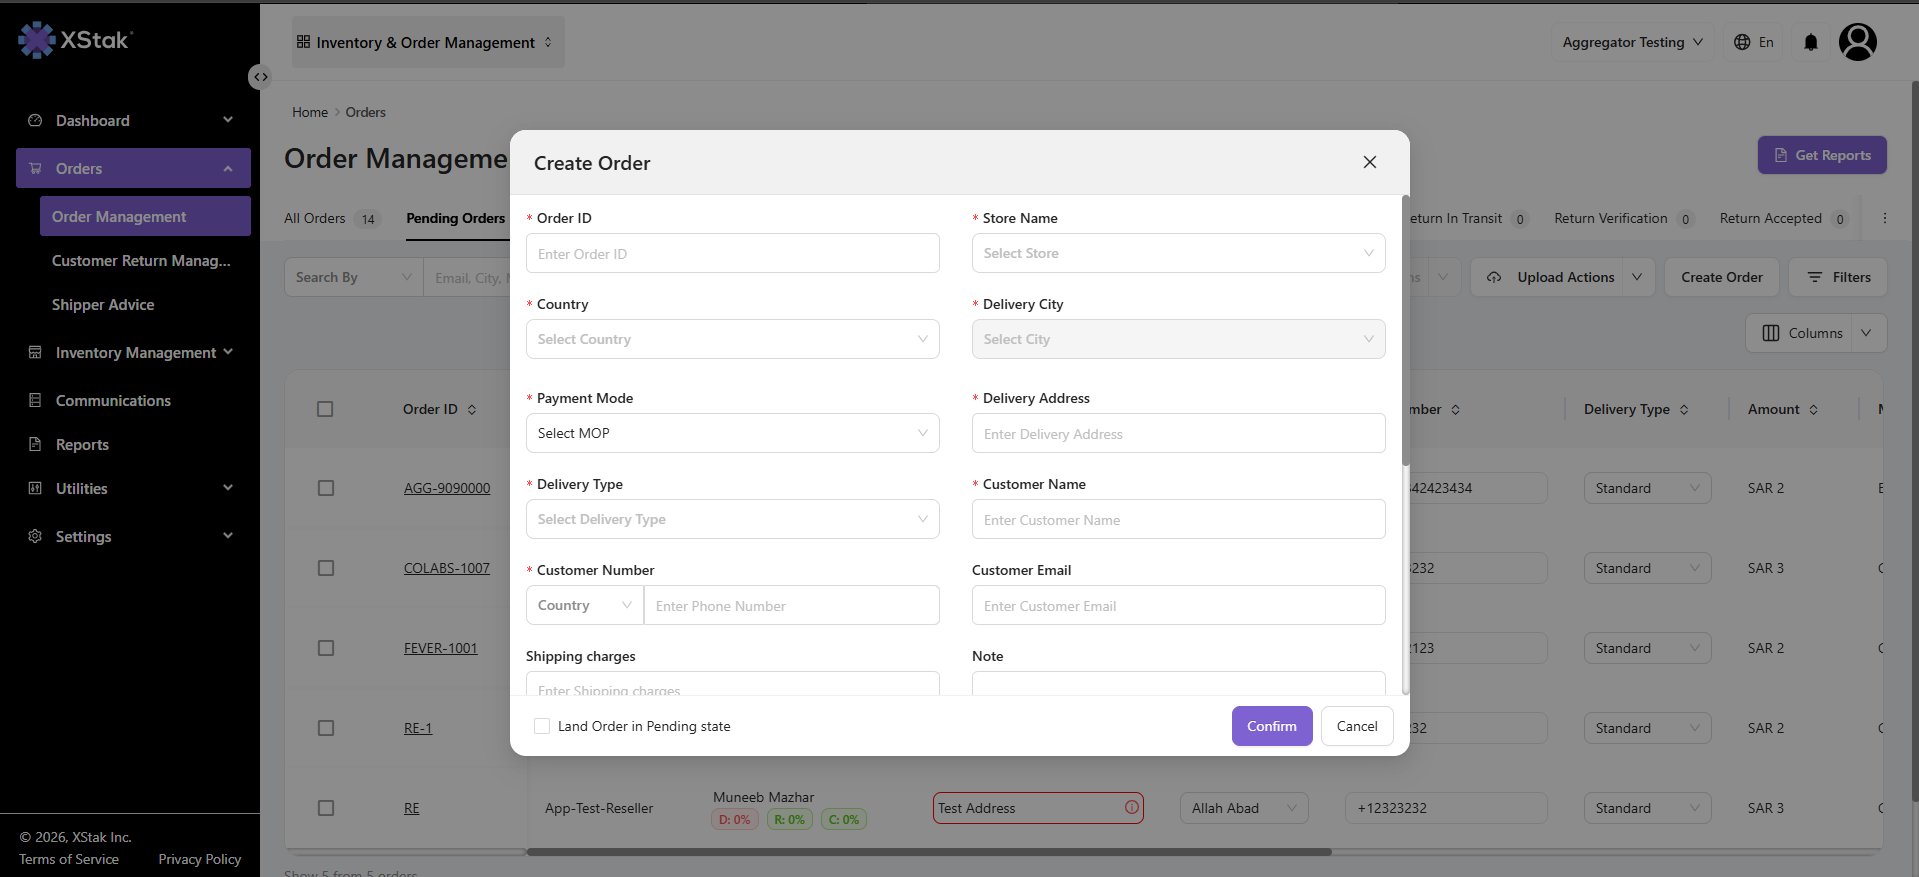
Step 4: Enter Order Information
Fill in the required fields:
-
Order ID
-
Store Name (Select Store)
-
Country (Select Country)
-
Delivery City (Select City)
-
Payment Mode
-
Delivery Address
-
Delivery Type
-
Customer Name
-
Customer Number
-
Customer Email
-
Shipping Charges
-
Notes (optional)
Step 5: Add Product Details
Under the Products section, enter:
-
Product Name
-
SKU
-
Quantity
-
Weight (kg)
-
Product Price
You can add multiple products within the same order if required.
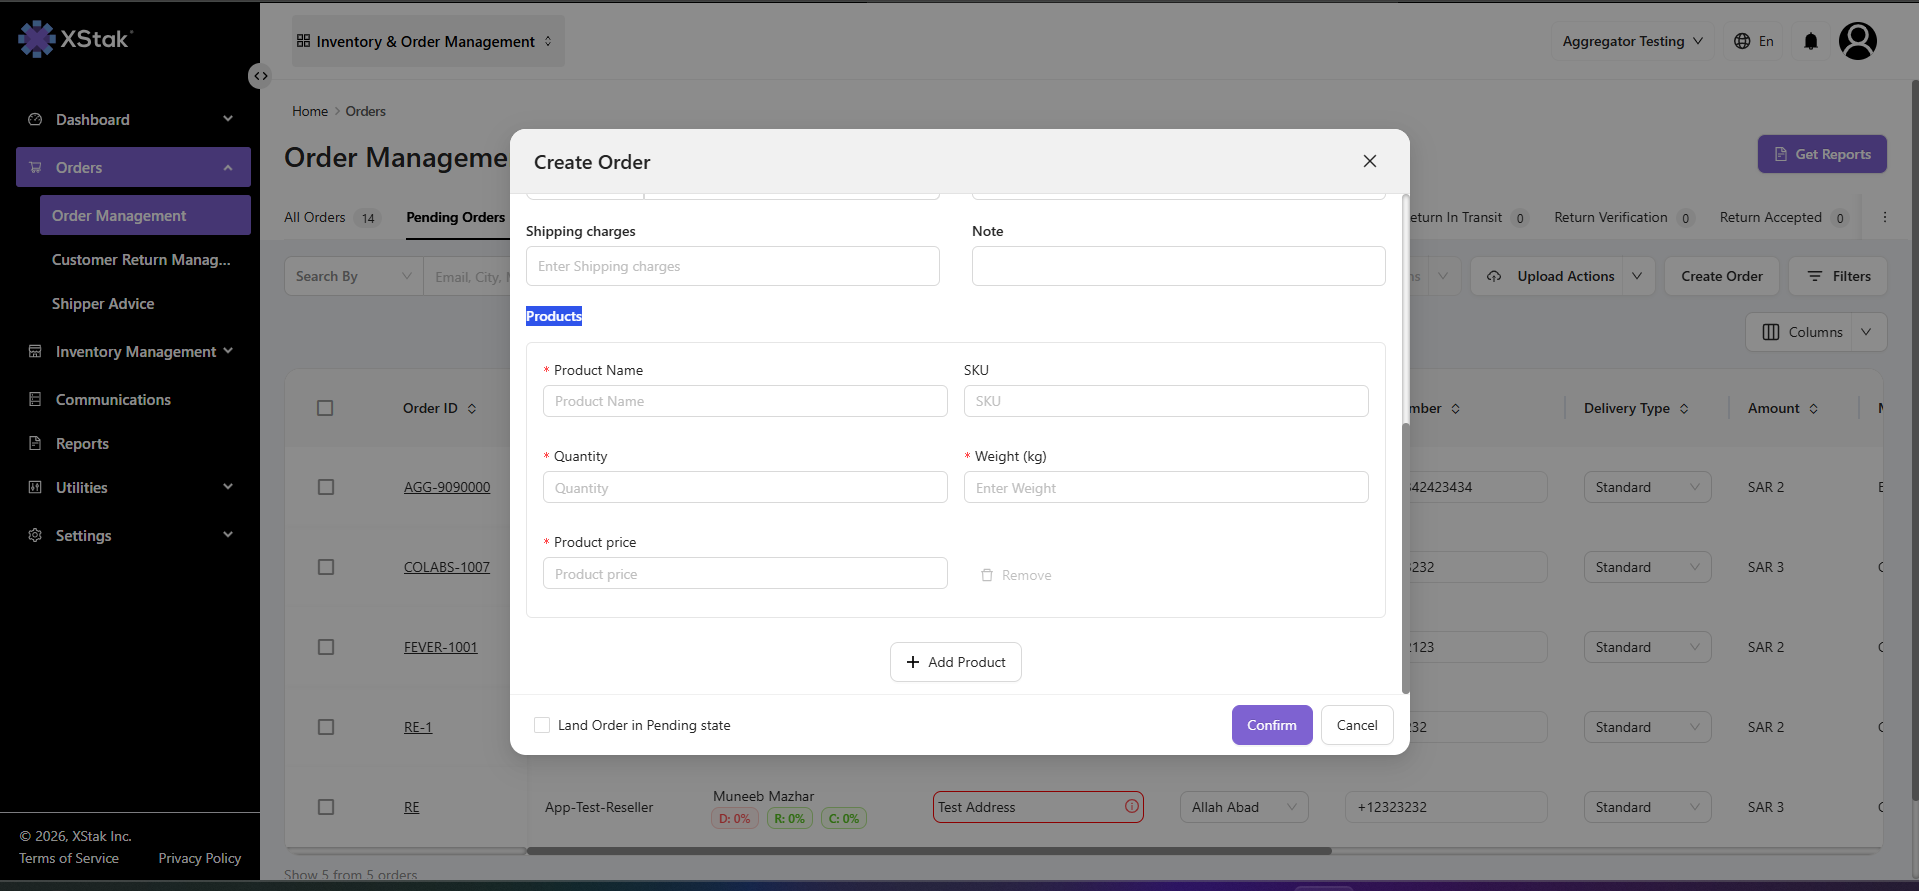
Step 6: Define Order Routing Behavior
Before submitting the order:
-
If “Land Order in Pending State” is enabled
→ The order will remain in the Pending Orders tab
-
If disabled
→ The order will follow the auto-verification and auto-assignment workflow
Step 7: Submit the Order
-
Click on Create Order to finalize the order
Result
-
The order is successfully created in OMS
-
It will appear in the Pending Orders tab (if configured)
-
Ready for further actions such as verification, editing, or assignment
Click here to know: How Editing Works in Order Management
How to Verify an Order (Pending Orders Tab)
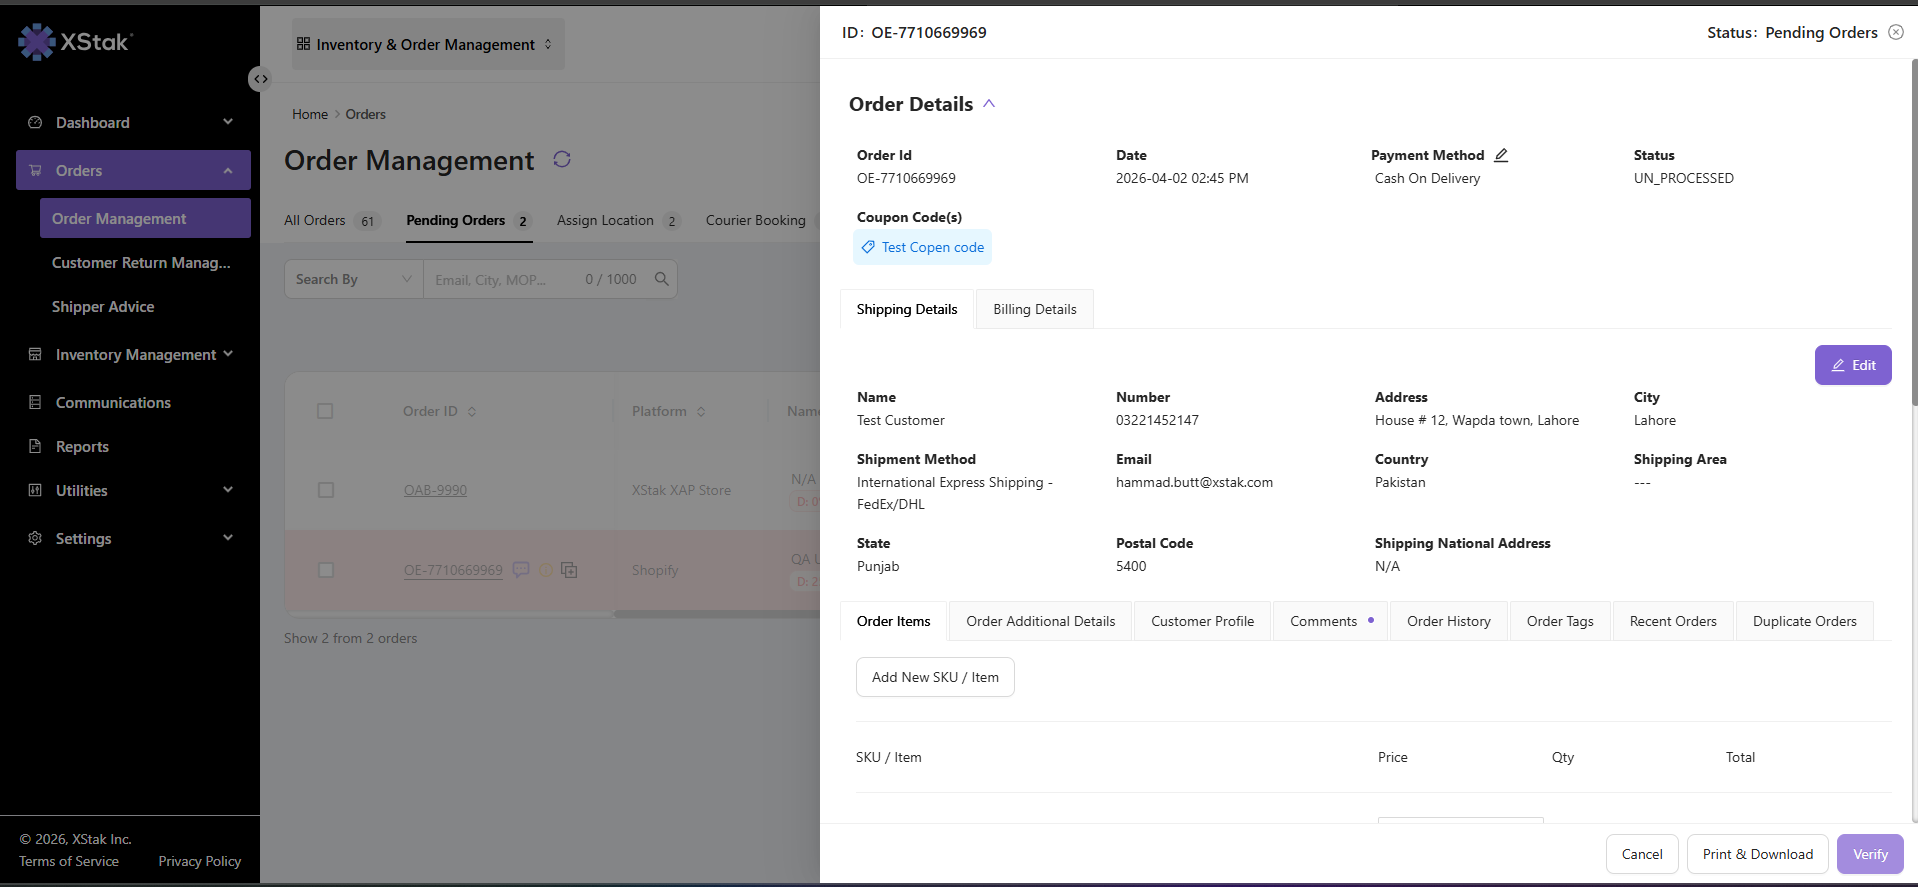
Step 1: Locate the Verify Button
-
Open order in Pending Orders tab
Step 2: Click Verify
-
Click on Verify button (bottom right)
Result
-
Order will be verified
-
It will move to the next stage (Assign Location)
How to Print & Download Order Slip
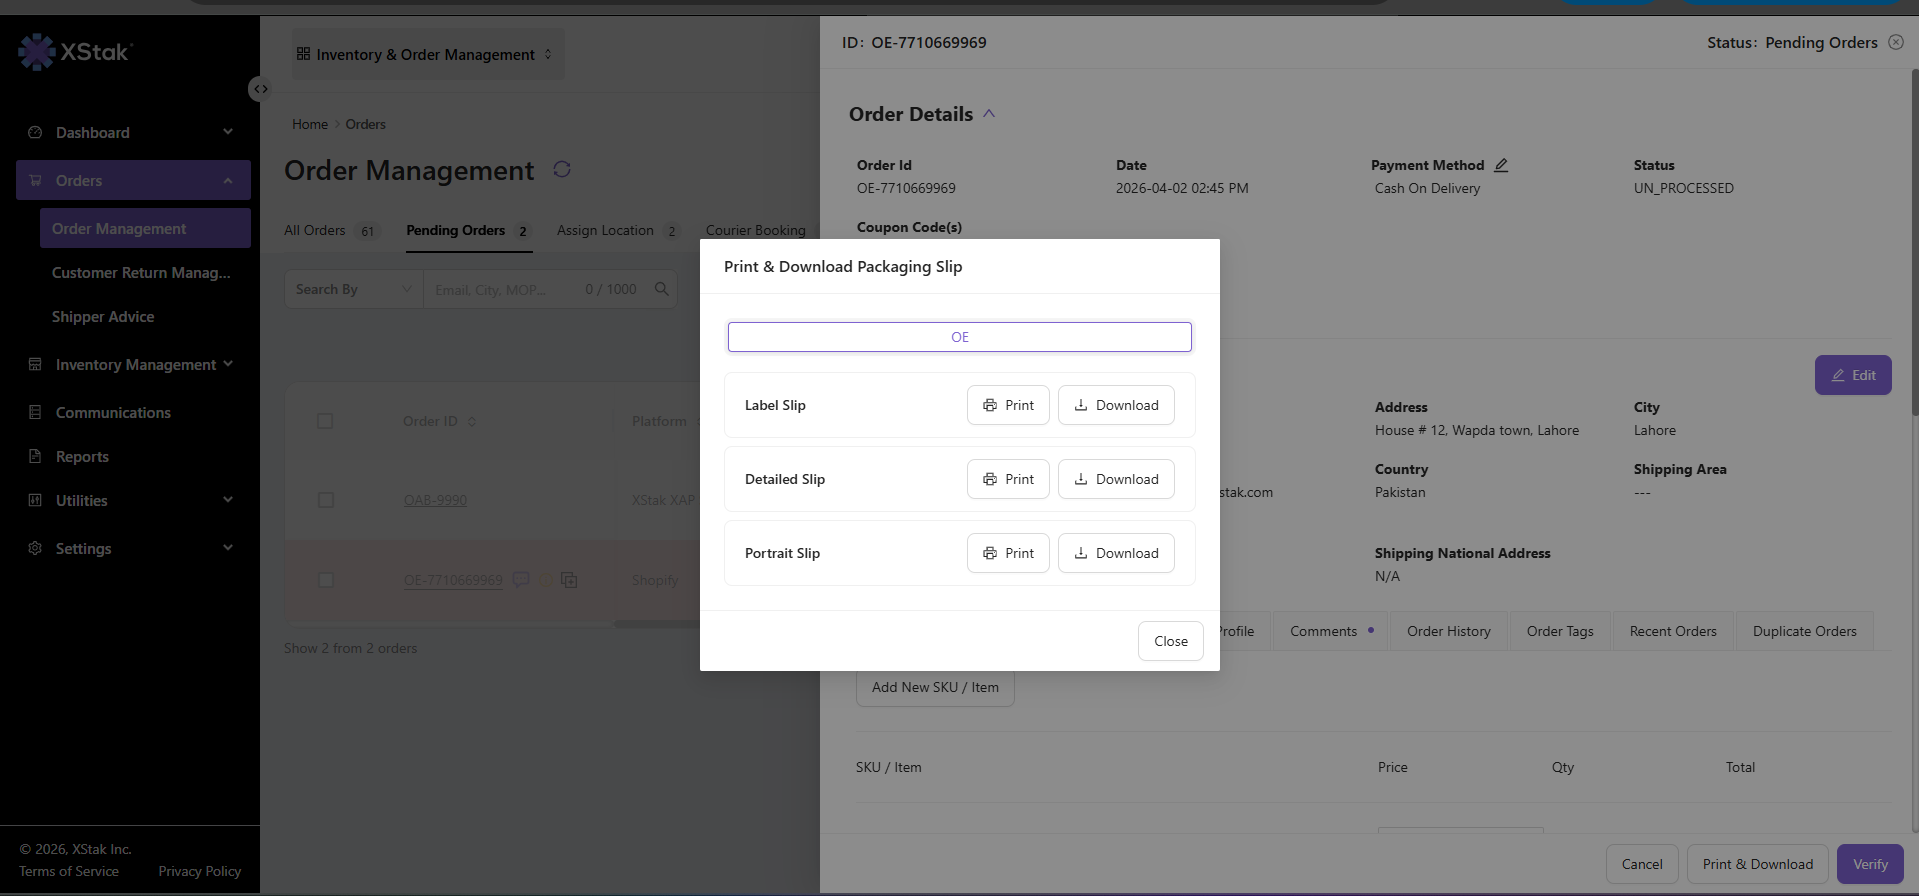
Step 1: Click Print & Download
-
Open the order and Click on Print & Download button
Step 2: Select OE Slip Type
A pop-up will appear with the following options:
-
Label Slip
-
Detailed Slip
-
Portrait Slip
Step 3: Print or Download
-
Choose to print directly
-
Or download the slip
How to Perform Bulk Actions
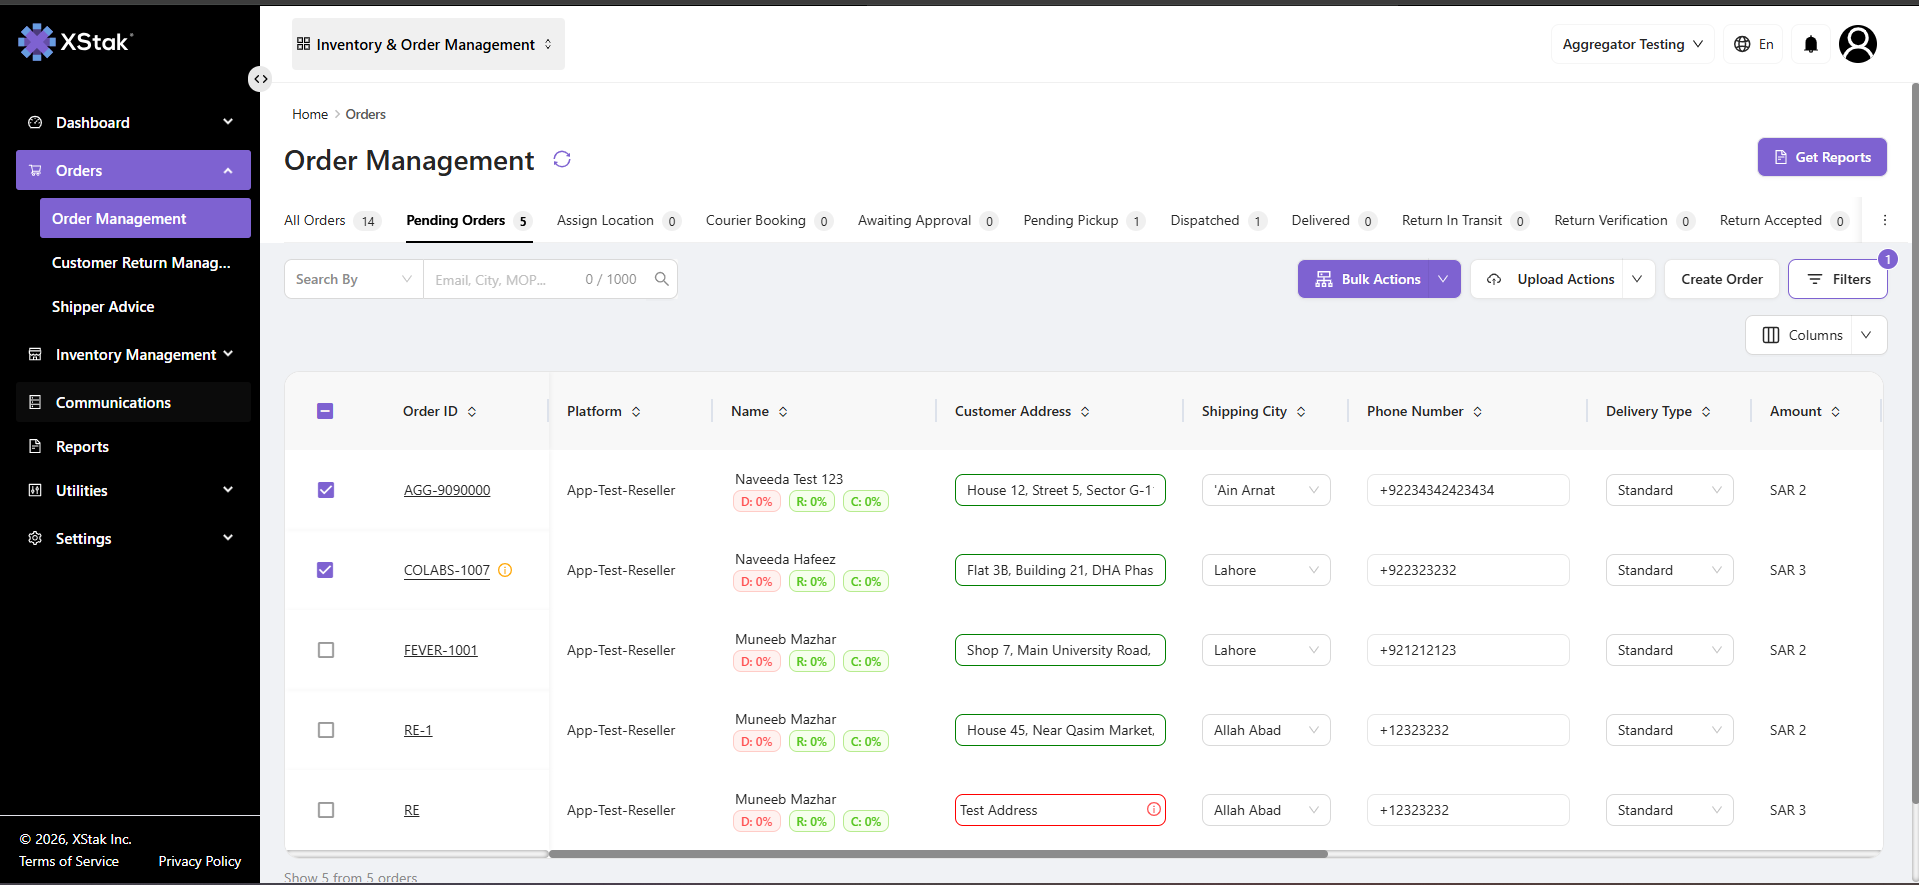
Step 1: Select multiple orders using the checkboxes on the left side.
Step 2: Use the Bulk Action Button
Then use the Bulk Actions Button to:
-
Verify Orders
-
Generate OE Slips
-
Cancel Order
-
Order Tags
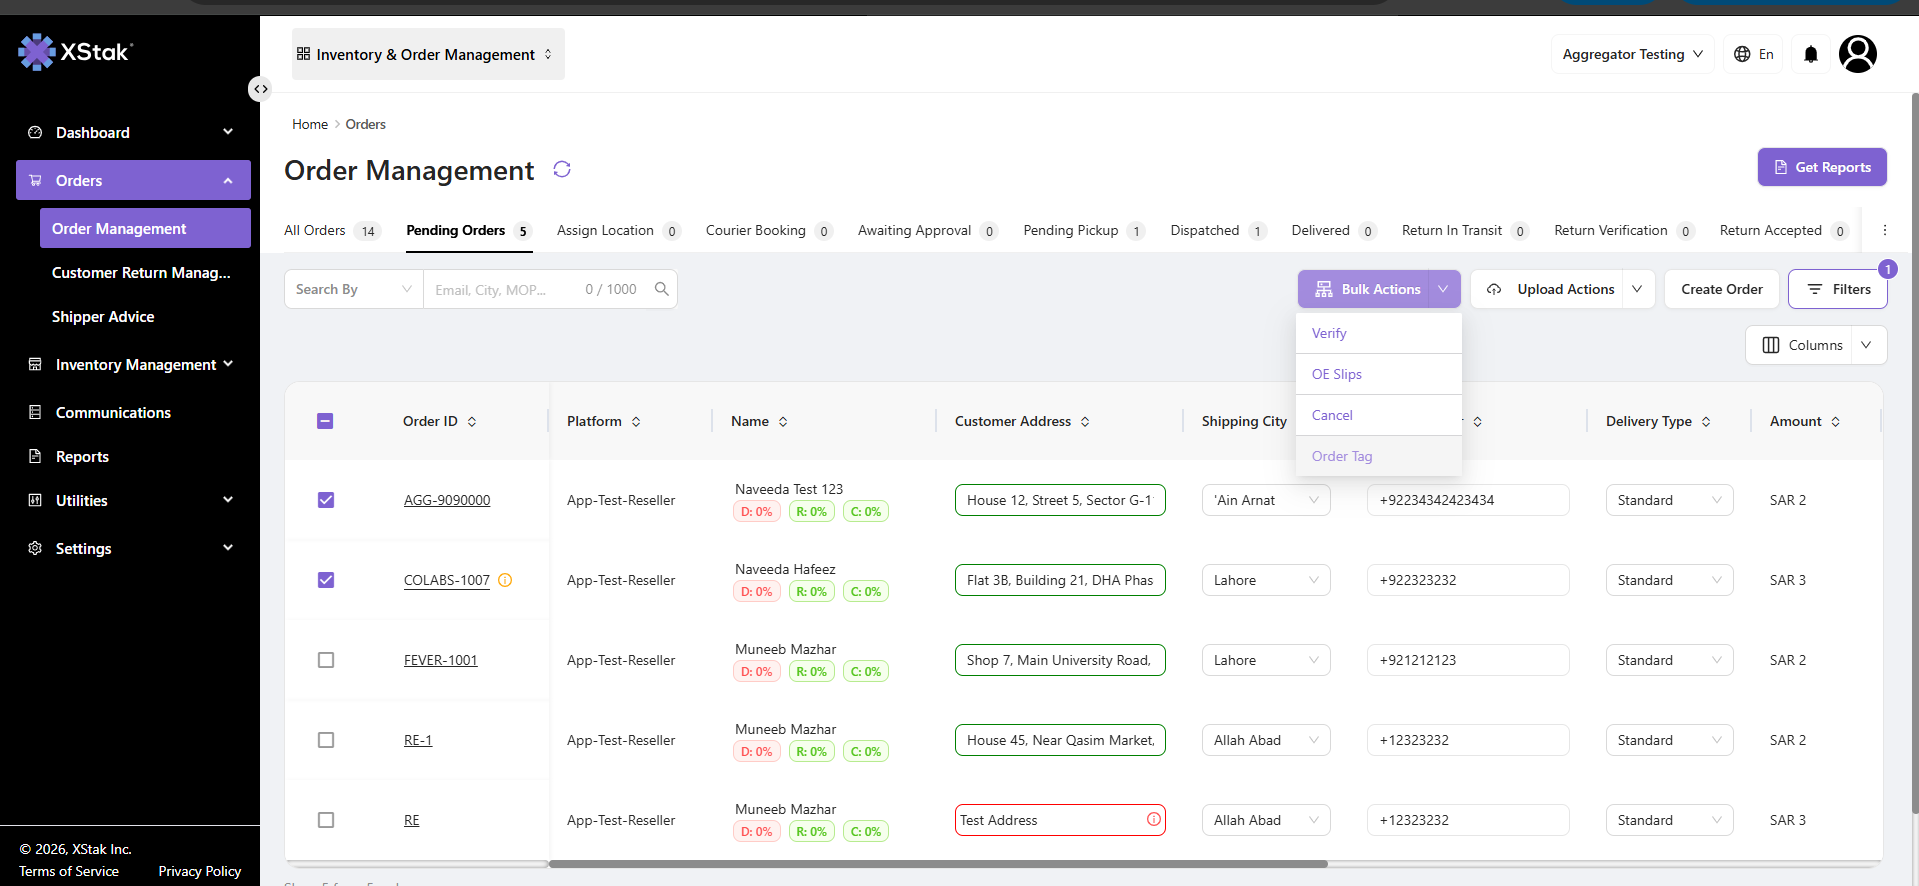
Bulk Action Functionalities
|
Action |
Description |
Purpose |
|---|---|---|
|
Verify Orders |
Confirms selected orders |
Ensures data accuracy before processing |
|
OE Slips |
Generates OE slips in bulk |
Used for operational documentation |
|
Cancel Orders |
Cancels selected orders |
Removes invalid or unwanted orders |
How to Access Upload File Feature
Click on the Upload File button available in the Pending Orders tab to begin bulk operations.
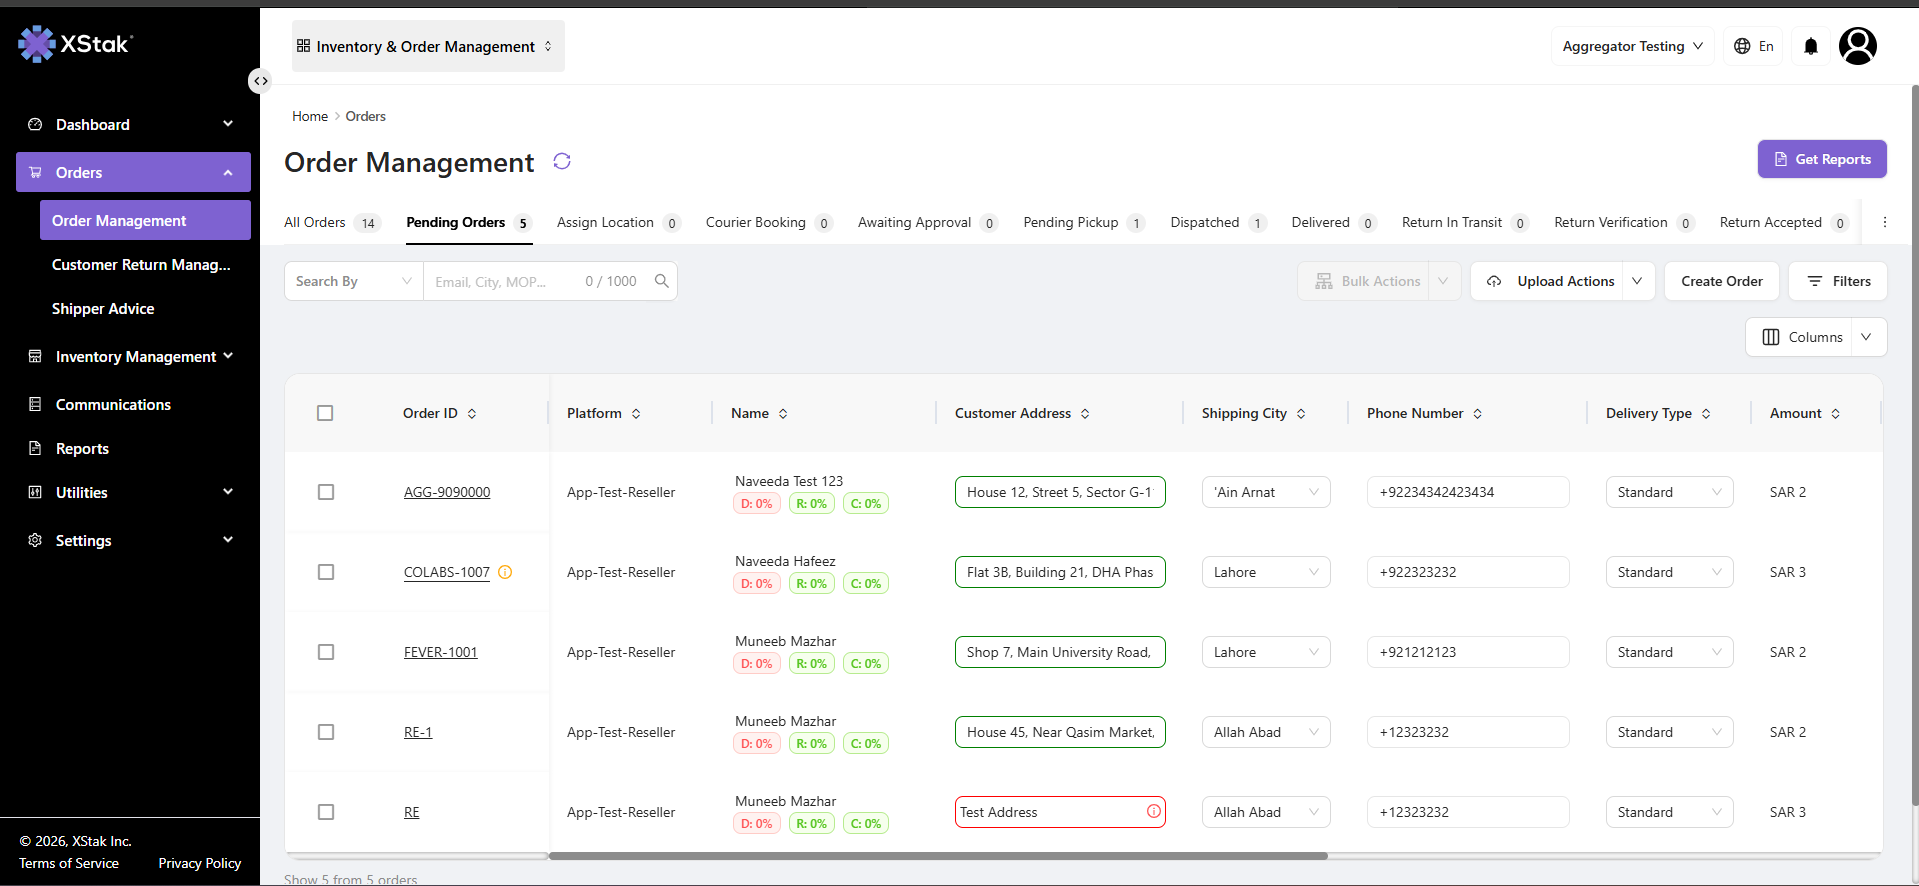
→ Available Bulk Upload Actions
When the upload pop-up appears, you will see multiple action types:
-
Upload File to Create Orders
-
Upload File to Verify Orders
-
Upload File to Cancel Orders
-
Upload File to Add Tags
-
Upload COD Adjustment File
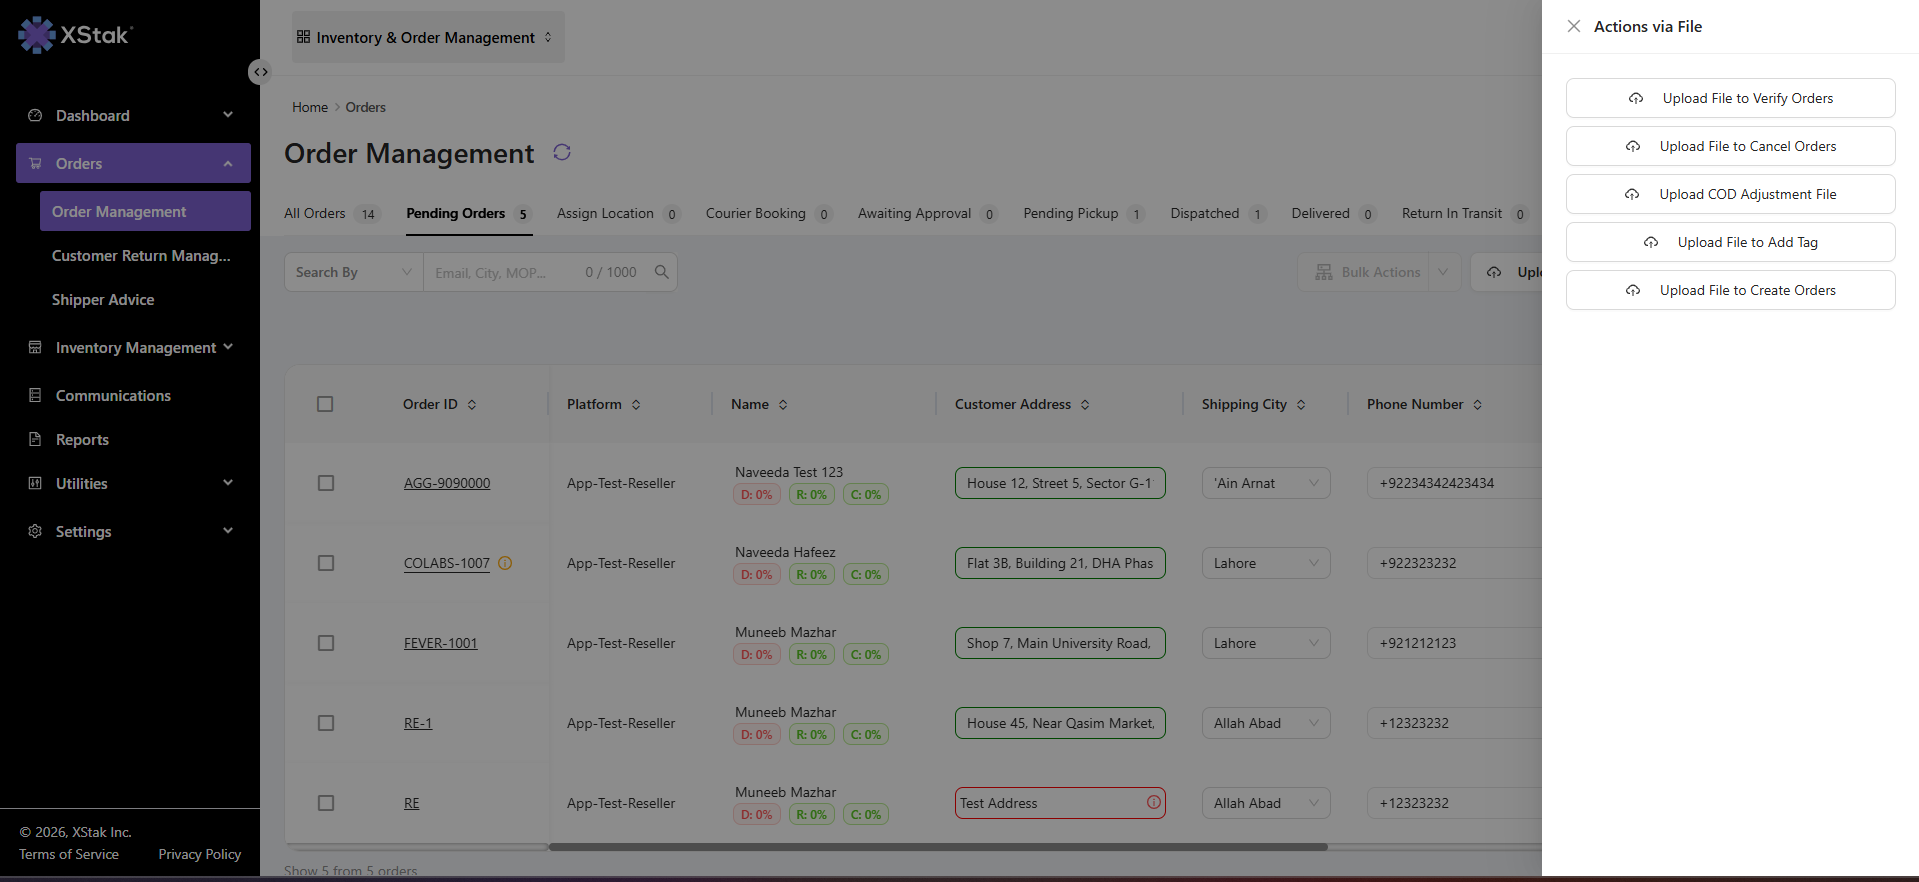
→ Upload Process
-
Click on Select File
-
Choose your file in CSV format from your system
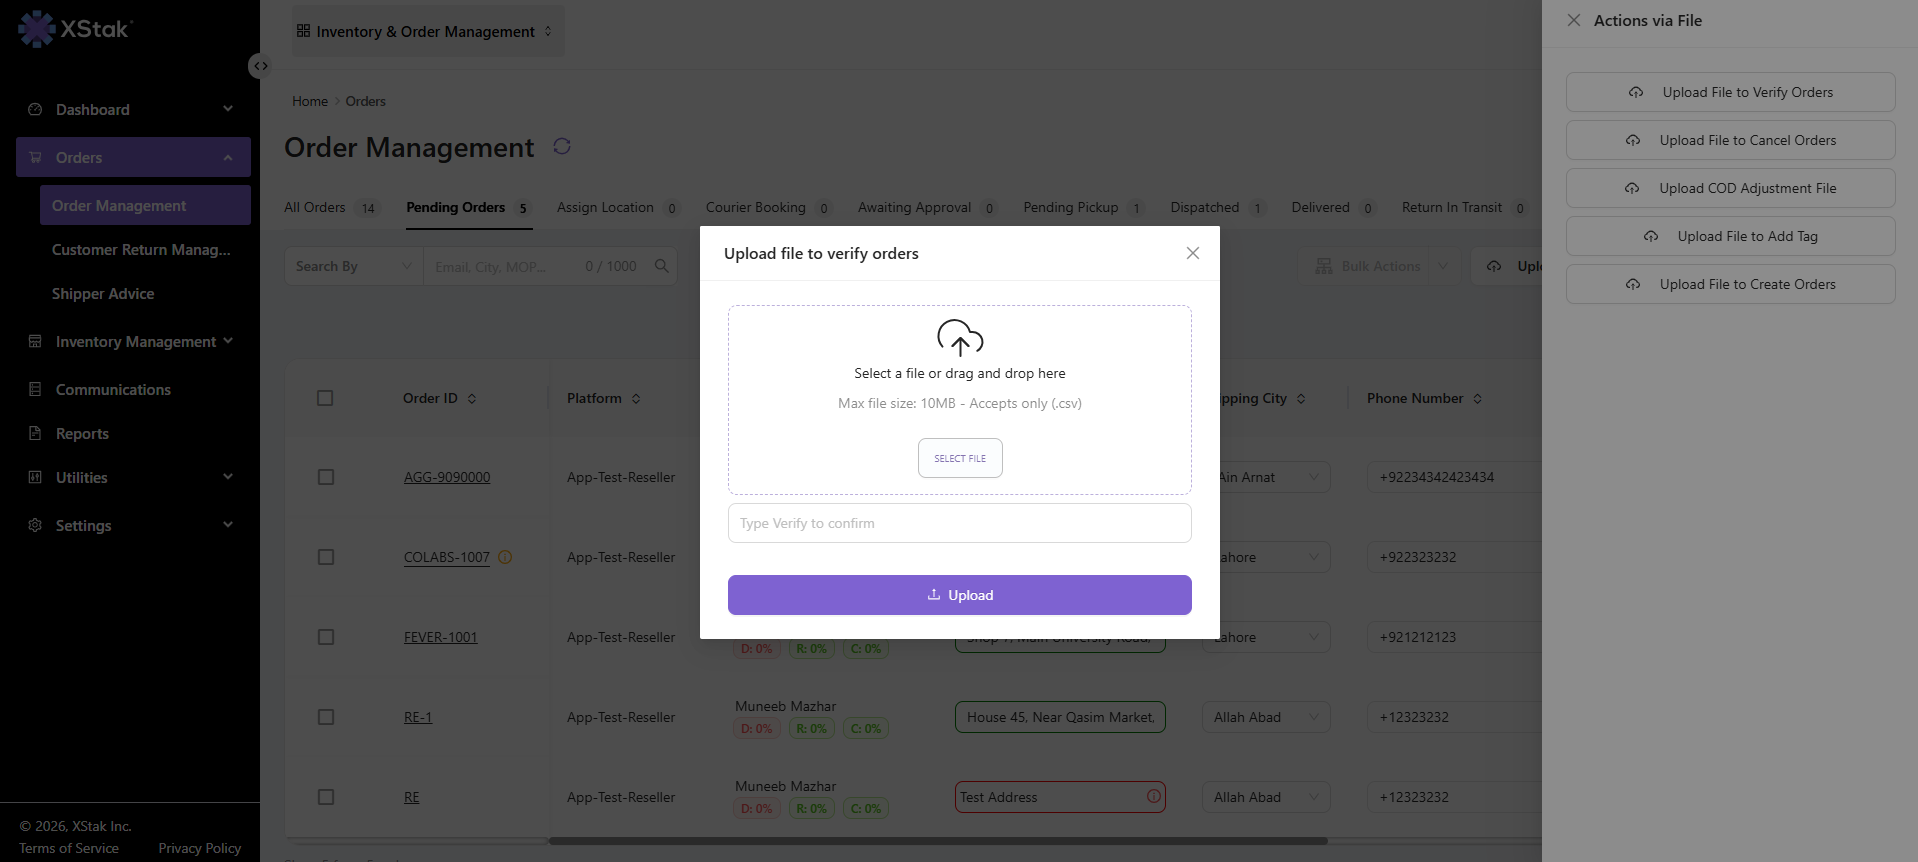
-
In the Upload Type / Edit Selected field
Select the required action (for example: Verify)
Upload the file containing Order IDs for bulk processing
-
Click on the Upload button
Result
-
The system processes the uploaded file
-
All valid order IDs are processed in bulk
-
Orders are automatically moved to the next stage based on the action selected
Important Notes
-
File must be in CSV format only
-
Ensure all Order IDs are correct and valid
-
Incorrect formatting may result in upload failure
-
Each upload type performs a different system action
How to Generate Reports from Pending Orders
The Pending Orders tab allows users to generate detailed operational reports for analysis, reconciliation, and business tracking.
→ Access Report Generation
-
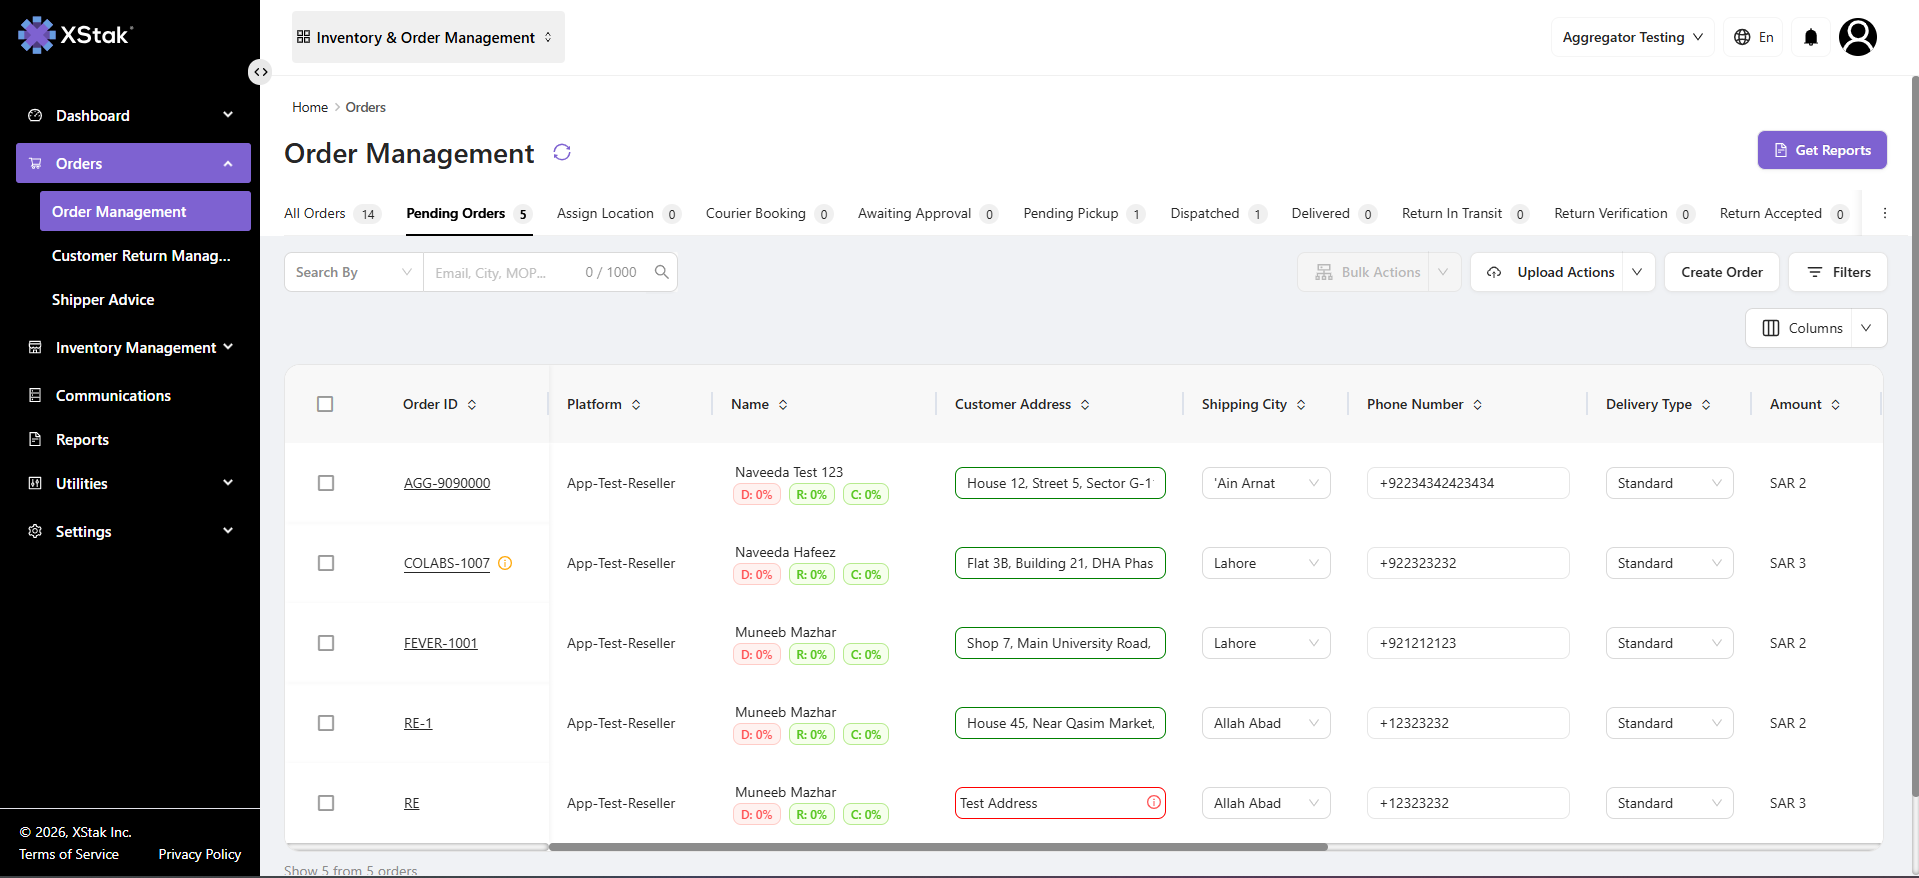
Go to the Pending Orders tab
-
Click on the Get Reports button on the top section
→ Open Report Sidebar
-
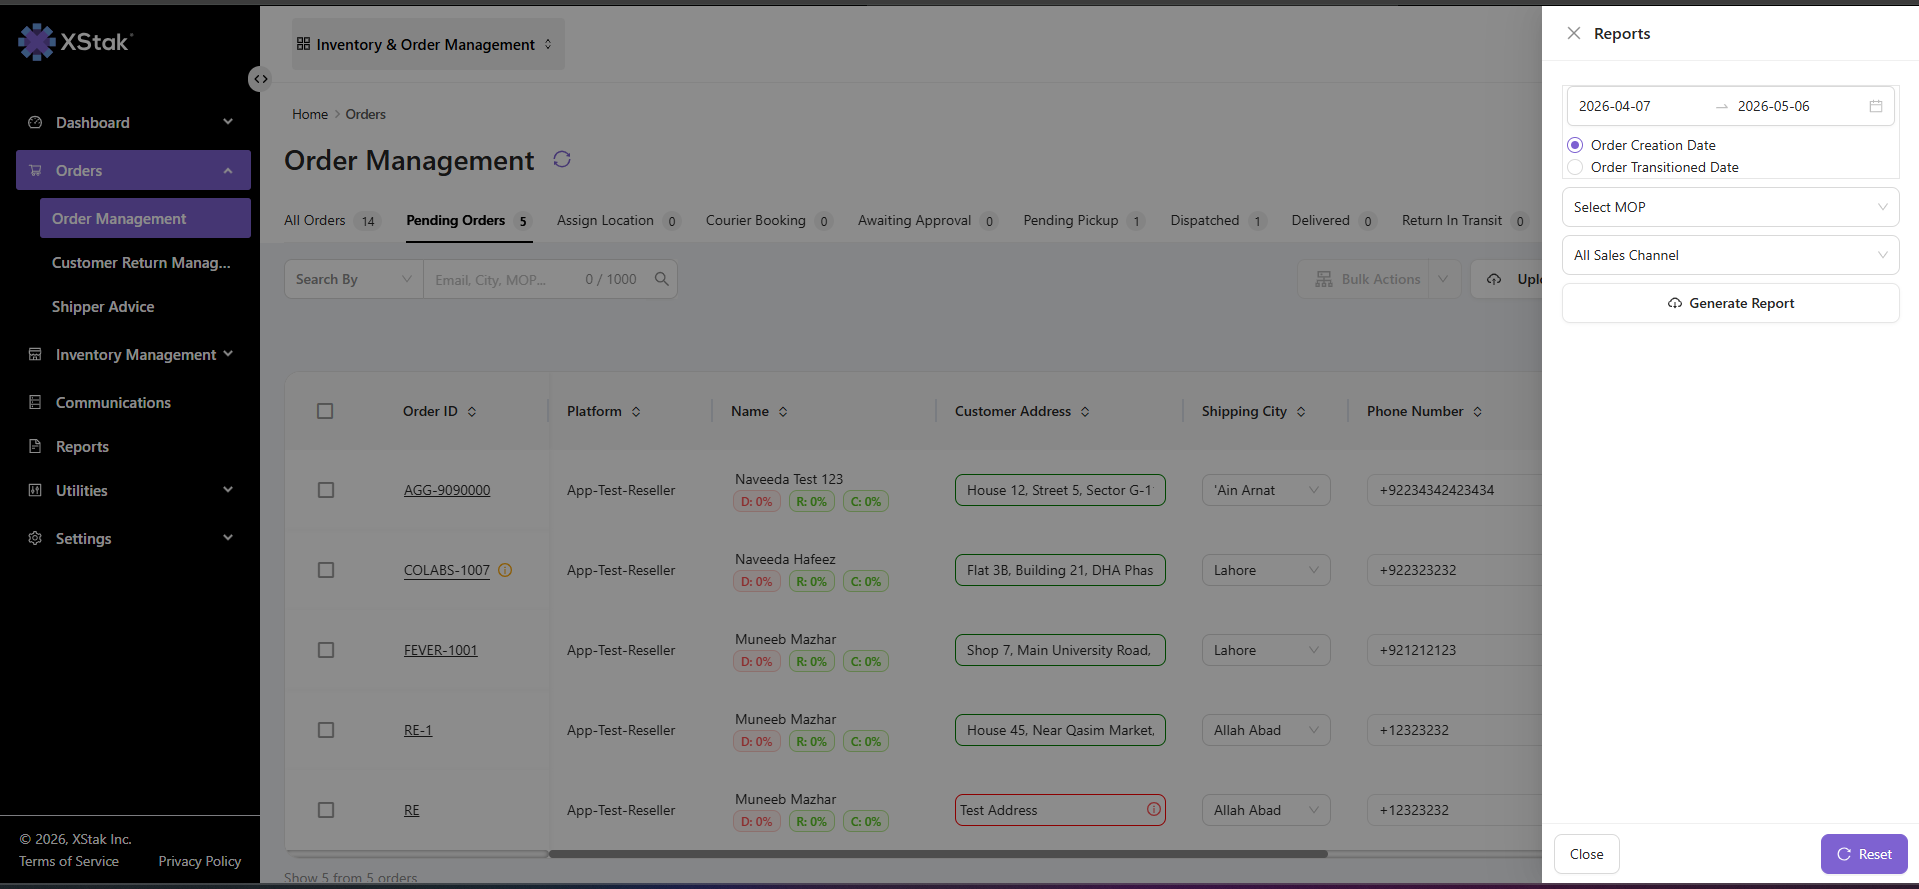
A report configuration sidebar will open on the right side of the screen
-
This panel allows you to define report filters and scope
→ Apply Date Filters
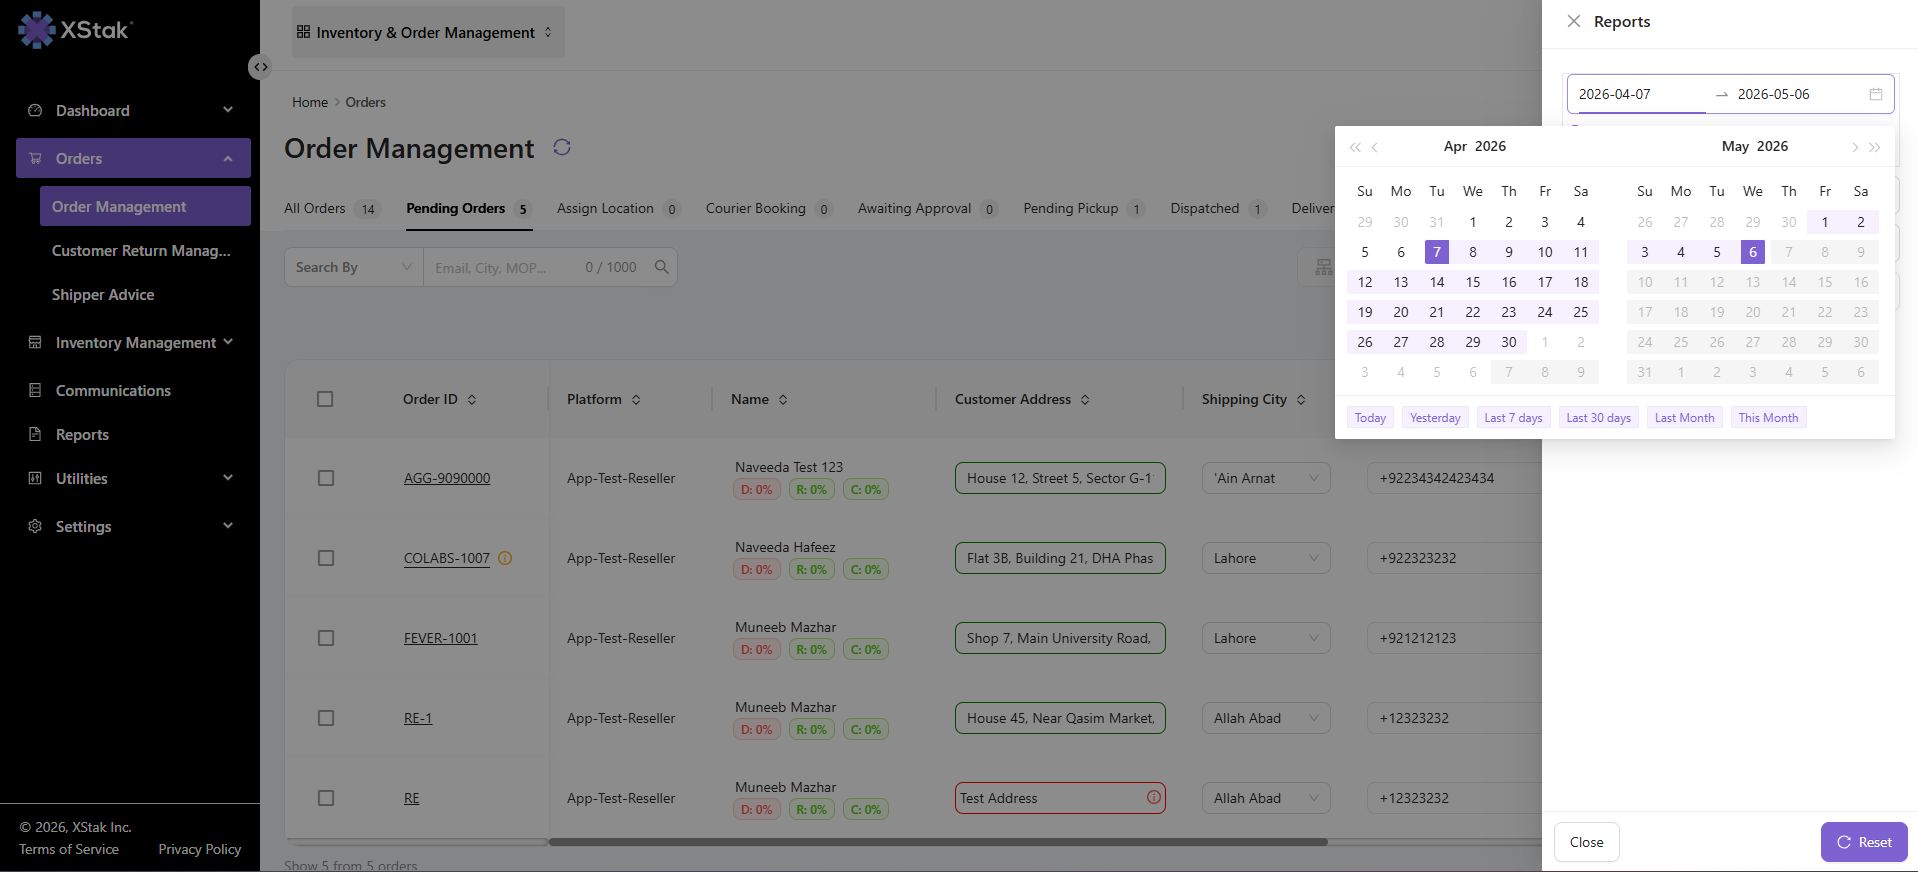
Select the required date range:
-
Start Date
-
End Date
Choose the report base type:
-
Order Creation Date
-
Order Transitioned Date
This defines how the report data will be extracted.
→ Select Report Filters
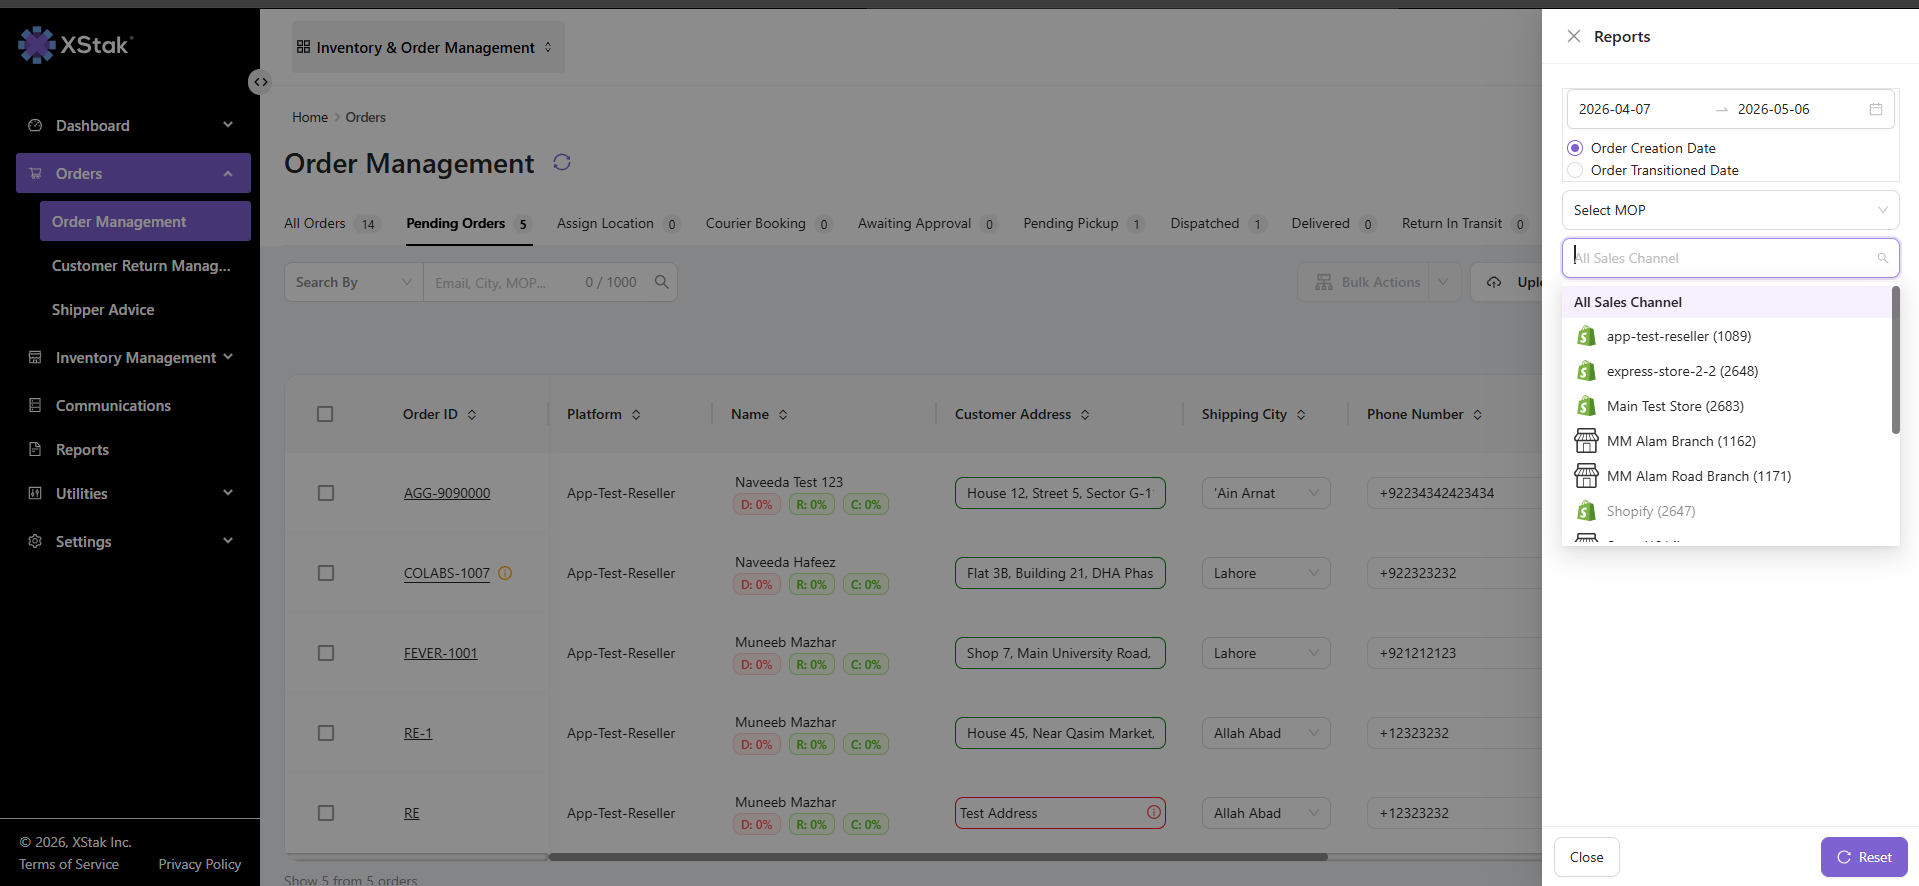
After selecting date range, apply operational filters:
-
Location
-
Sales Channel
→ Generate Report
-
Click on Generate Report button
-
The system will start processing the request
→ Download Report
-
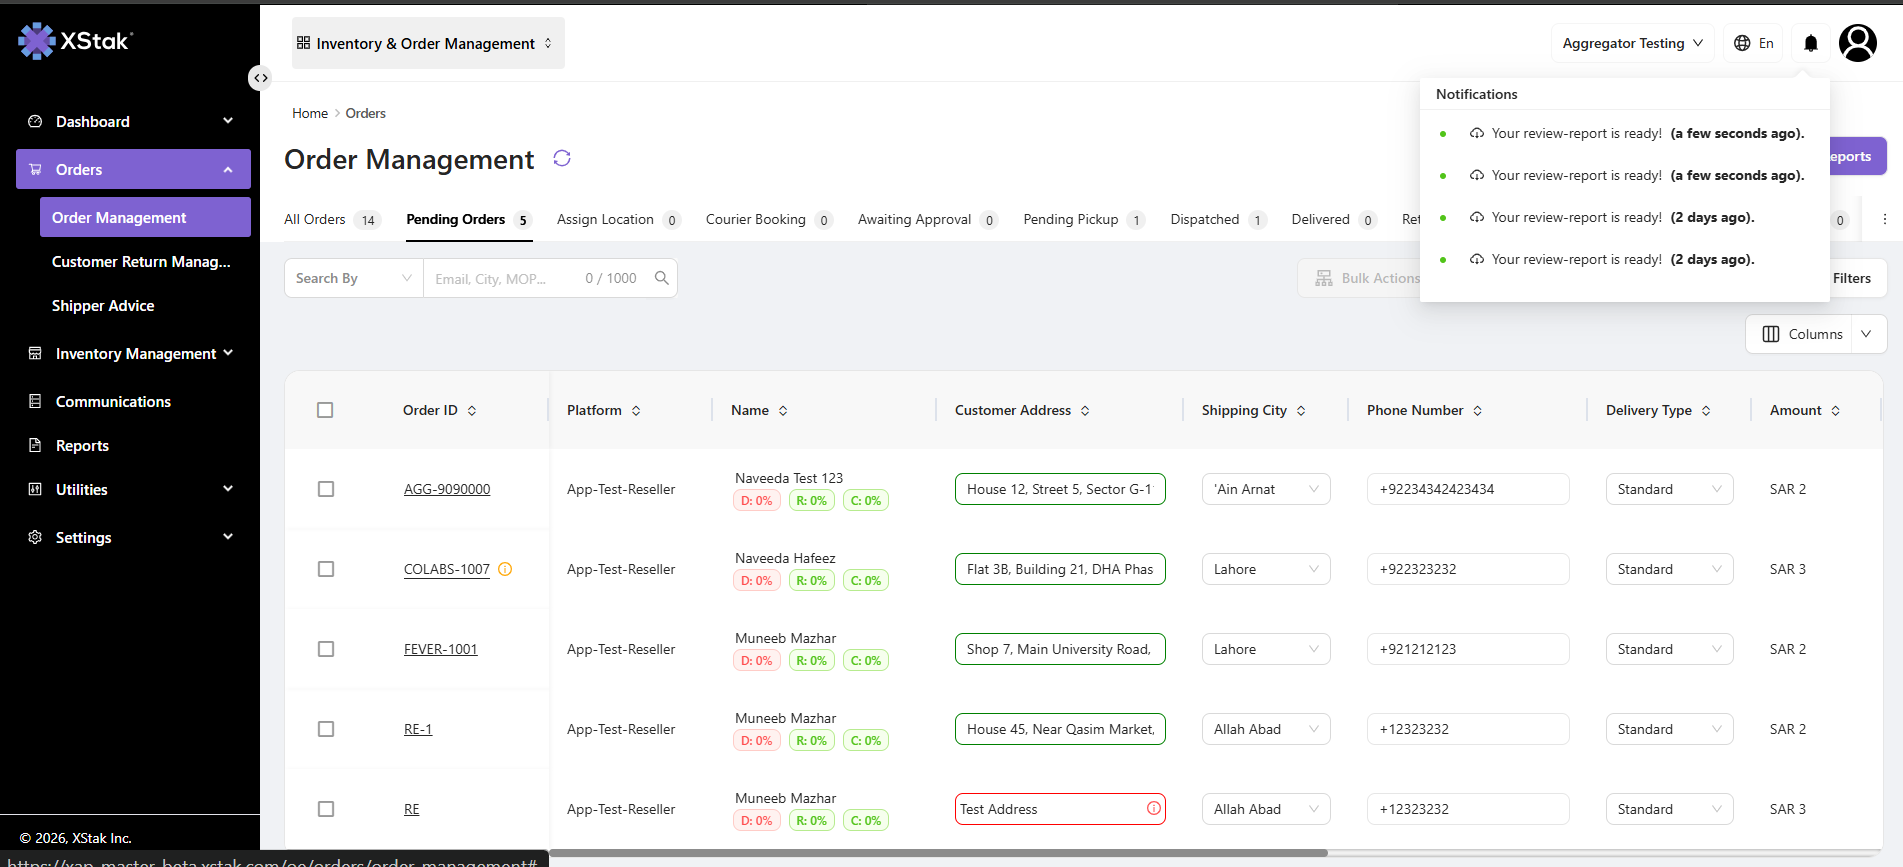
Once generated, the report will be available in the Notification Center (bell icon)
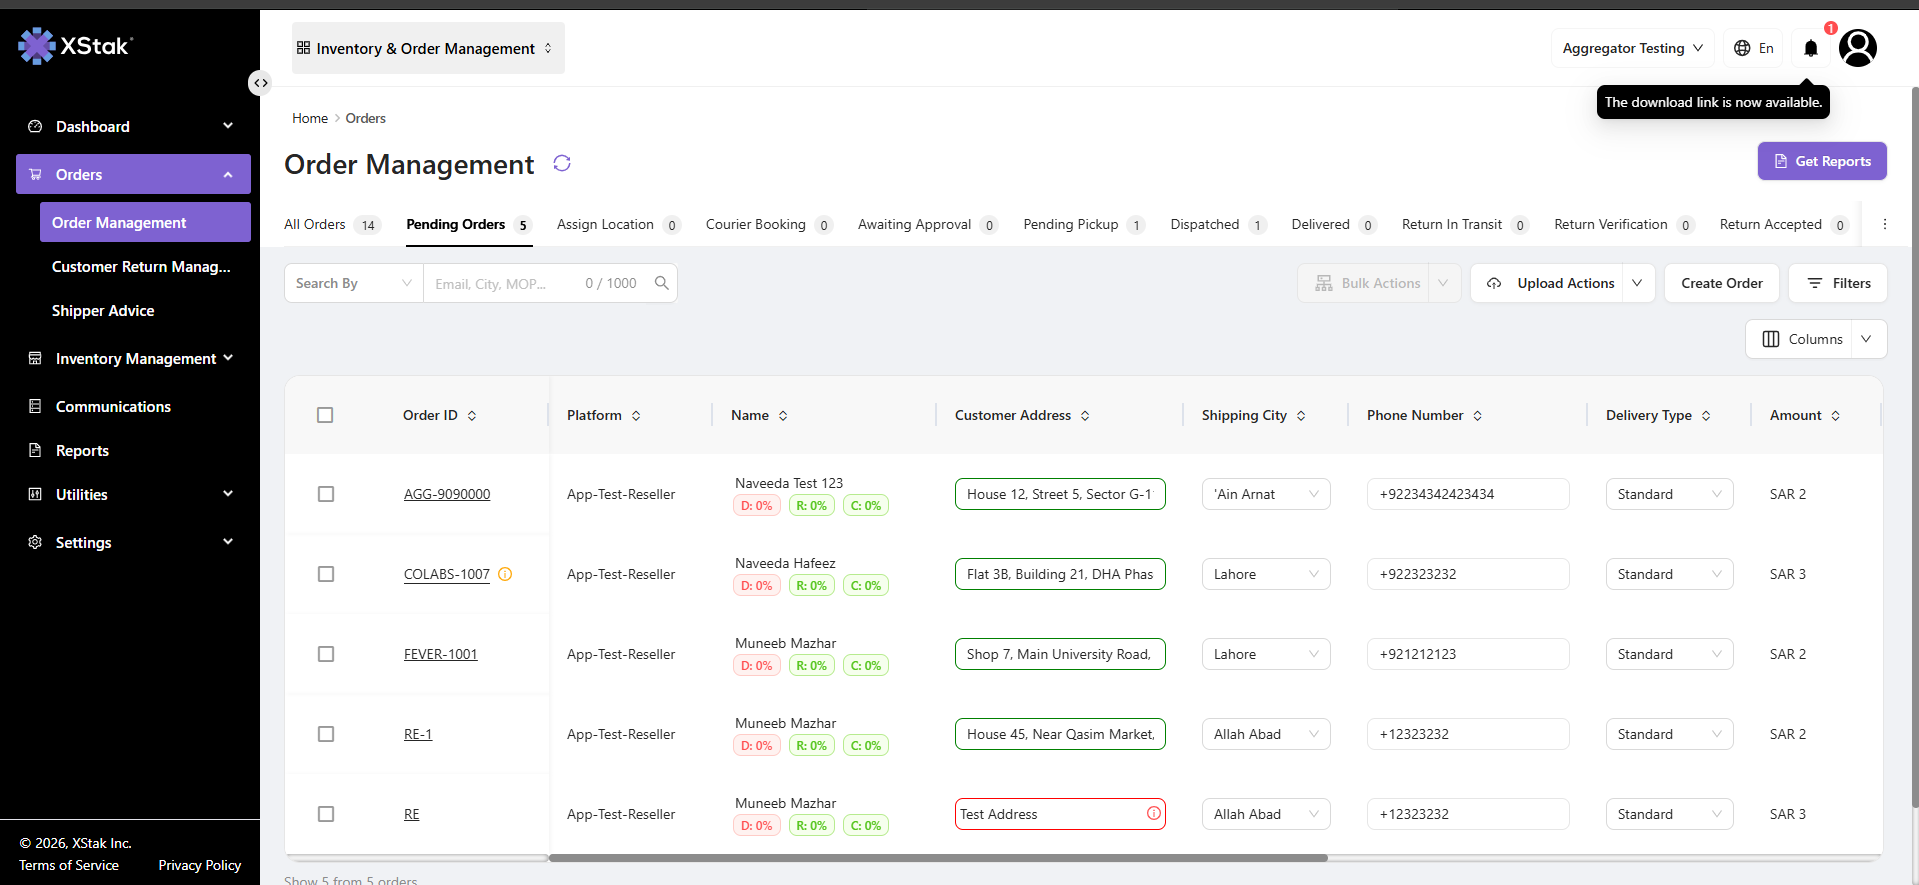
-
Click the notification to download the file
→Result
-
A consolidated report of selected orders is generated
-
Data includes filtered orders based on:
-
Date range
-
Location
-
Sales channel
-
Order status (Pending Orders context)
-