
The Pending Pickup module helps businesses manage orders that are ready for dispatch but have not yet been handed over to the courier. This guide explains each function and provides step-by-step instructions so users can operate the module efficiently.
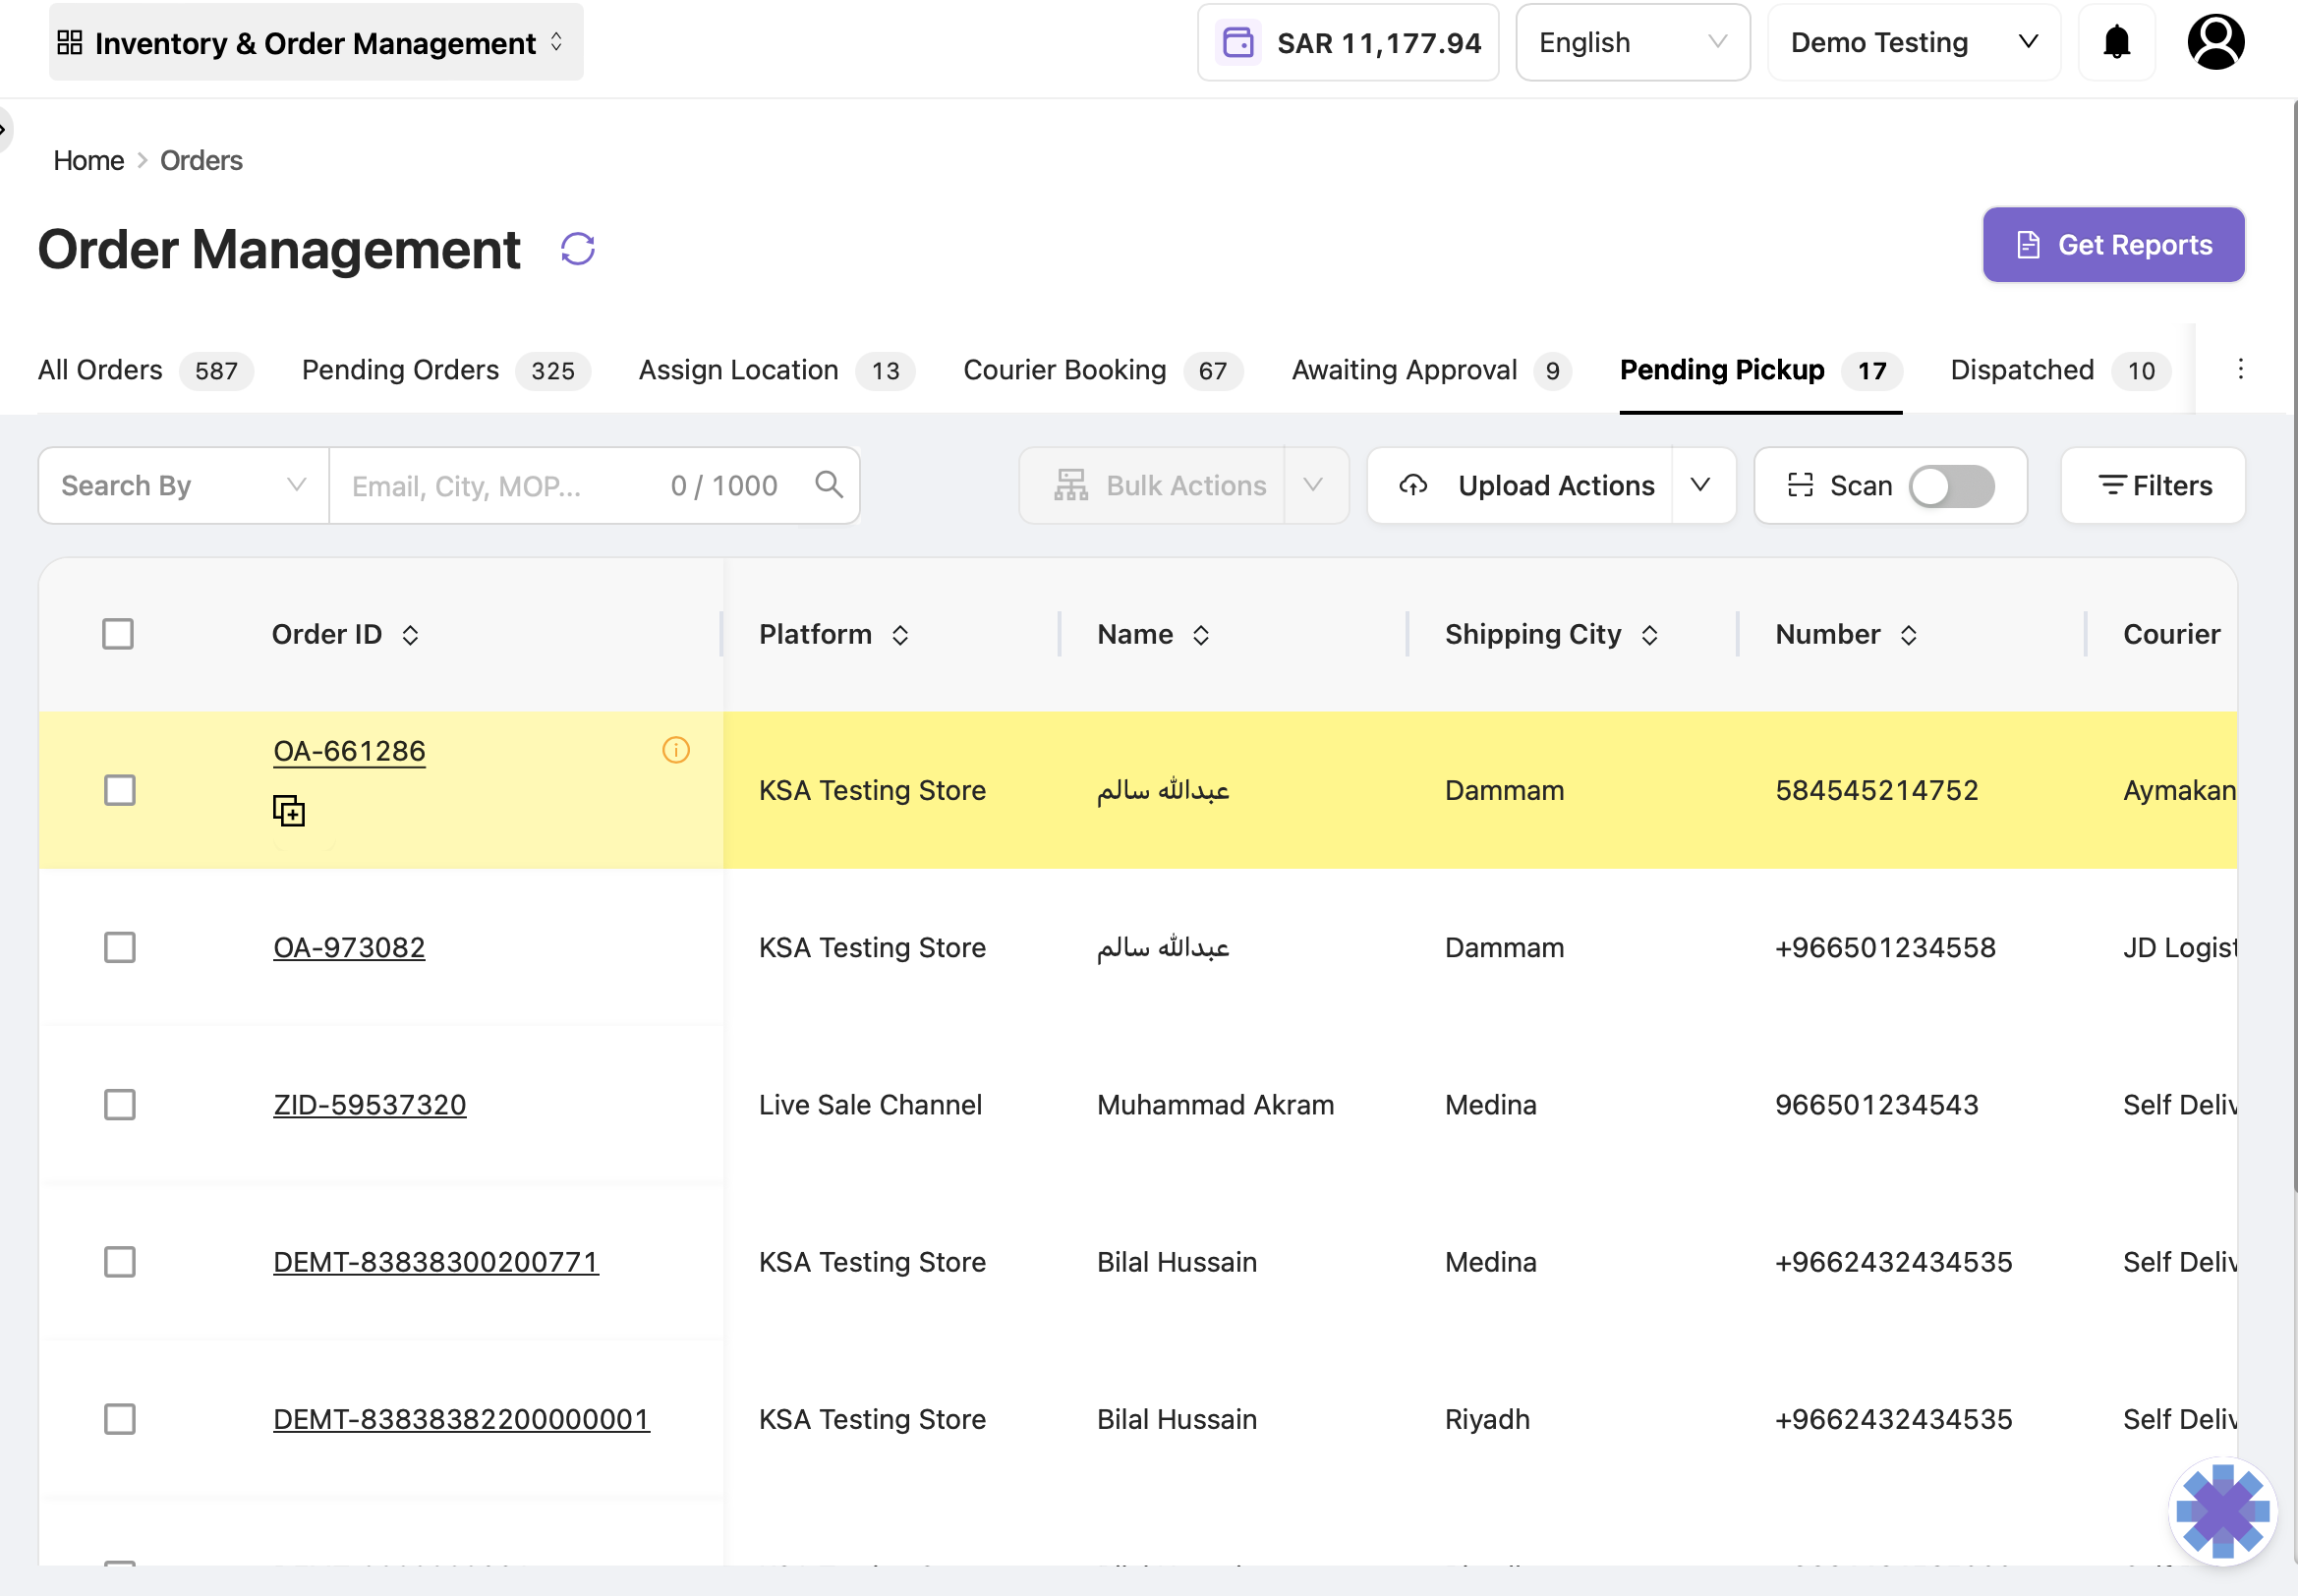
1. Purpose of the Pending Pickup Module
|
Purpose |
What It Means |
Why It Is Important |
|---|---|---|
|
Loadsheet Management |
Generate and maintain a load sheet of all orders picked up by the rider. |
Ensures both the store and courier have correct pickup records. |
|
Order Verification through Scanning |
Scan orders for loadsheet creation or order-level dispatch verification. |
Prevents errors and ensures accurate dispatching. |
|
Dispatch Operations Management |
Dispatch, reverse, cancel, or upload actions in bulk. |
Saves time and ensures smooth daily operations. |
|
Reports & Tracking |
Access detailed reports related to pending pickups and dispatch activities. |
Provides complete visibility and control over operations. |
2. Scanning Types & Their Functions
There are two scanning modes, each serving a different operational purpose.
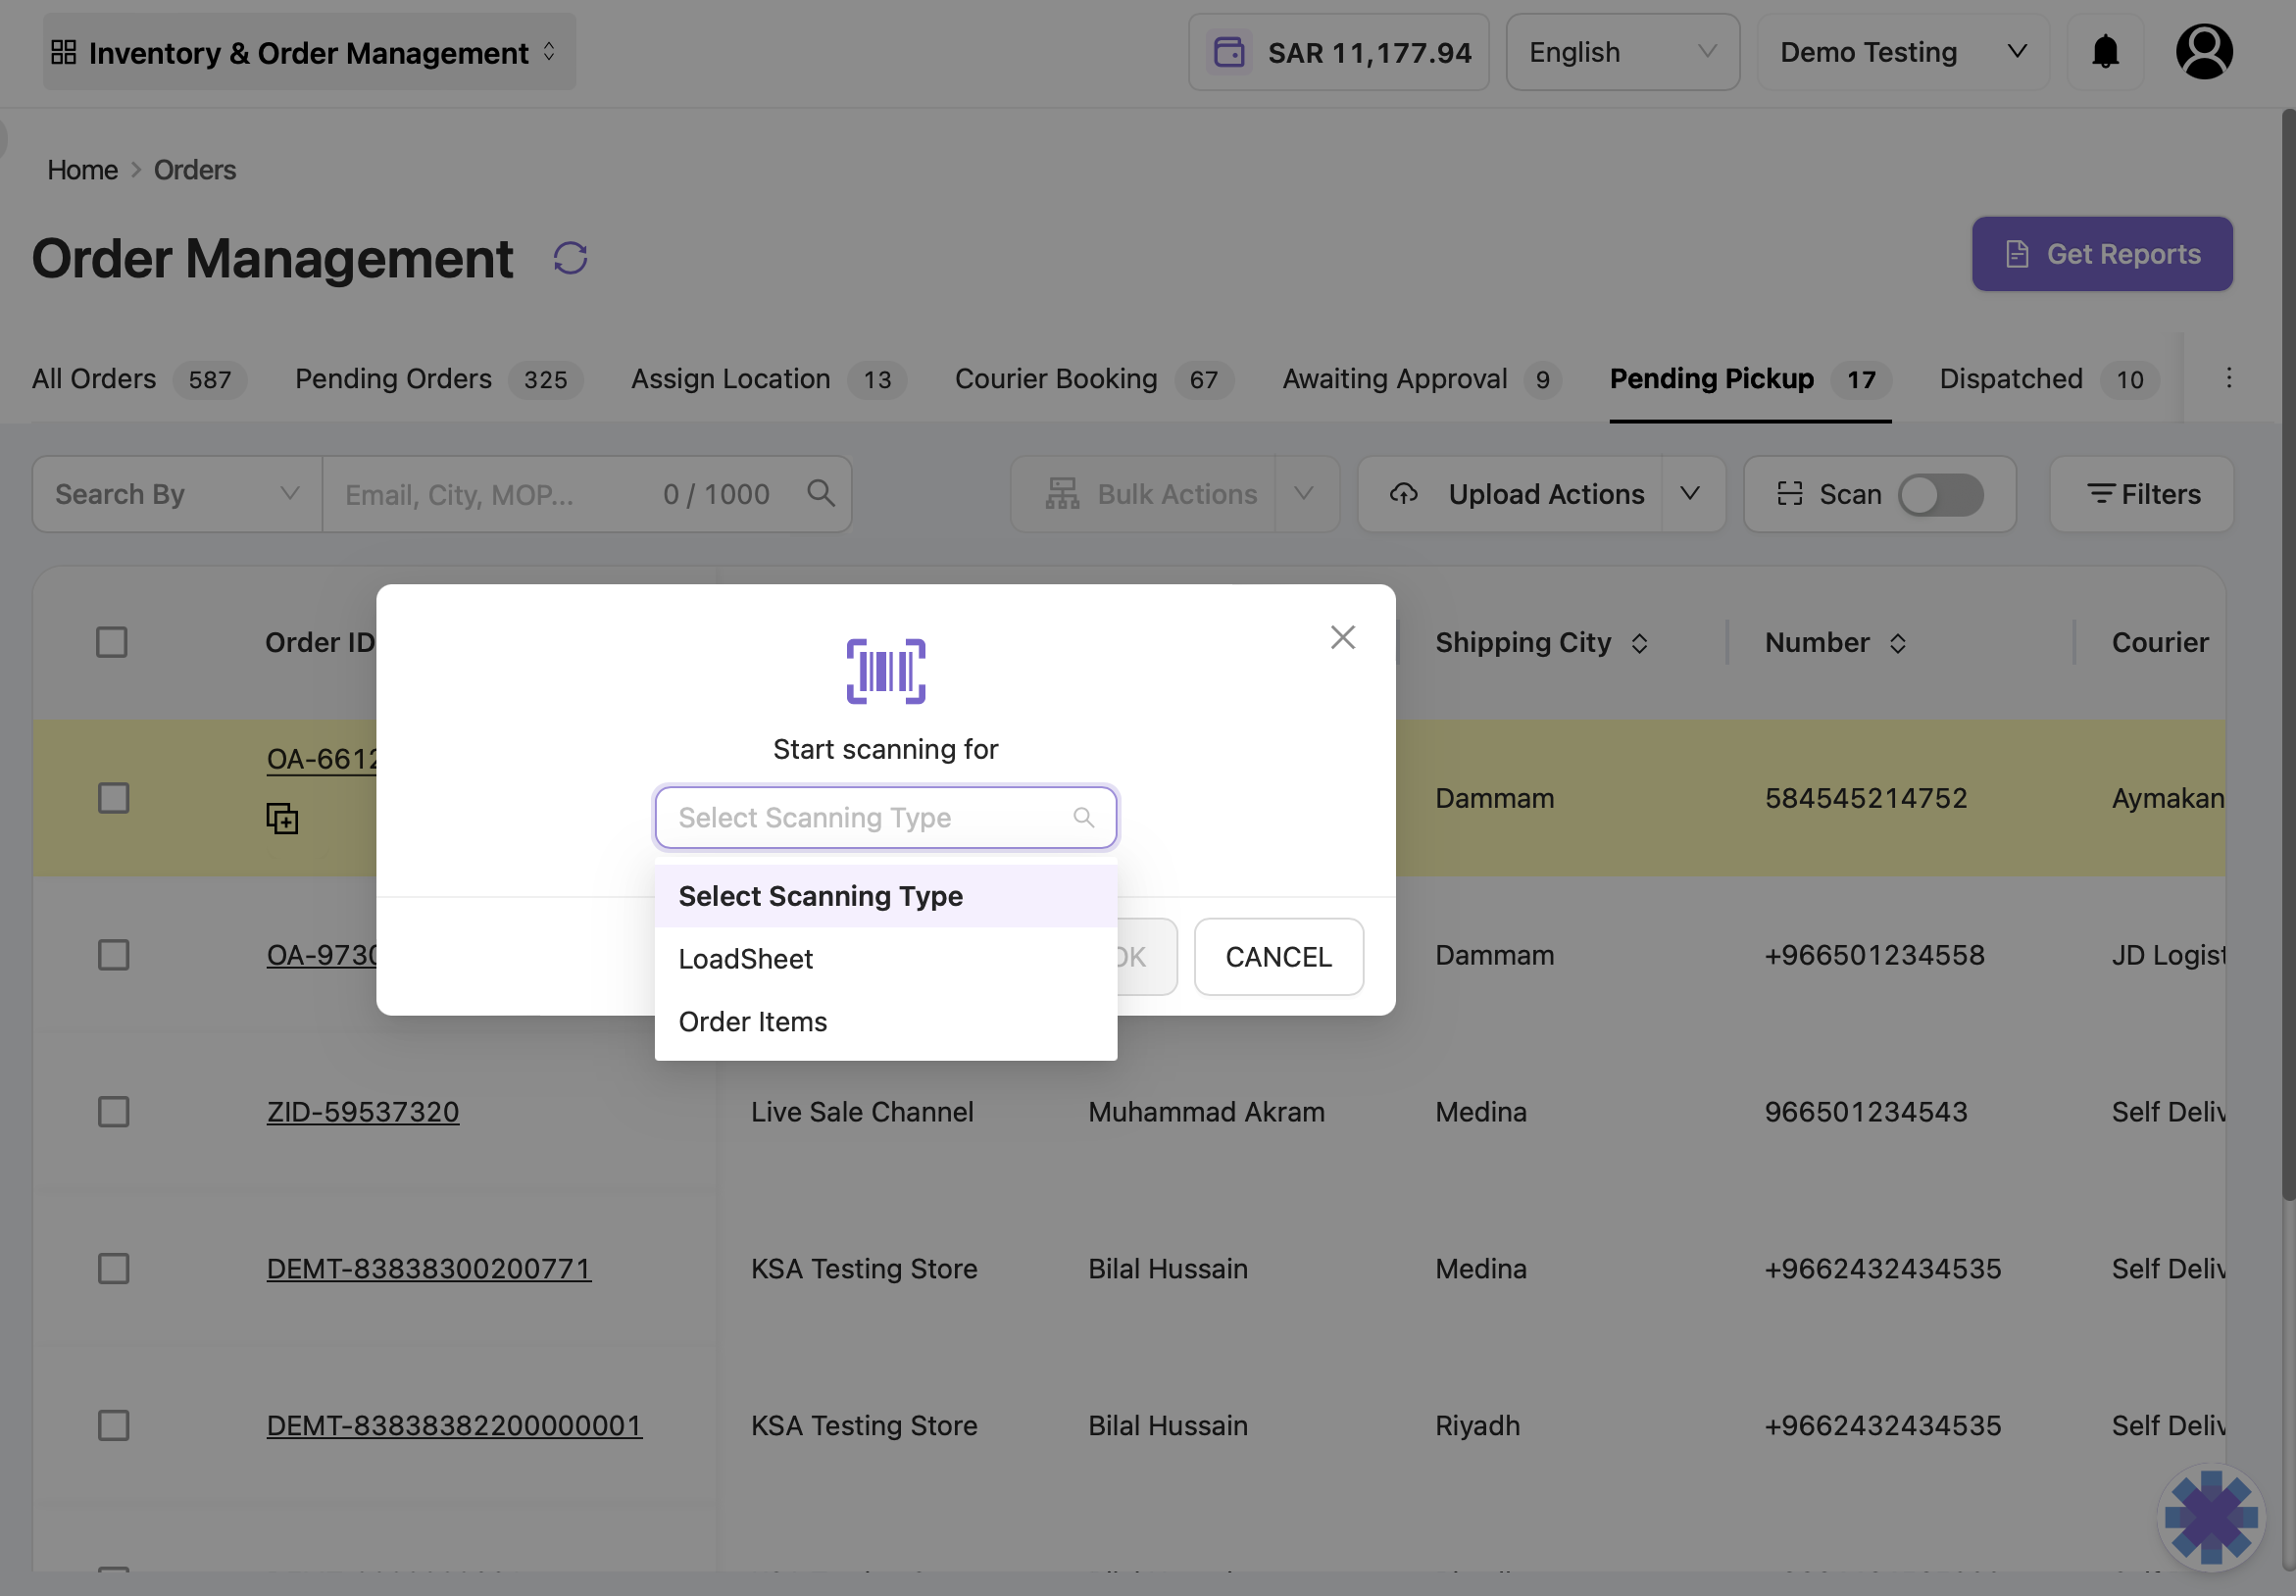
A. Loadsheet Scanning
Used when the rider arrives to collect orders.
|
Detail |
Description |
|---|---|
|
Purpose |
To record all orders handed over to the rider. |
|
How It Works |
Scan each order OR upload manually before generating the loadsheet. |
|
Scanning Options |
Order ID, Tracking ID, Scan Gun. |
B. Order Item Scanning
Used for item-level verification before dispatch.
|
Detail |
Description |
|---|---|
|
Purpose |
To ensure each order item is scanned and verified before dispatch. |
|
Two Modes Available |
Manual Dispatch OR Auto Dispatch after scanning. |
|
Scan Options |
Order ID, Tracking ID. |
3. Scan Toggle Button – How to Use It
The scanning feature supports two primary workflows:
-
Loadsheet Scanning
-
Order Item Scanning
Both workflows help streamline handover to couriers while maintaining operational accuracy.
A. Initiating the Scanning Process
Step 1: Enable the Scan Toggle
-
Navigate to Orders → Order Management → Pending Pickup.
-
Activate the Scan Toggle Button located at the top of the screen.
-
Once activated, two scanning options will appear:
-
Start Scanning for Loadsheet
-
Start Scanning for Order Item
-
B. Loadsheet Scanning Workflow
Loadsheet scanning is used when the rider arrives to collect the orders. This ensures that both the courier and your warehouse have an accurate record of orders handed over.
Step 2: Select "Start Scanning for Loadsheet"
You will now choose one of the following search methods:
-
Search by Order ID
-
Search by Tracking Number
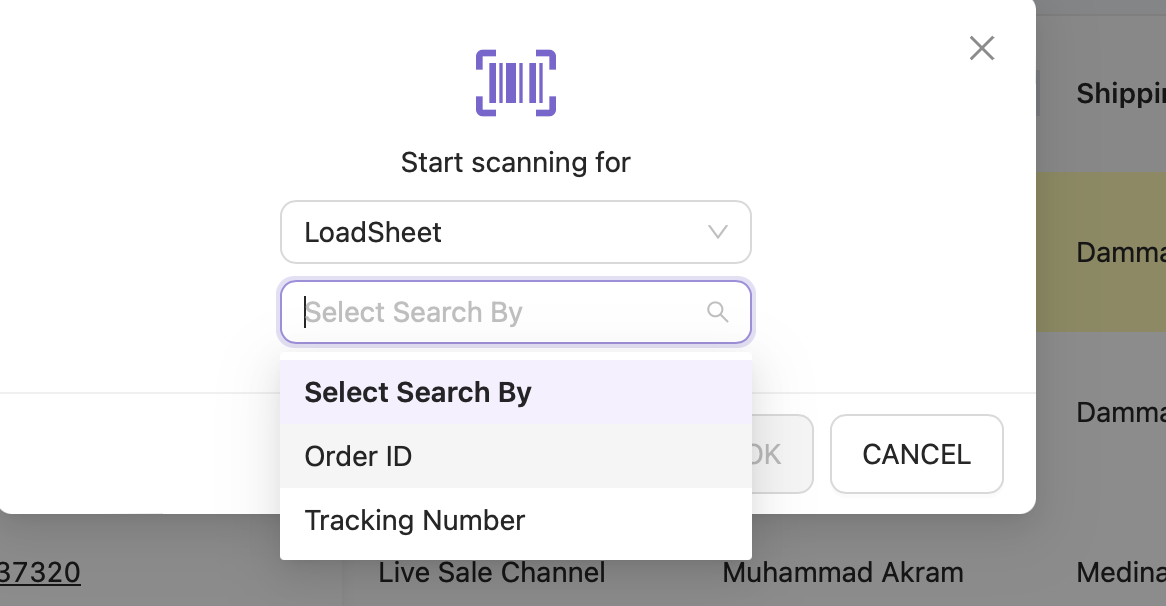
Loadsheet Scanning Workflow
1. Scanning by Order ID
Step 3:
Select “Search by Order ID.”
Step 4:
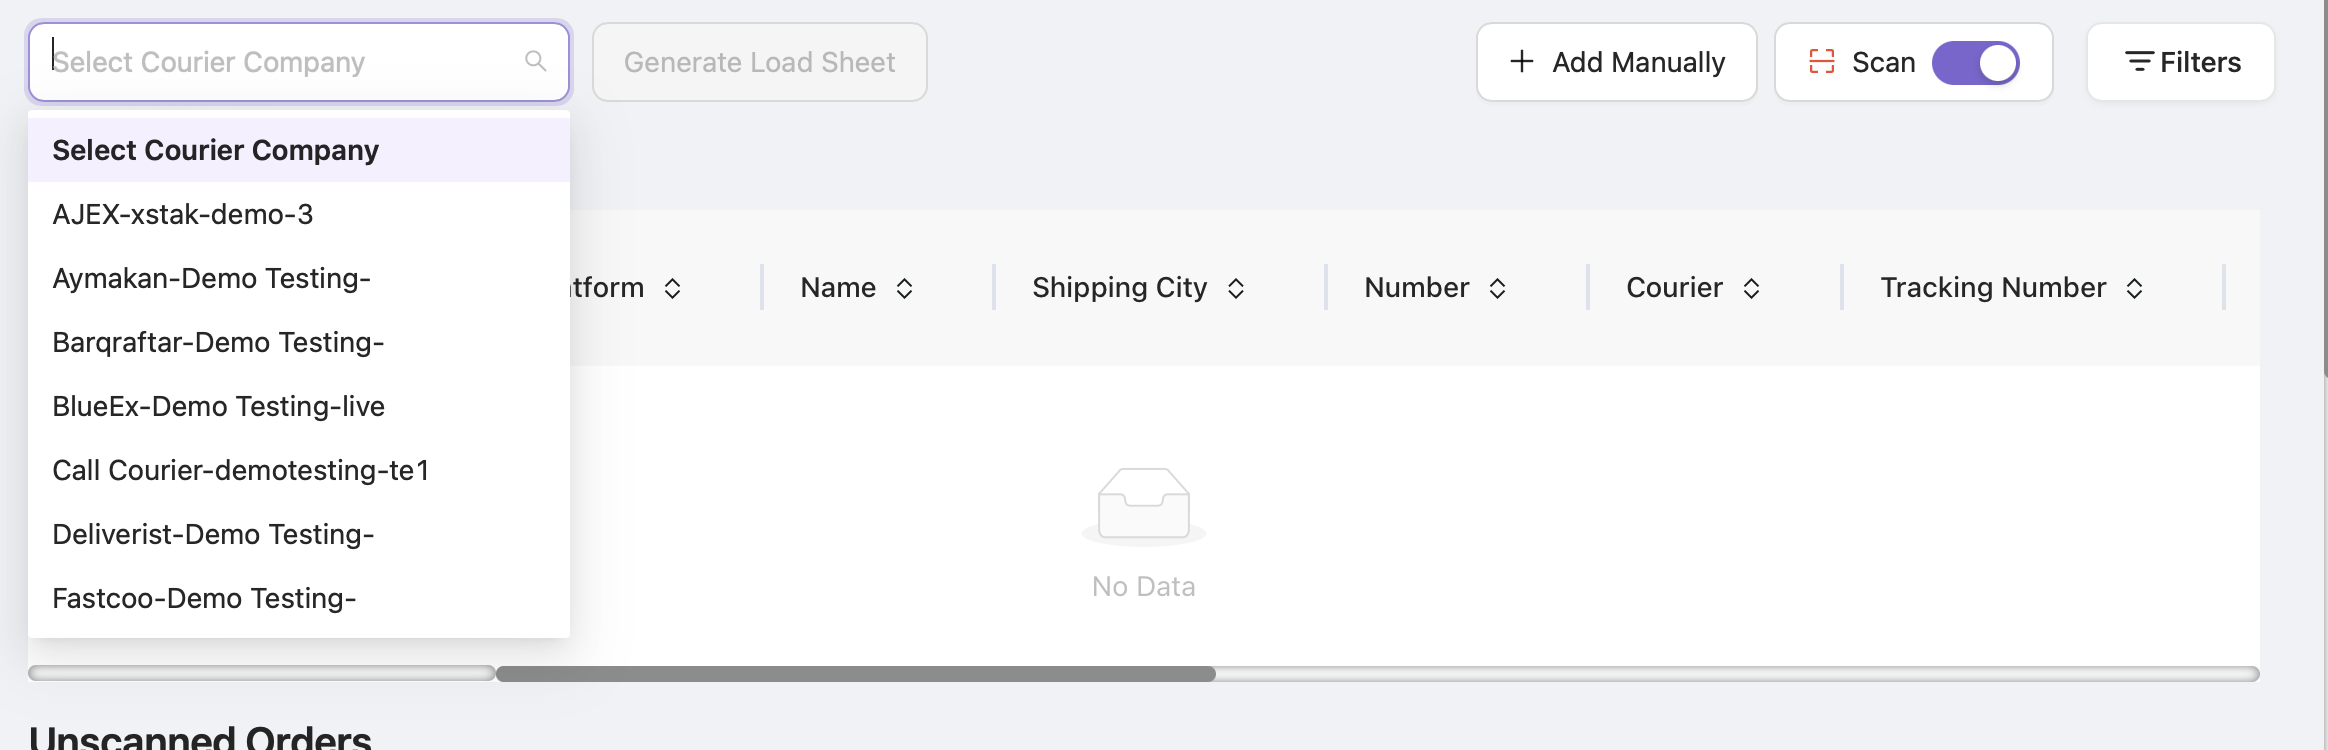
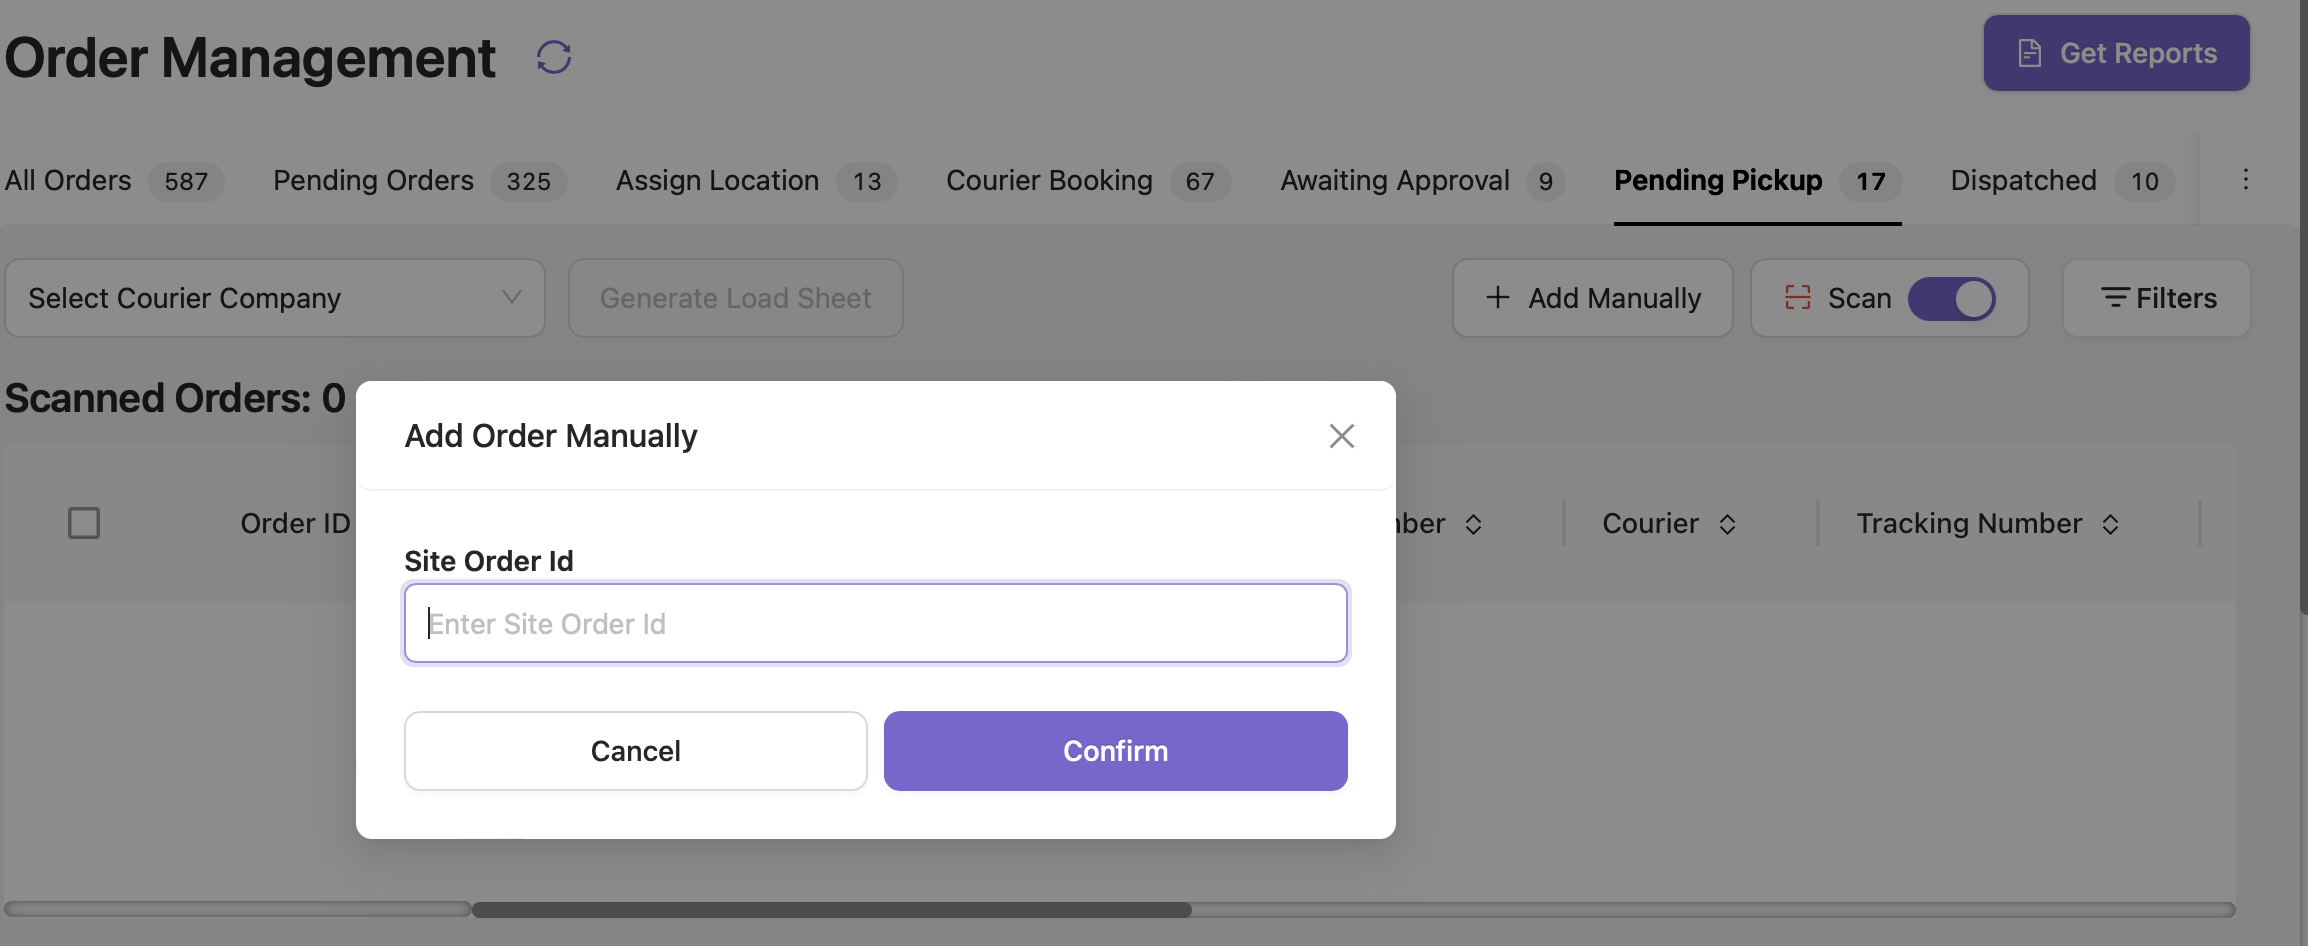
Scan the order using a barcode scanner, or click “Add Manually.”
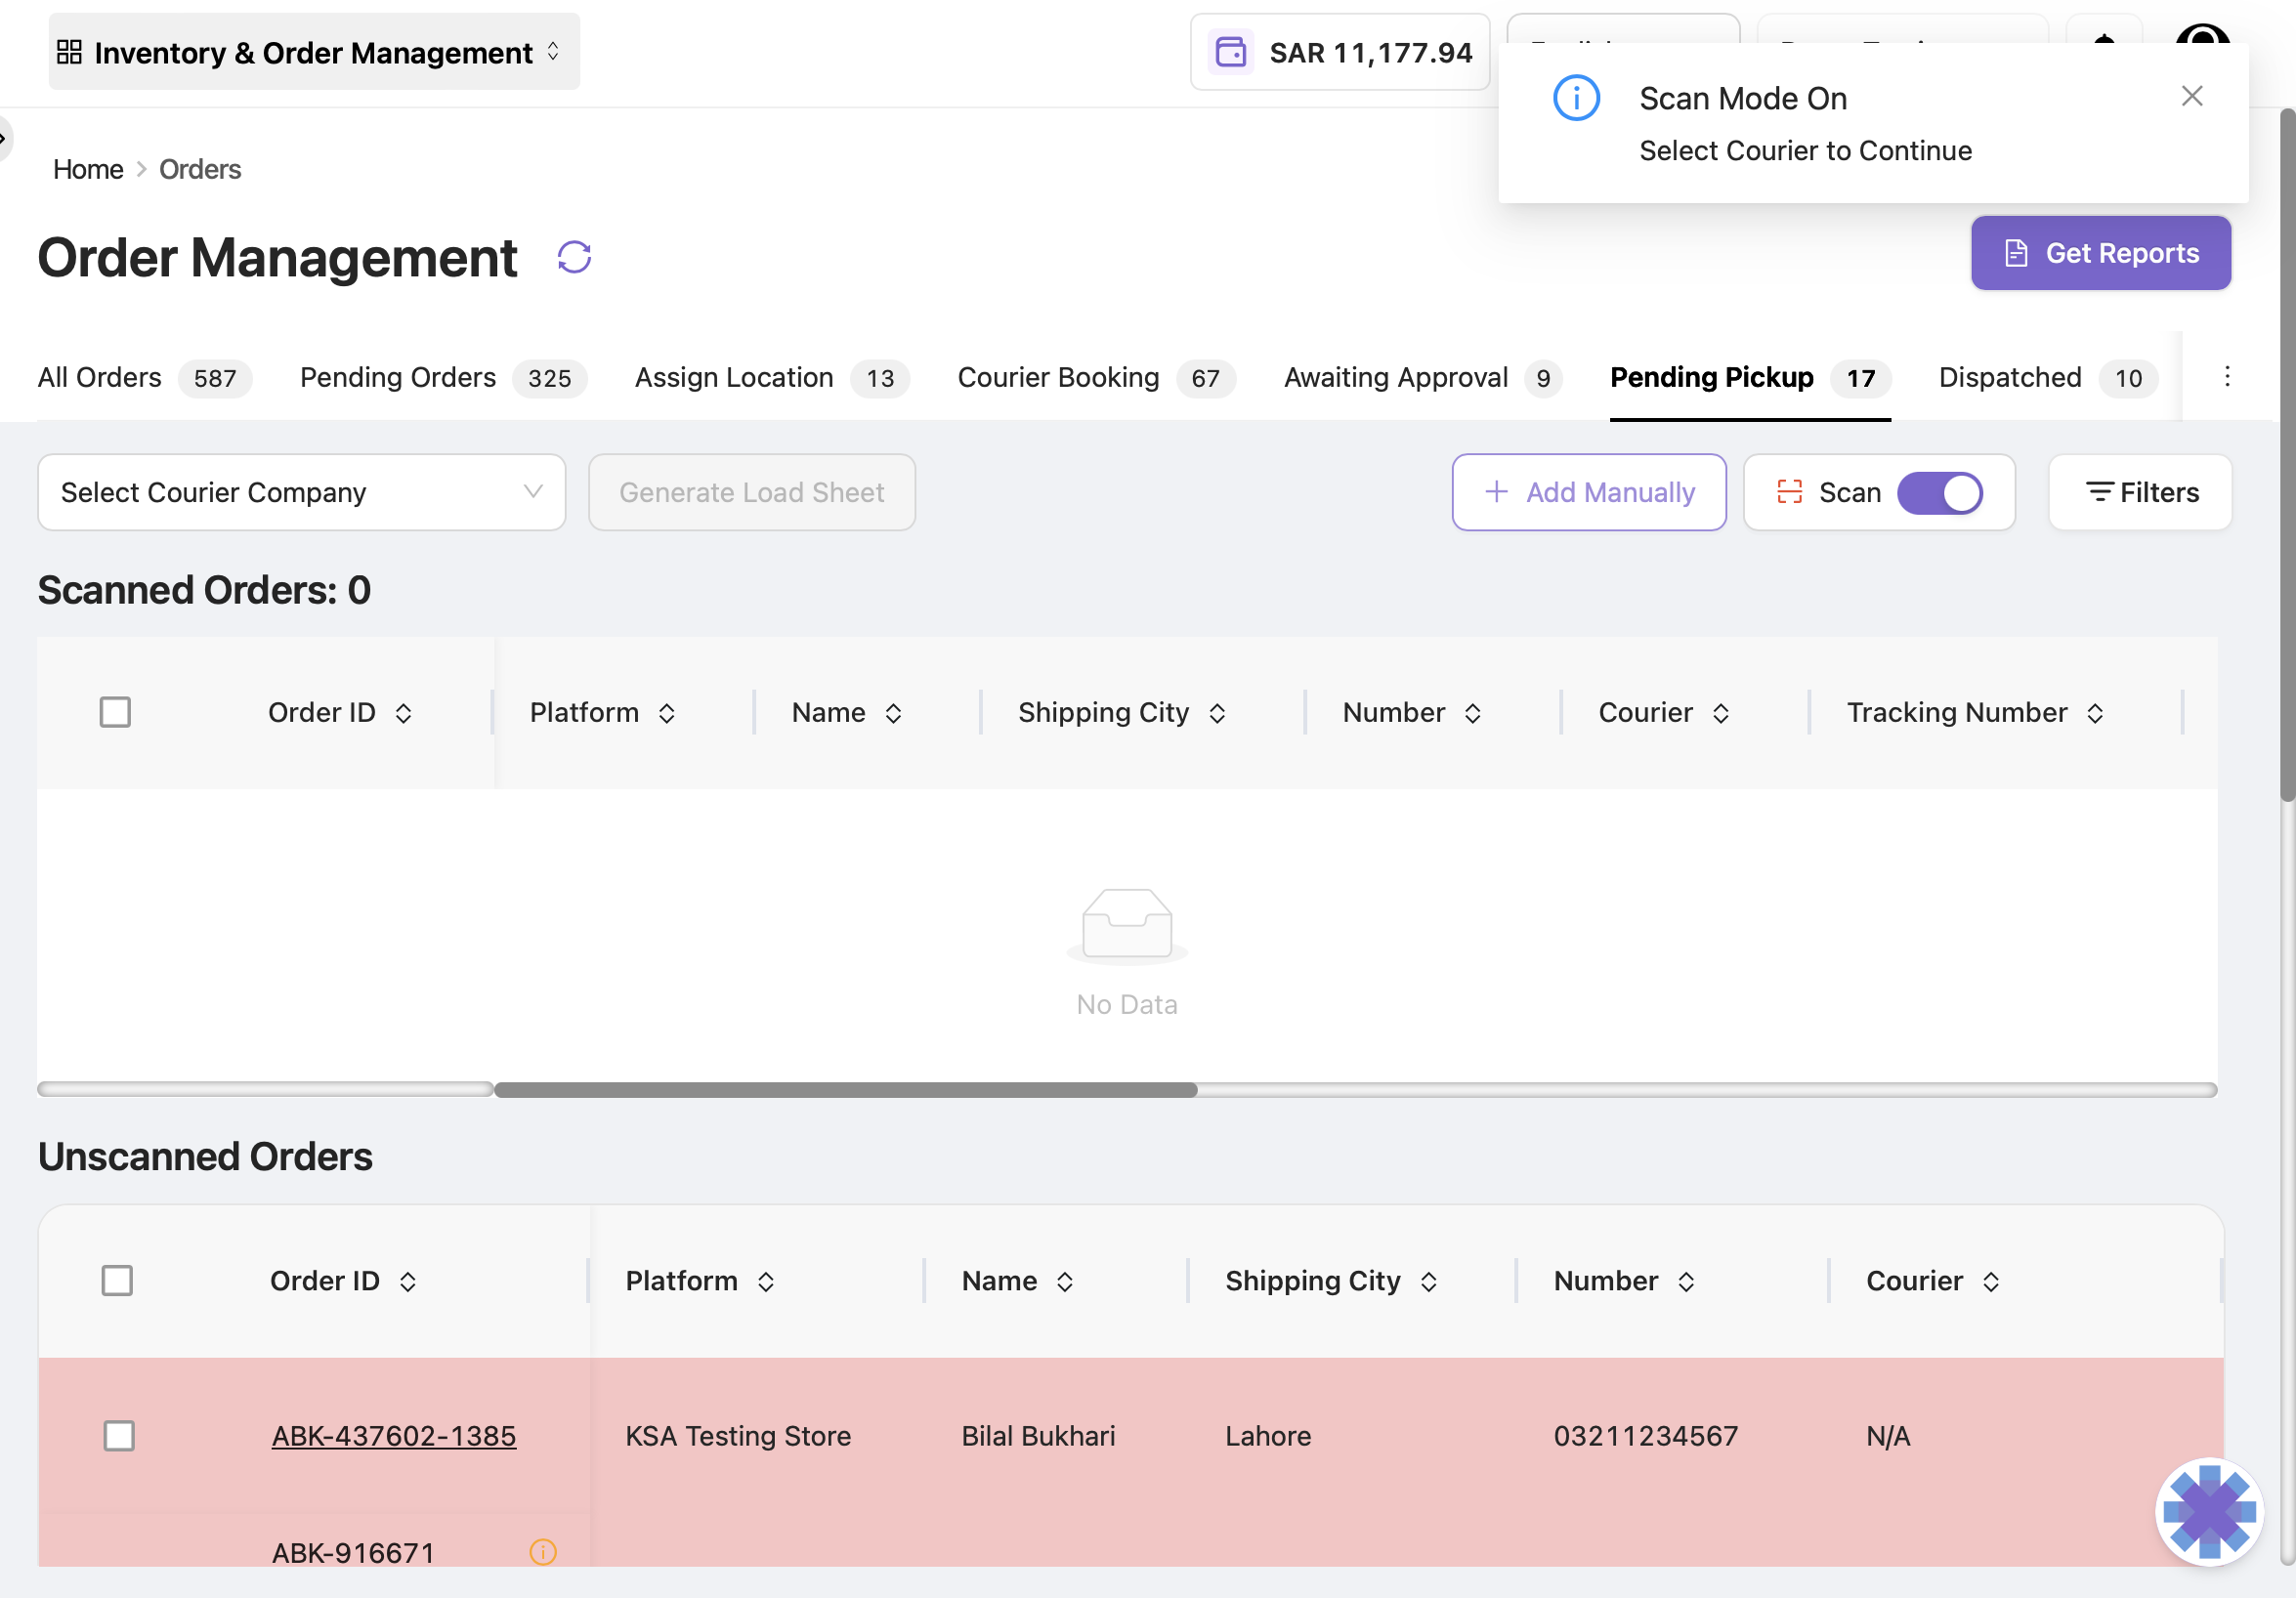
Step 5:
If you are adding manually, enter the Order ID and select the Courier from the dropdown.
Step 6:
Click “Confirm.”
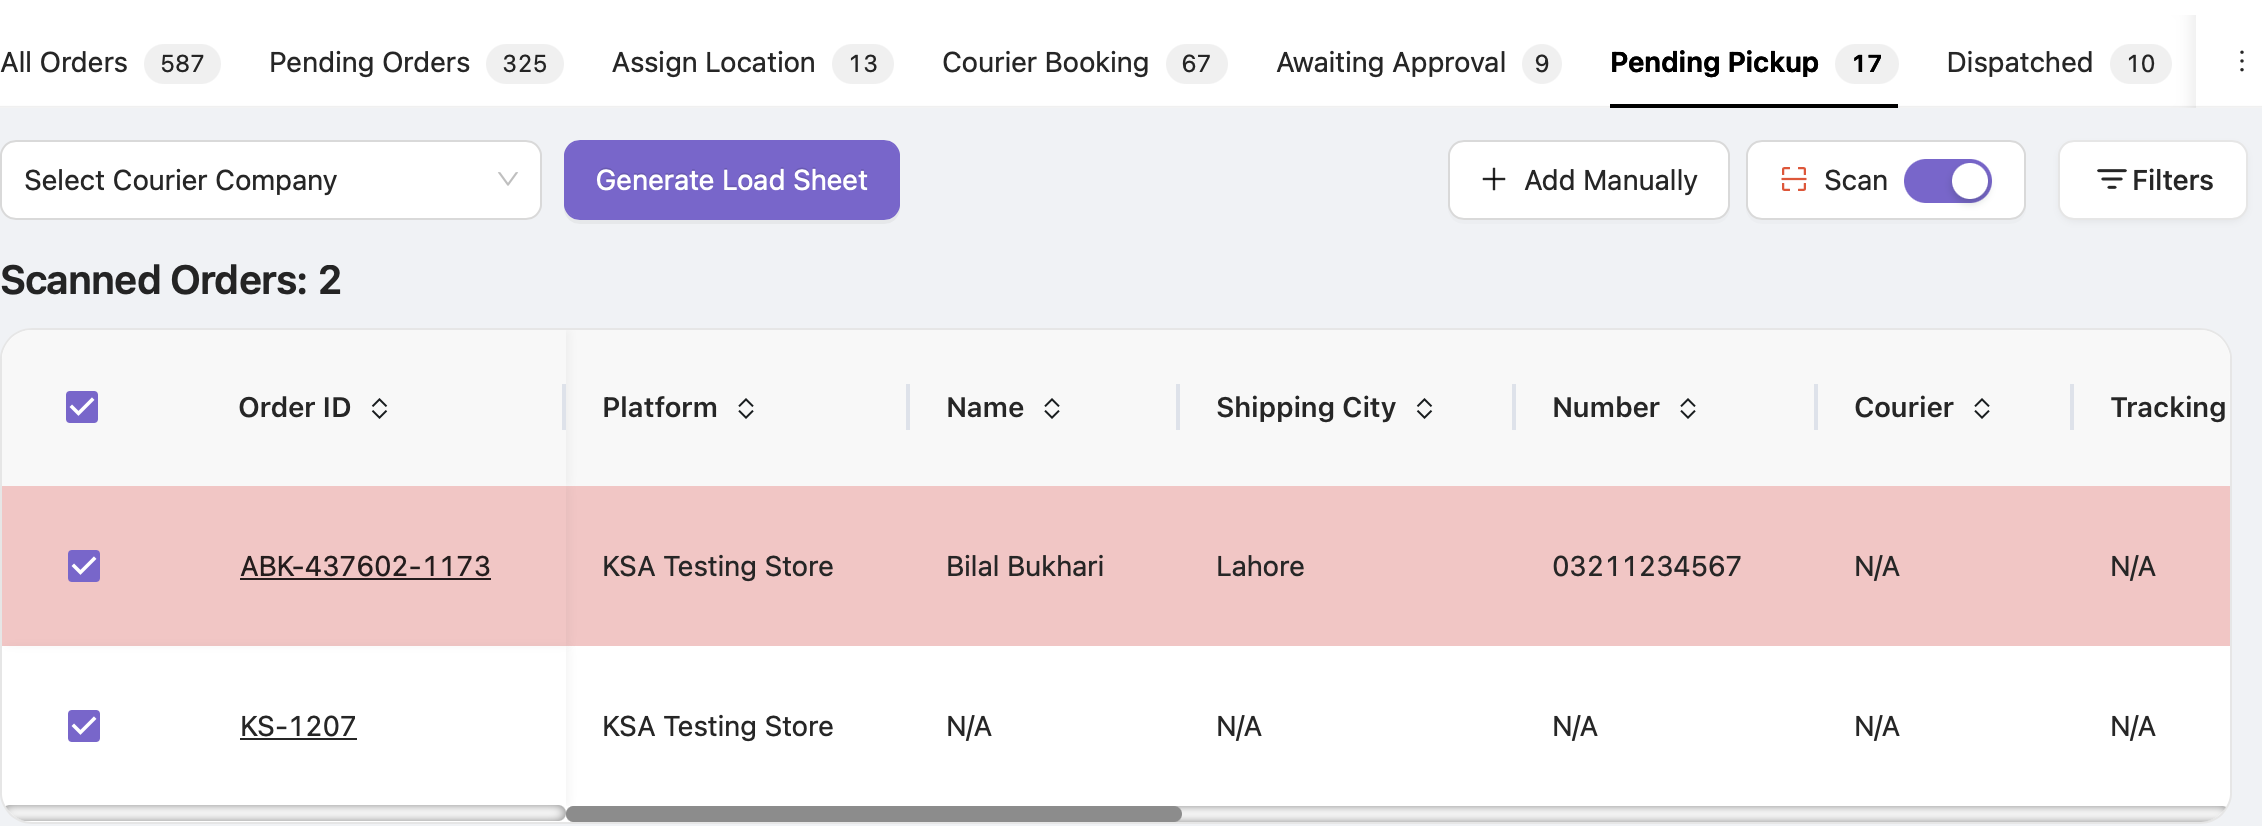
Once scanned, the order will appear in the scanned order list. From here, you can select orders in bulk and generate the loadsheet.
2. Scanning by Tracking Number
Step 3:
Select “Search by Tracking Number.”
Step 4:
Scan the tracking ID using a barcode scanner, or click “Add Manually.”
Step 5:
If manual, enter the Tracking Number and select the Courier.
Step 6:
Click “Confirm.”
The scanned order will be added to the loadsheet list.
3. Generating the Loadsheet
Step 7:
Select the scanned orders individually, or click “Select All.”
Step 8:
Click “Generate Loadsheet.”
Step 9:
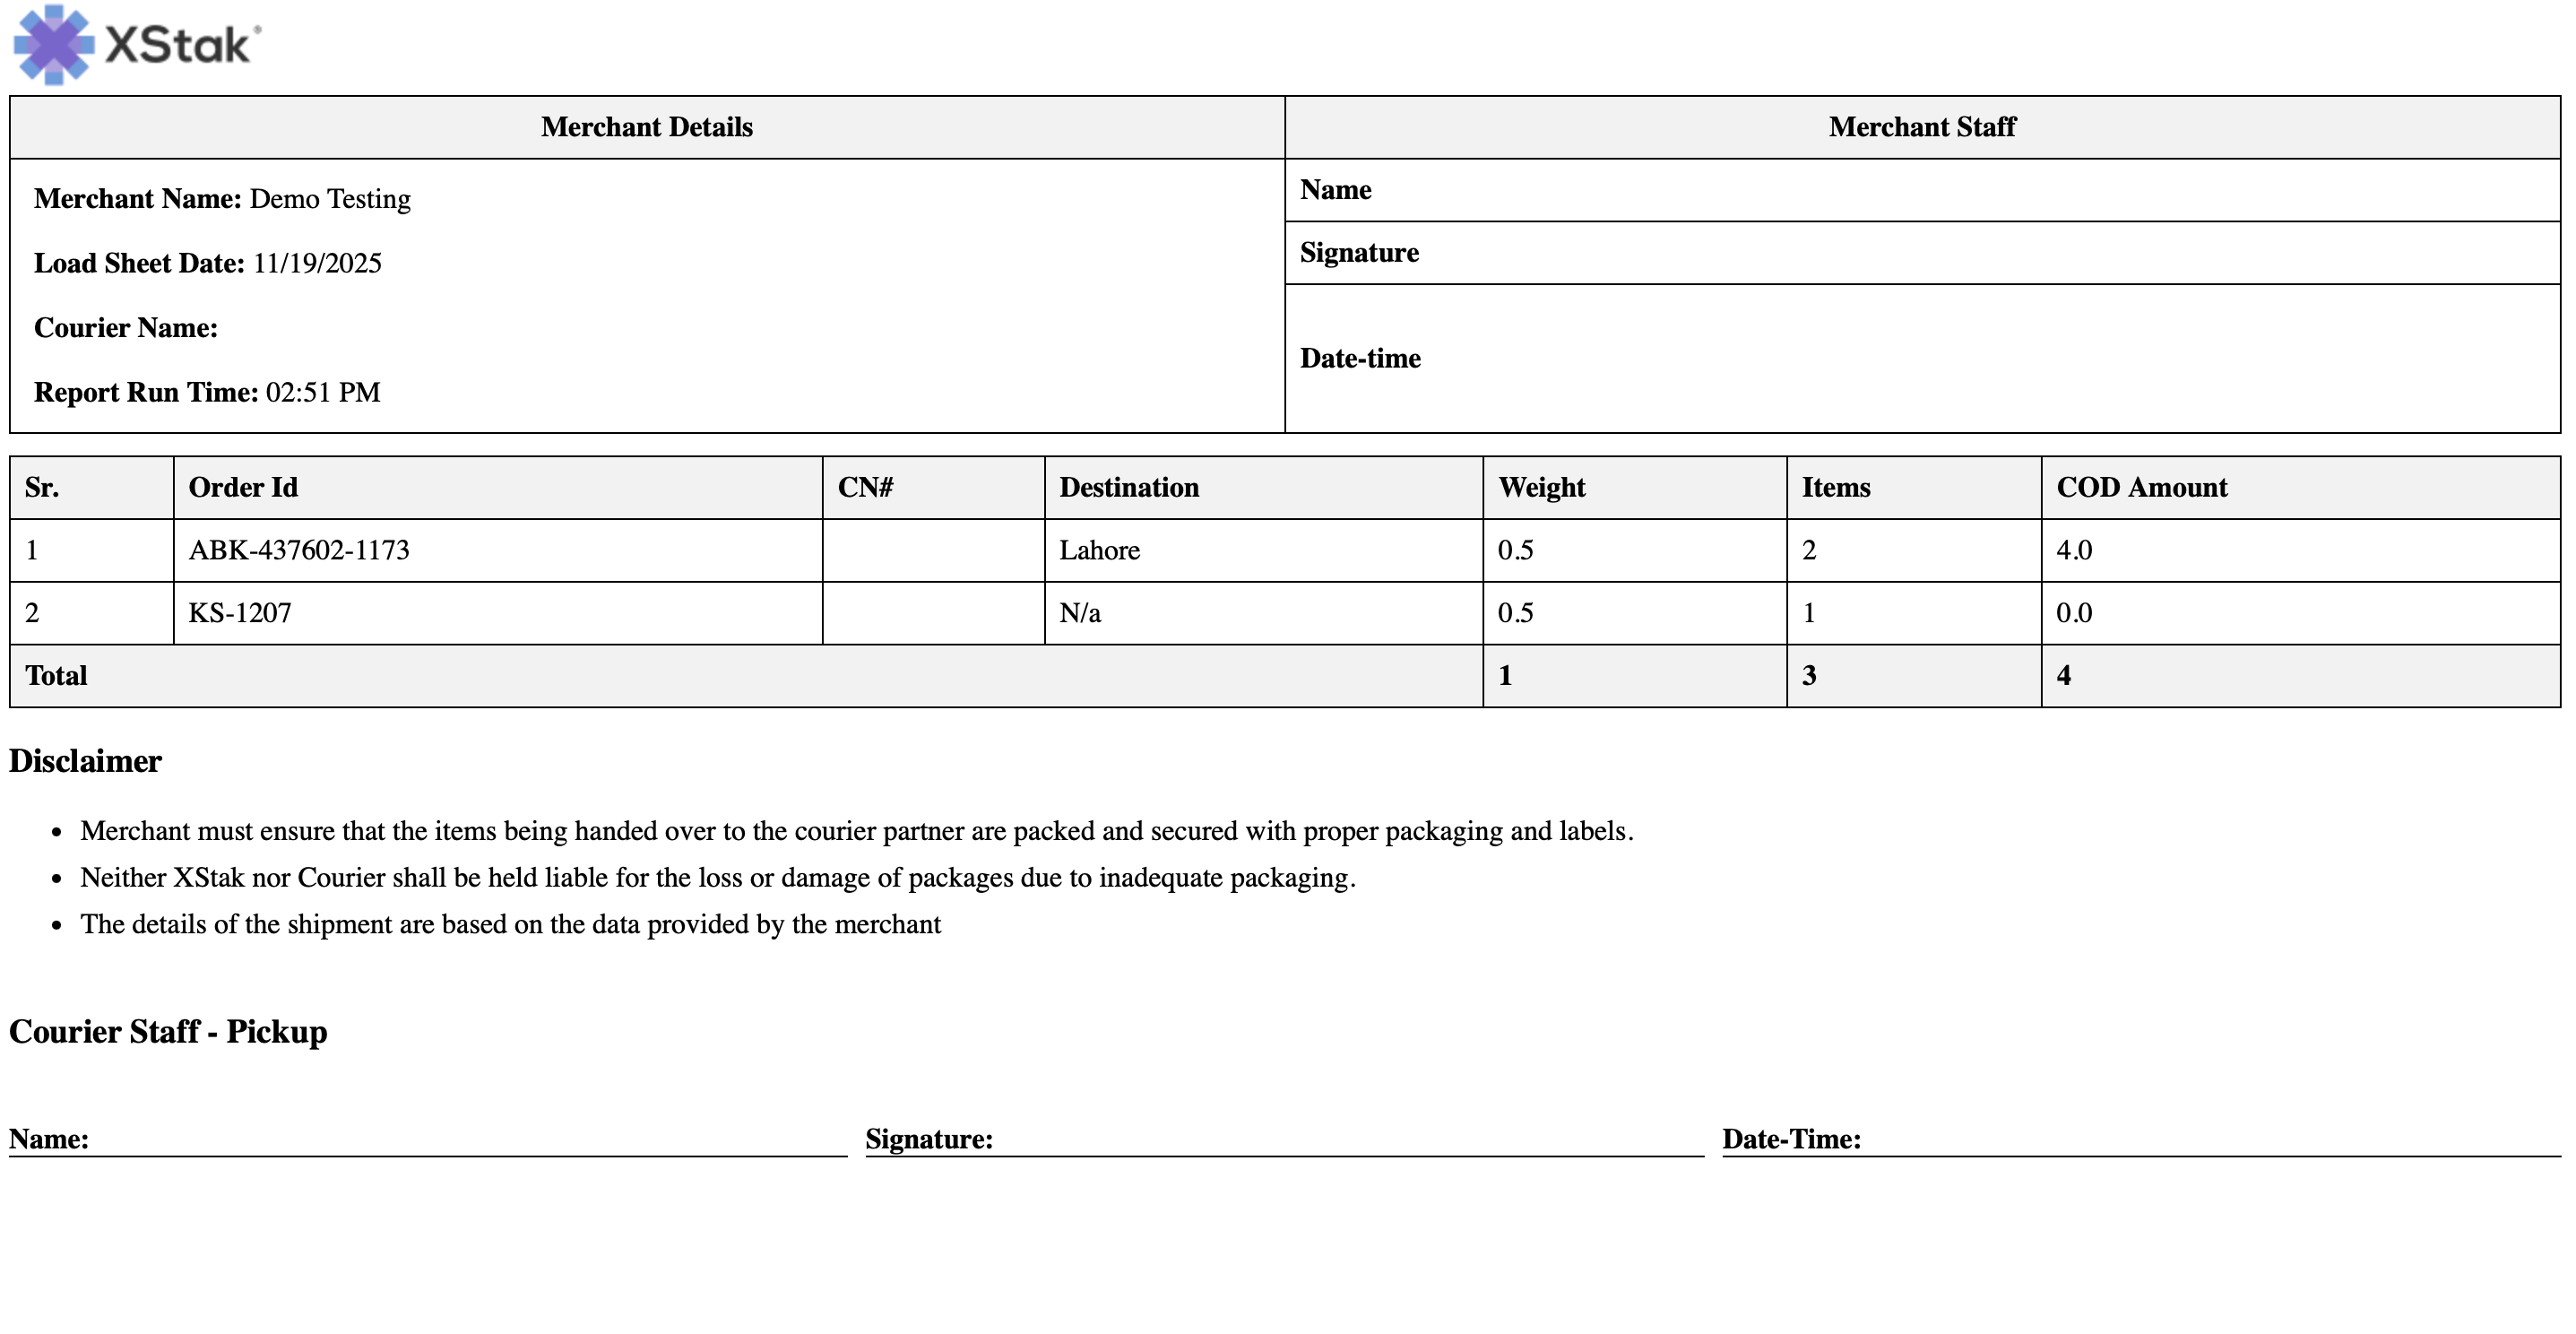
A loadsheet will be generated for courier handover.
Purpose:
This process ensures that both your team and the courier have a verified and complete record of the orders handed over.
Order Item Scanning Workflow
This workflow is designed to verify the accuracy of the items inside each order (SKU-level validation) before dispatch.
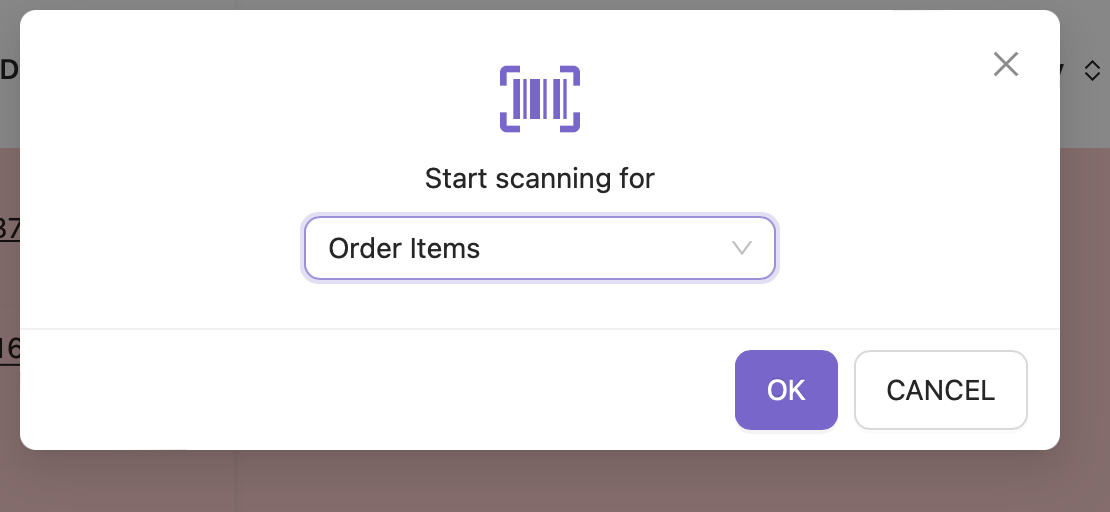
Step 1: Select “Start Scanning for Order Item”
Once selected, the system will display two dispatch modes:
Dispatch Modes
-
Auto Dispatch on Scan
The order is automatically dispatched as soon as a valid scan is completed.
Best for high-volume operations. -
Manual Dispatch
Items are scanned first, and the user manually selects and dispatches the orders afterward.
Useful when a final review is required.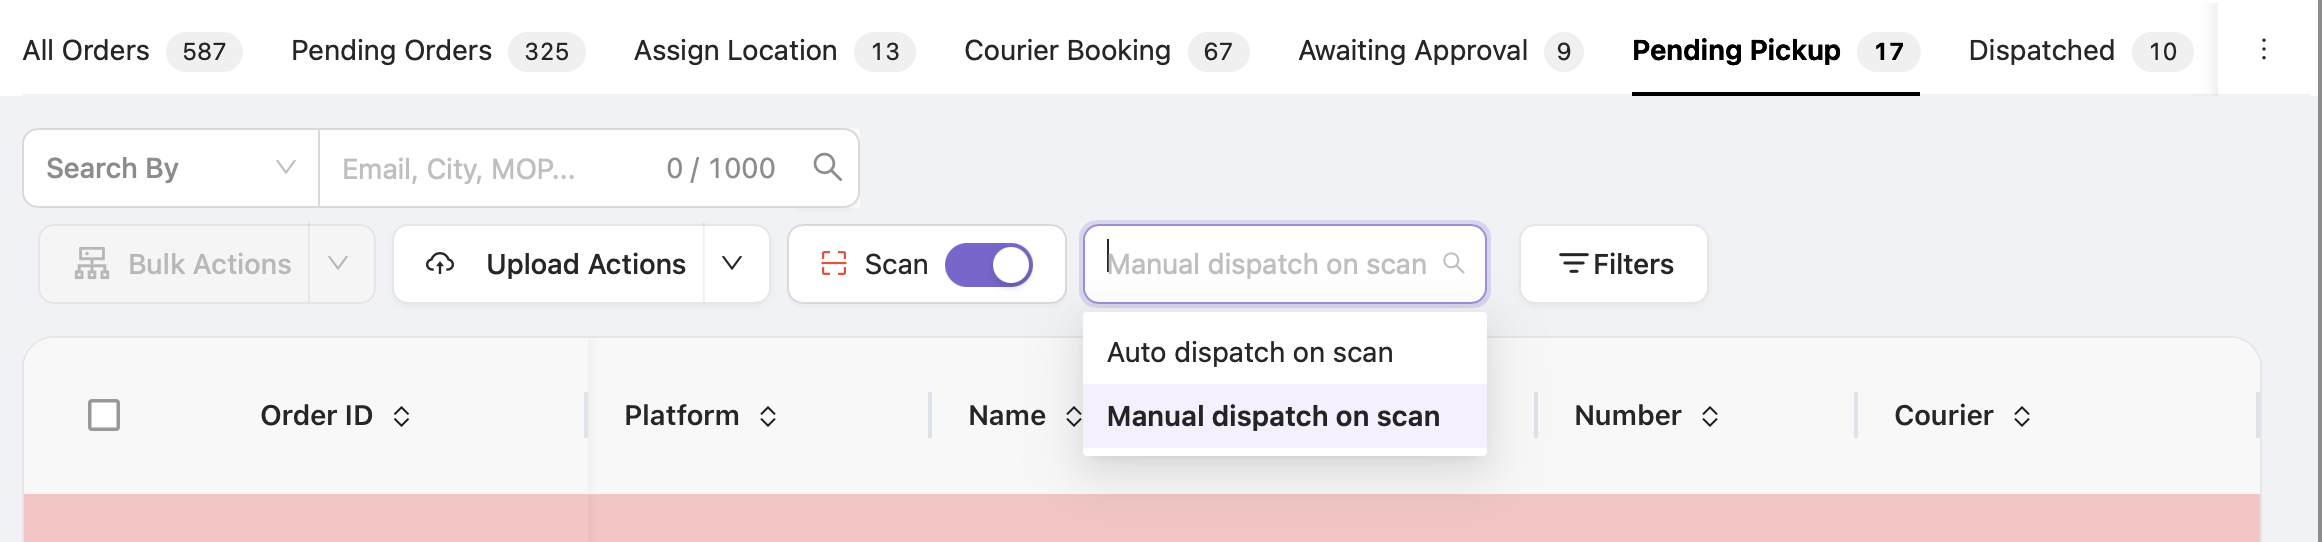
Steps for Item-Level Scanning
Step 2:
Choose either Auto Dispatch or Manual Dispatch mode.
Step 3:
Scan the Order ID, Tracking Number, or SKU.
Step 4:
The system will validate the scanned SKU against the order details.
Step 5:
If Auto Dispatch is selected, the order will immediately move to the Dispatched stage after a successful scan.
Step 6:
If Manual Dispatch is selected, you will need to choose the scanned orders and click “Dispatch.”
Purpose:
This ensures that the correct items are packed and dispatched, preventing issues caused by incorrect SKUs or mismatched order contents.
5. Filters & Search – How to Use Them
|
Filter |
Use Case |
Example |
|---|---|---|
|
Order Creation Date |
Find orders created on specific days. |
View all orders created today. |
|
Transition Date |
Track orders moved to Pending Pickup on a specific day. |
Identify orders pending since yesterday. |
|
Location |
Filter by warehouse or store. |
View only Riyadh location orders. |
|
Courier |
See orders for a specific courier. |
Show only BlueX orders. |
How to Use:
Select filters → Click “Apply” → Order list updates accordingly.
6. Upload Actions – How to Perform File-Based Updates
|
Upload Option |
What It Does |
How to Use |
|---|---|---|
|
Cancel Orders |
Cancels orders in bulk. |
Upload the cancellation file. |
|
Dispatch Orders |
Moves orders to dispatched stage. |
Upload dispatch file with correct details. |
|
Return Orders |
Marks orders as returned. |
Upload return file. |
|
Deliver Orders |
Updates orders as delivered. |
Upload delivery file. |
|
Revert Orders |
Moves order back to previous stage. |
Upload revert file. |
|
Add Tags |
Adds custom tags to orders. |
Upload tag file. |
Purpose:
Reduces manual work and keeps order statuses accurate.
7. Bulk Actions – What You Can Do & How
|
Action |
Function |
Steps to Use |
|---|---|---|
|
Dispatch Orders |
Dispatch multiple orders at once. |
Select orders → Click “Dispatch.” |
|
Generate AWB / GSP / OE Slips |
Generates shipping documents. |
Select courier → Generate slips. |
|
Cancel Loadsheet |
Deletes loadsheet in case of error. |
Click loadsheet → Cancel. |
|
Reverse Orders |
Moves orders back to pending. |
Select orders → Reverse.
|
8. Reports – What You Can Generate
|
Report |
Description |
Steps |
|---|---|---|
|
Dispatch Notes |
Summary of all dispatched orders. |
Select filters → Download. |
|
Bulk Dispatch Files |
File containing dispatch status. |
Select courier → Download. |
|
Bulk AWB Files |
Generate all AWBs in one click. |
Choose courier and filters → Download. |
Important Note — Editing Restrictions in Pending Pickup
⚠️ Orders in the Pending Pickup stage cannot be edited directly.
To make any changes:
Step 1 — Revert the Order
-
Use the Revert Order option under Bulk Actions or Upload Actions.
-
The order will move back to Awaiting Approval.
Step 2 — Edit the Order
-
Apply the required changes.
Step 3 — Rebook the Order
-
Because reverting cancels the previous booking, you must rebook the order.
Purpose:
To maintain dispatch accuracy and prevent modification of orders already prepared for courier handover.