
The Awaiting Approval section is used to review and finalize orders before dispatch. At this stage, orders require managerial or system approval before they can move forward. Users can approve, reject, cancel, reverse, or tag orders individually or in bulk. They can also upload files or generate reports for verification and tracking.
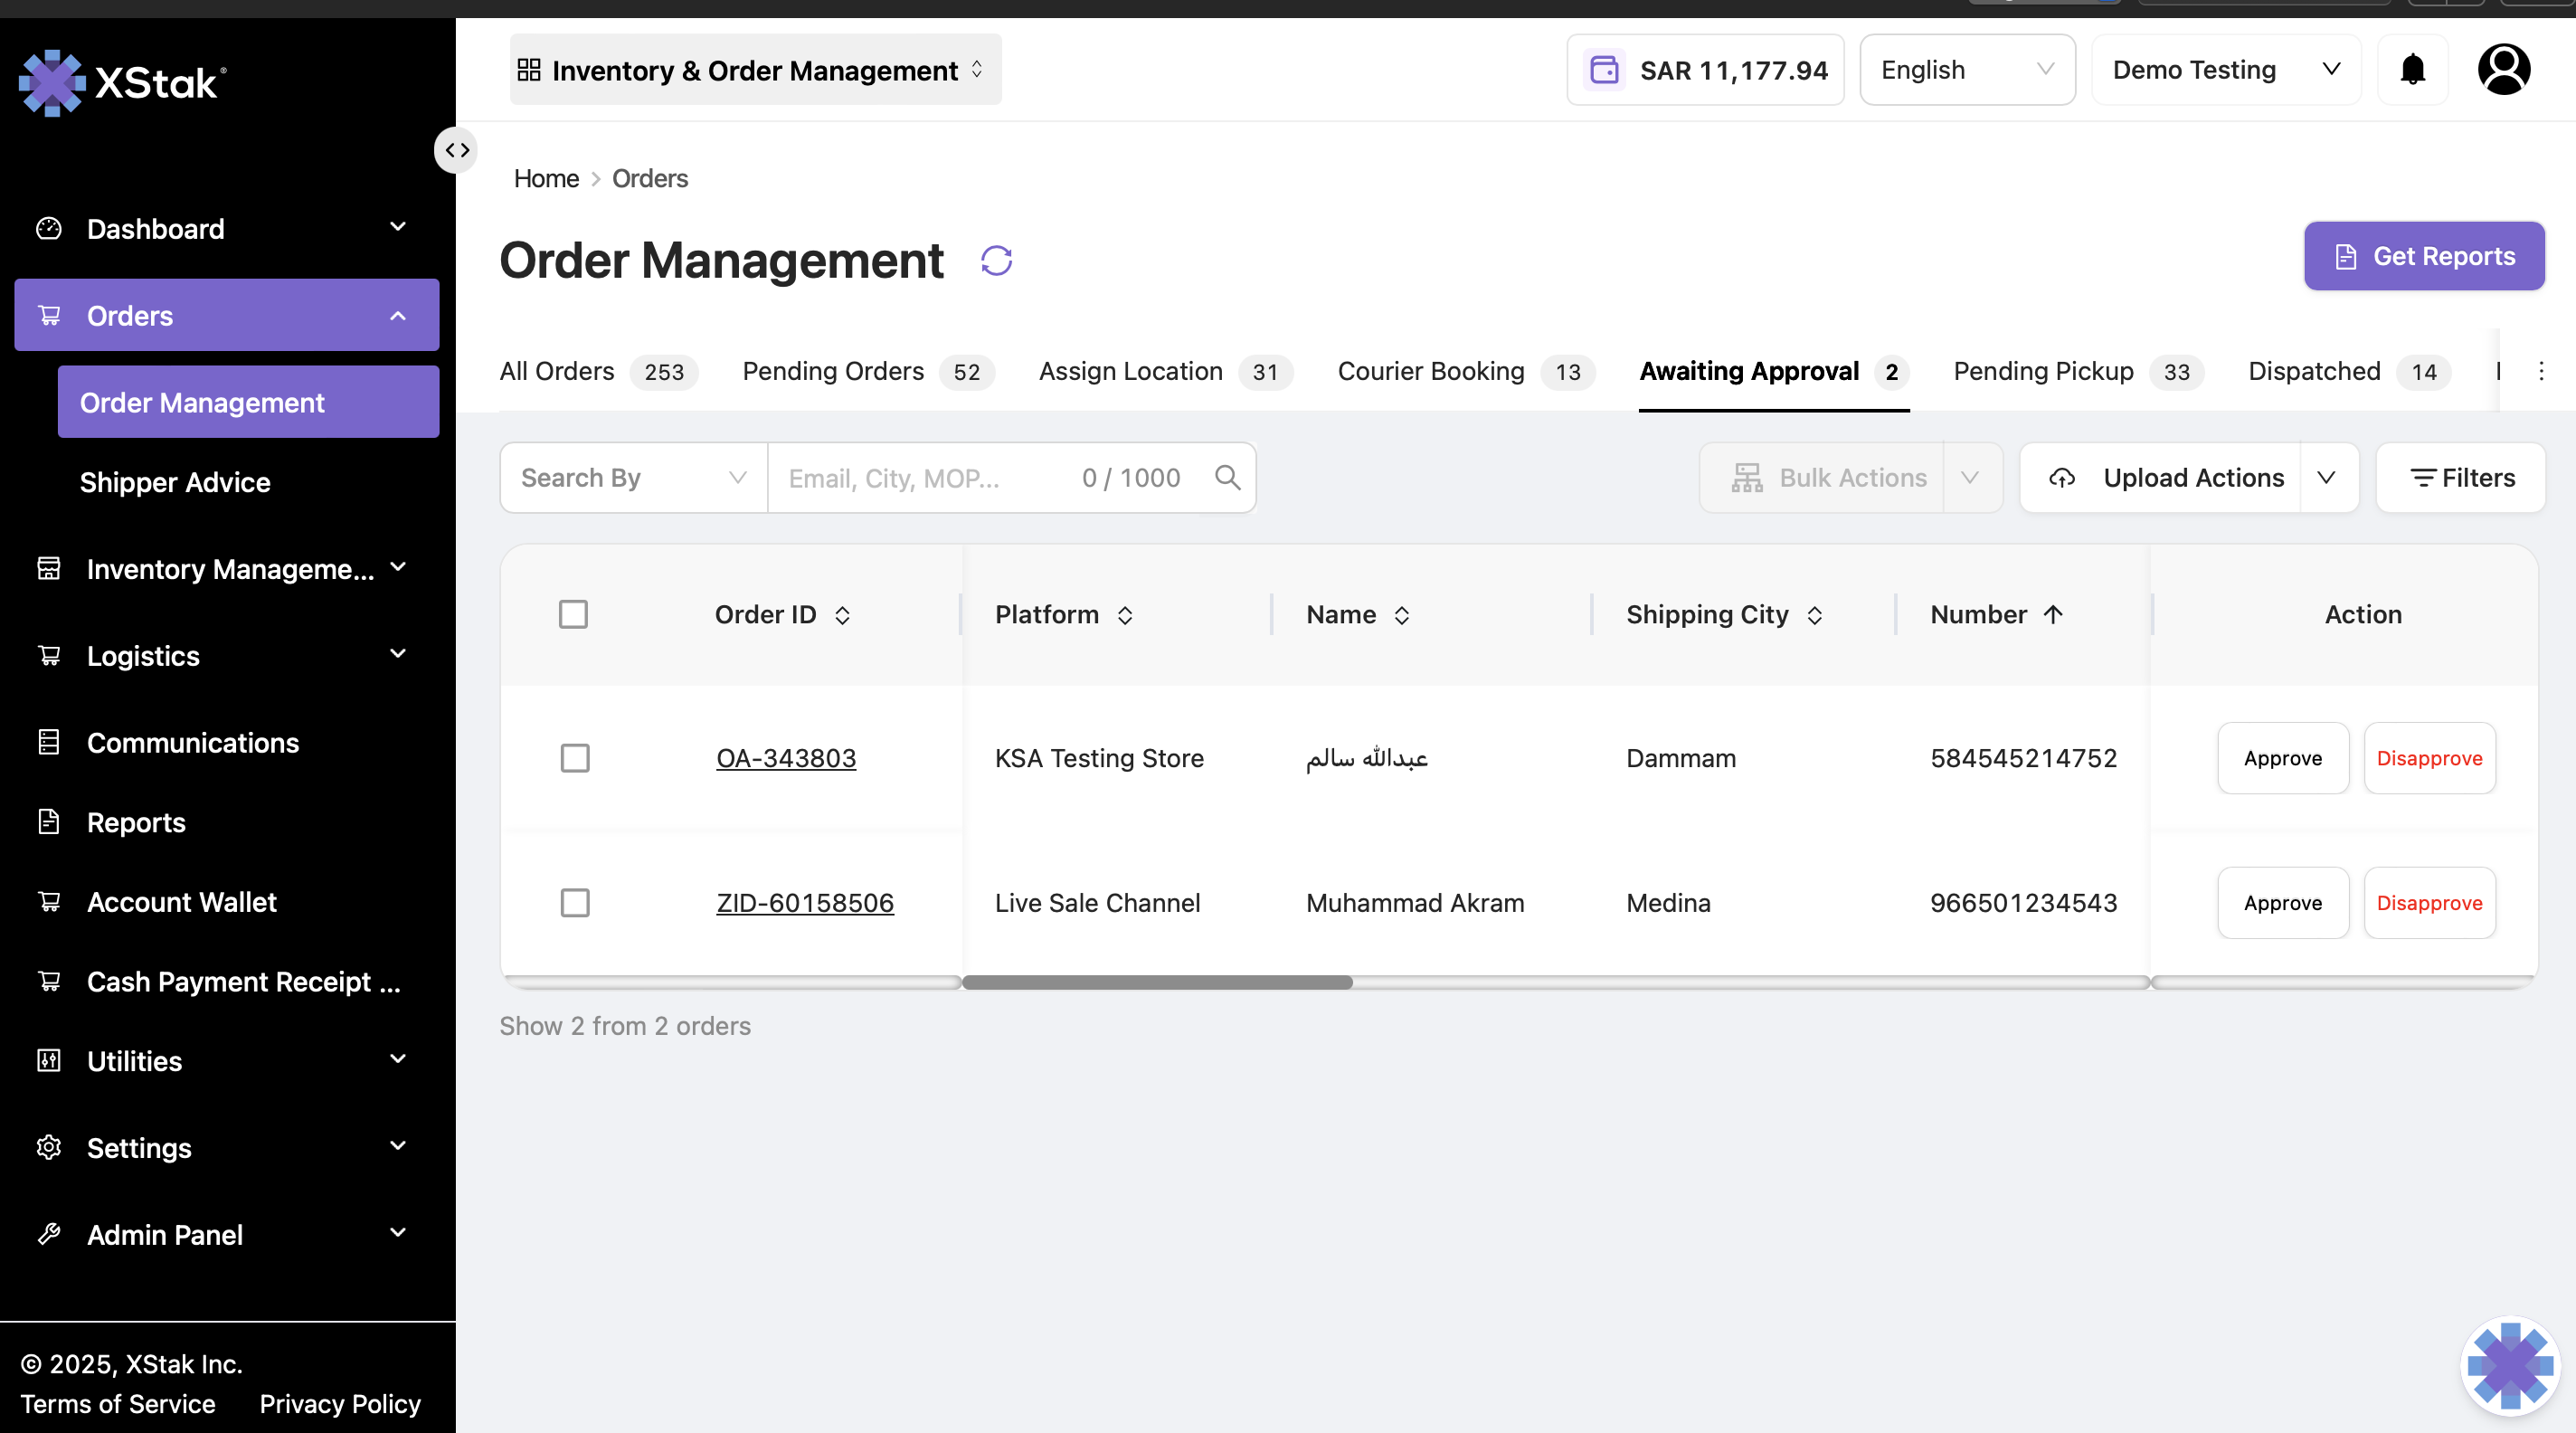
Key Functionalities
|
Feature |
Description / Purpose |
|---|---|
|
Order List View |
Displays all orders awaiting final approval, including Order ID, customer, SKU, location, and status details. |
|
Filters & Search |
Refines visible orders using filters such as order creation date, order transitioned date, mode of payment, sales channel, and location. |
|
Bulk Actions |
Performs multiple actions at once, including approve, reject, cancel, reverse, generate OE/AWB slips, and add tags. |
|
Upload Actions |
Supports bulk file uploads for large order sets, such as approve, cancel, add tags, or revert orders. |
|
Reports Section |
Generates reports such as Order List, Pick List, Out-of-Stock, and Order Data for analysis and record-keeping. |
Upload File Options
|
Upload Type |
Purpose / Function |
|---|---|
|
Upload File to Cancel Orders |
Cancels multiple orders directly from the Awaiting Approval stage. |
|
Upload Bulk Revert File |
Moves rejected or approved orders back to the Pending stage for re-verification. |
|
Upload File to Approve Orders |
Approves multiple orders at once for processing or dispatch. |
|
Upload File to Add Tags |
Adds tracking or classification tags to selected orders for better categorization. |
Note:
-
Always use the official sample file format before uploading.
-
Ensure all mandatory fields marked with an asterisk (*) are filled in before submitting the file.
Process Flow — Step-by-Step
-
Navigate to Awaiting Approval:
Orders → Order Management → Awaiting Approval -
Filter orders:
Apply filters by date, payment mode, location, or sales channel to narrow the results. -
Review orders:
Check order details such as SKU, customer information, and location. -
Approve or reject orders:
-
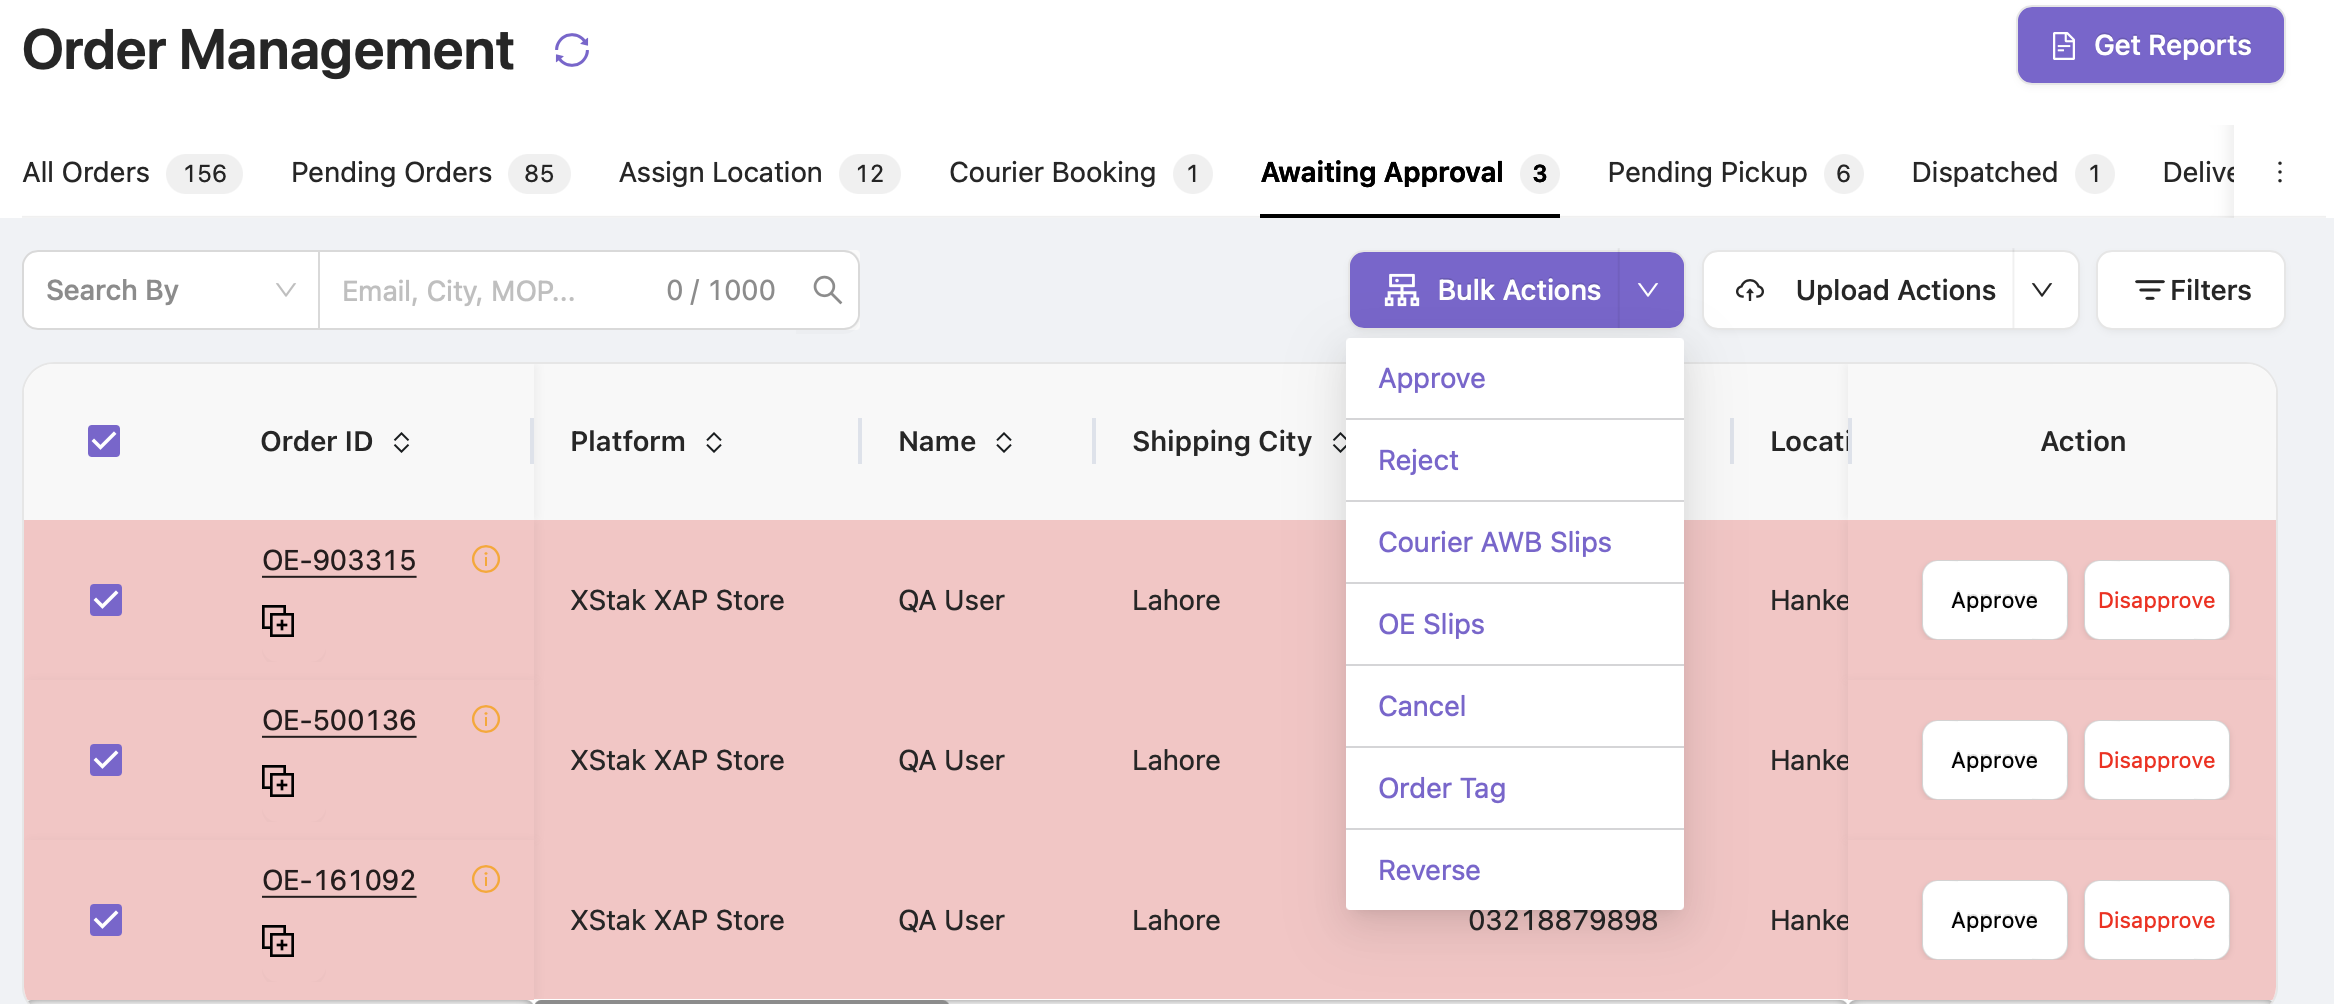
Select one or multiple orders.
-
Use the Bulk Actions menu to approve, reject, cancel, reverse, or tag the selected orders.
-
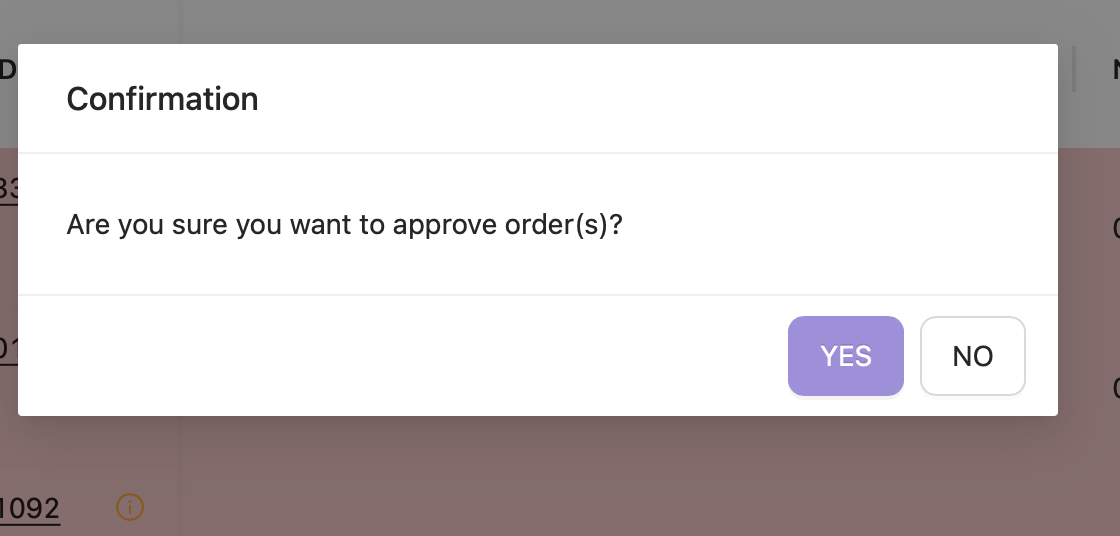
A confirmation dialog box appears for each bulk action.
-
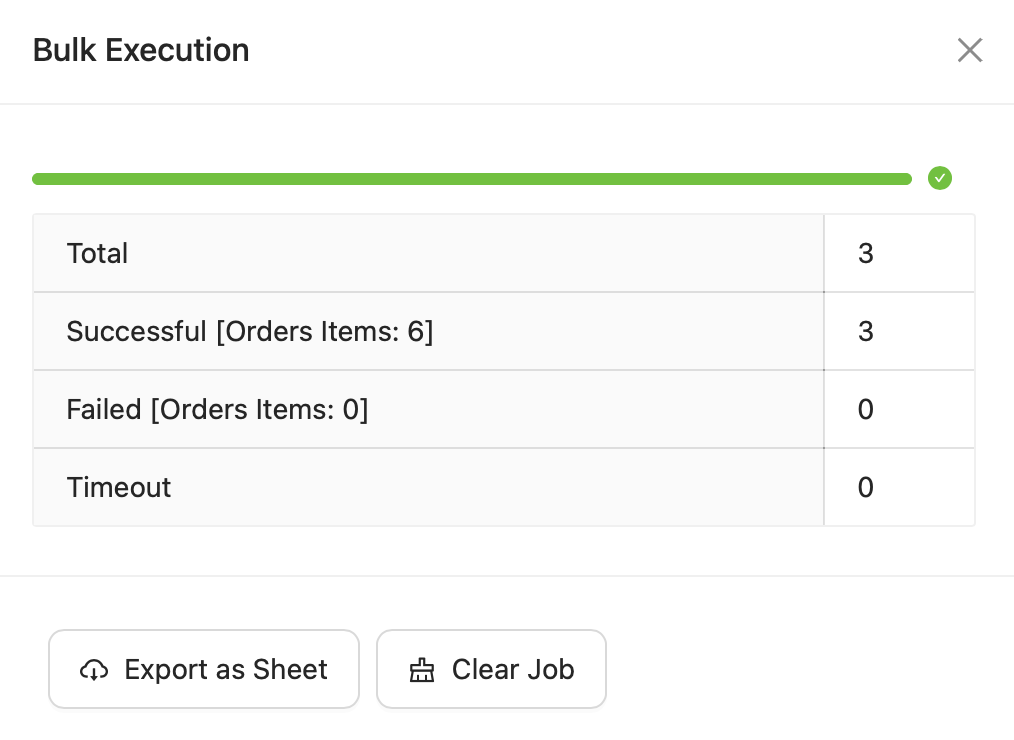
After confirmation, the bulk action is performed and the execution status is displayed.
-
You can also generate OE Slips and AWB Slips directly from the same menu.
-
-
Upload bulk files, if required:
-
Go to Upload Actions and choose the relevant file type: Approve, Cancel, Revert, or Add Tags.
-
Upload the prepared file to execute the bulk operation.
-
-
Generate reports:
-
Click the Reports button to generate reports such as Order List, Pick List, Out of Stock, or Order Data.
-
Apply filters such as date, MOP, location, or sales channel before downloading.
-