
Order Creation via File — How To Guide
Purpose: This guide explains how to create multiple orders in bulk by uploading a structured Excel or CSV file, including sample file preparation, mandatory fields, UTF-8 formatting, COD calculation, upload validation, and parsing error handling.
Overview
Order creation via file is a functionality that enables users to create multiple orders in bulk by uploading a structured Excel or CSV file in UTF-8 format. This feature simplifies the process of adding large order volumes by allowing all order details—such as customer name, address, contact, SKU, quantity, payment mode, and location—to be entered in a single file template.
Before uploading, users should download the sample file provided in the system to ensure the correct format is followed.
-
All columns marked with an asterisk (*) are mandatory and must be filled in for the order to be created successfully.
-
The file must be saved and uploaded in UTF-8 format to avoid character or encoding issues.
Once uploaded, the system will validate the file contents.
-
If all data is valid, the orders will be successfully created and appear in the Pending Orders stage.
-
If there are any errors (e.g., missing mandatory fields, incorrect formats, or invalid SKUs), a Parsing Error File will be generated automatically.
This file highlights the specific rows and columns where the error occurred, allowing users to correct the data and re-upload the file. -
Video link: https://screenrec.com/share/1HZz3INuJ0
Steps to Upload Orders via File in Pending Orders Tab
Step 1: Access Upload Action
-
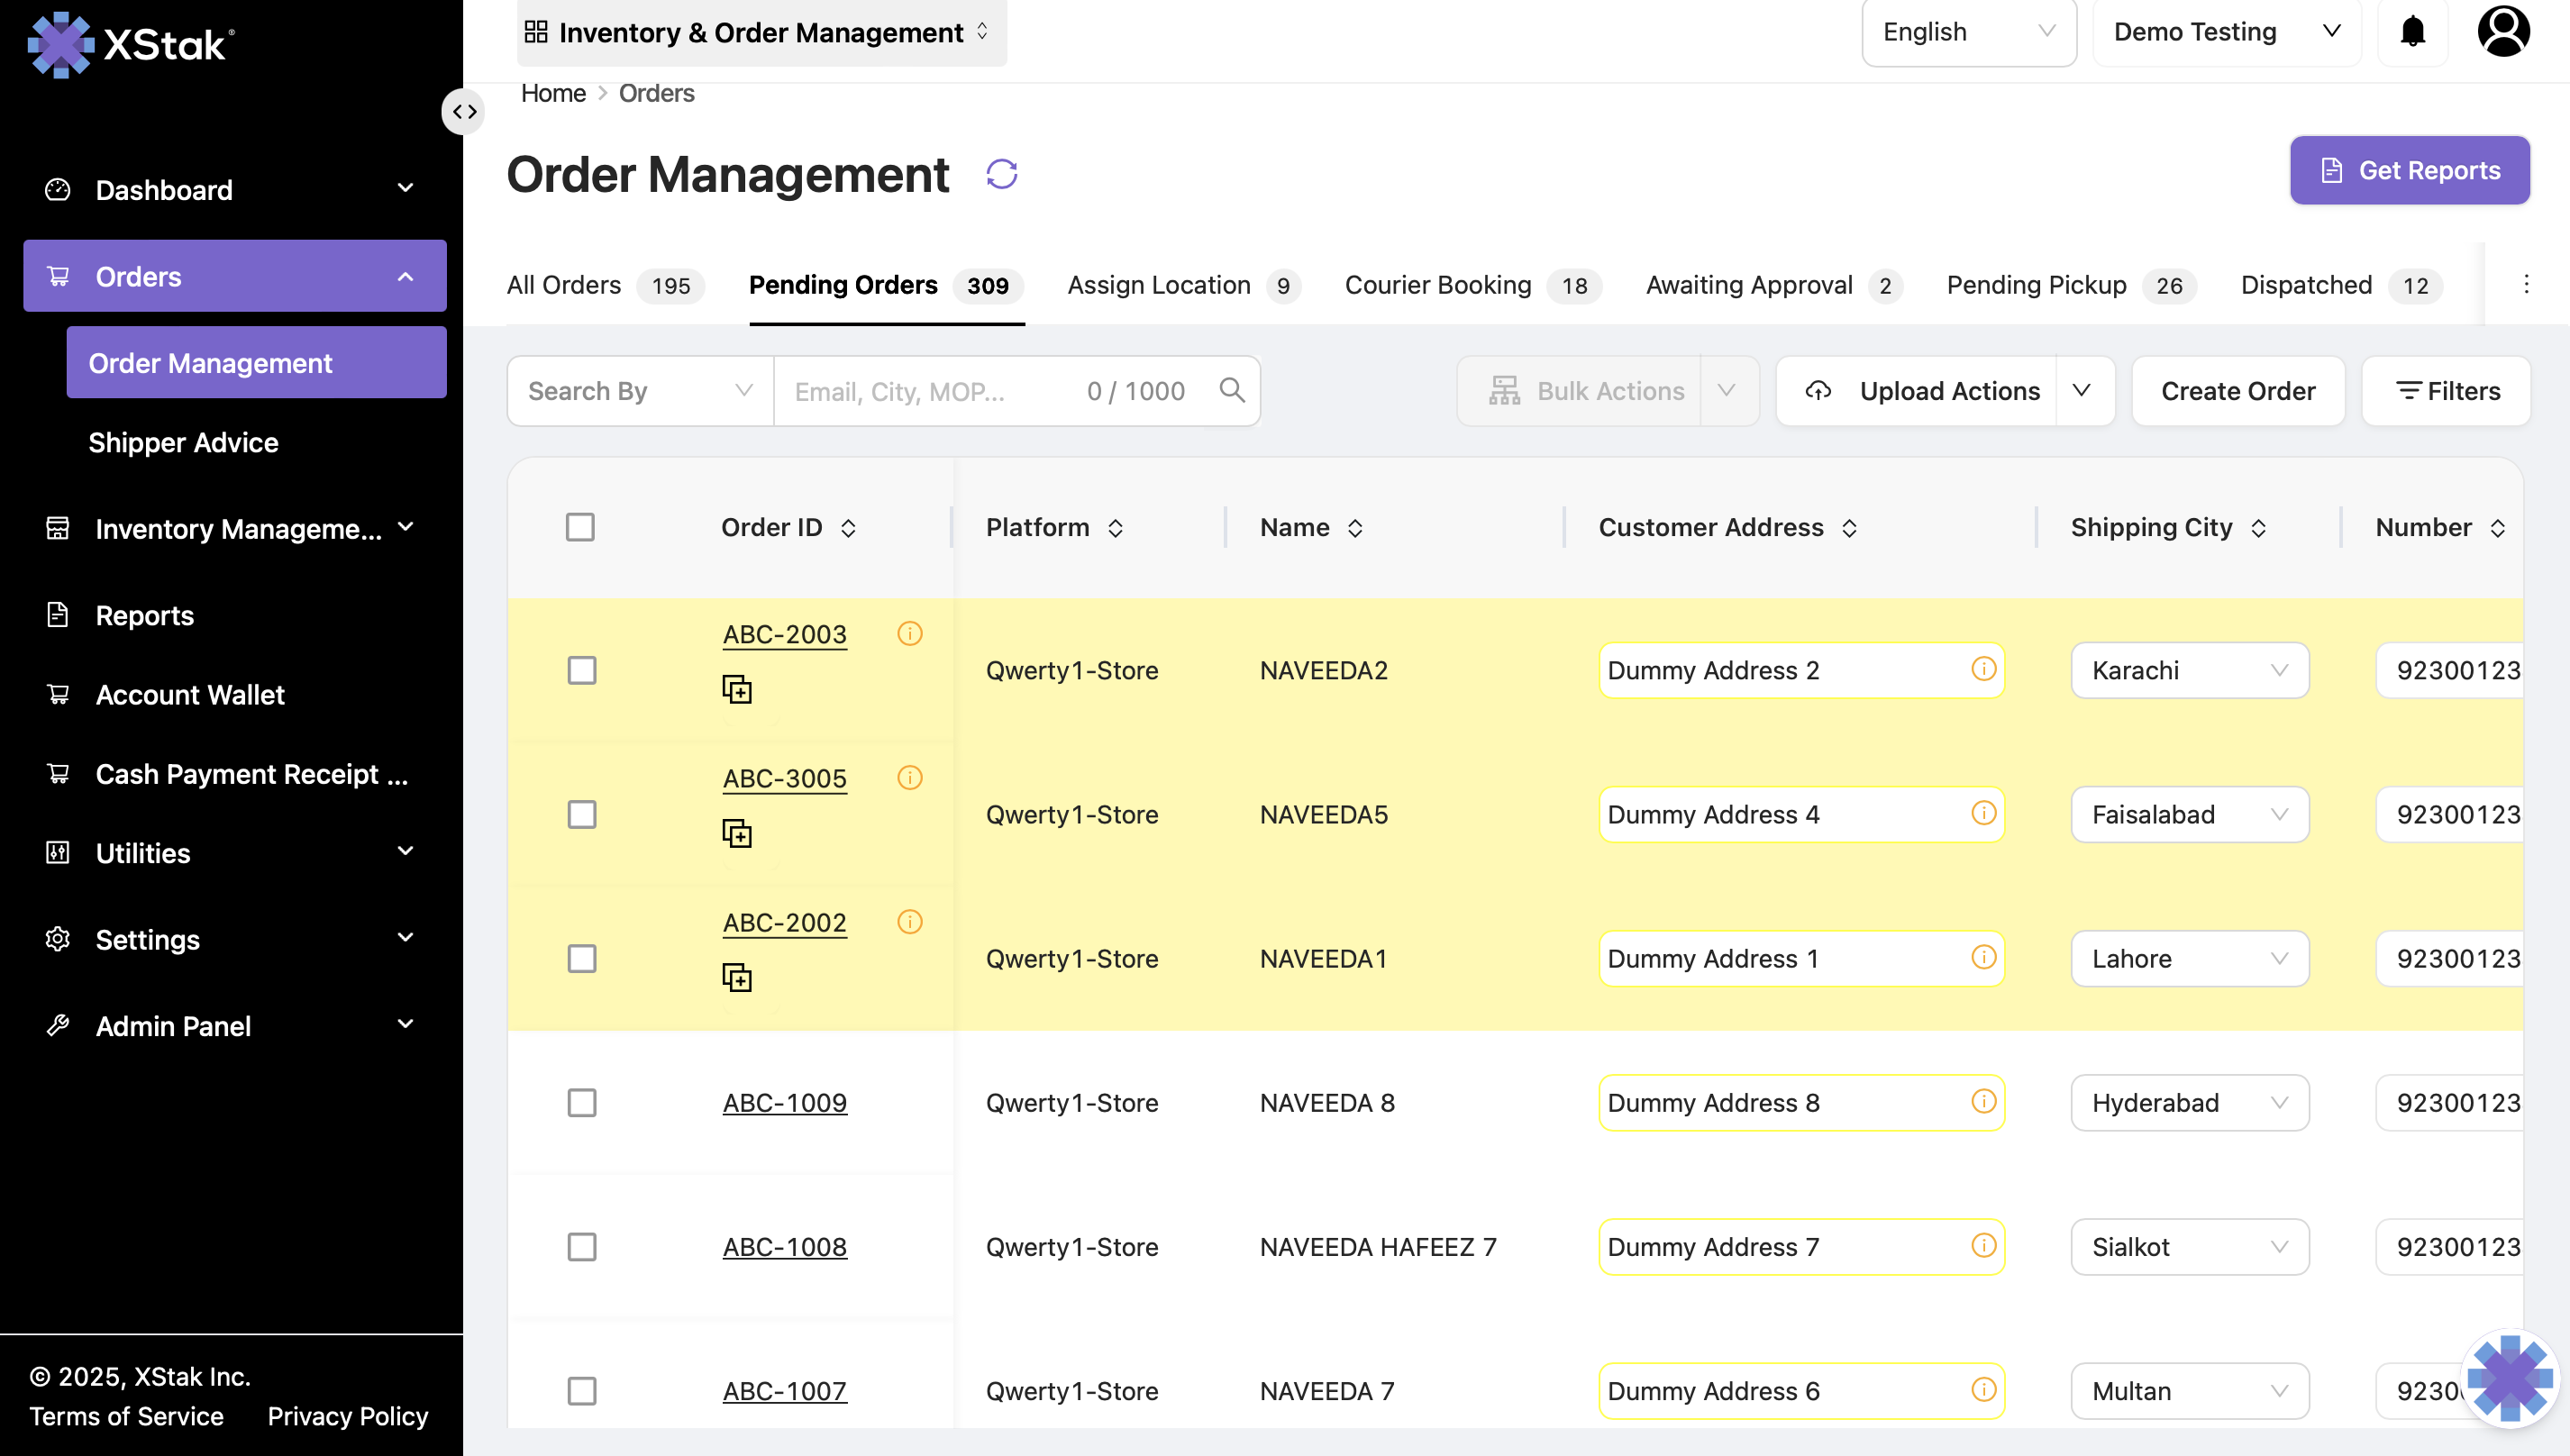
Go to the Pending Orders tab.
-
Click on the Upload Action button.
-
Select Action via File.
Step 2: Download and Prepare the File
-
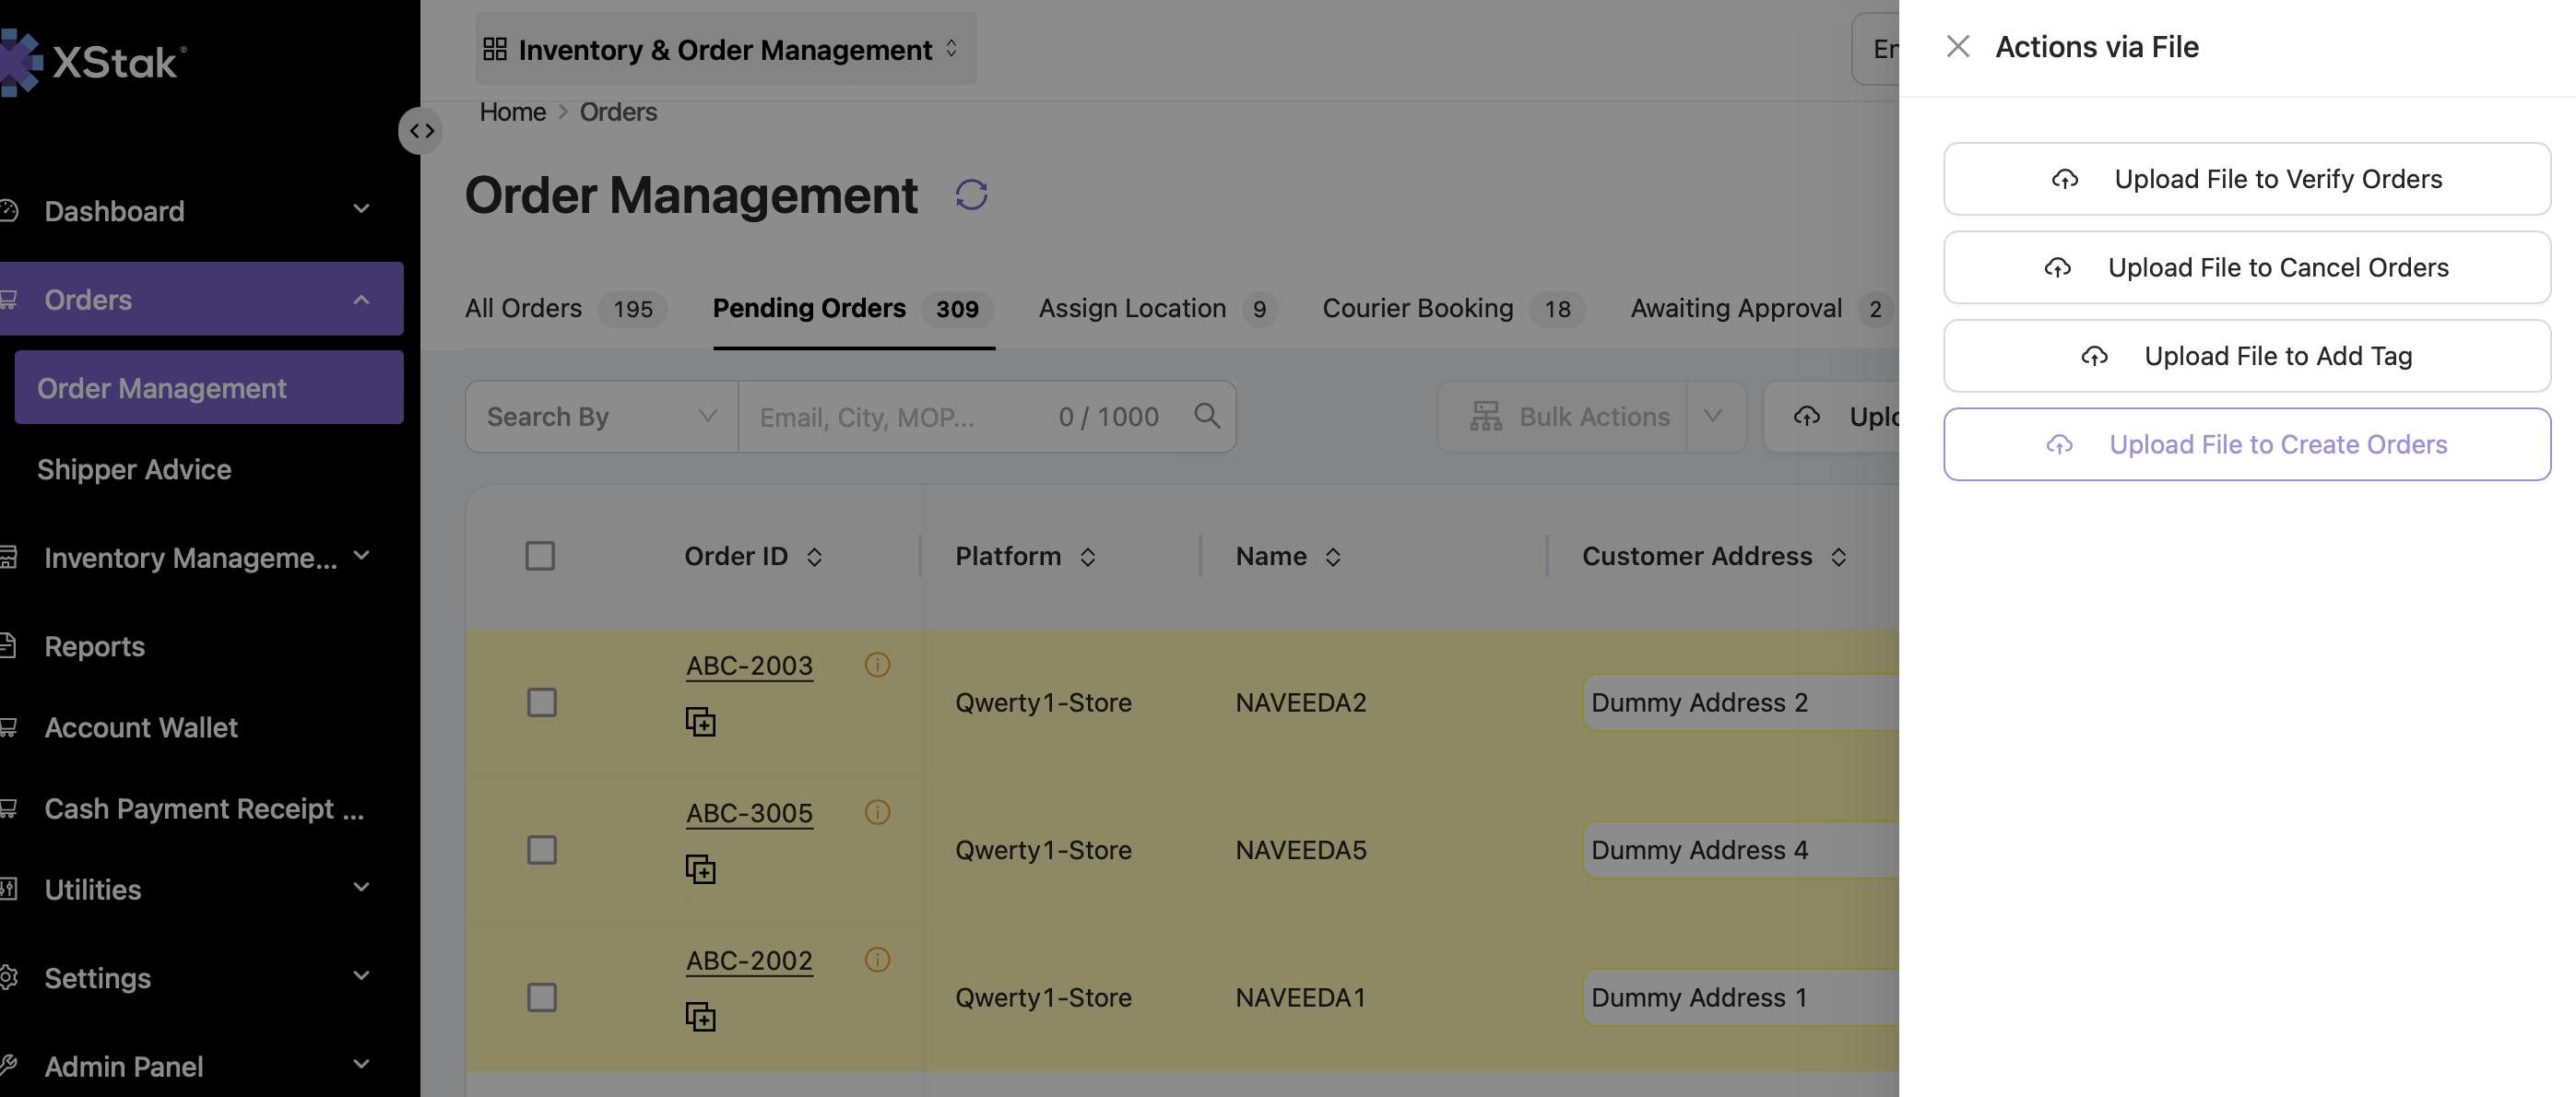
Click on “Upload File to Create Orders.”
-
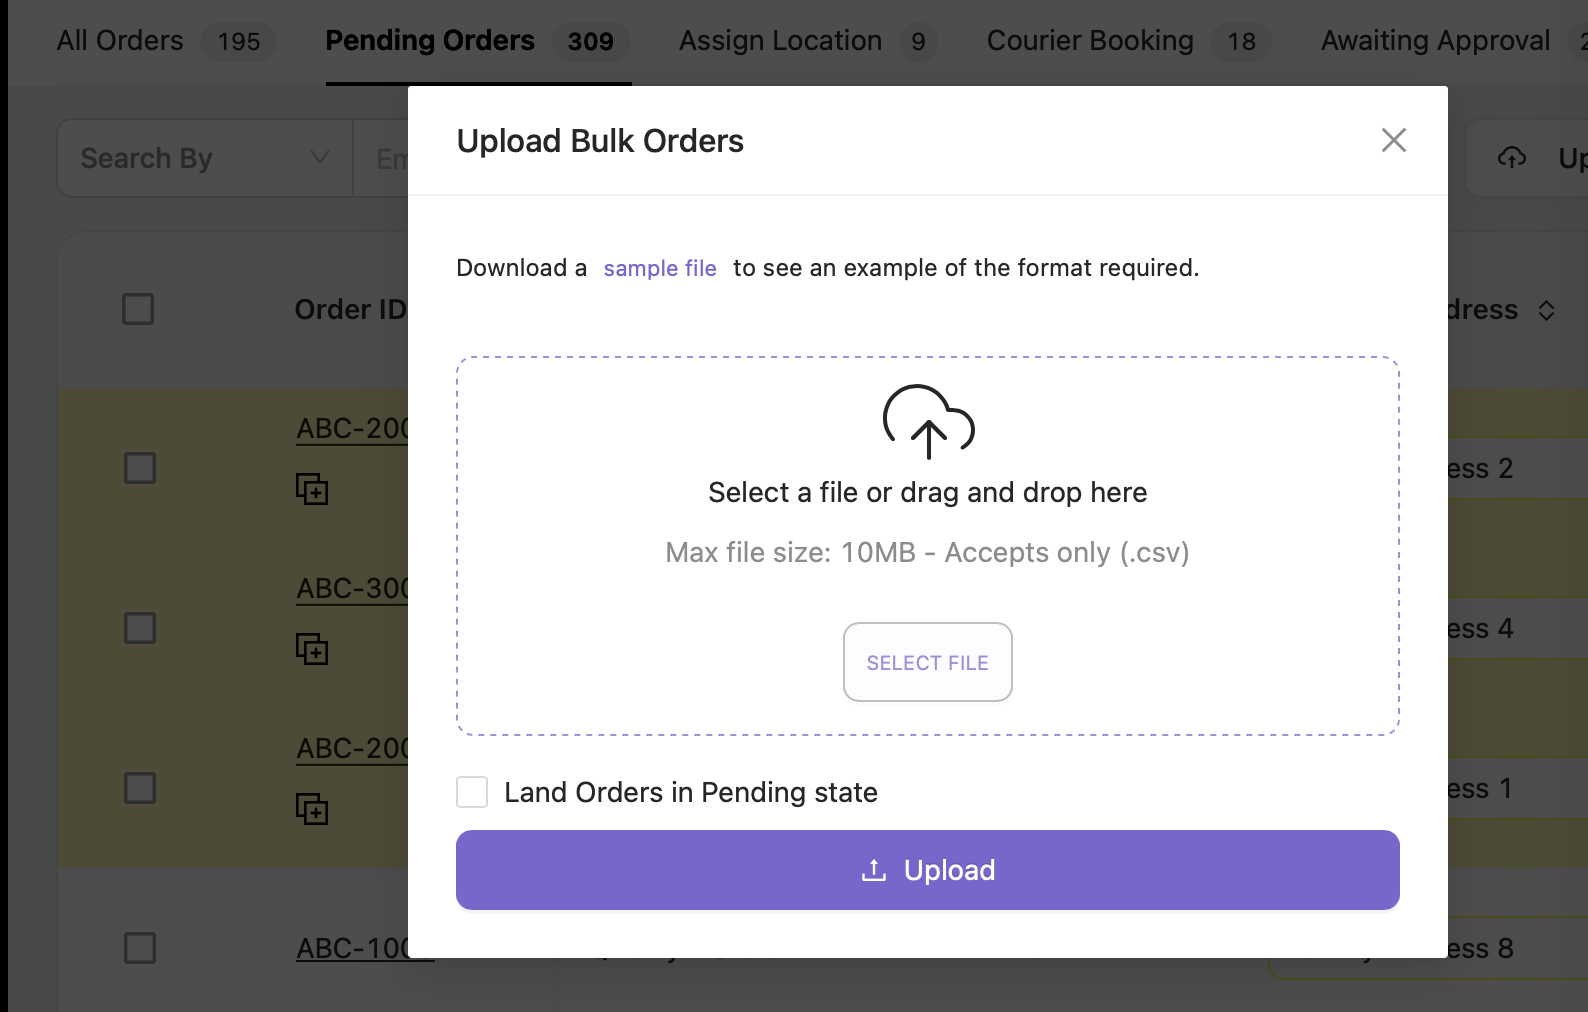
Download the sample file from the provided link.
-
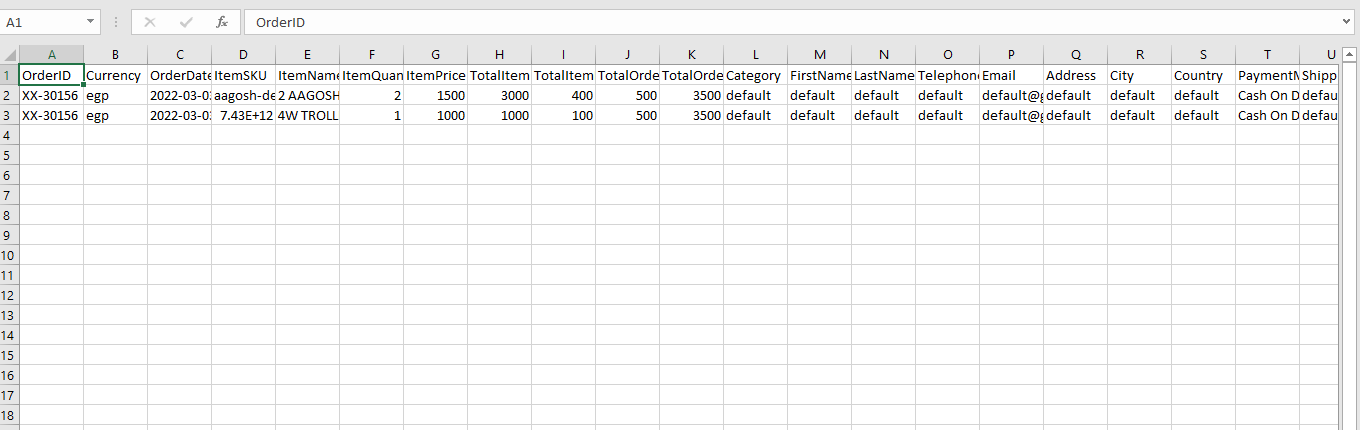
Open the sample file and enter your order details according to the given format.
Step 3: Enter Order Details
-
For every order, make sure to keep a unique short key (identifier).
-
Enter the Order ID in the Order ID column.
-
Fill in all required details:
-
Item SKU
-
Item Name
-
Quantity
-
Price
-
Country , etc.
-
Step 4: Perform Calculations
COD Calculation Logic
Our system automatically calculates the COD (Cash on Delivery) amount based on item prices and quantities to ensure accuracy and consistency across orders.
Formula Breakdown:
-
Total Item Price = Item Quantity × Item Price
-
Example:
1 × 2000 = 2000
-
-
Total Order Discount = Sum of all Item Discounts
-
Example:
200 (SKU123) + 100 (SKU421) = 300
-
-
Total Order Value = Total Item Price − Total Order Discount
-
Example:
2000 − 300 = 1700
-
By default, this calculated value is used as the COD amount.
However, for specific cases — such as client commitments, discounts, or agreed margins — the user can manually enter a custom COD amount.
The manually added COD will be considered the final payable amount for that order.
Step 5: Upload the File
-
Click on “Choose File” and select your prepared Excel file.
-
Click Upload.
-
The orders will be created successfully if all details are correct.
Best Practices
-
Always download and use the latest sample file before preparing a bulk upload.
-
Confirm that all mandatory columns marked with an asterisk (*) are completed.
-
Save the file in UTF-8 format before uploading.
-
Use unique short keys and Order IDs to avoid duplicate order issues.
-
Review the parsing error file carefully, correct all highlighted rows and columns, and re-upload the corrected file.