
All Orders Tab
Purpose
This document explains how the All Orders Tab works in the Order Management System, including end-to-end order visibility, order detail review, bulk OE slip generation, report generation, and manual order creation.
Overview
The All Orders Tab is the central view of the Order Management System. It provides a complete, consolidated listing of all orders across every status in the OMS lifecycle.
This tab is designed for end-to-end visibility, allowing users to monitor total operational volume, track order distribution across statuses, and access complete order-level details in a single unified interface.
Unlike other tabs, the All Orders Tab does not restrict data by workflow stage. Instead, it acts as a master dataset from which users can apply filters, generate insights, and extract operational reports.
Access Path
To access the All Orders Tab:
-
Click on Orders from the sidebar
-
Select Order Management from the dropdown menu
-
The All Orders Tab is displayed as the first tab in the section
This tab represents the default landing view for order operations.
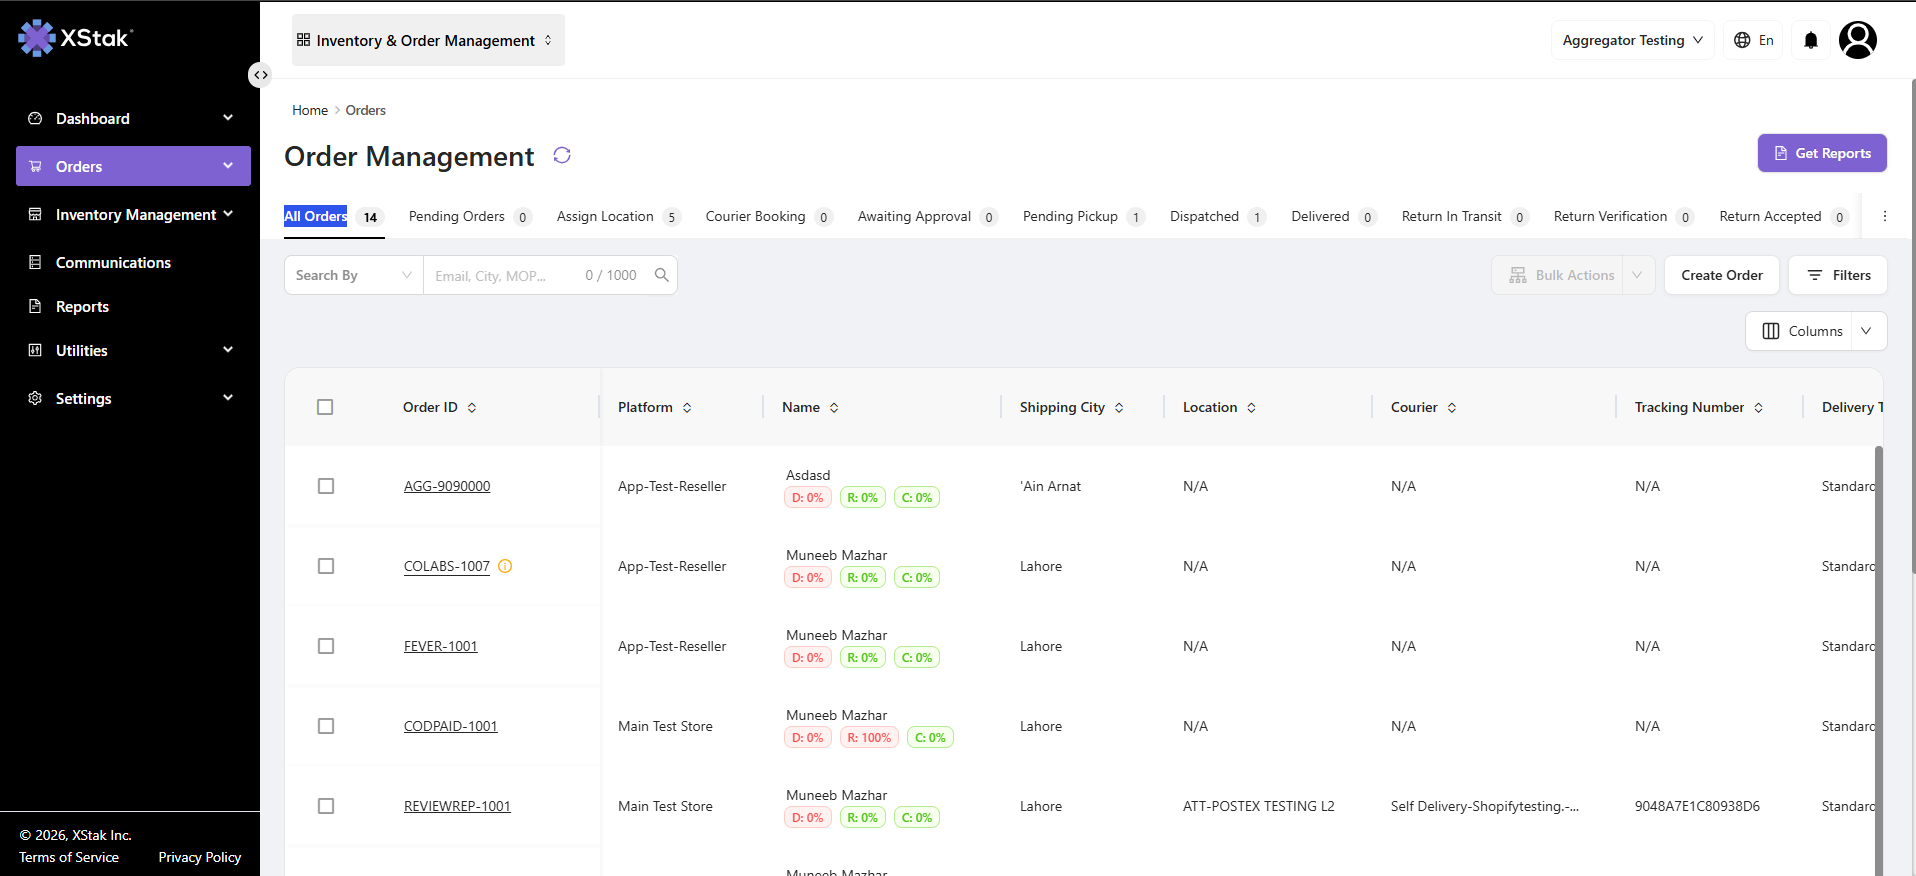
Key Purpose of All Orders Tab
-
Provides a complete view of all OMS orders in one place
-
Displays total order distribution across all statuses
-
Enables cross-status operational analysis
-
Serves as the primary source for reporting and exports
-
Supports advanced filtering for detailed investigation
Click here to know: How Filtering Works in Order Management
Important Note
This tab is read-only for visibility purposes.
No order actions (such as editing, status updates, or processing) can be performed from this view.
View and Understand the Order List
Once inside the module, you will see a table displaying all orders across statuses.
Each order includes the following details:
-
Order ID for identification
-
Customer Name for verification
-
SKU (product details)
-
Payment Mode (e.g., COD or prepaid)
-
Courier Information (if assigned)
-
Current Order Status
1. Order Details View (Click on Order ID)
Within the Order Management screen, users can open complete order details for any order.
Step 1: Open Order Details
Click on any Order ID in the table.
Step 2: View Full Order Information
The system will open a detailed order view containing:
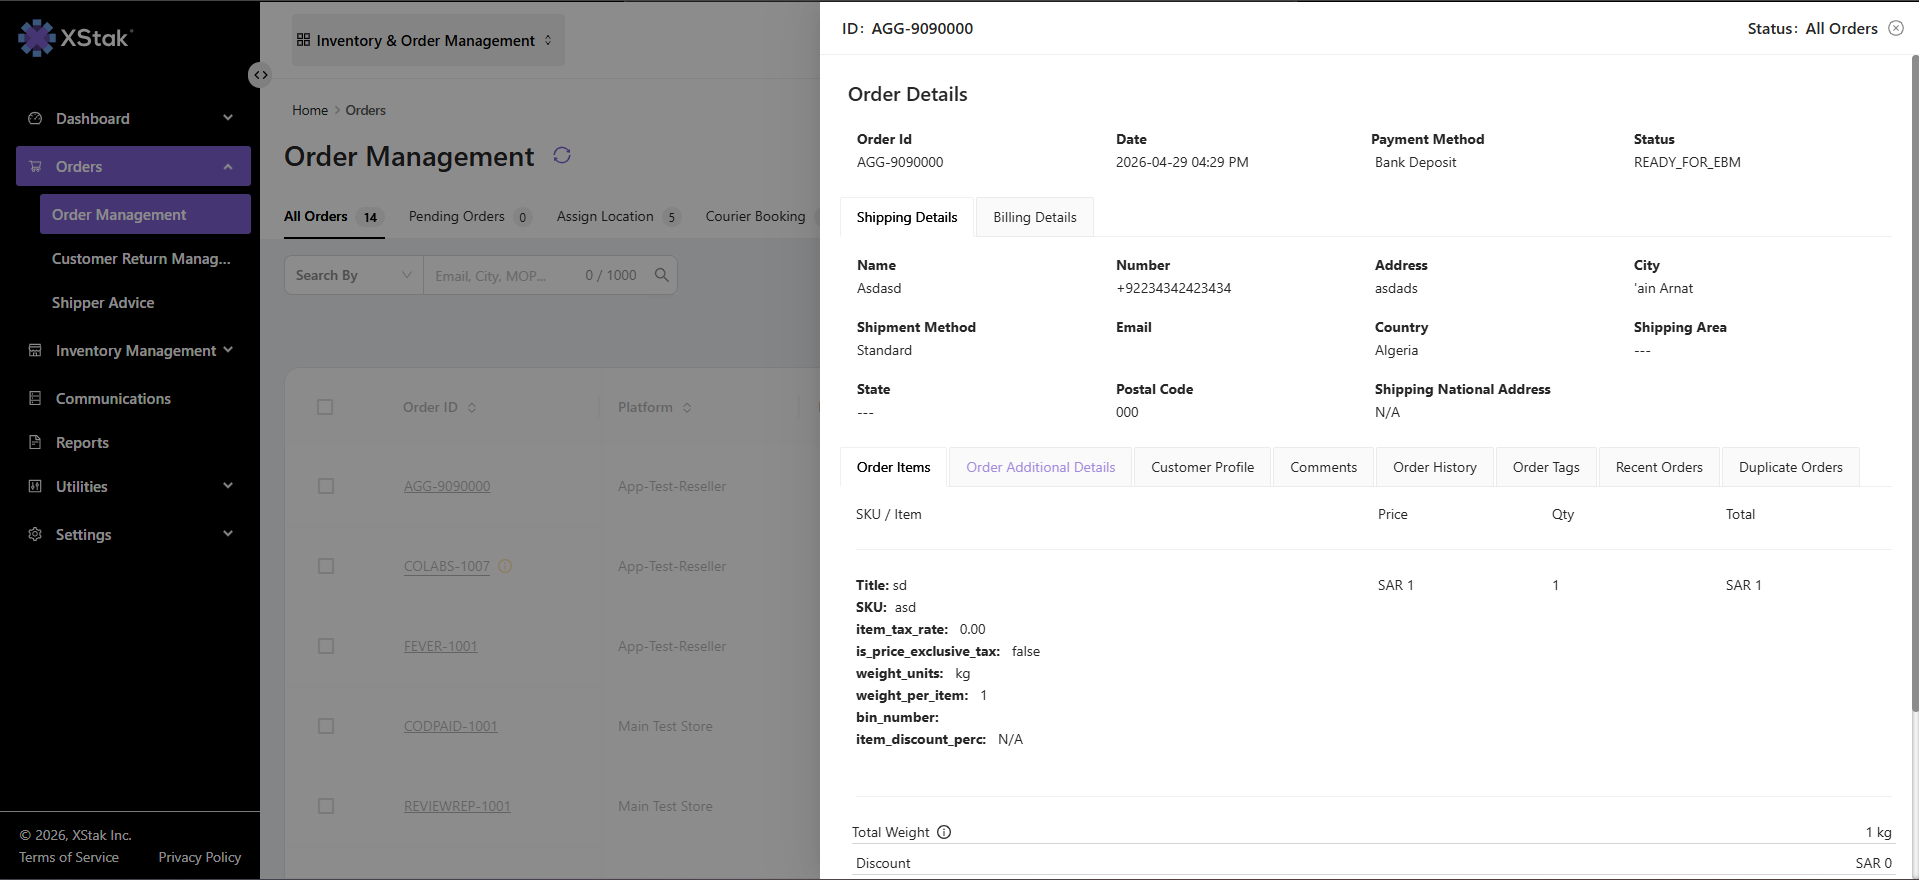
-
Order Items
-
Order Additional Details
-
Customer Profile
-
Comments Section
-
Order History Timeline
-
Order Tags
-
Recent Orders of Customer
-
Duplicate Orders (if any)
-
SKU / Item Level Breakdown
Provides a comprehensive view of each order including:
-
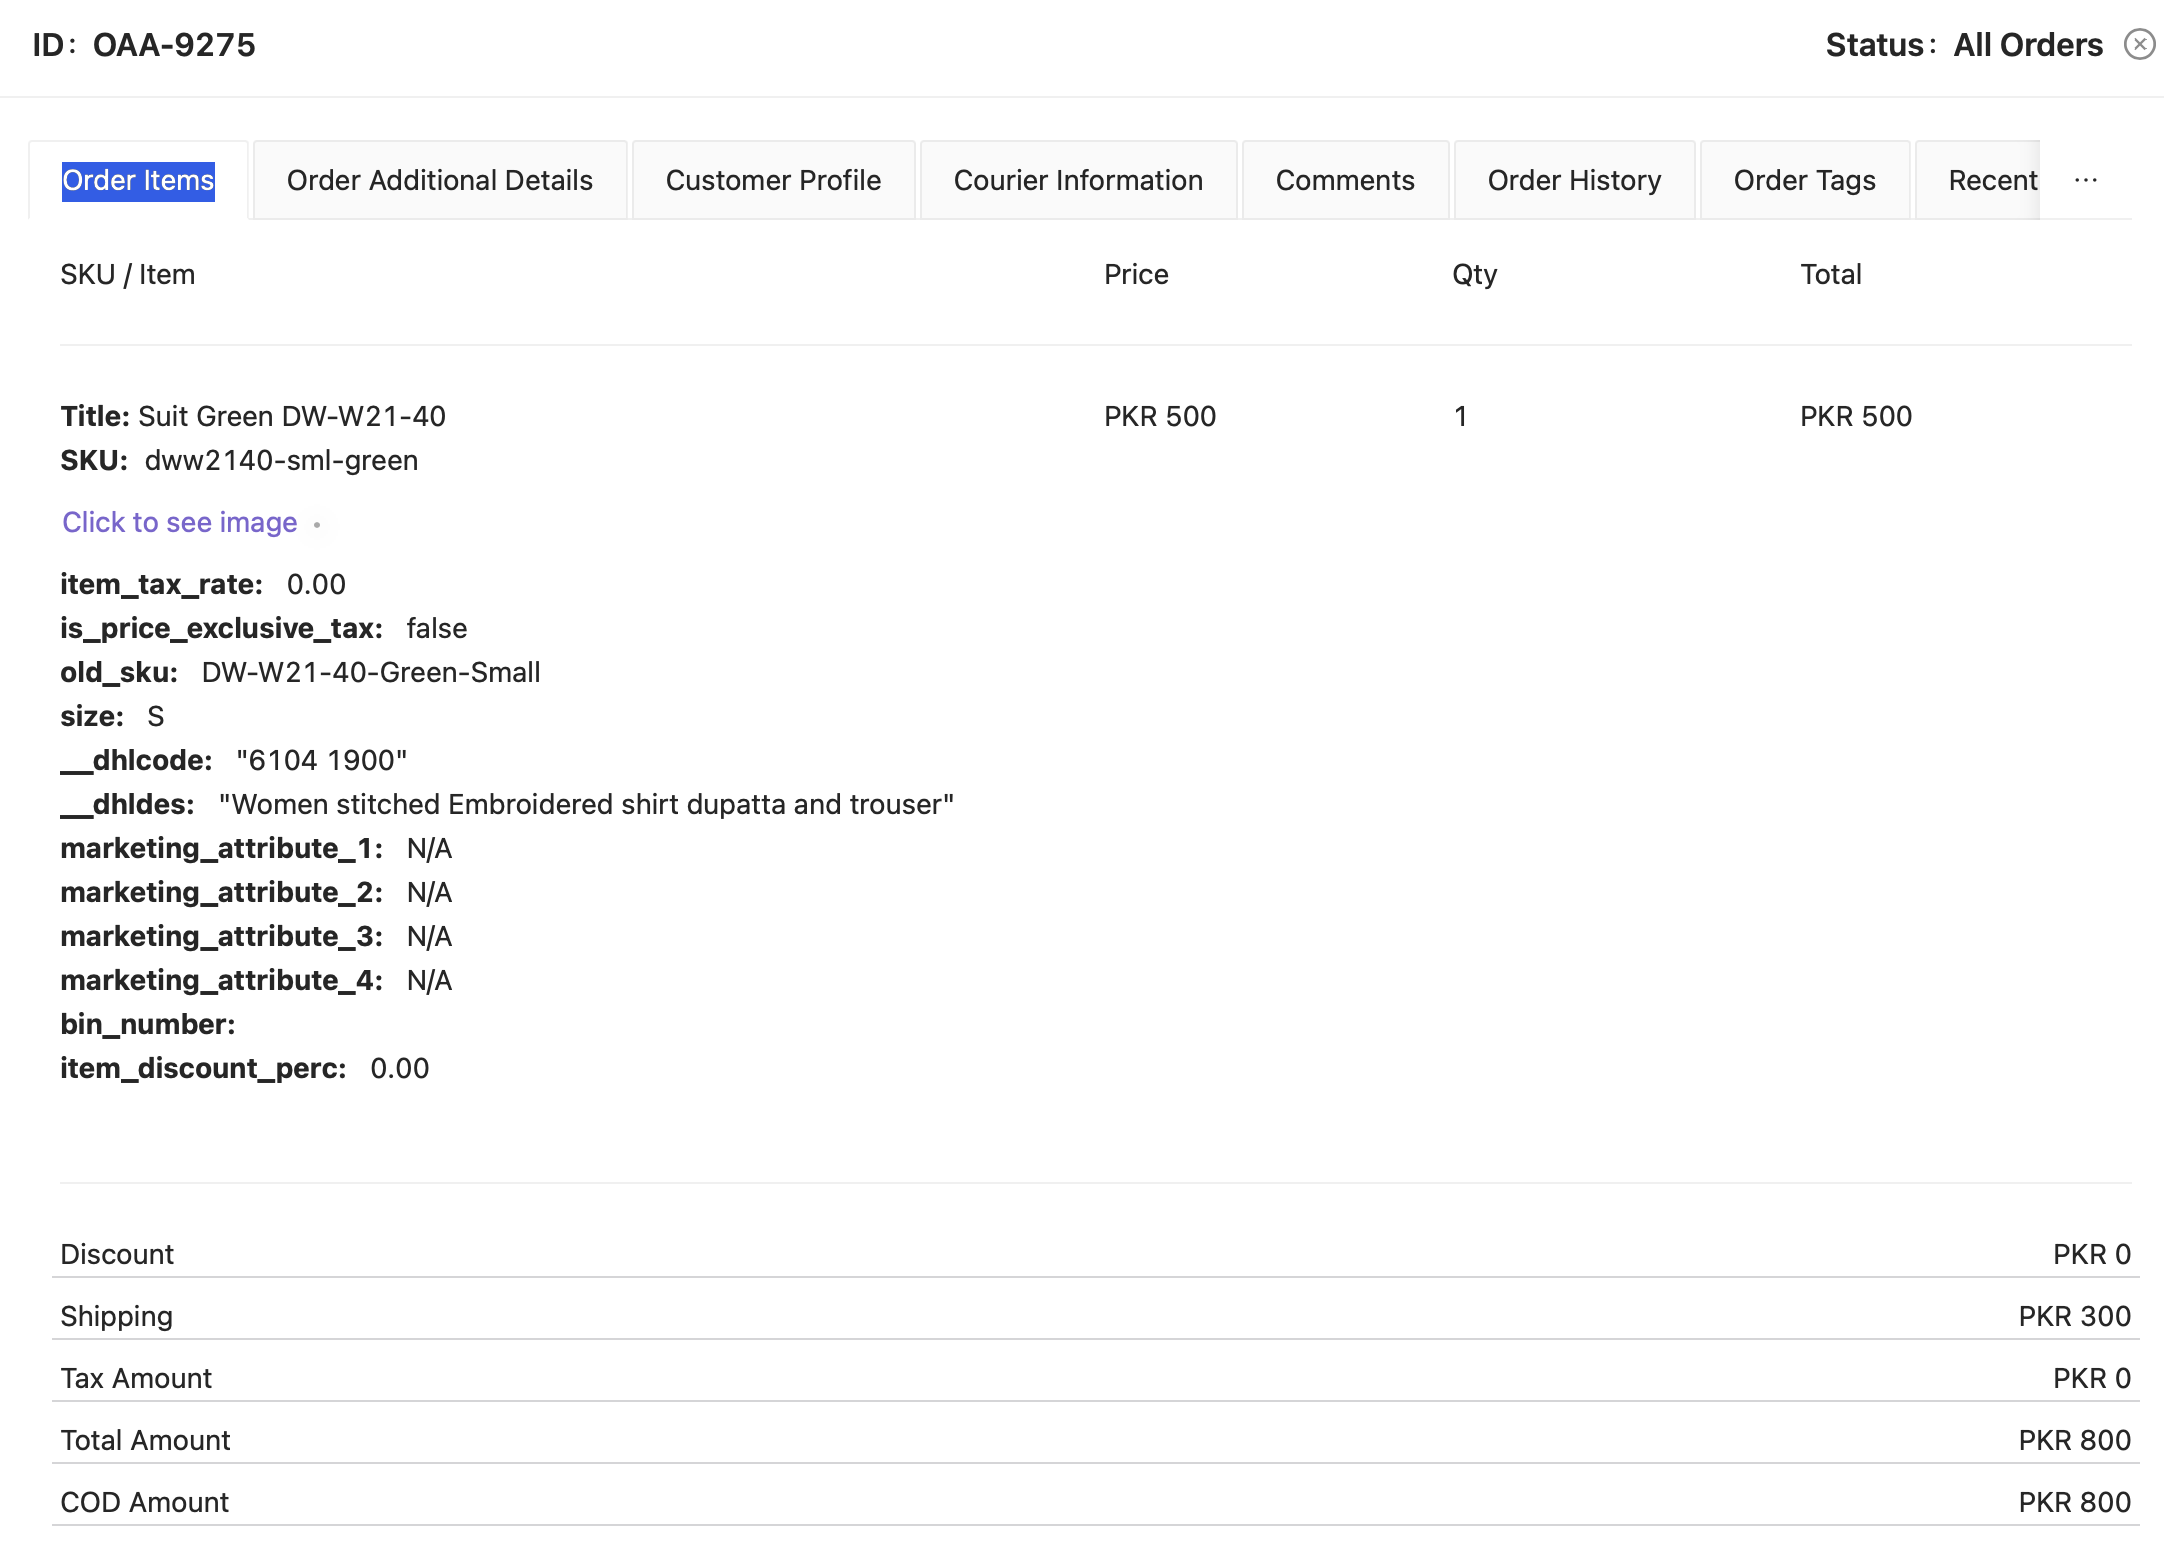
Order Items:
Displays all products (SKUs), quantities, prices, and item statuses included in the order.
-
Order Additional Details:
Shows order-specific data such as courier information, fulfillment location, and applied automation steps.
-
Customer Profile:
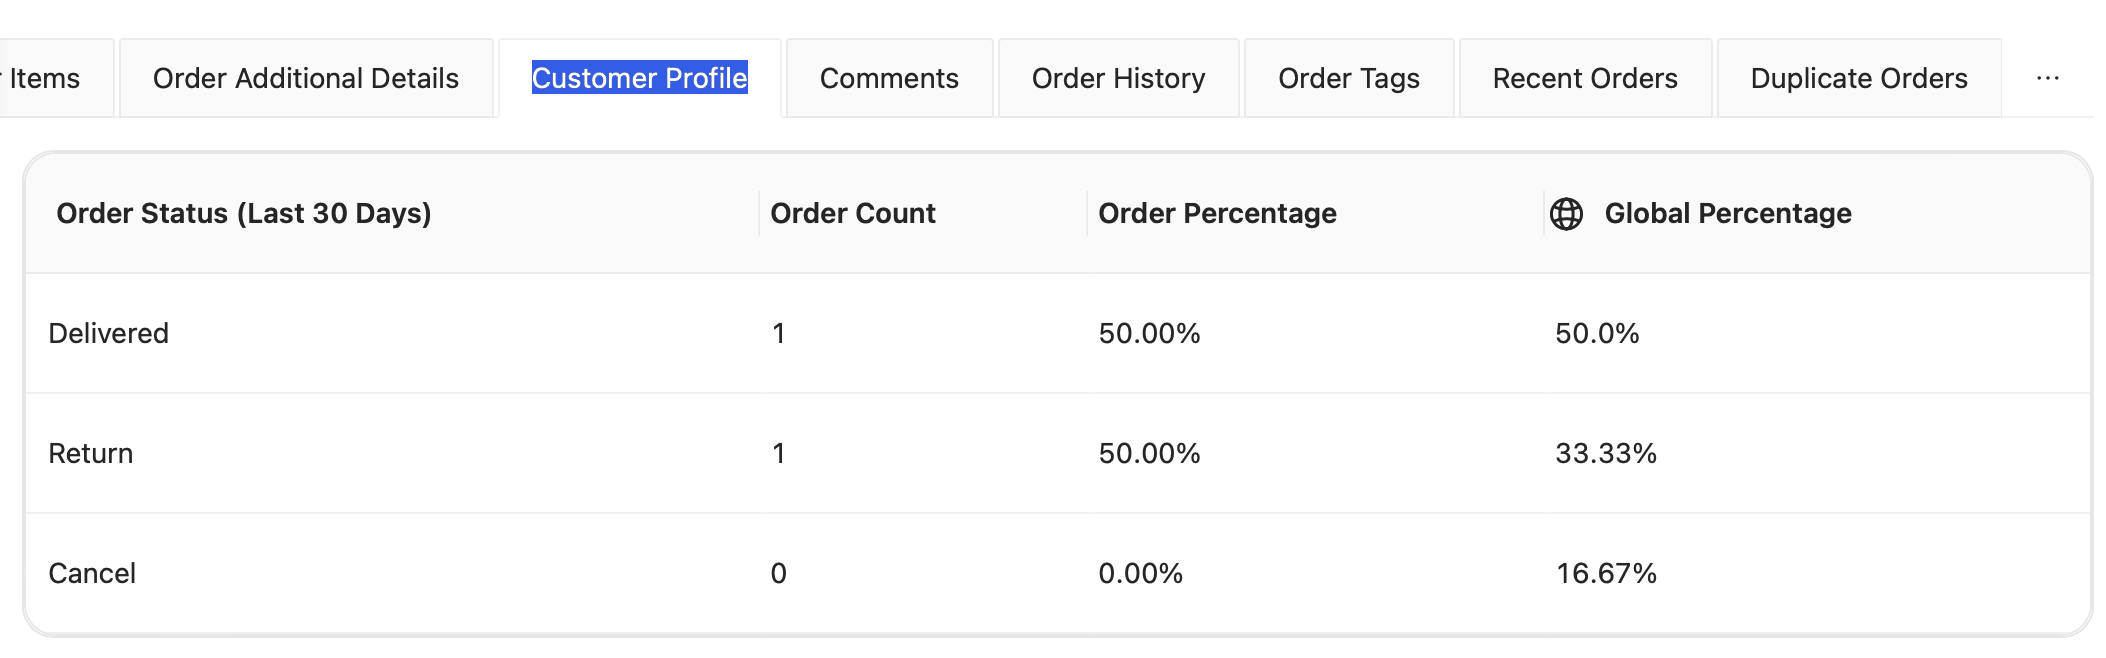
The Customer Profile section provides detailed insights into a customer’s order behavior and performance based on their Delivered, Returned, and Cancelled orders.
Each metric reflects both the count and percentage of orders within those categories, allowing teams to quickly assess the reliability and engagement level of a customer.
This module also displays the customer’s overall order history, including:
-
Delivery Ratio: Percentage of successfully delivered orders.
-
Return Ratio: Percentage of orders returned by the customer.
-
Cancellation Rate: Proportion of orders canceled before delivery.
-
Additionally, it incorporates global percentage comparisons, using data aggregated from a wide record of orders processed through multiple couriers.
This global benchmarking helps teams analyze customer behavior patterns, identify high-risk profiles, and make informed operational or marketing decisions.
-
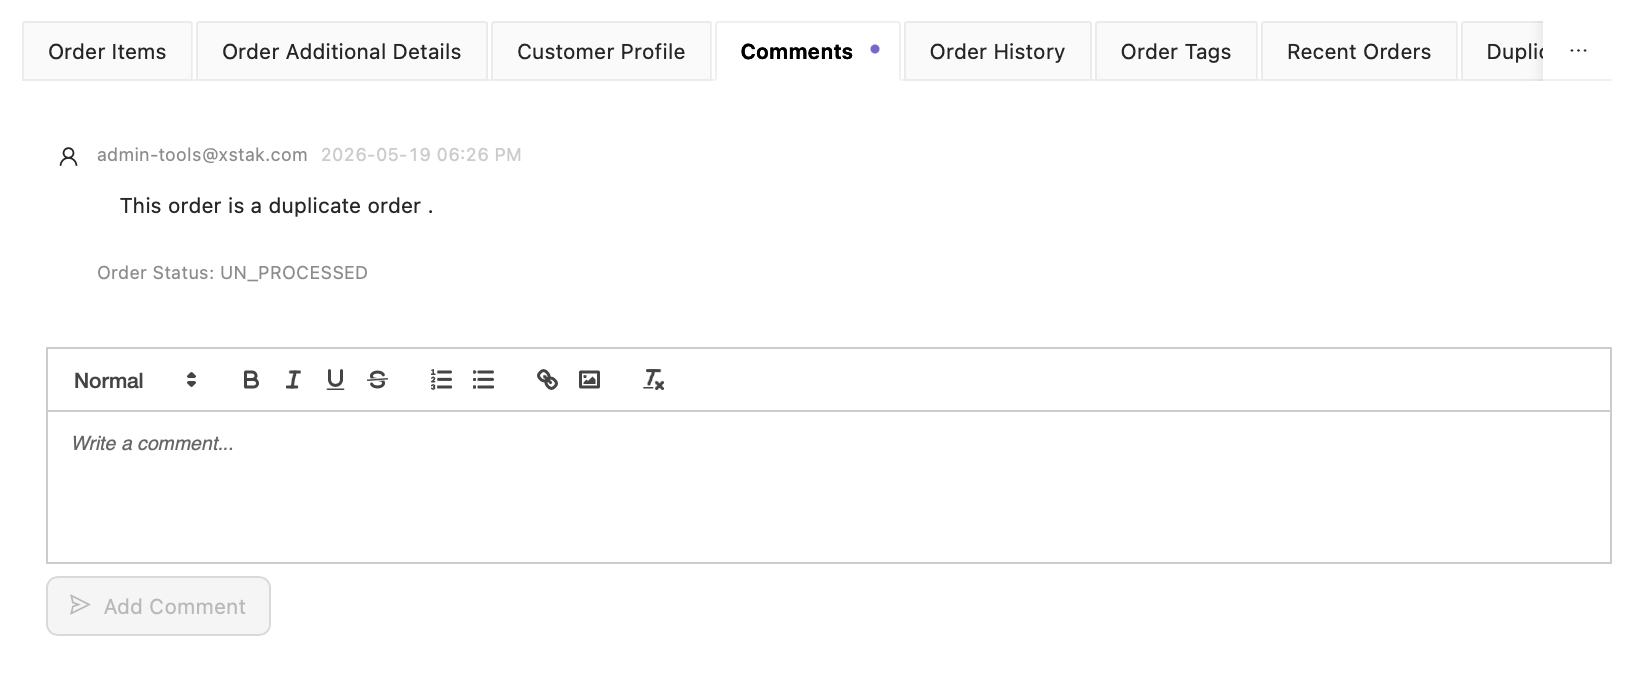
Comments:
Displays internal comments or system-generated notes related to the order’s progress or exceptions.
-
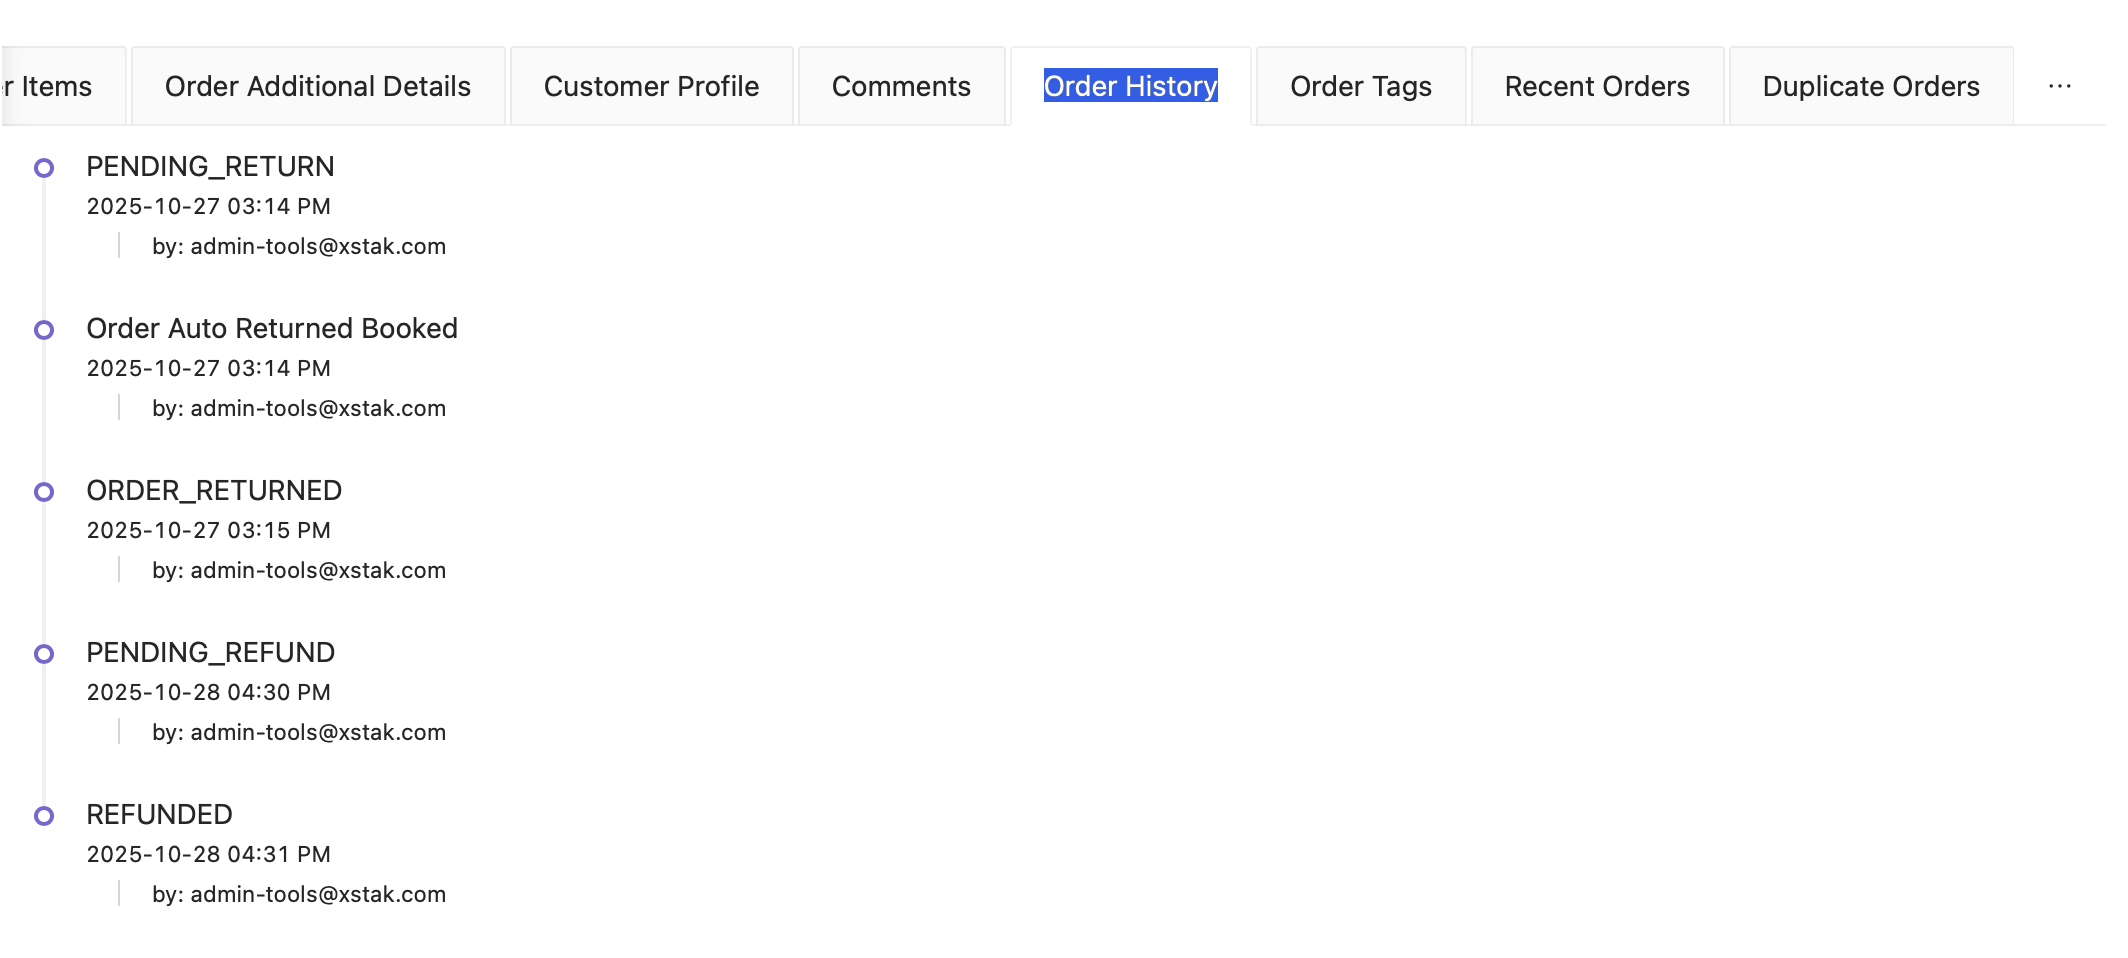
Order History:
Lists every event and transition that occurred for the order (e.g., created, dispatched, delivered)
-
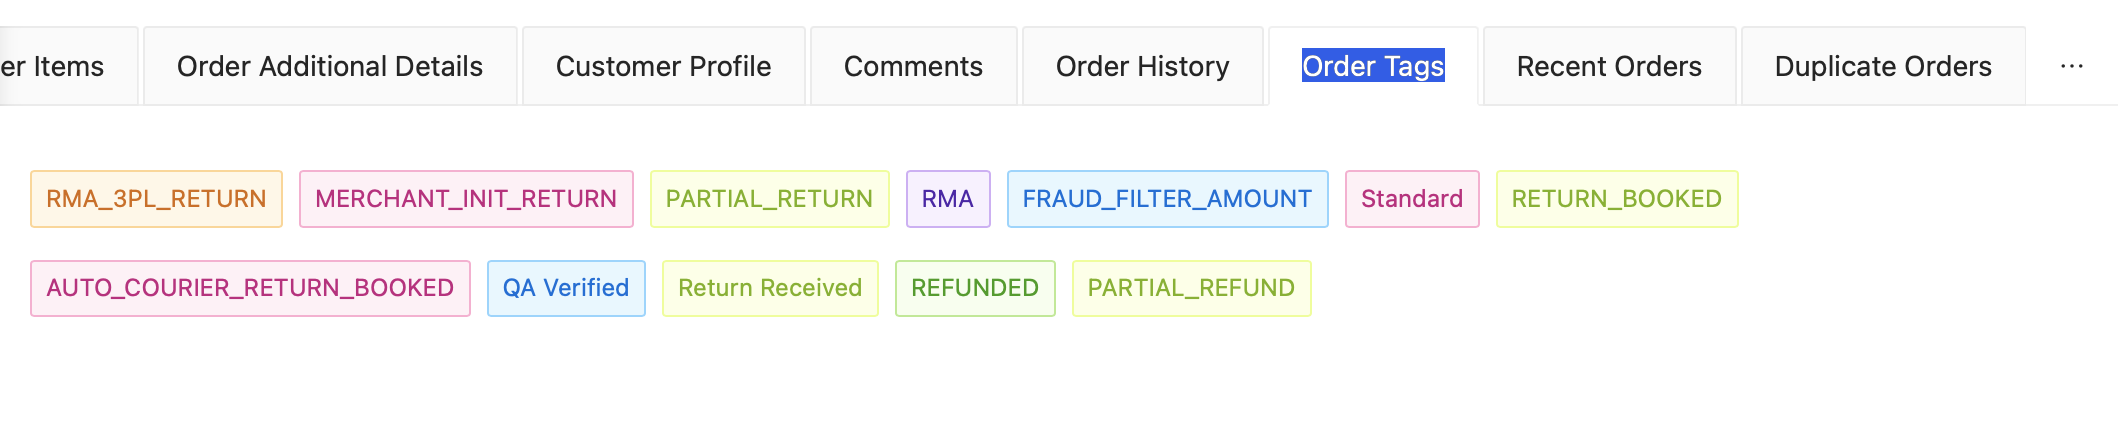
Order Tags:
Shows tags linked with the order, used for categorization or automation.
-
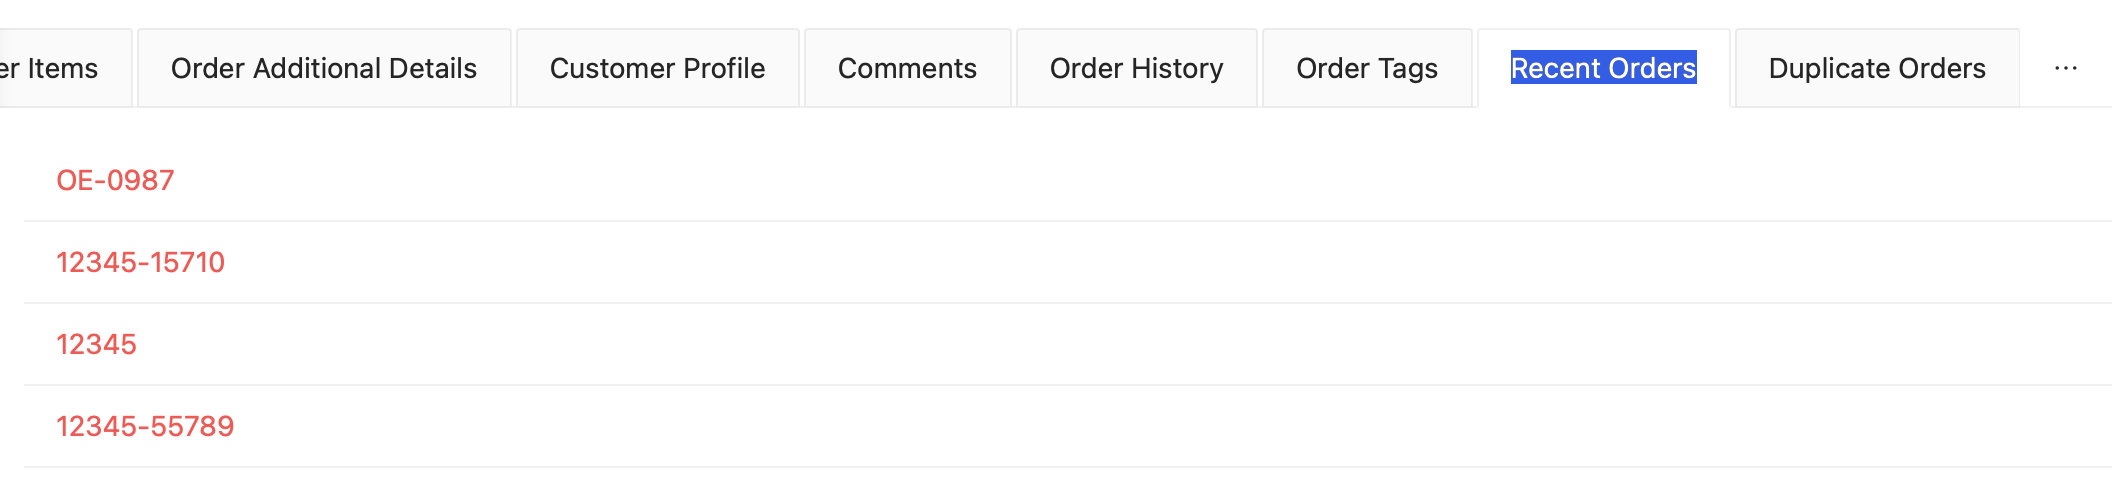
Recent Orders:
Displays the most recent orders placed by the same customer for quick cross-reference.
-
Duplicate Orders:
Highlights any duplicate entries identified in the system to avoid repeated processing.
Outcome
This detailed view provides a complete 360-degree order profile, allowing users to:
-
Track full order lifecycle
-
Review customer behavior
-
Validate order accuracy
-
Investigate issues or duplicates
-
Analyze SKU-level performance
2. Bulk Actions — OE Slip Generation (Step-by-Step)
The All Orders Tab allows users to generate OE slips in bulk, enabling faster operational execution without processing orders individually.
Follow the steps below to complete bulk OE slip generation:
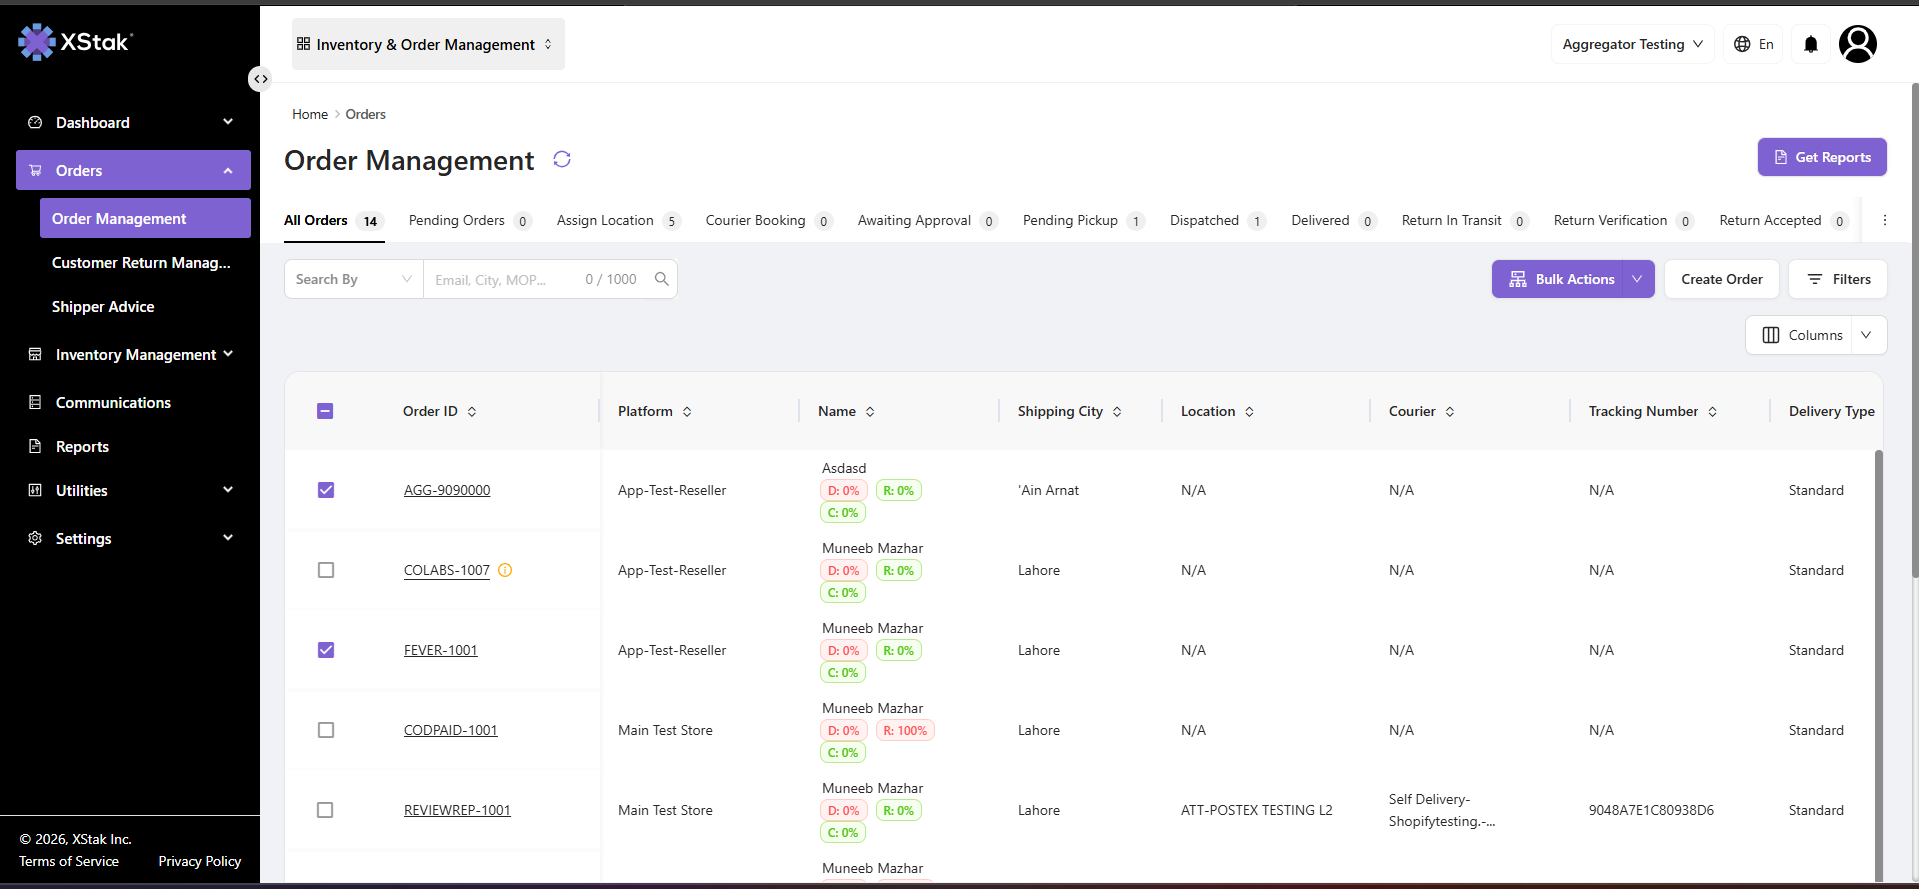
Step 1: Select Orders
Locate the orders you want to process.
-
Click the checkbox located on the left side of each Order ID
-
You can select multiple orders at the same time
Step 2: Activate Bulk Actions
Once at least one order is selected:
-
The Bulk Actions button becomes active at the top of the table
Step 3: Open Bulk Actions Menu
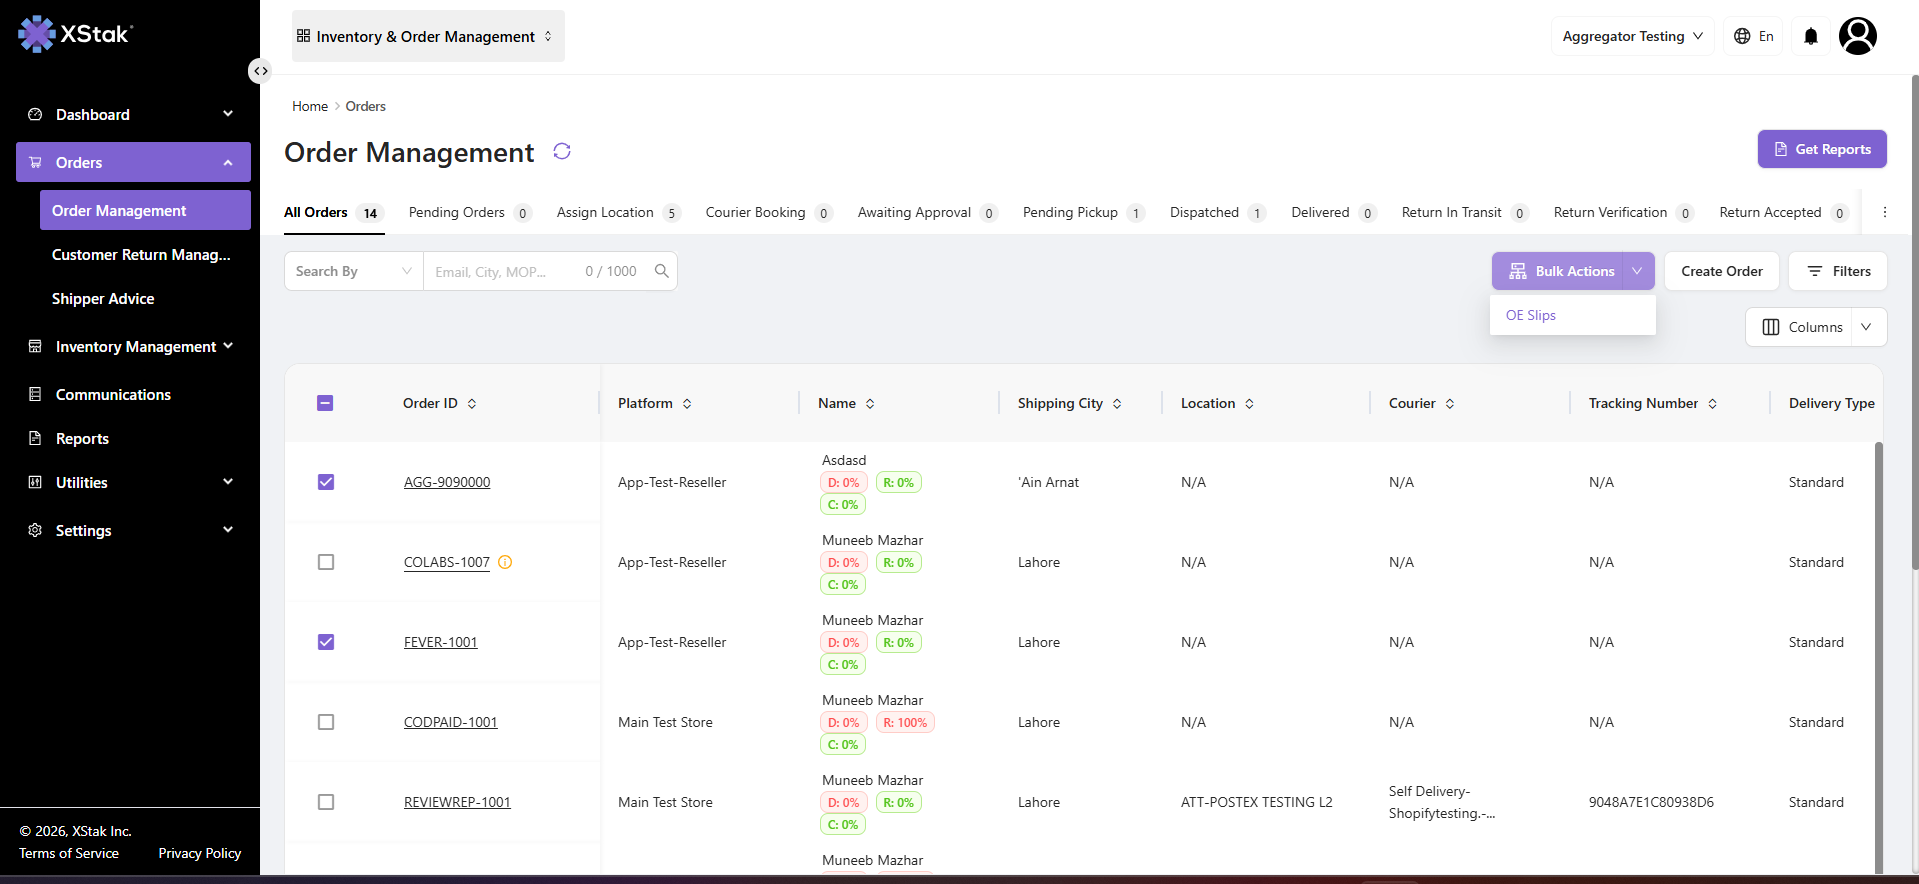
Click on the Bulk Actions button to view available options for selected orders.
Step 4: Choose OE Slip Generation
From the dropdown options:
-
Click on OE Slips
Step 5: System Processing
-
The system starts processing all selected orders
-
OE slips are generated in bulk for eligible orders
A confirmation pop-up appears on the screen asking for final approval before download:
-
If the user clicks Yes, the system proceeds to generate and download the OE slips
-
If the user clicks No, the process is cancelled and no action is taken
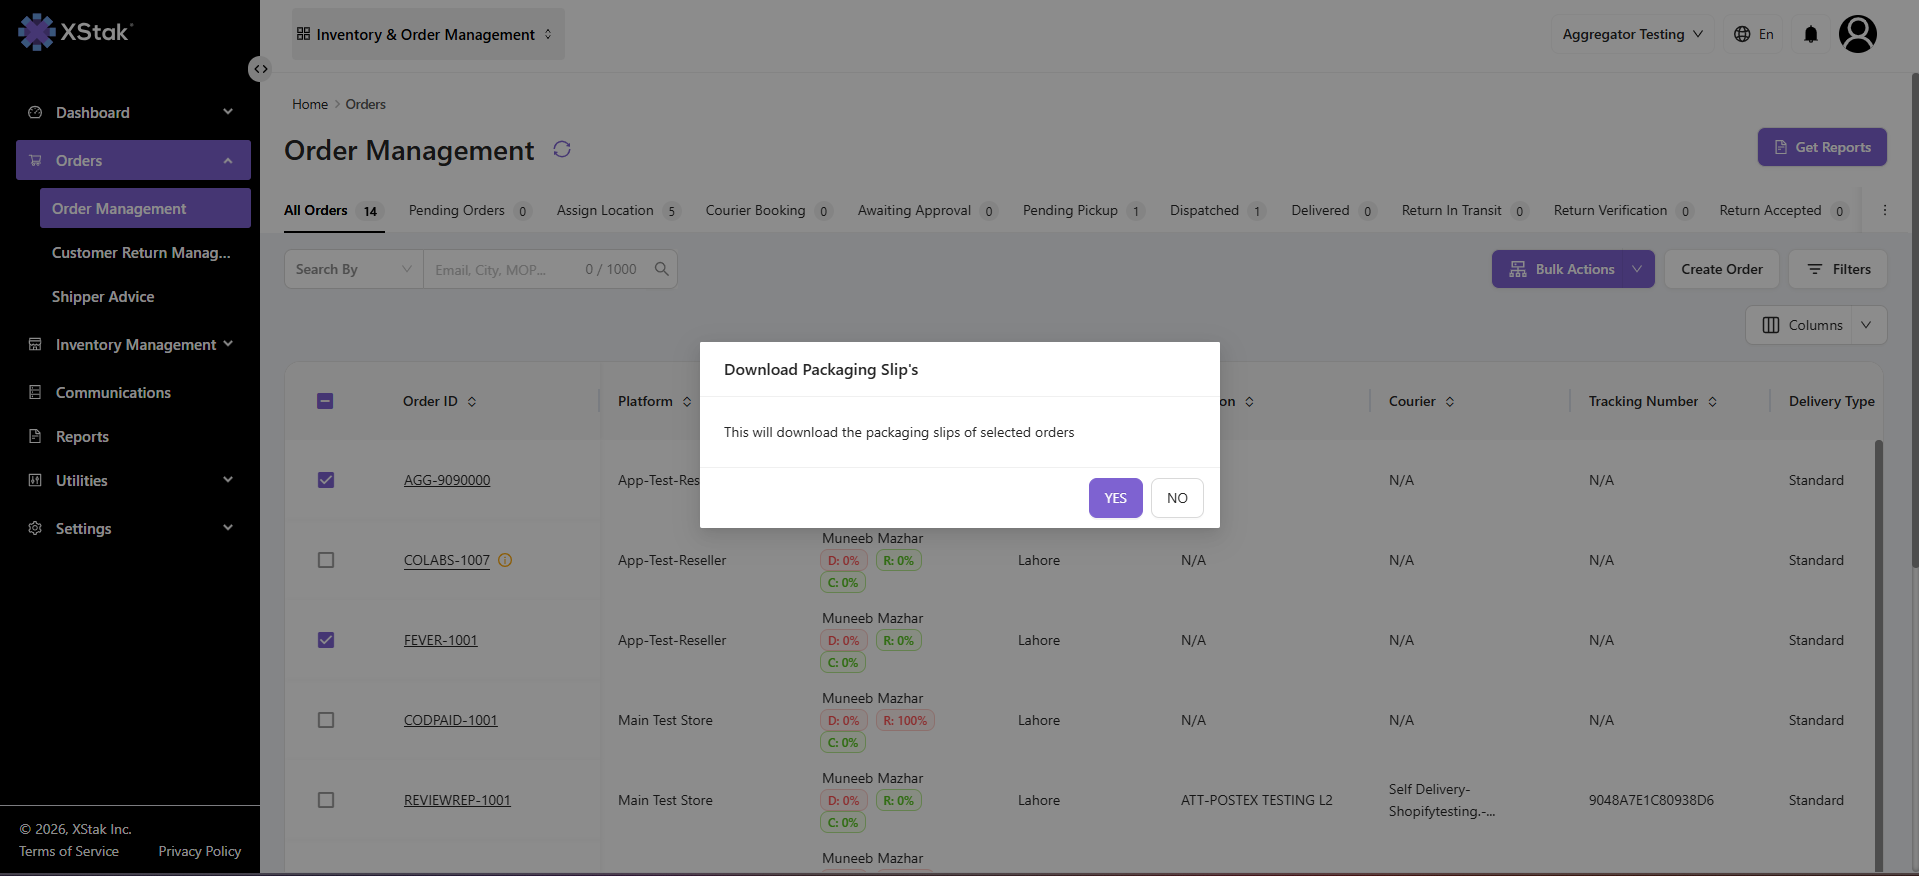
This step ensures controlled execution and prevents accidental bulk downloads.
Step 6: Access Generated OE Slips
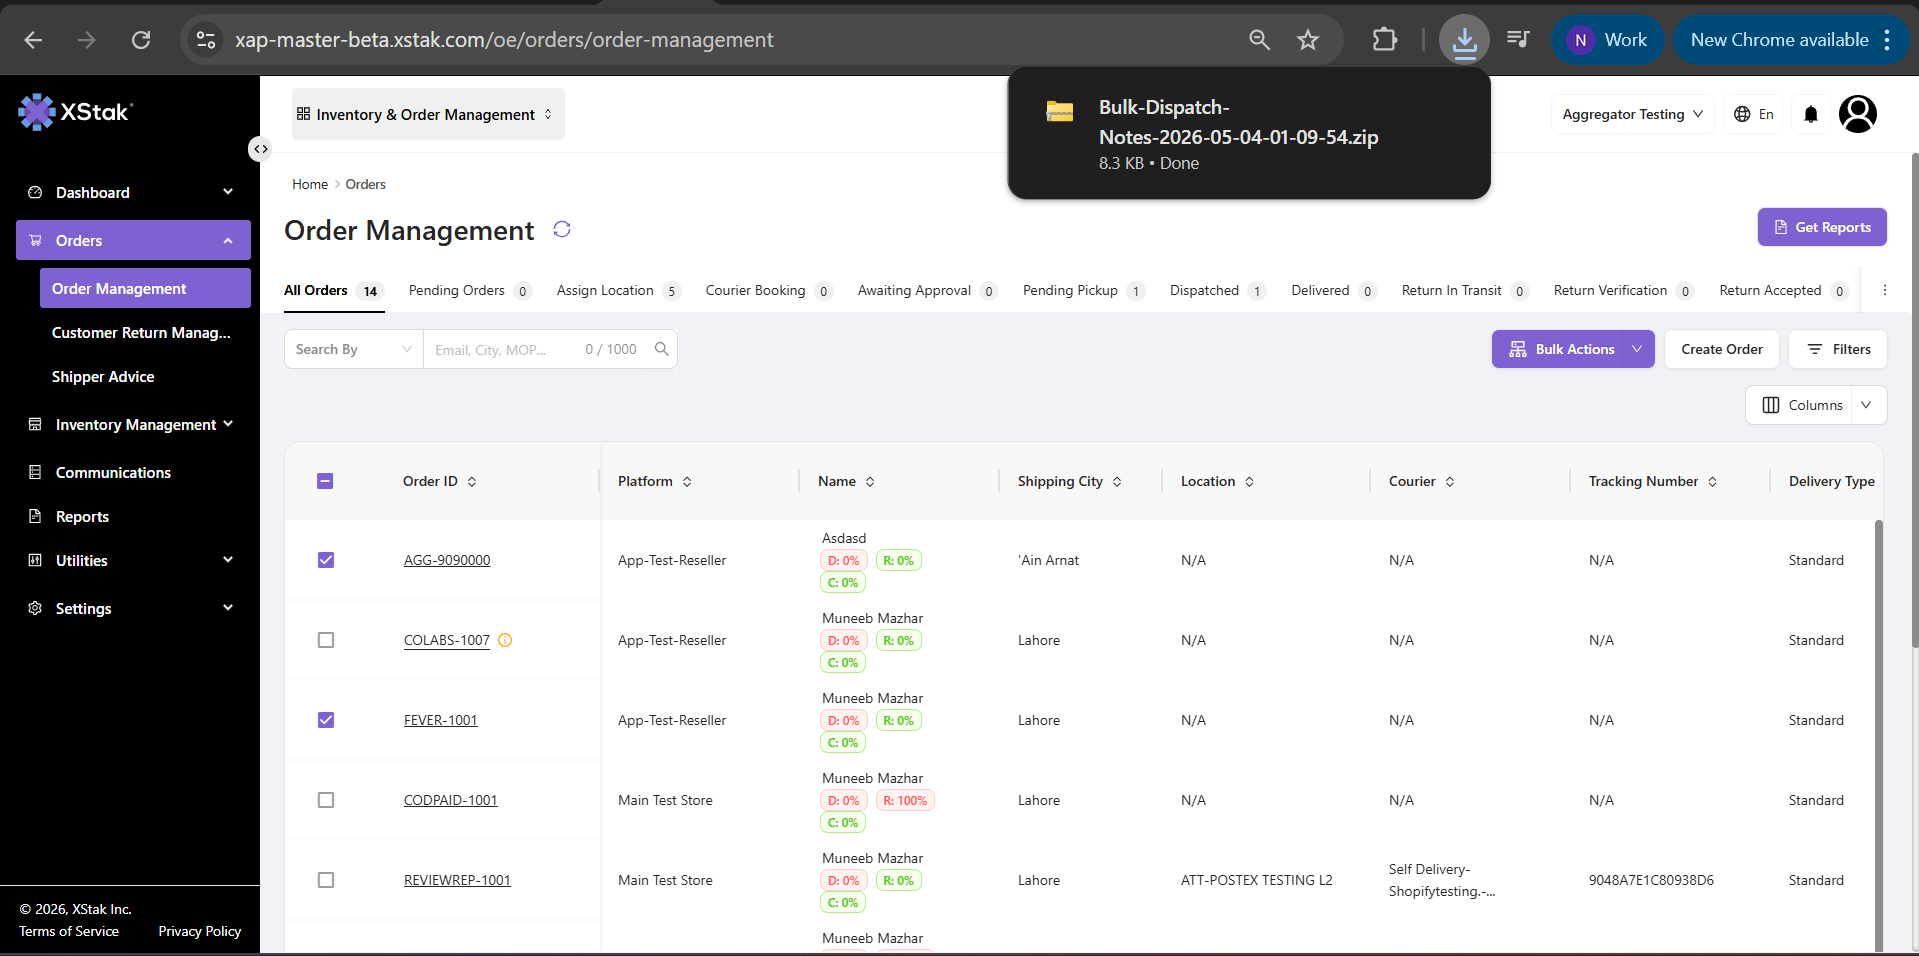
Once processing is completed:
-
OE slips become available for viewing or download
-
You may receive a system notification
-
Generated documents can be accessed from the relevant output section
Important Notes
-
Bulk Actions only activate when at least one order is selected
-
Only eligible orders will be processed for OE slip generation
-
Orders with restricted or invalid statuses will be automatically skipped
-
This feature is designed to support high-volume operational efficiency
3. Report Generation from All Orders Tab (Step-by-Step)
The All Orders Tab supports advanced report generation functionality that allows users to extract structured order data for analysis, review, and external reporting. This feature provides a consolidated dataset of orders based on selected filters and date ranges.
Step 1: Open All Orders Tab
Navigate to:
Orders → Order Management → All Orders Tab
Step 2: Access Report Section
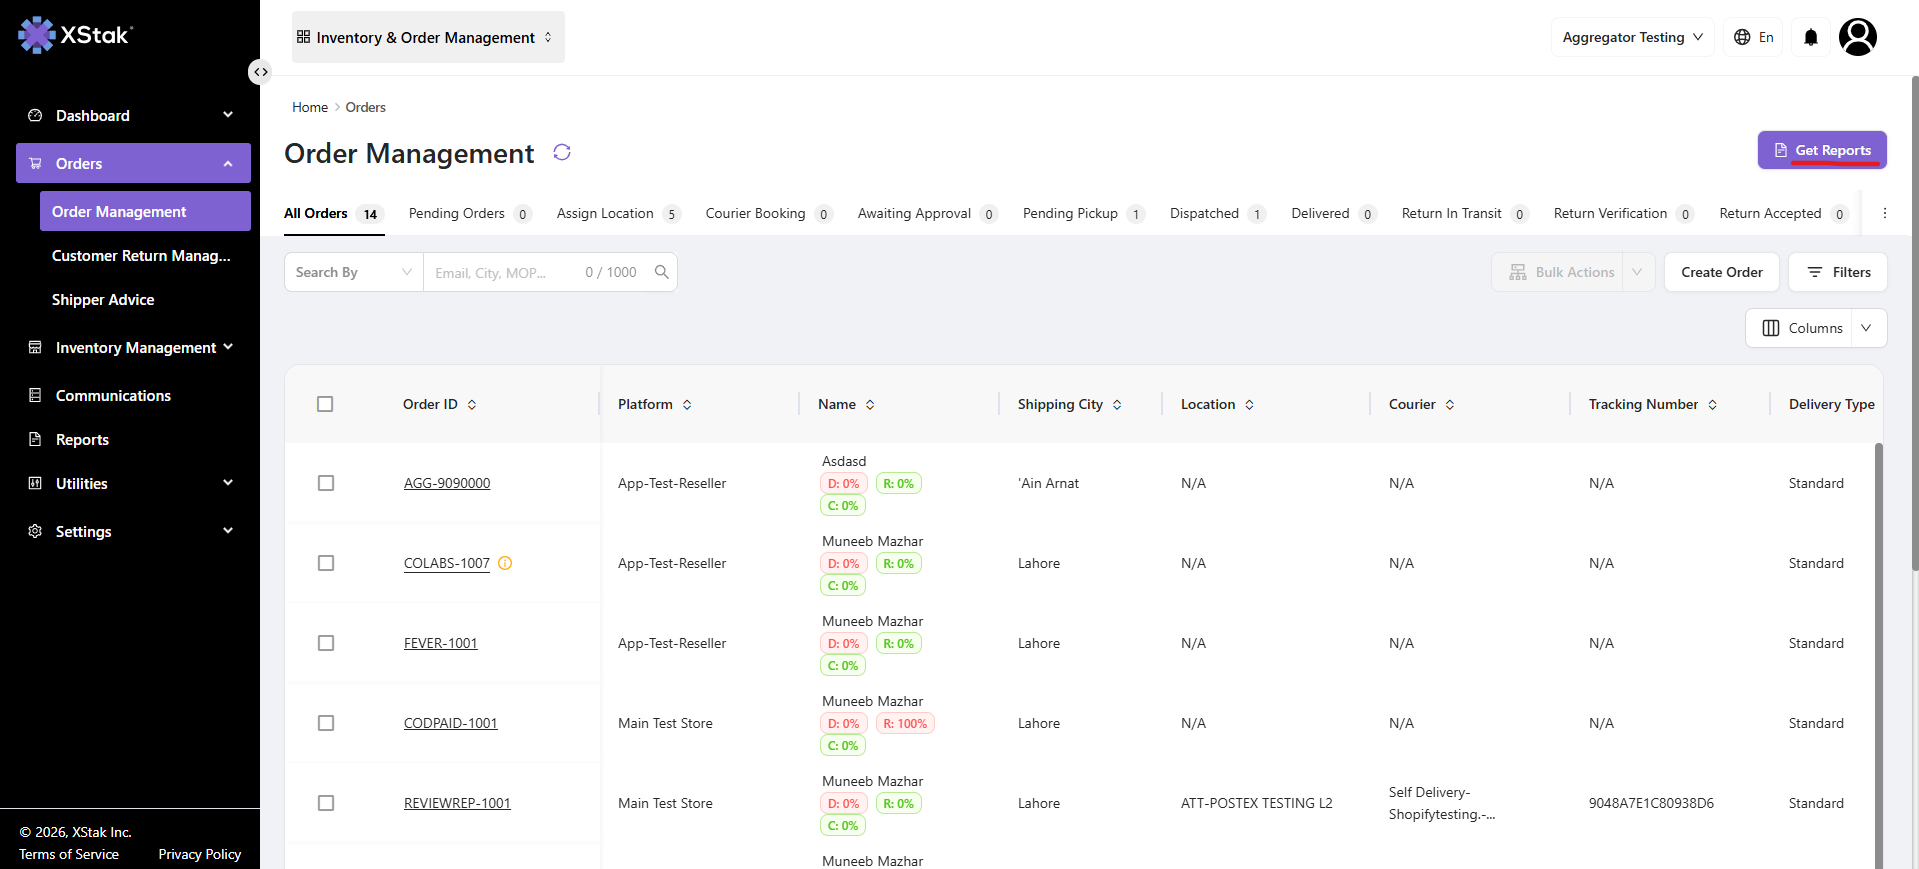
At the top section of the All Orders screen:
-
Click on Get Reports
Step 3: Open Report Configuration Panel
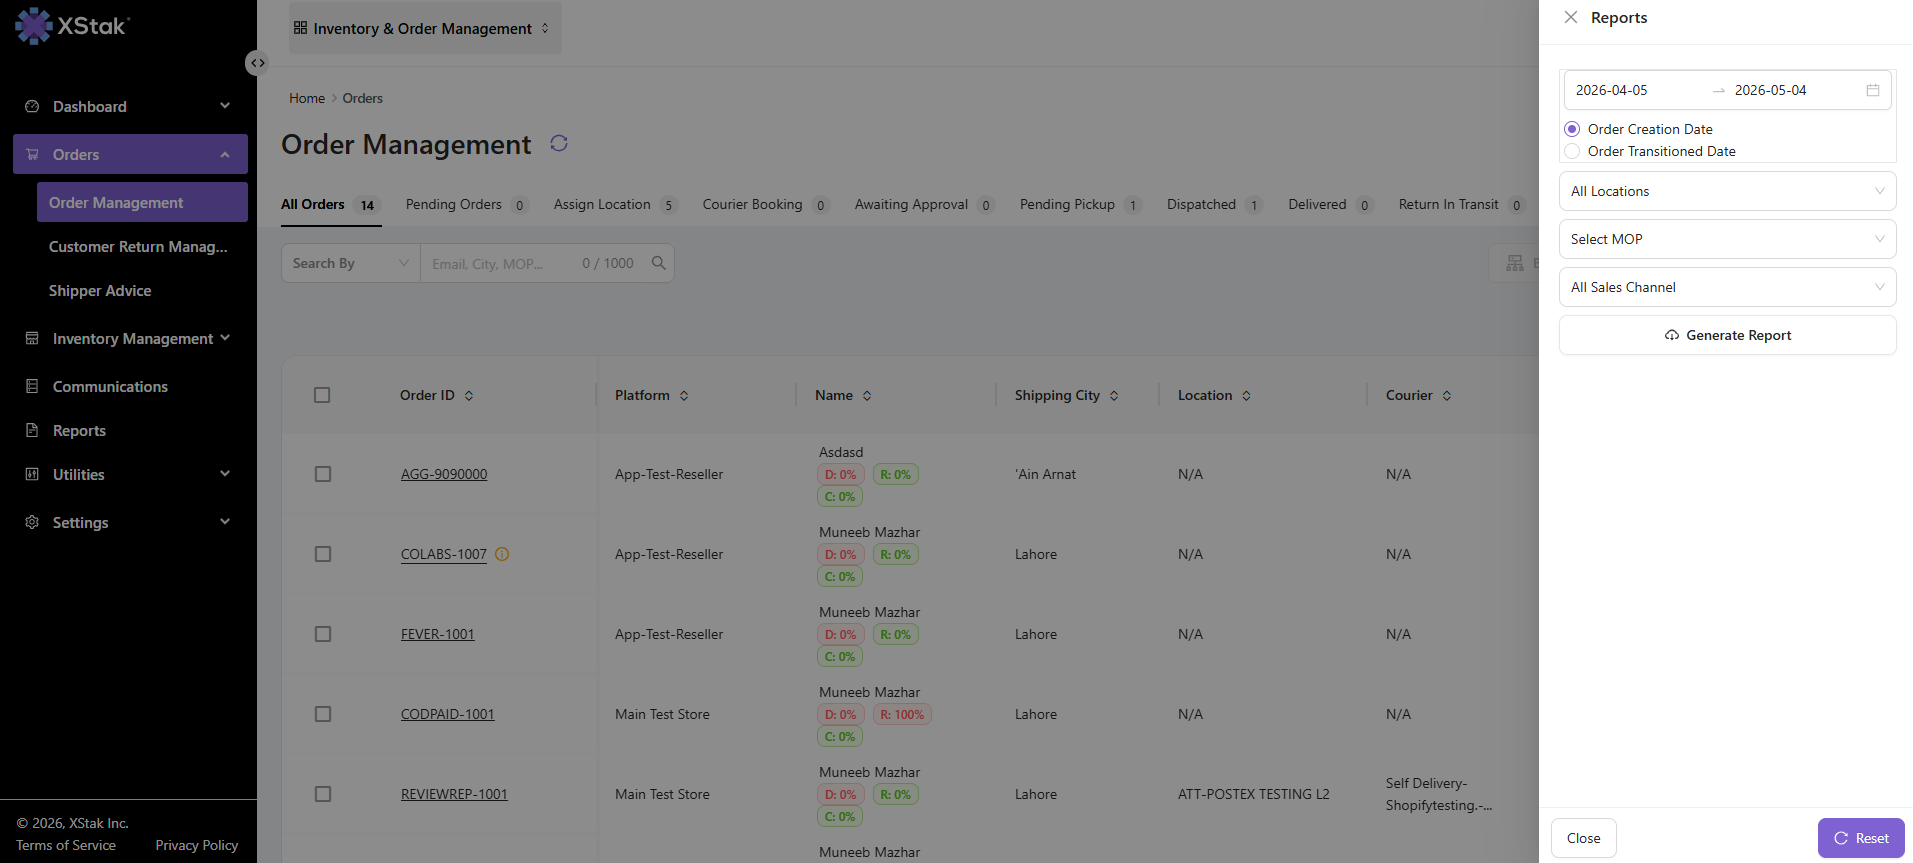
After clicking Get Reports:
-
A report configuration panel will open
-
This panel allows you to define the scope of the report
Step 4: Select Date Range
Define the reporting period by selecting:
-
Start Date (example: 2026-04-04)
-
End Date (example: 2026-05-03)
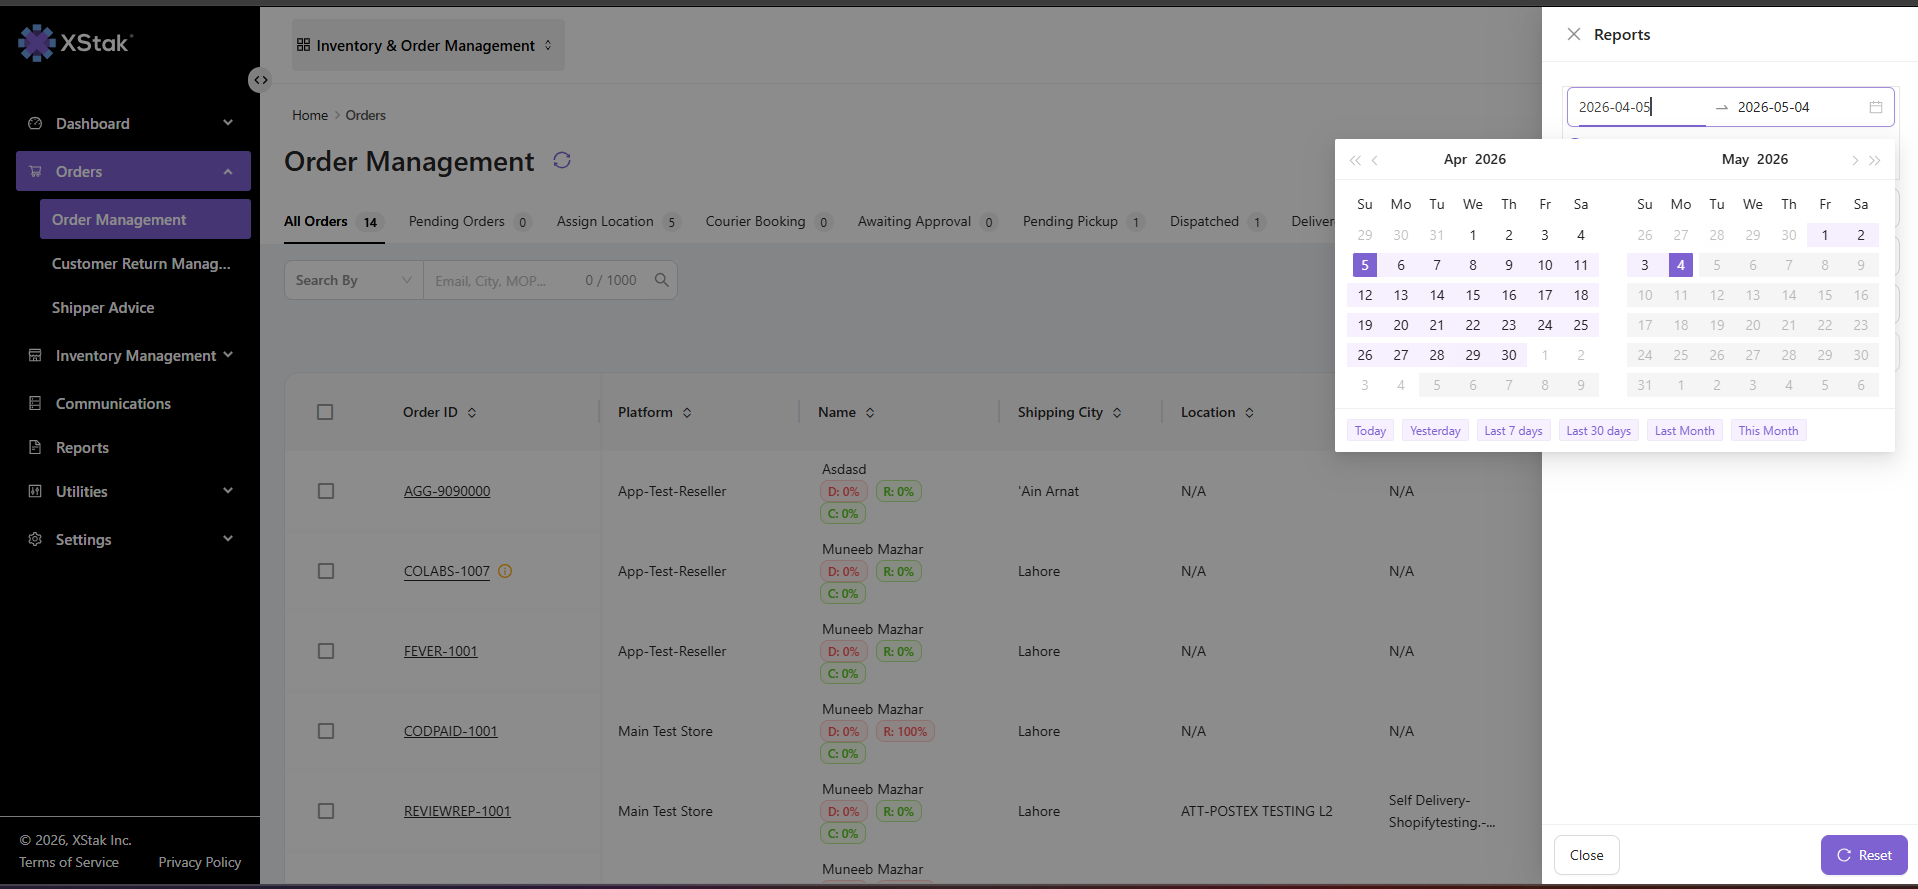
This determines the time window for all included orders.
Step 5: Choose Date Type Filter
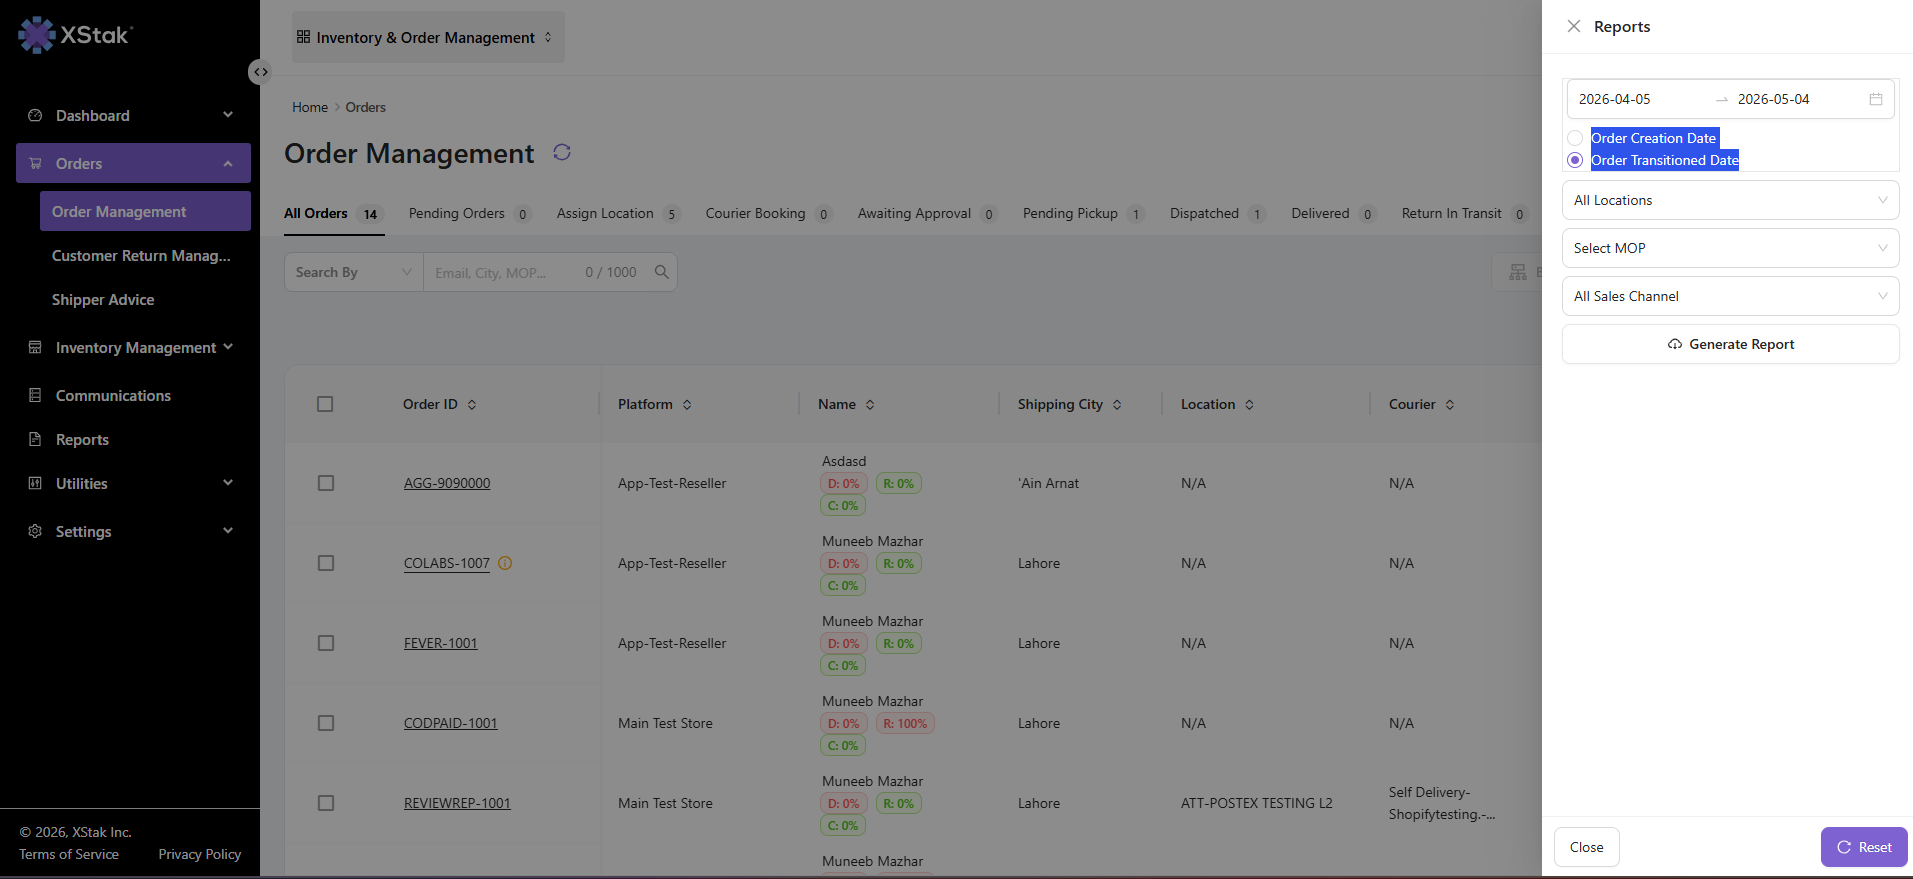
Select the type of date you want to base the report on:
-
Order Creation Date → Orders created within the selected period
-
Order Transitioned Date → Orders that changed status within the period
Step 6: Apply Additional Filters (Optional)
Refine your report using additional filters such as:
-
Location (Store/Warehouse filtering)
-
Mode of Payment (MOP)
-
Sales Channel
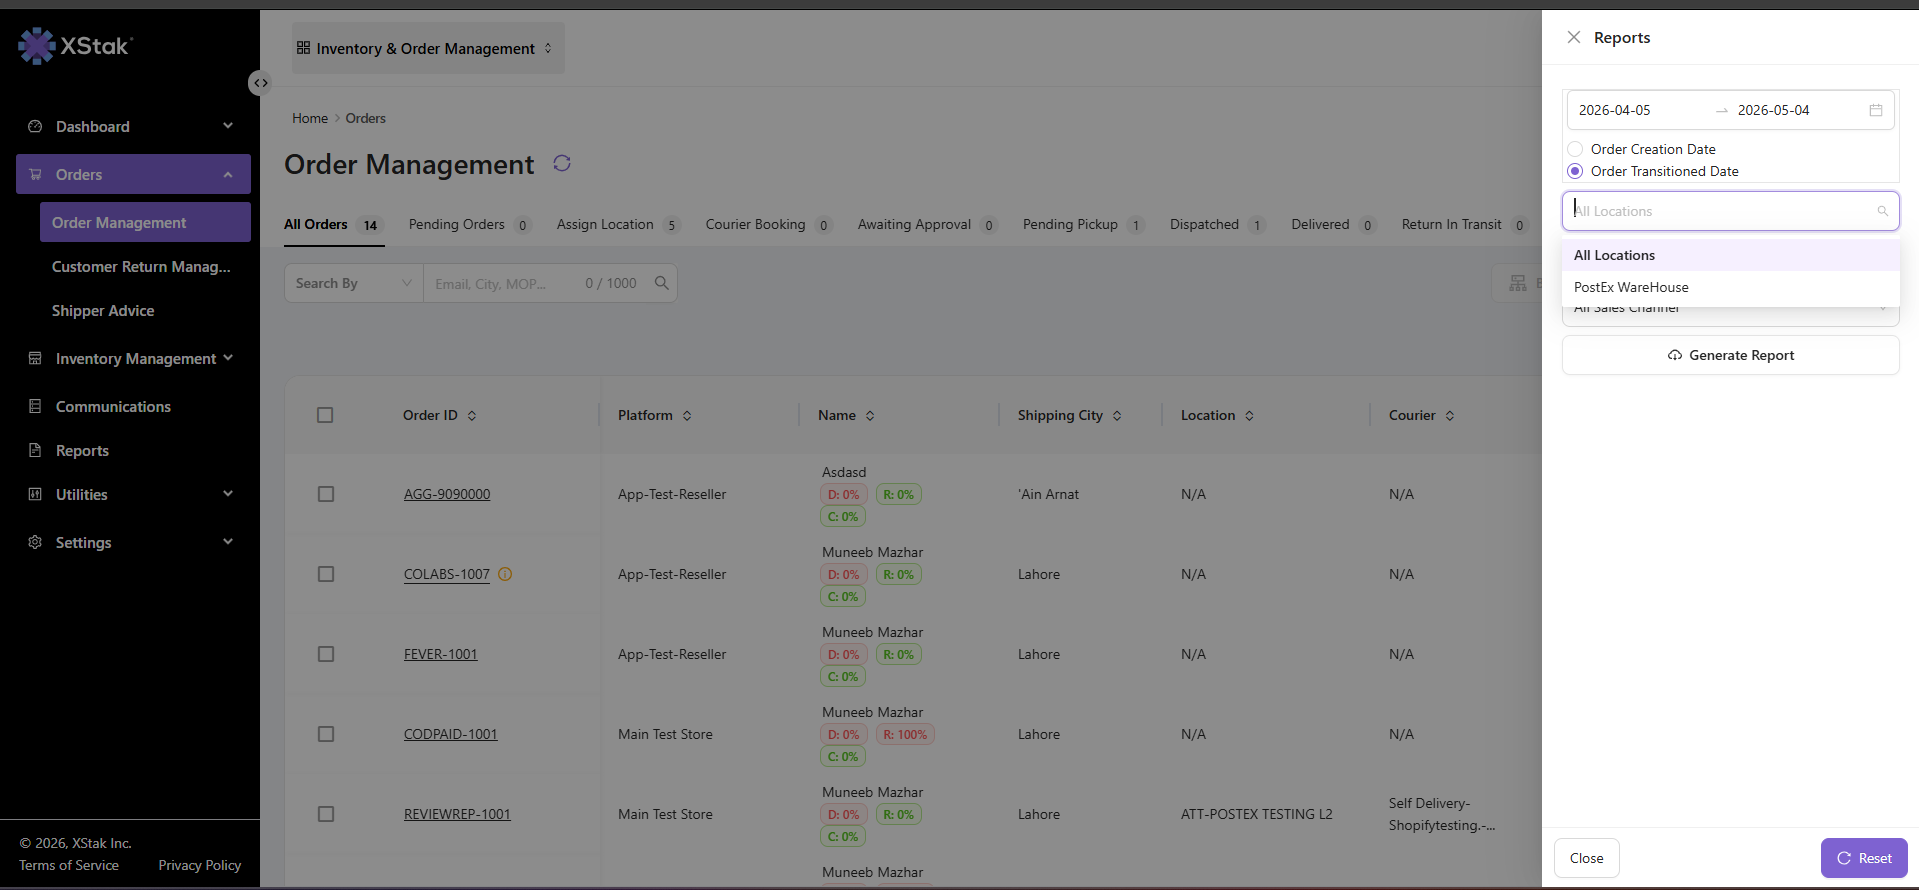
These filters help segment the report for more precise operational analysis.
Step 7: Generate Report
After configuring all filters:
-
Click on Generate Report
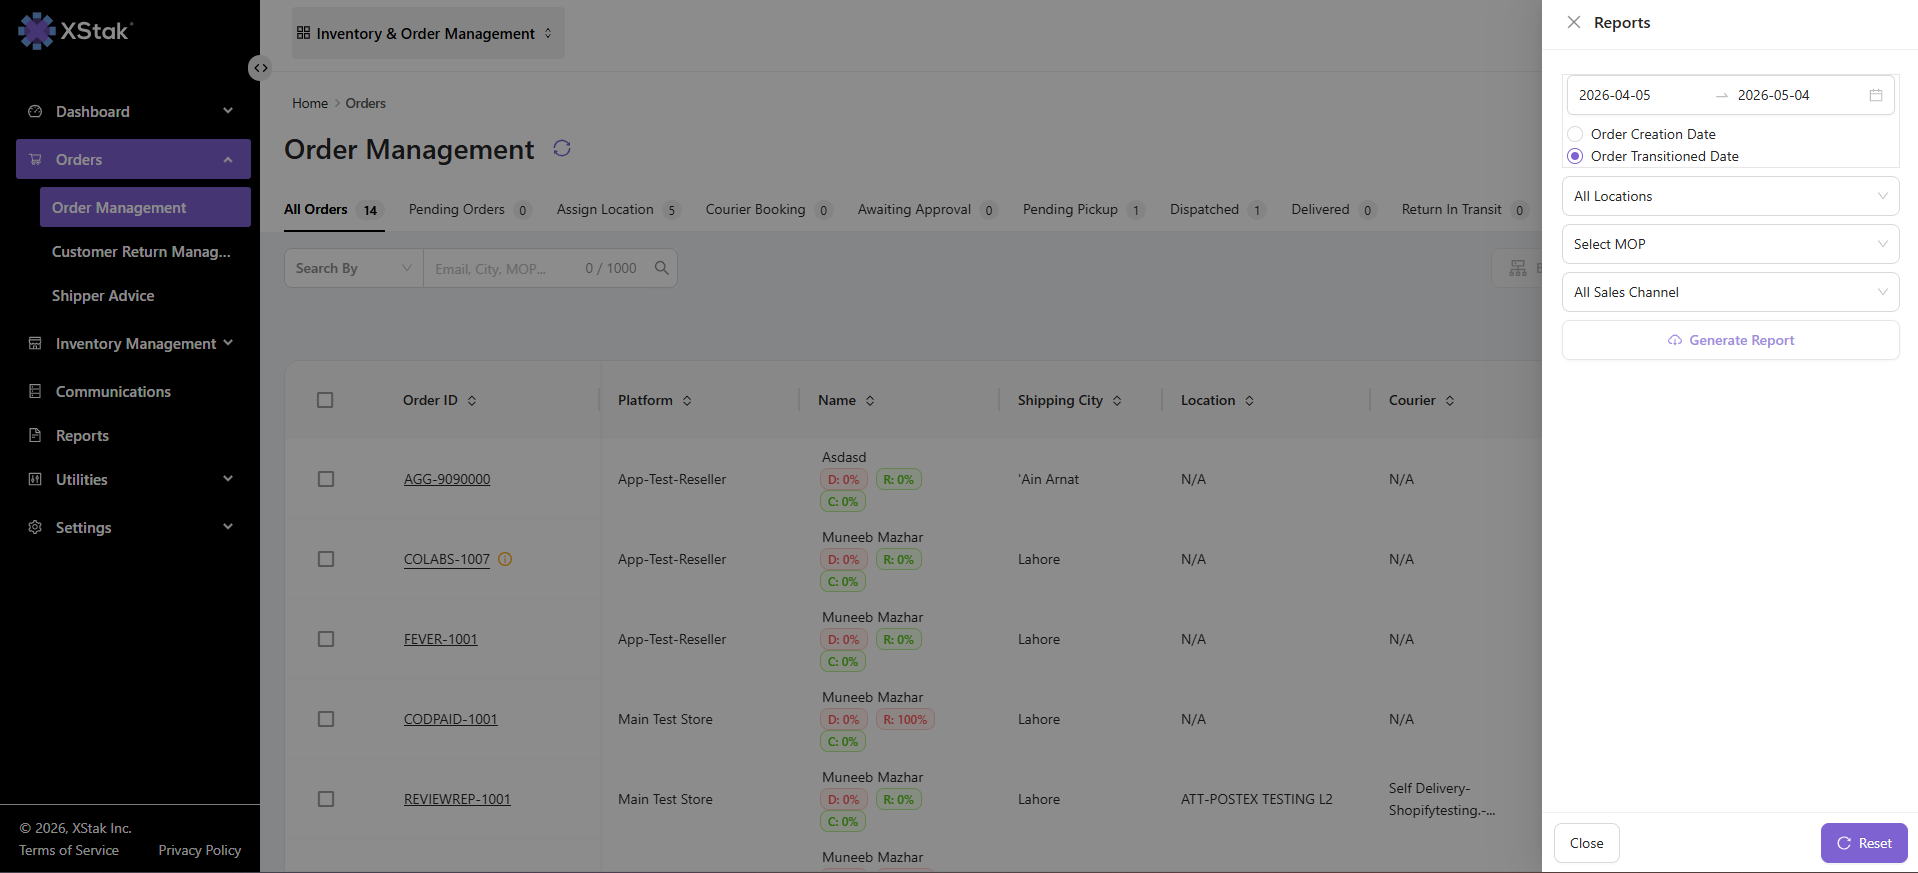
Step 8: System Processing
Once the report is triggered:
-
The system processes the request
-
Data is compiled based on selected filters
-
A structured report file is generated
Step 9: Access Report
After processing is complete:
-
The report is sent to the notification center
-
Users can open the notification icon
-
Download the generated report directly from there
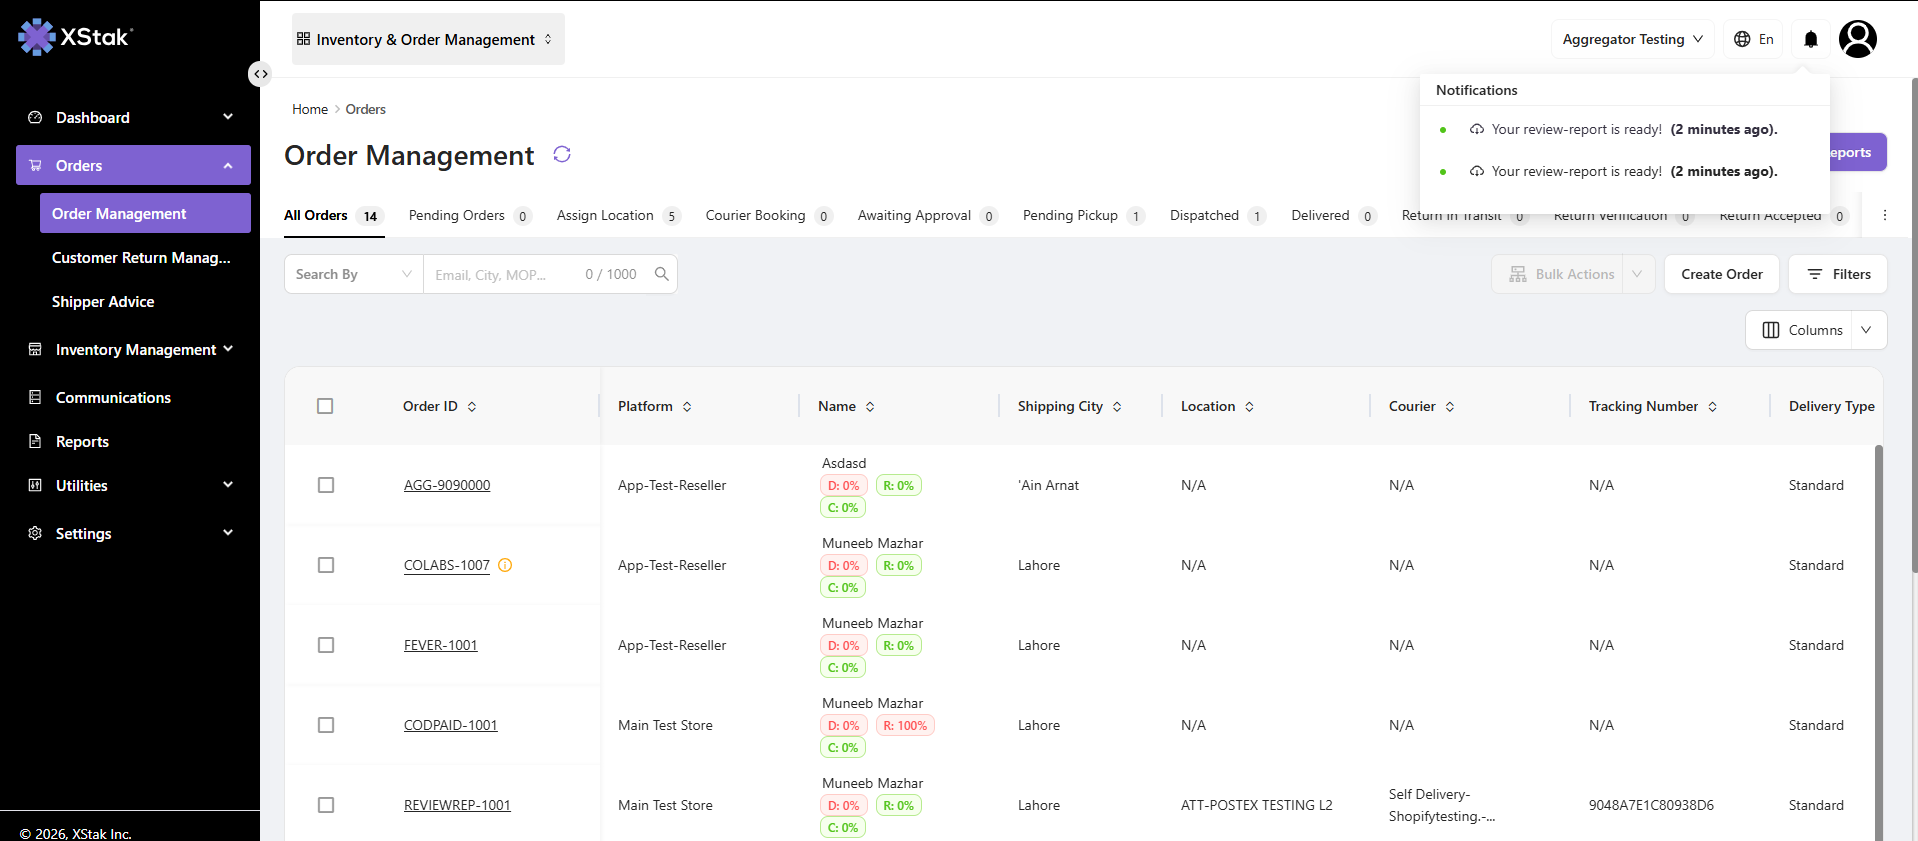
3. Create Order (Manual Order Creation)
OMS also supports direct manual order creation from the Order Management interface, enabling teams to create orders without dependency on external channels.
Step 1: Start Order Creation
Click on the Create Order button available at the top of the Order Management screen.
Step 2: Open Order Form
A structured order creation form will open, designed to capture all necessary order and customer information.
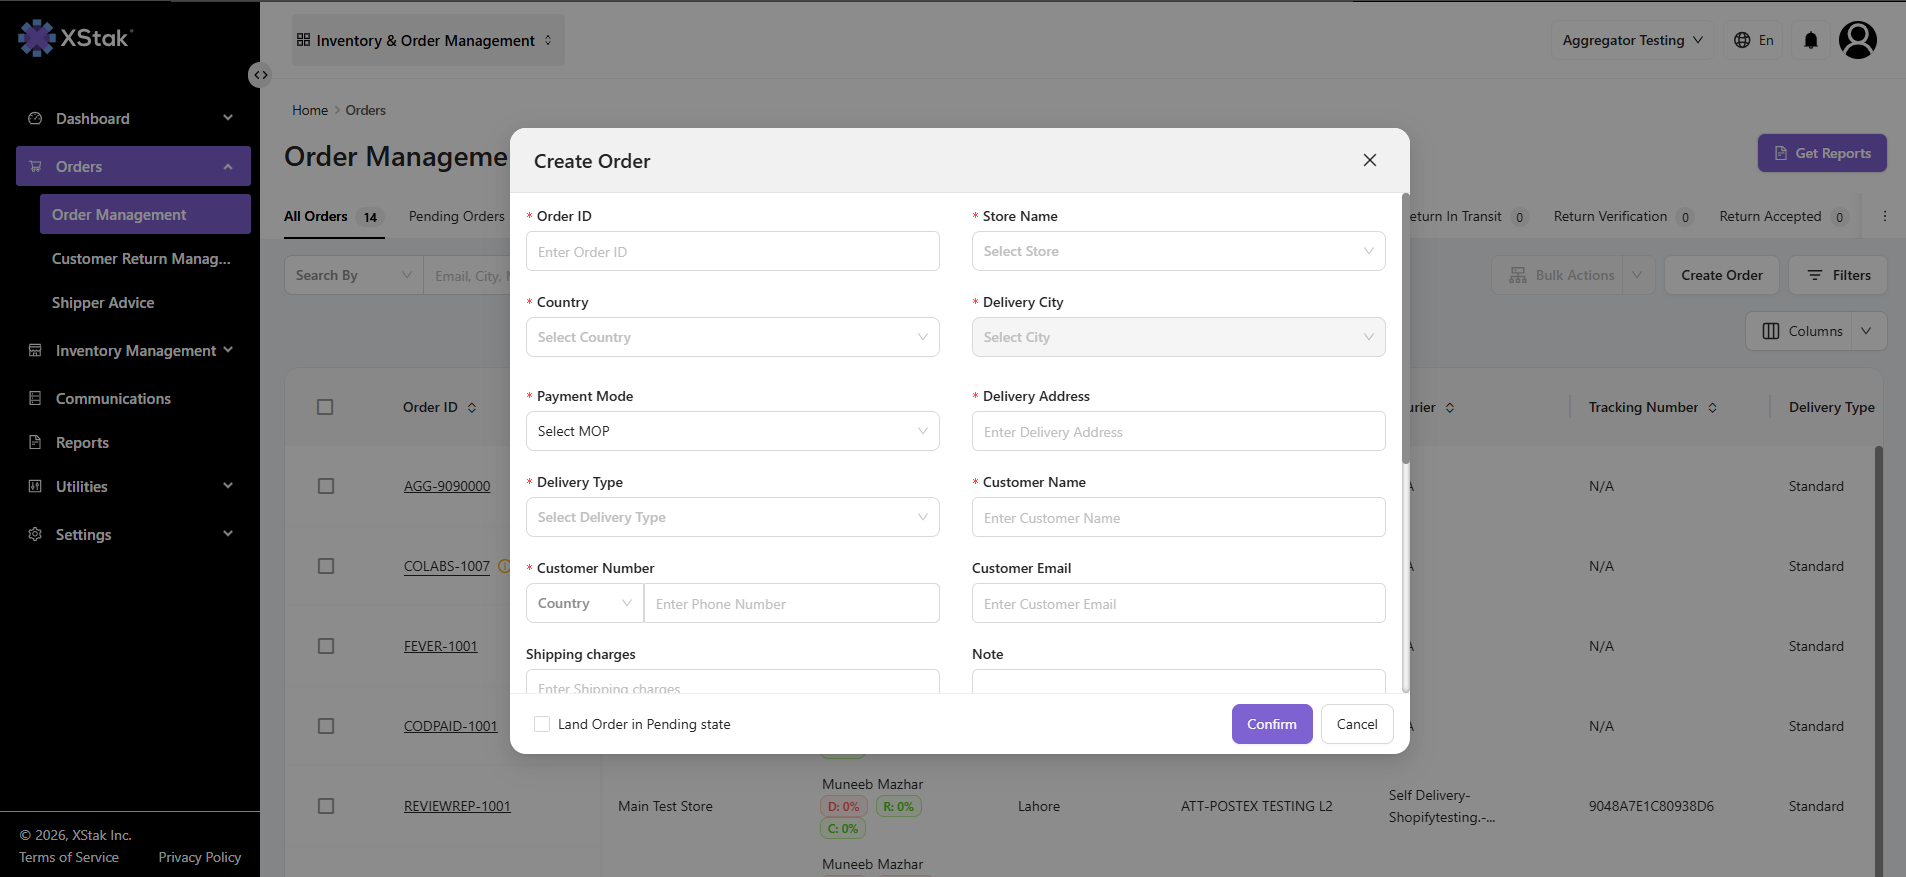
Step 3: Enter Order Information
Fill in the required order details:
-
Order ID
-
Store Name (Select Store)
-
Country (Select Country)
-
Delivery City (Select City)
-
Payment Mode
-
Delivery Address
-
Delivery Type
-
Customer Name
-
Customer Number
-
Customer Email
-
Shipping Charges
-
Notes (optional instructions or remarks)
Step 4: Add Product Details
Under the Products section, add item-level information:
-
Product Name
-
SKU
-
Quantity
-
Weight (kg)
-
Product Price
Multiple products can be added to a single order if required.
Step 5: Define Order Routing Behavior
Before submission, a key configuration option is available:
-
If “Land Order in Pending State” is enabled
→ The order will directly land in Pending Orders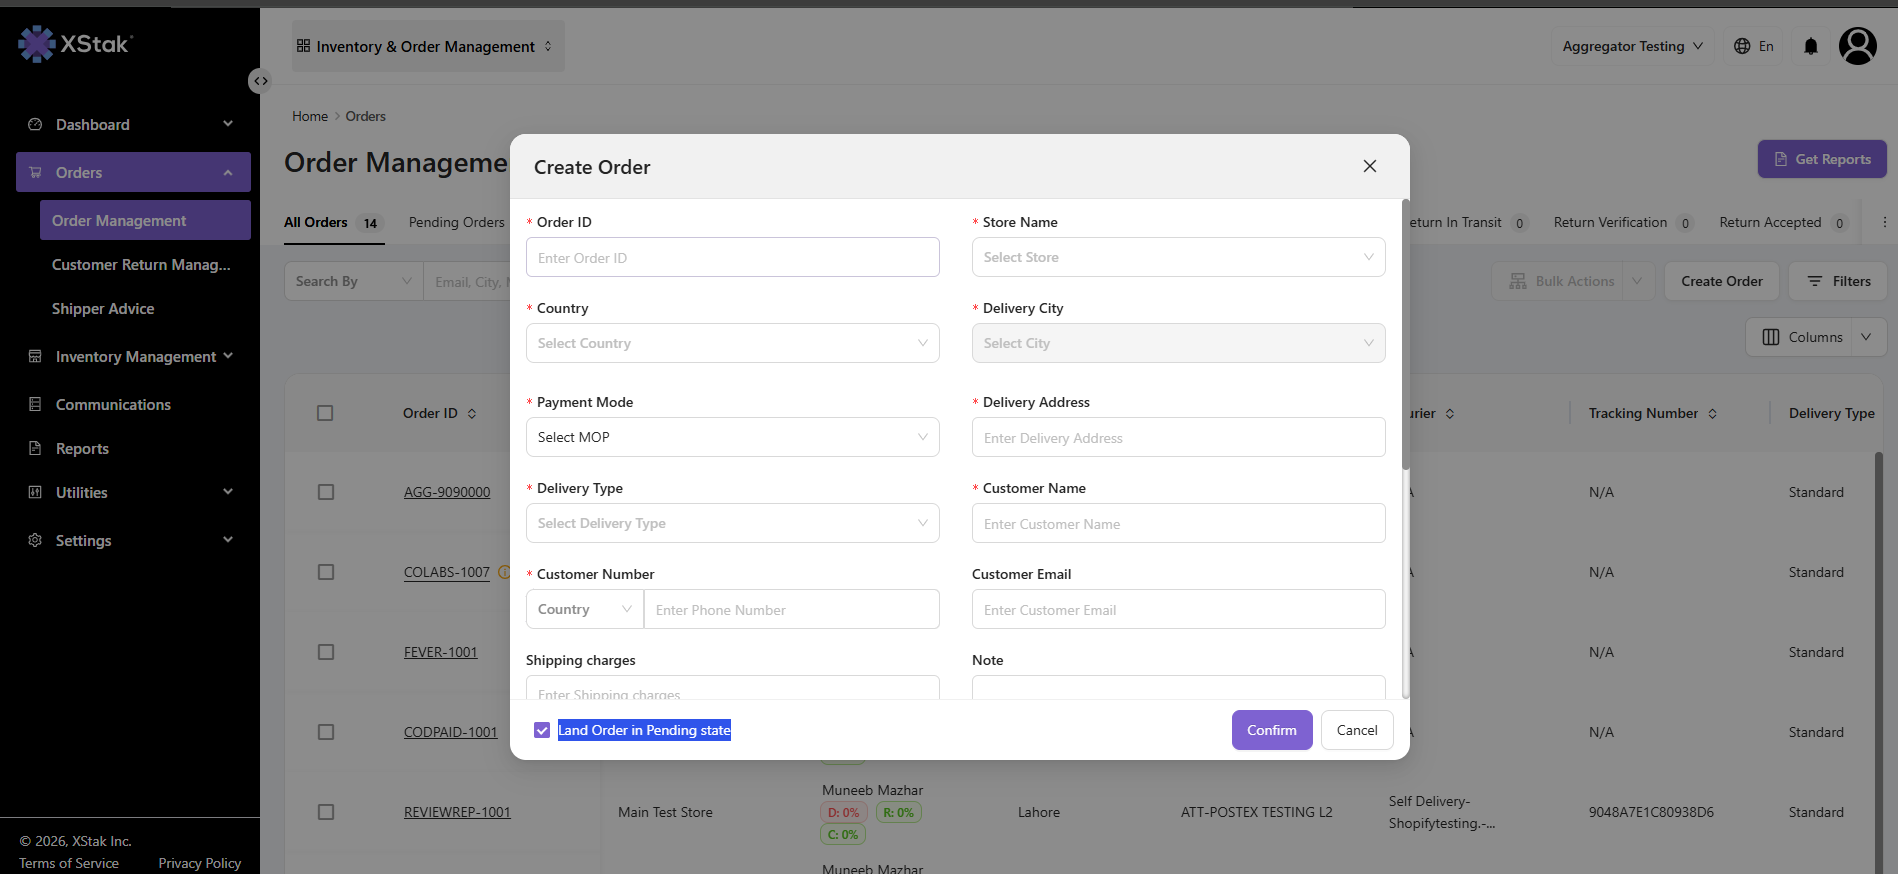
-
If disabled
→ The order will follow the standard auto-verification and auto-assignment flow
Step 6: Submit the Order
Click Create Order to finalize and submit the entry into the system.