
Add SKU and Merge Orders — How To Guide
Purpose: This guide explains how to add additional SKUs to an existing order and consolidate multiple customer orders into a single shipment while keeping product details, pricing, and sales channel updates accurate.
Overview
This guide explains how to add additional SKUs to an existing order and merge two separate orders into one. Merchants commonly use this process when a customer places multiple orders and requests consolidation into a single shipment.
1. Understanding Order Merging
To merge two orders (for example, Order A and Order B):
-
You will add the SKUs from Order A into Order B.
-
After confirming that all SKUs from Order A have been added into Order B, you may cancel Order A.
-
The merged order will carry Order B’s order ID, along with the combined product list and updated total price.
2. Step-by-Step Process
Step 1: Move the Order to “Assign Location”
To make changes to an existing order, it must first be moved to the Assign Location tab.
-
Navigate to the Orders section.
-
Locate order Xyz.
-
Move the order to the Assign Location state using the available action options.
Step 2: Open the Order
-
Go to the Assign Location tab.
-
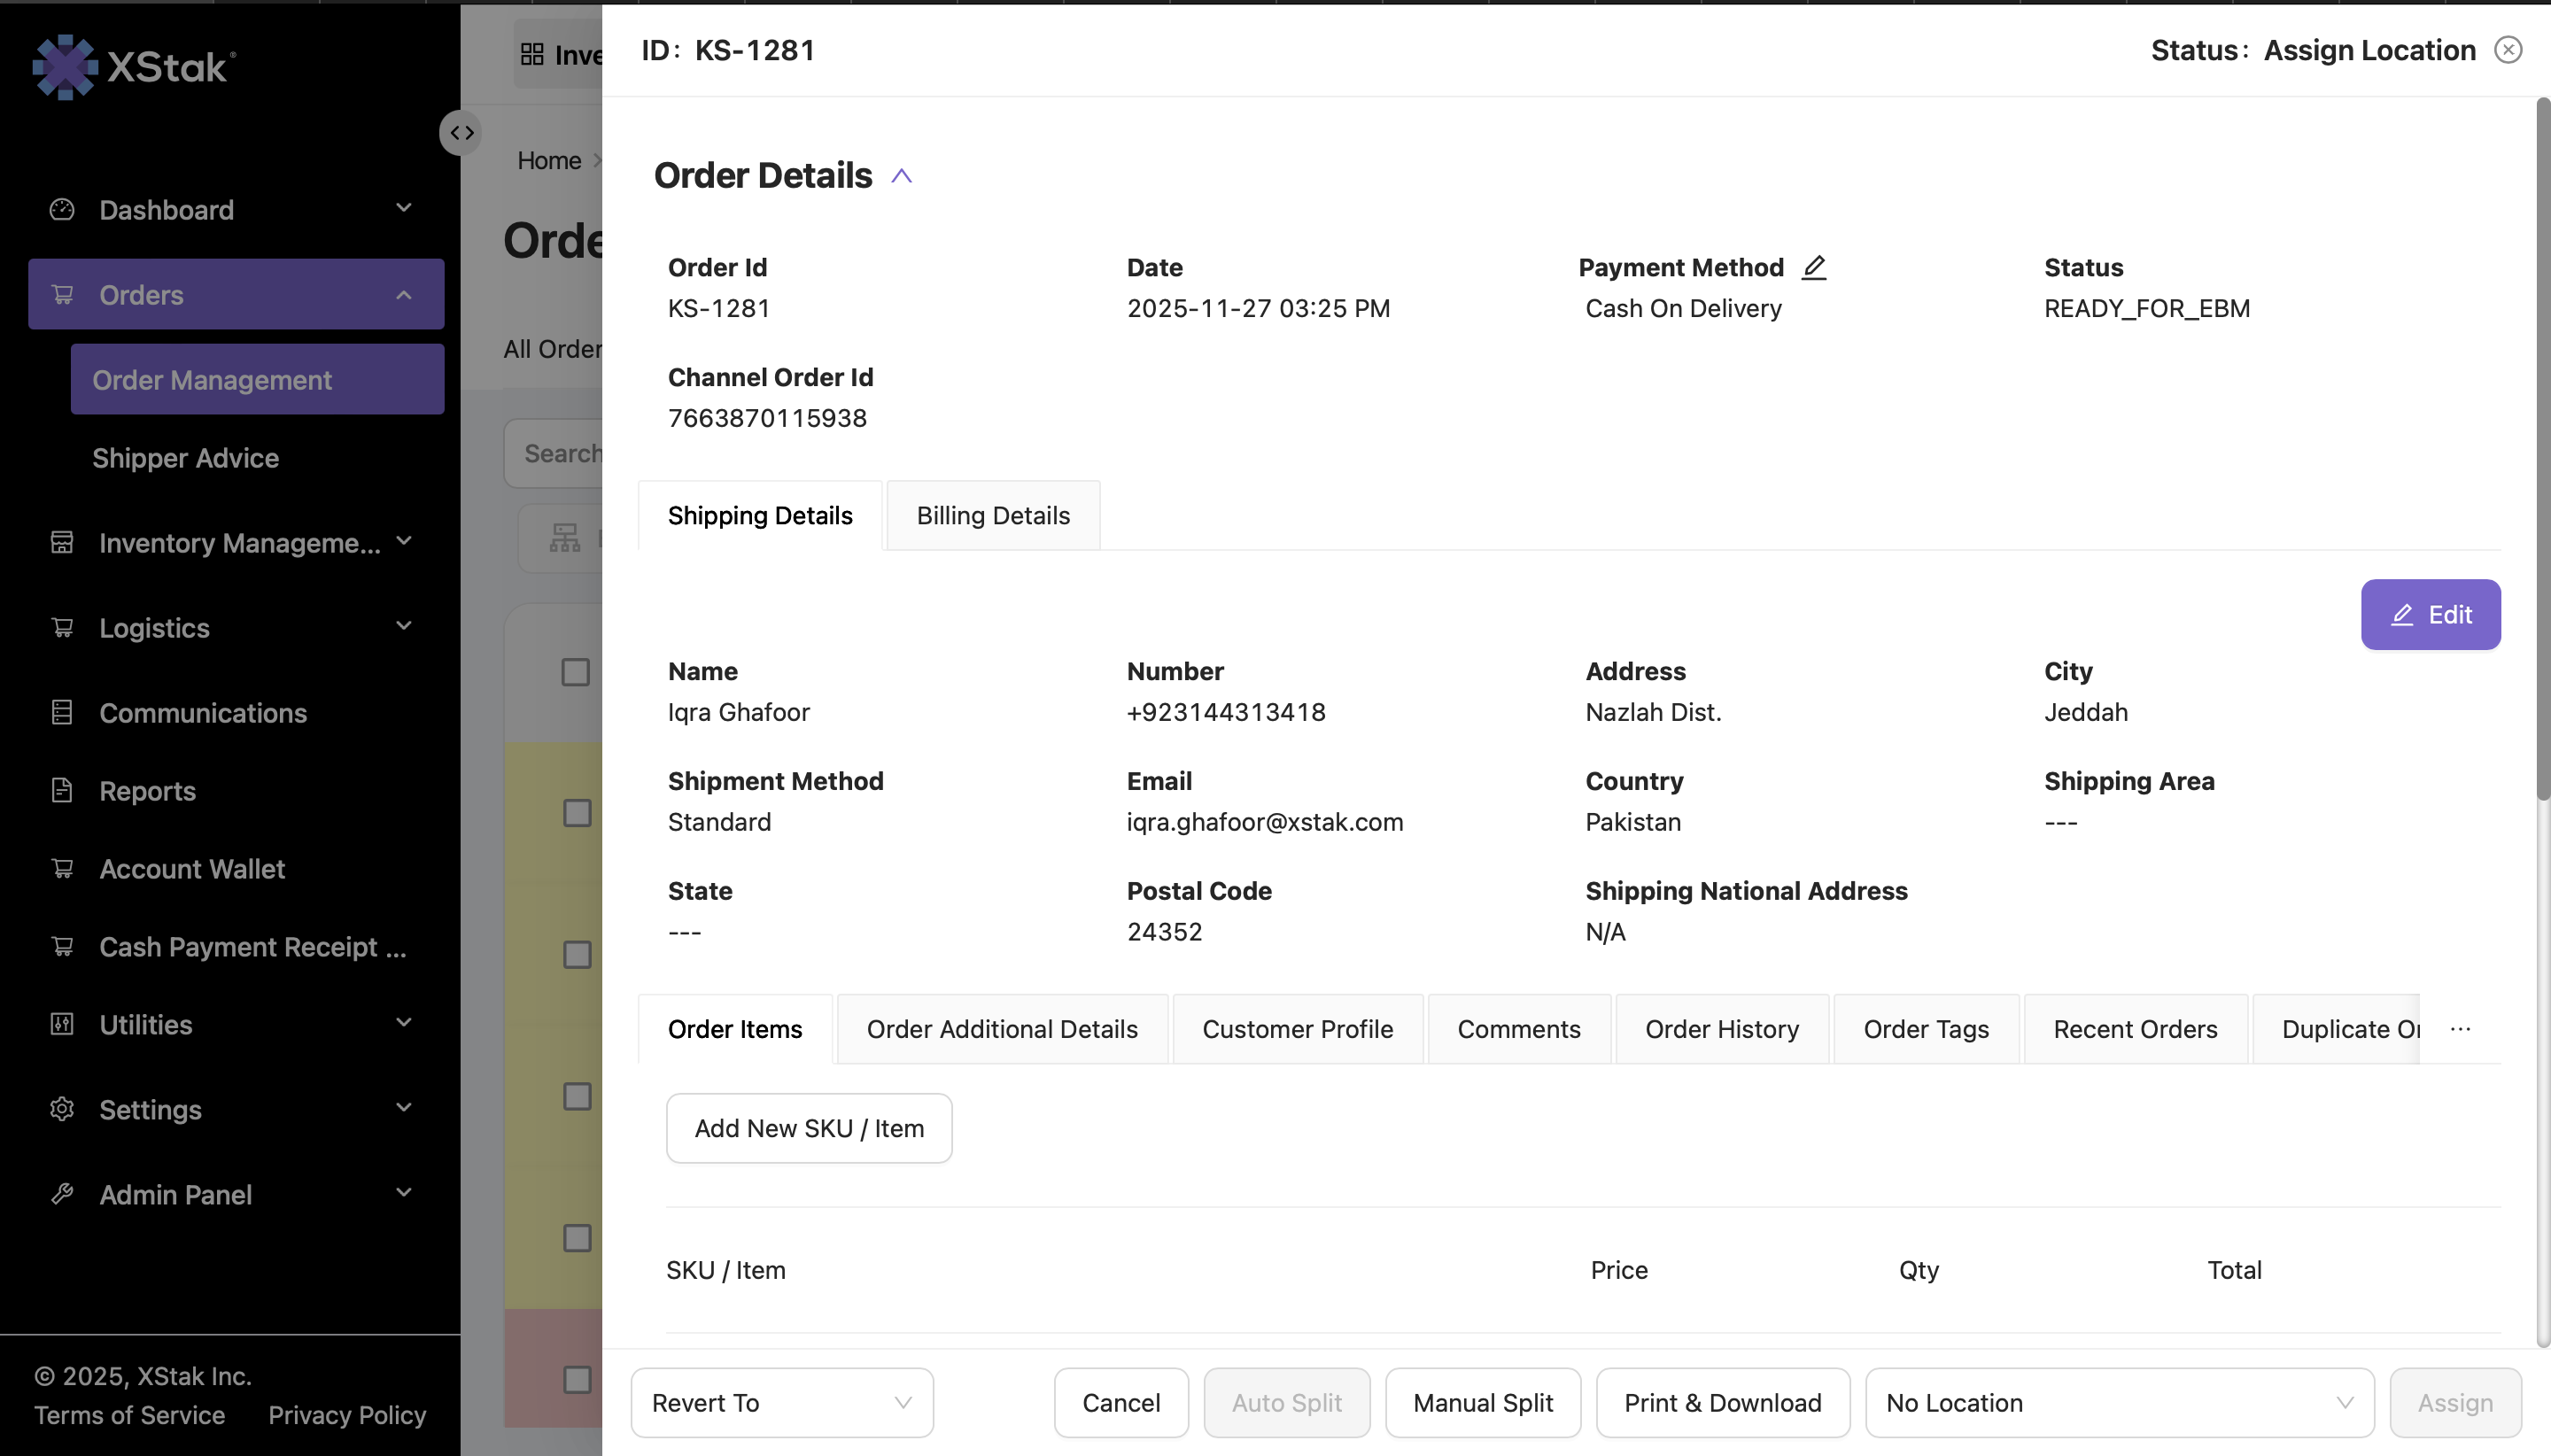
Click on the order ID to open its details page.
-
Scroll down to the section where the order editing options are available.
Step 3: Select “Add New SKU / Item”
-
Scroll to the bottom portion of the order details page.
-
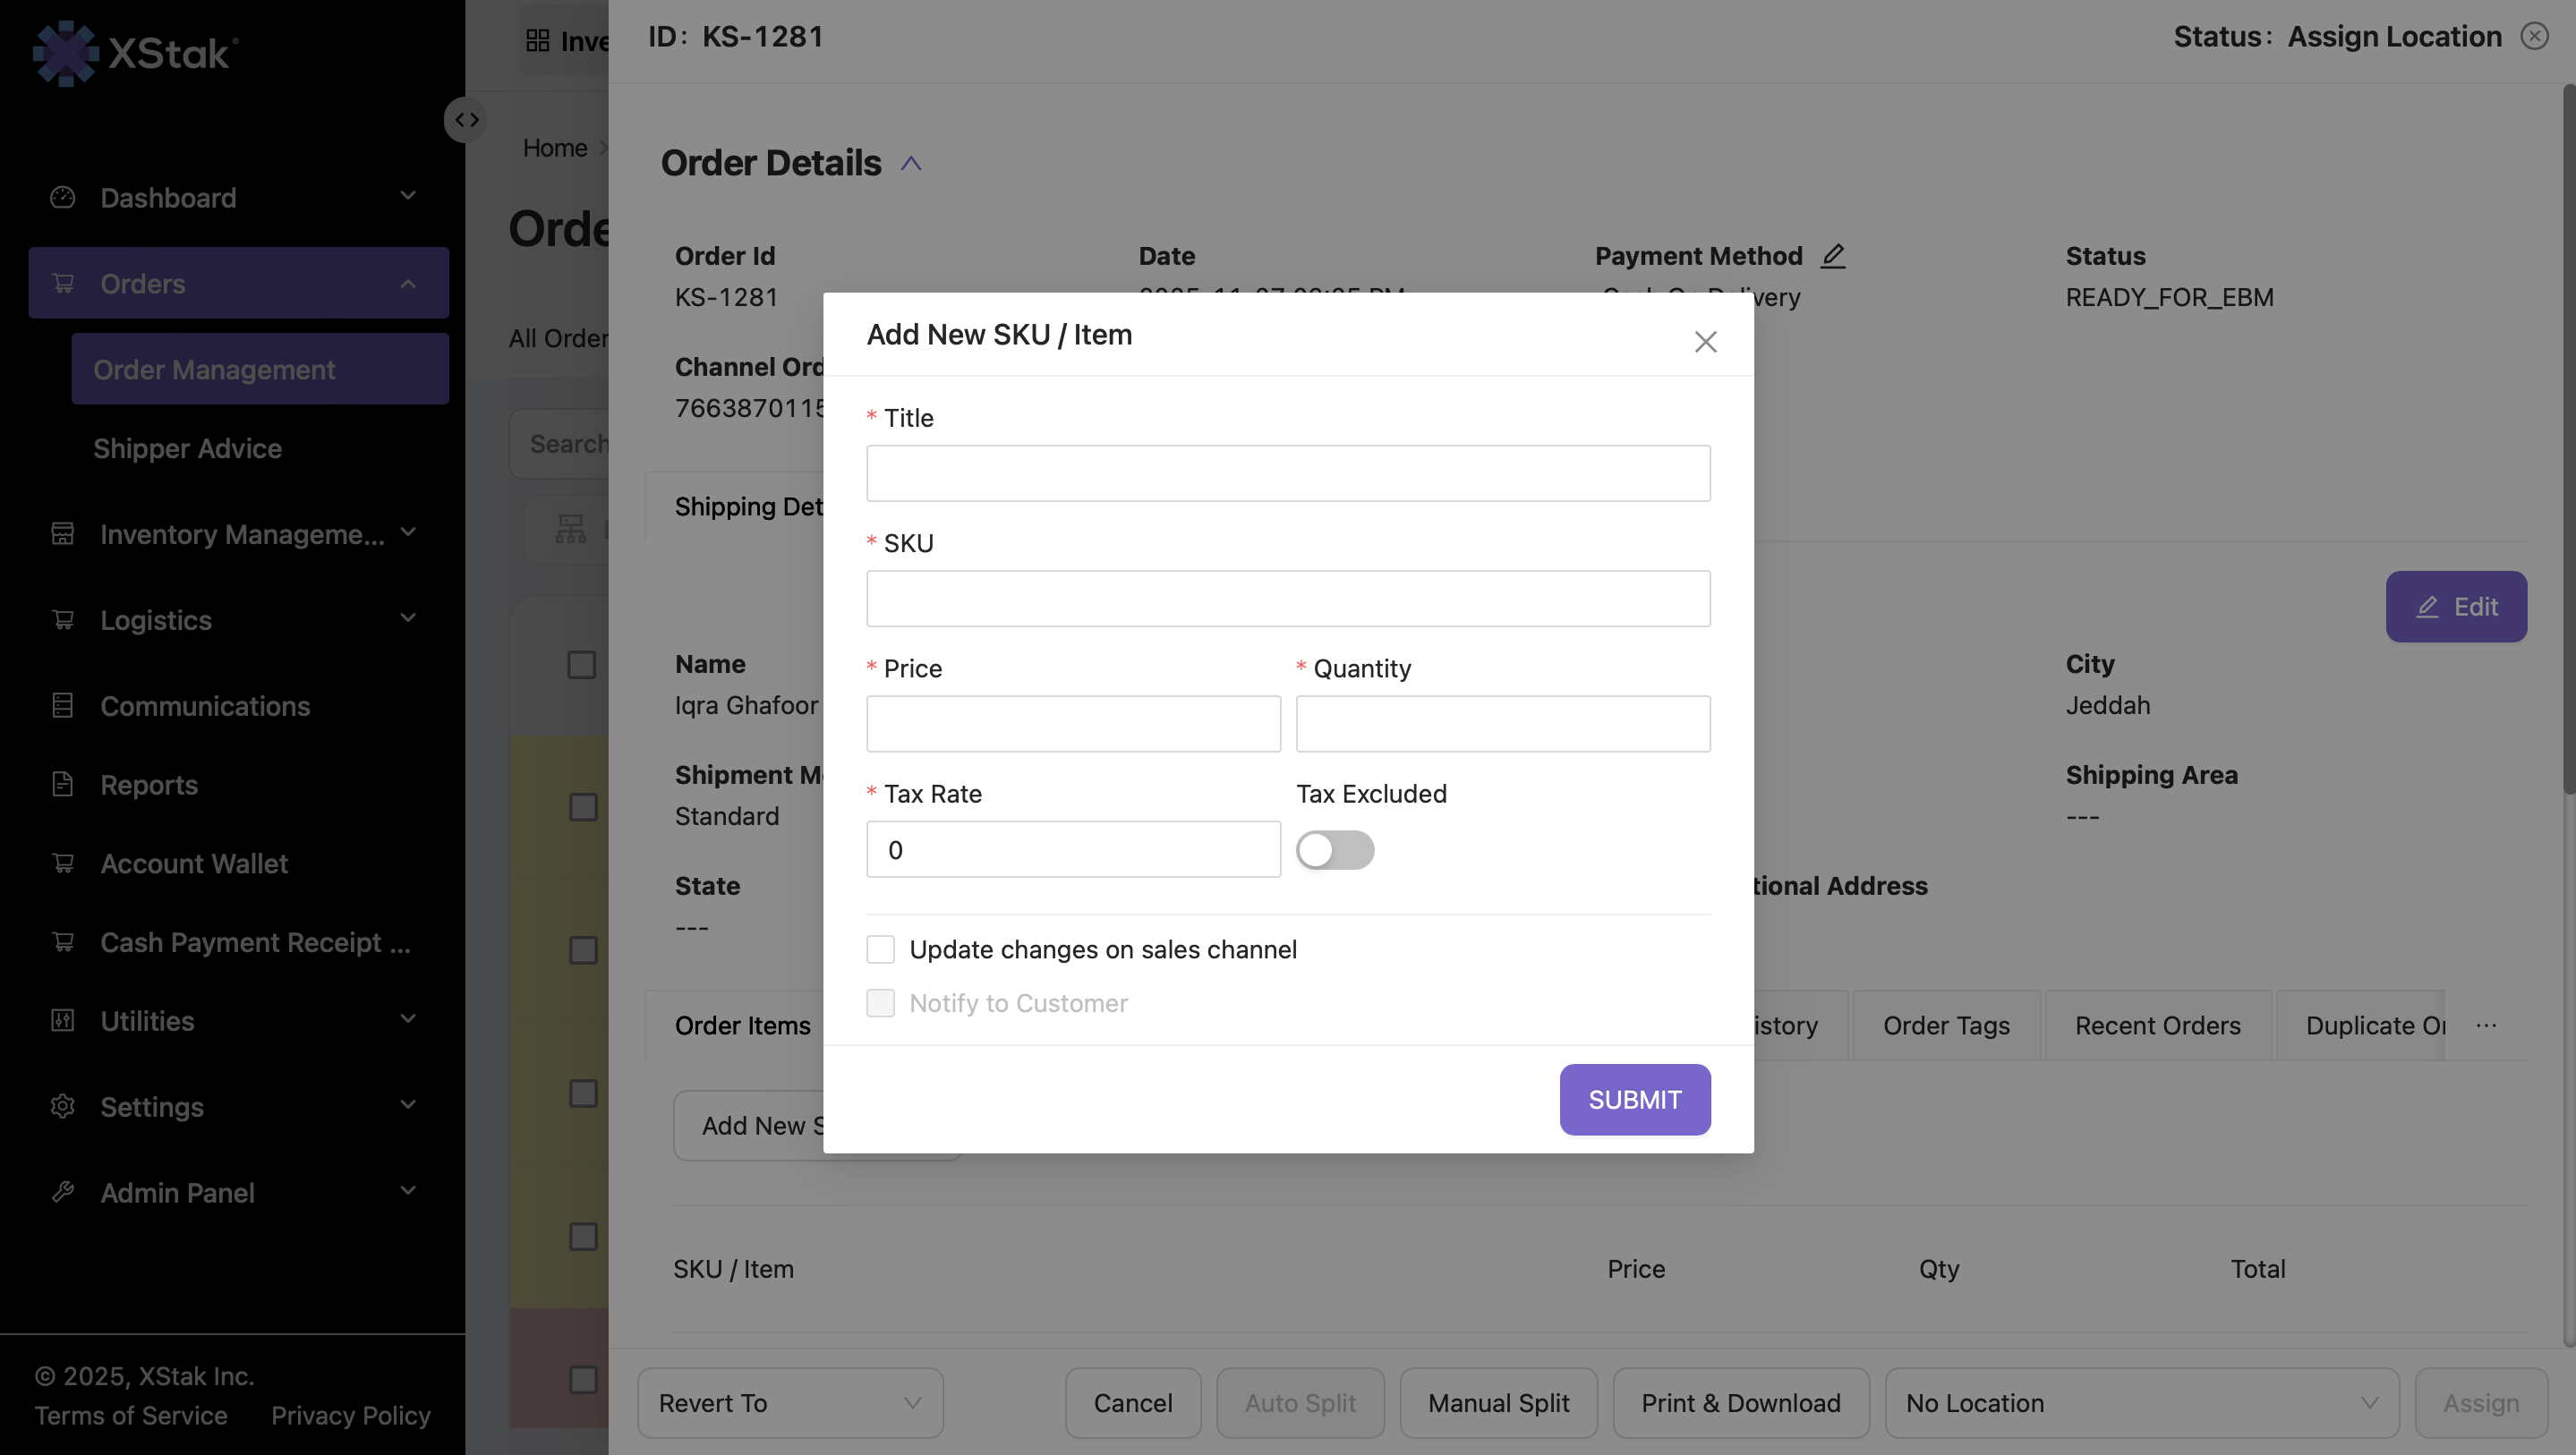
Click on Add New SKU / Item.
The system will open a form where you can enter the new SKU details.
Step 4: Enter New SKU Details
Fill out the required fields for the SKU you want to add:
-
SKU Code
-
Quantity
-
Unit Price
-
Discount (if applicable)
-
Special Price (if applicable)
This allows you to add all product information accurately.
Step 5: Update Changes on Sales Channel
You may enable the checkbox:
“Want to update on sales channel as well?”
Selecting this ensures that the newly added SKU and price changes are also pushed to the connected sales channel (e.g., Shopify, WooCommerce, Daraz).
Step 6: Submit the SKU Addition
-
After entering all required information, click Submit.
-
The new SKU will now appear under the same order ID.
-
The order amount will be automatically recalculated based on the total of all SKUs.
3. Verification
After submission:
-
The new SKU will be visible under the order’s product list.
-
The updated order value will reflect the combined total.
-
At this stage, you may proceed with the order normally.
-
If merging orders, you may now cancel Order A, as all its SKUs have been successfully added to Order B.
4. Instruction Video
Best Practices
-
Confirm that all SKUs from the source order have been added before canceling the original order.
-
Review quantity, unit price, discount, and special price values before submitting changes.
-
Enable sales channel updates only when the connected channel should reflect the SKU and pricing changes.
-
Verify the final product list and order total after submission.
-
Keep the merged order ID clear for customer support and fulfillment tracking.