
The Column Management feature allows users to fully customize the order table view according to their operational requirements. It ensures that each team only sees the most relevant data for their workflow.
Step 1: Open Order Management Tab
Go to:
Orders → Order Management → Any Tab (All Orders / Pending / Dispatched, etc.)
Step 2: Open Column Menu
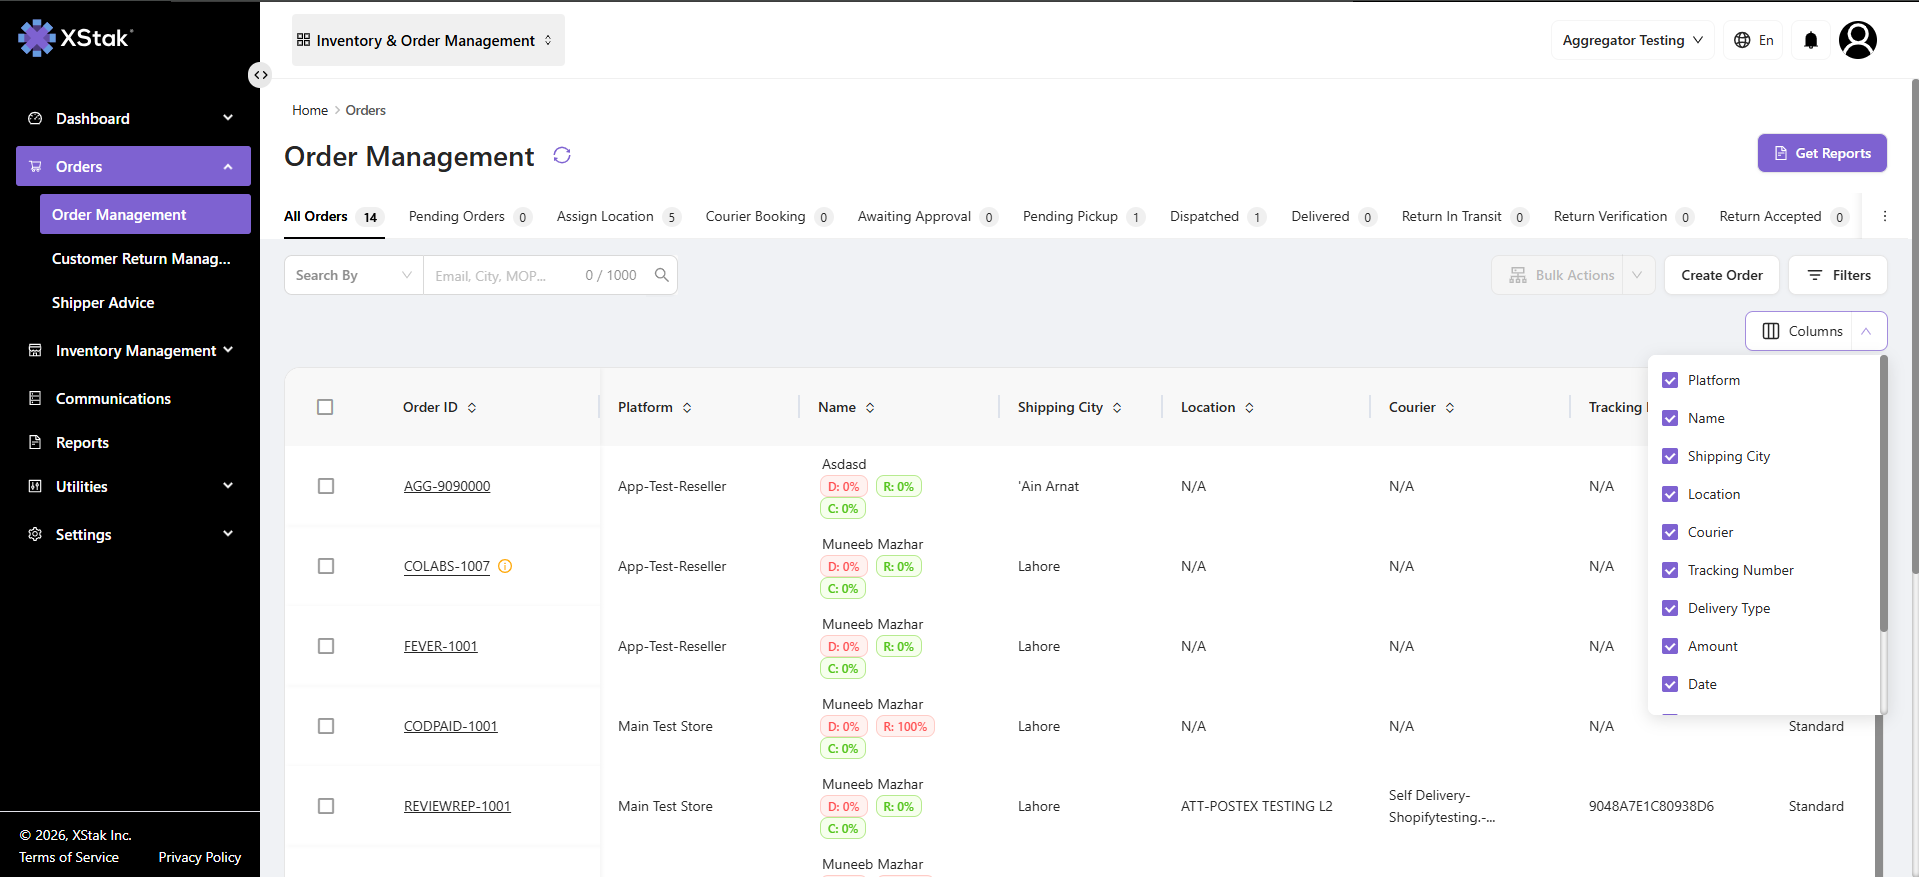
On the right side of the screen, click on the Columns button.
Step 3: View Available Columns
After clicking:
-
A dropdown panel will open
-
It will display a full list of all available columns
Step 4: Select or Remove Columns
In the dropdown list:
-
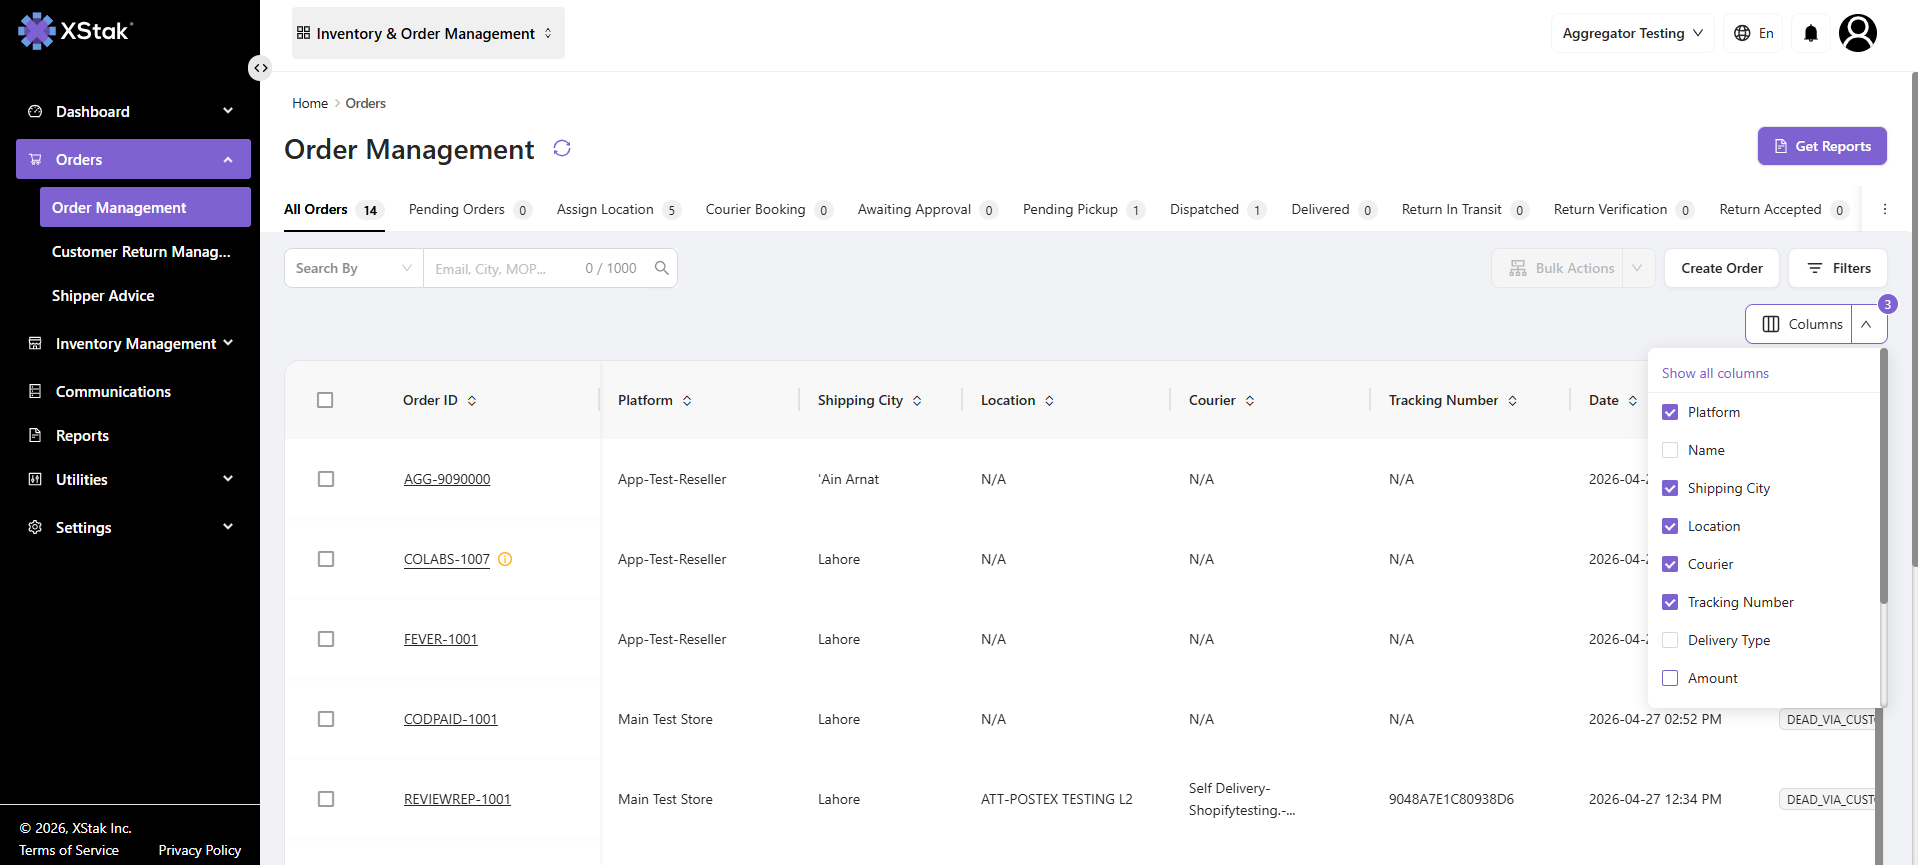
Columns are shown with checkboxes
-
Checked = Visible in table
-
Unchecked = Hidden from table
You can:
-
Add columns (enable checkbox)
-
Remove columns (disable checkbox)
-
Reduce unnecessary data fields
-
Focus only on operationally important metrics
Step 5: Apply Changes Across All Tabs
Once updated:
-
The selected column configuration is applied automatically
-
The changes reflect across all Order Management tabs
-
Each tab updates dynamically based on the same column settings
Outcome
This feature allows teams such as:
-
Support
-
Logistics
-
Finance
-
Operations
to create role-based customized views of order data, improving clarity and operational speed.