
How to Initiate a Customer Return
This guide explains how to initiate a customer return from the Delivered Orders tab in OMS, complete the return request form, select the correct return method, and submit the request for further processing.
Step 1: Navigate to the Delivered Orders Tab
-
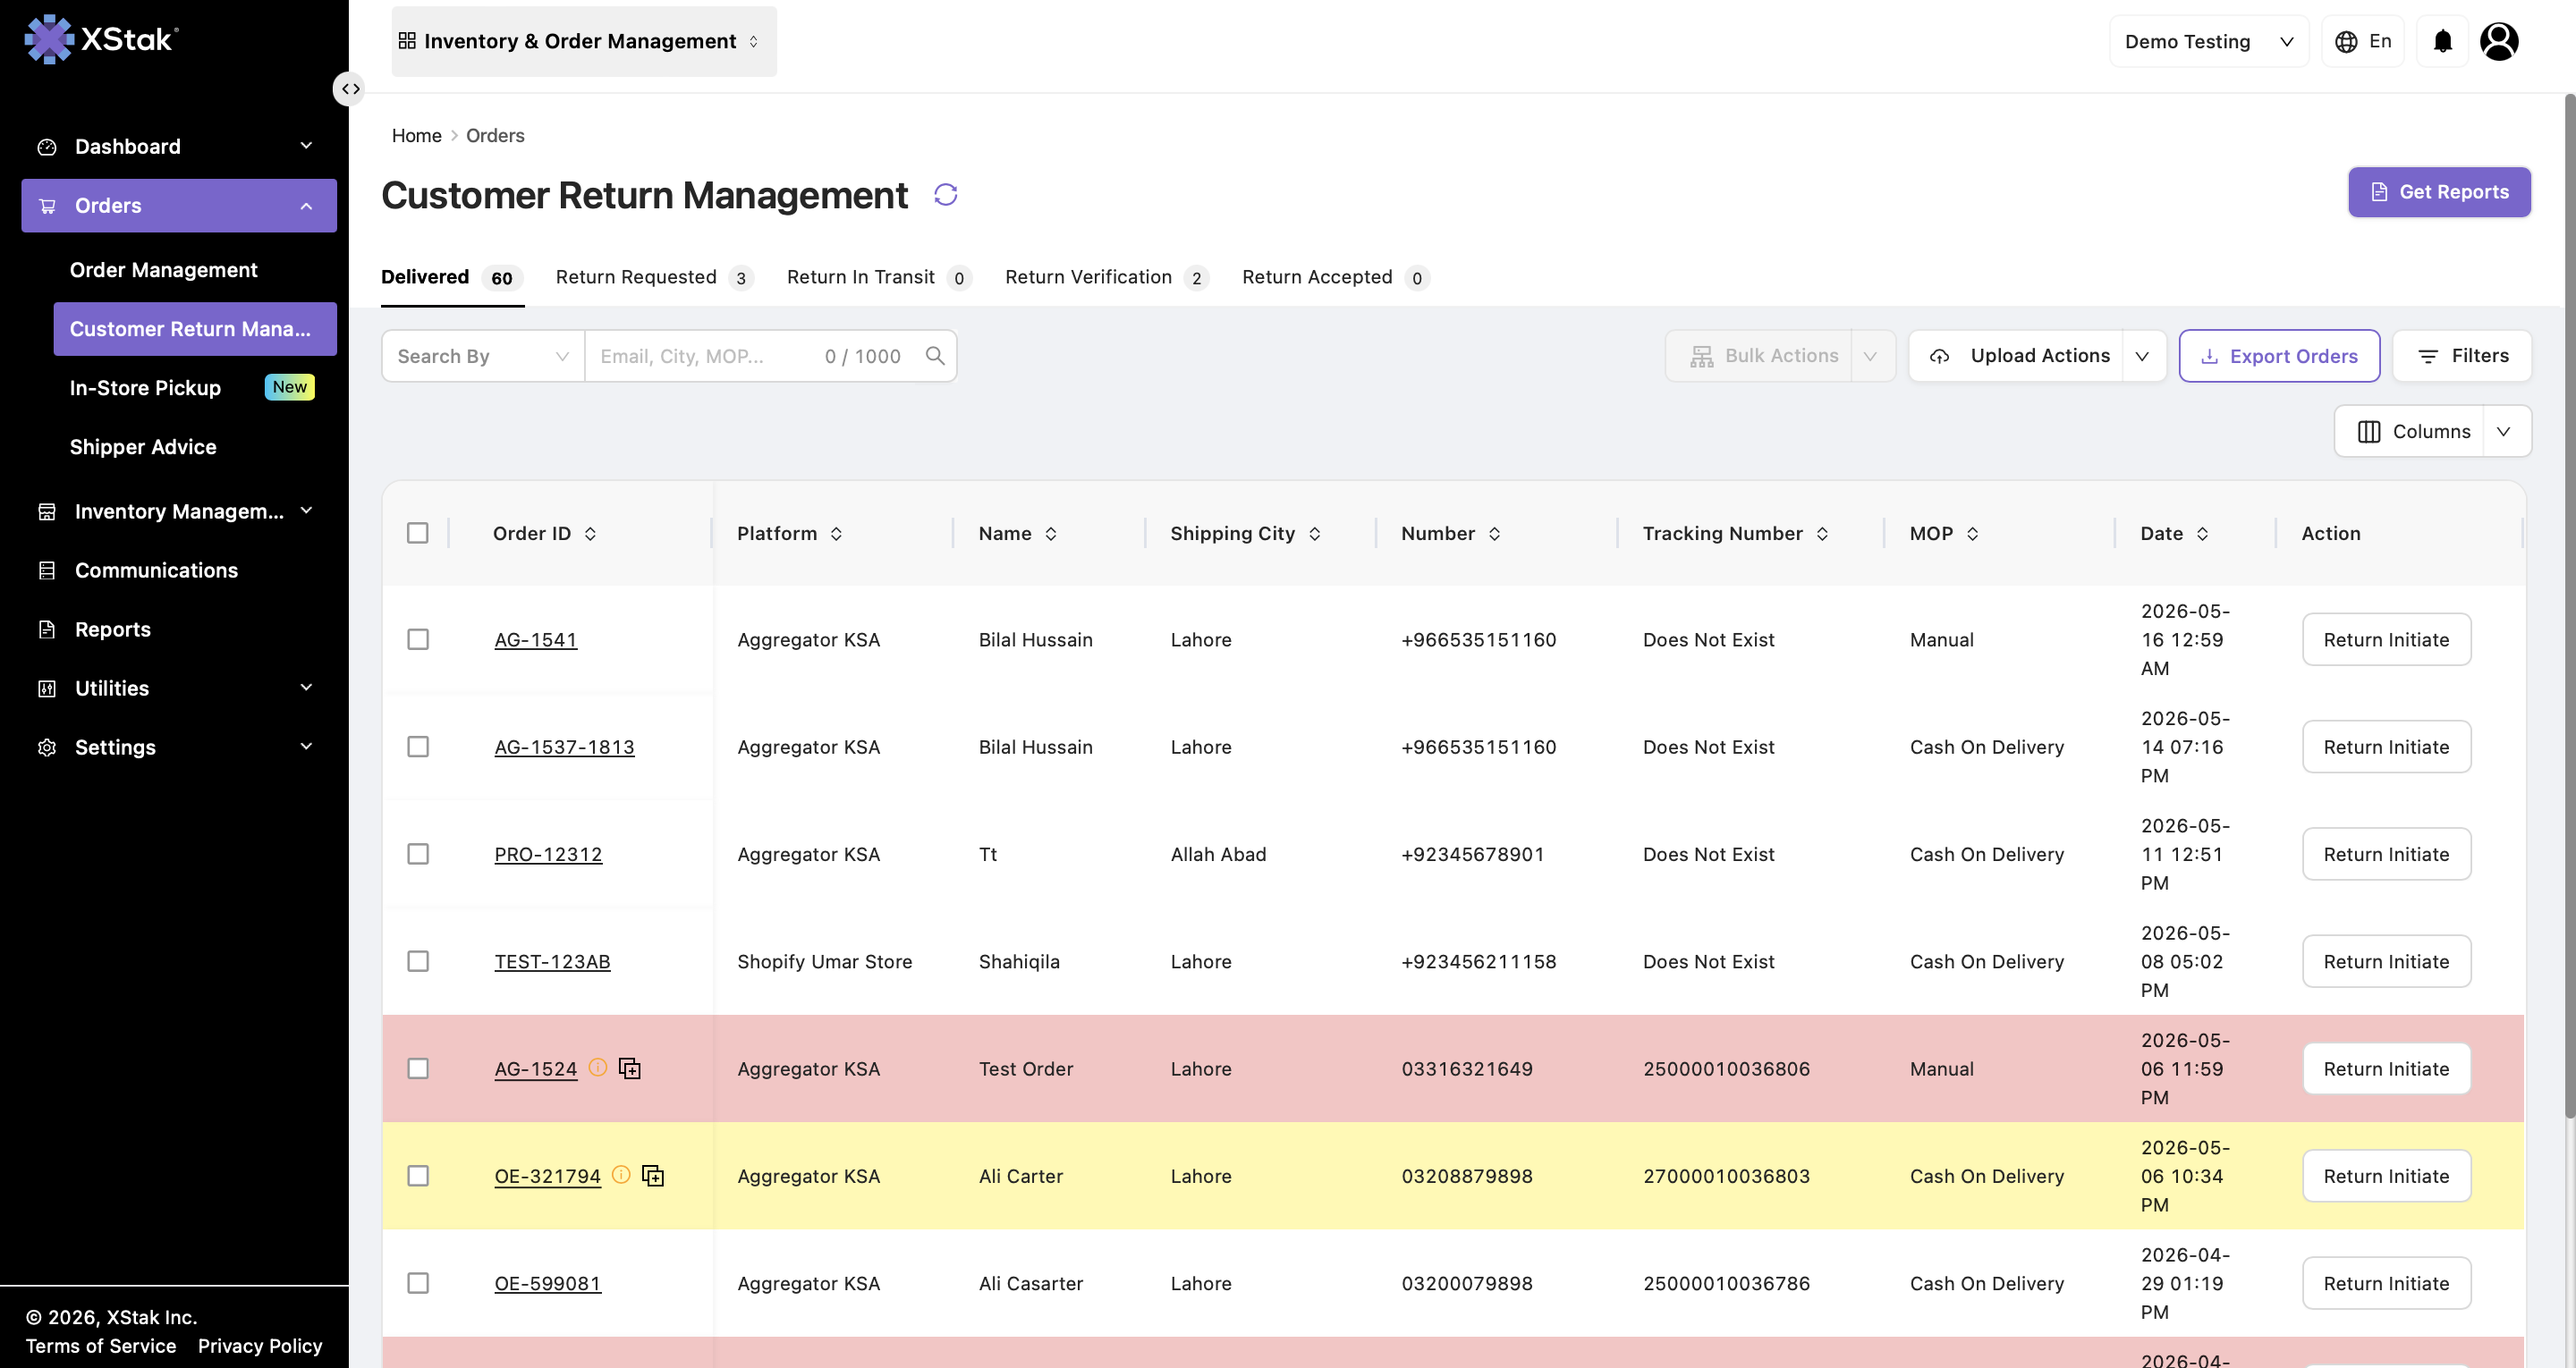
Open the Orders section in OMS.
-
Navigate to the Customer Return Management module.
-
By default, the module opens on the Delivered Orders tab.
-
Use the search bar or available filters to locate the order that needs to be returned.
Step 2: Initiate the Return Request
-
Locate the required order.
-
Click the Return Initiate button available on the order row.
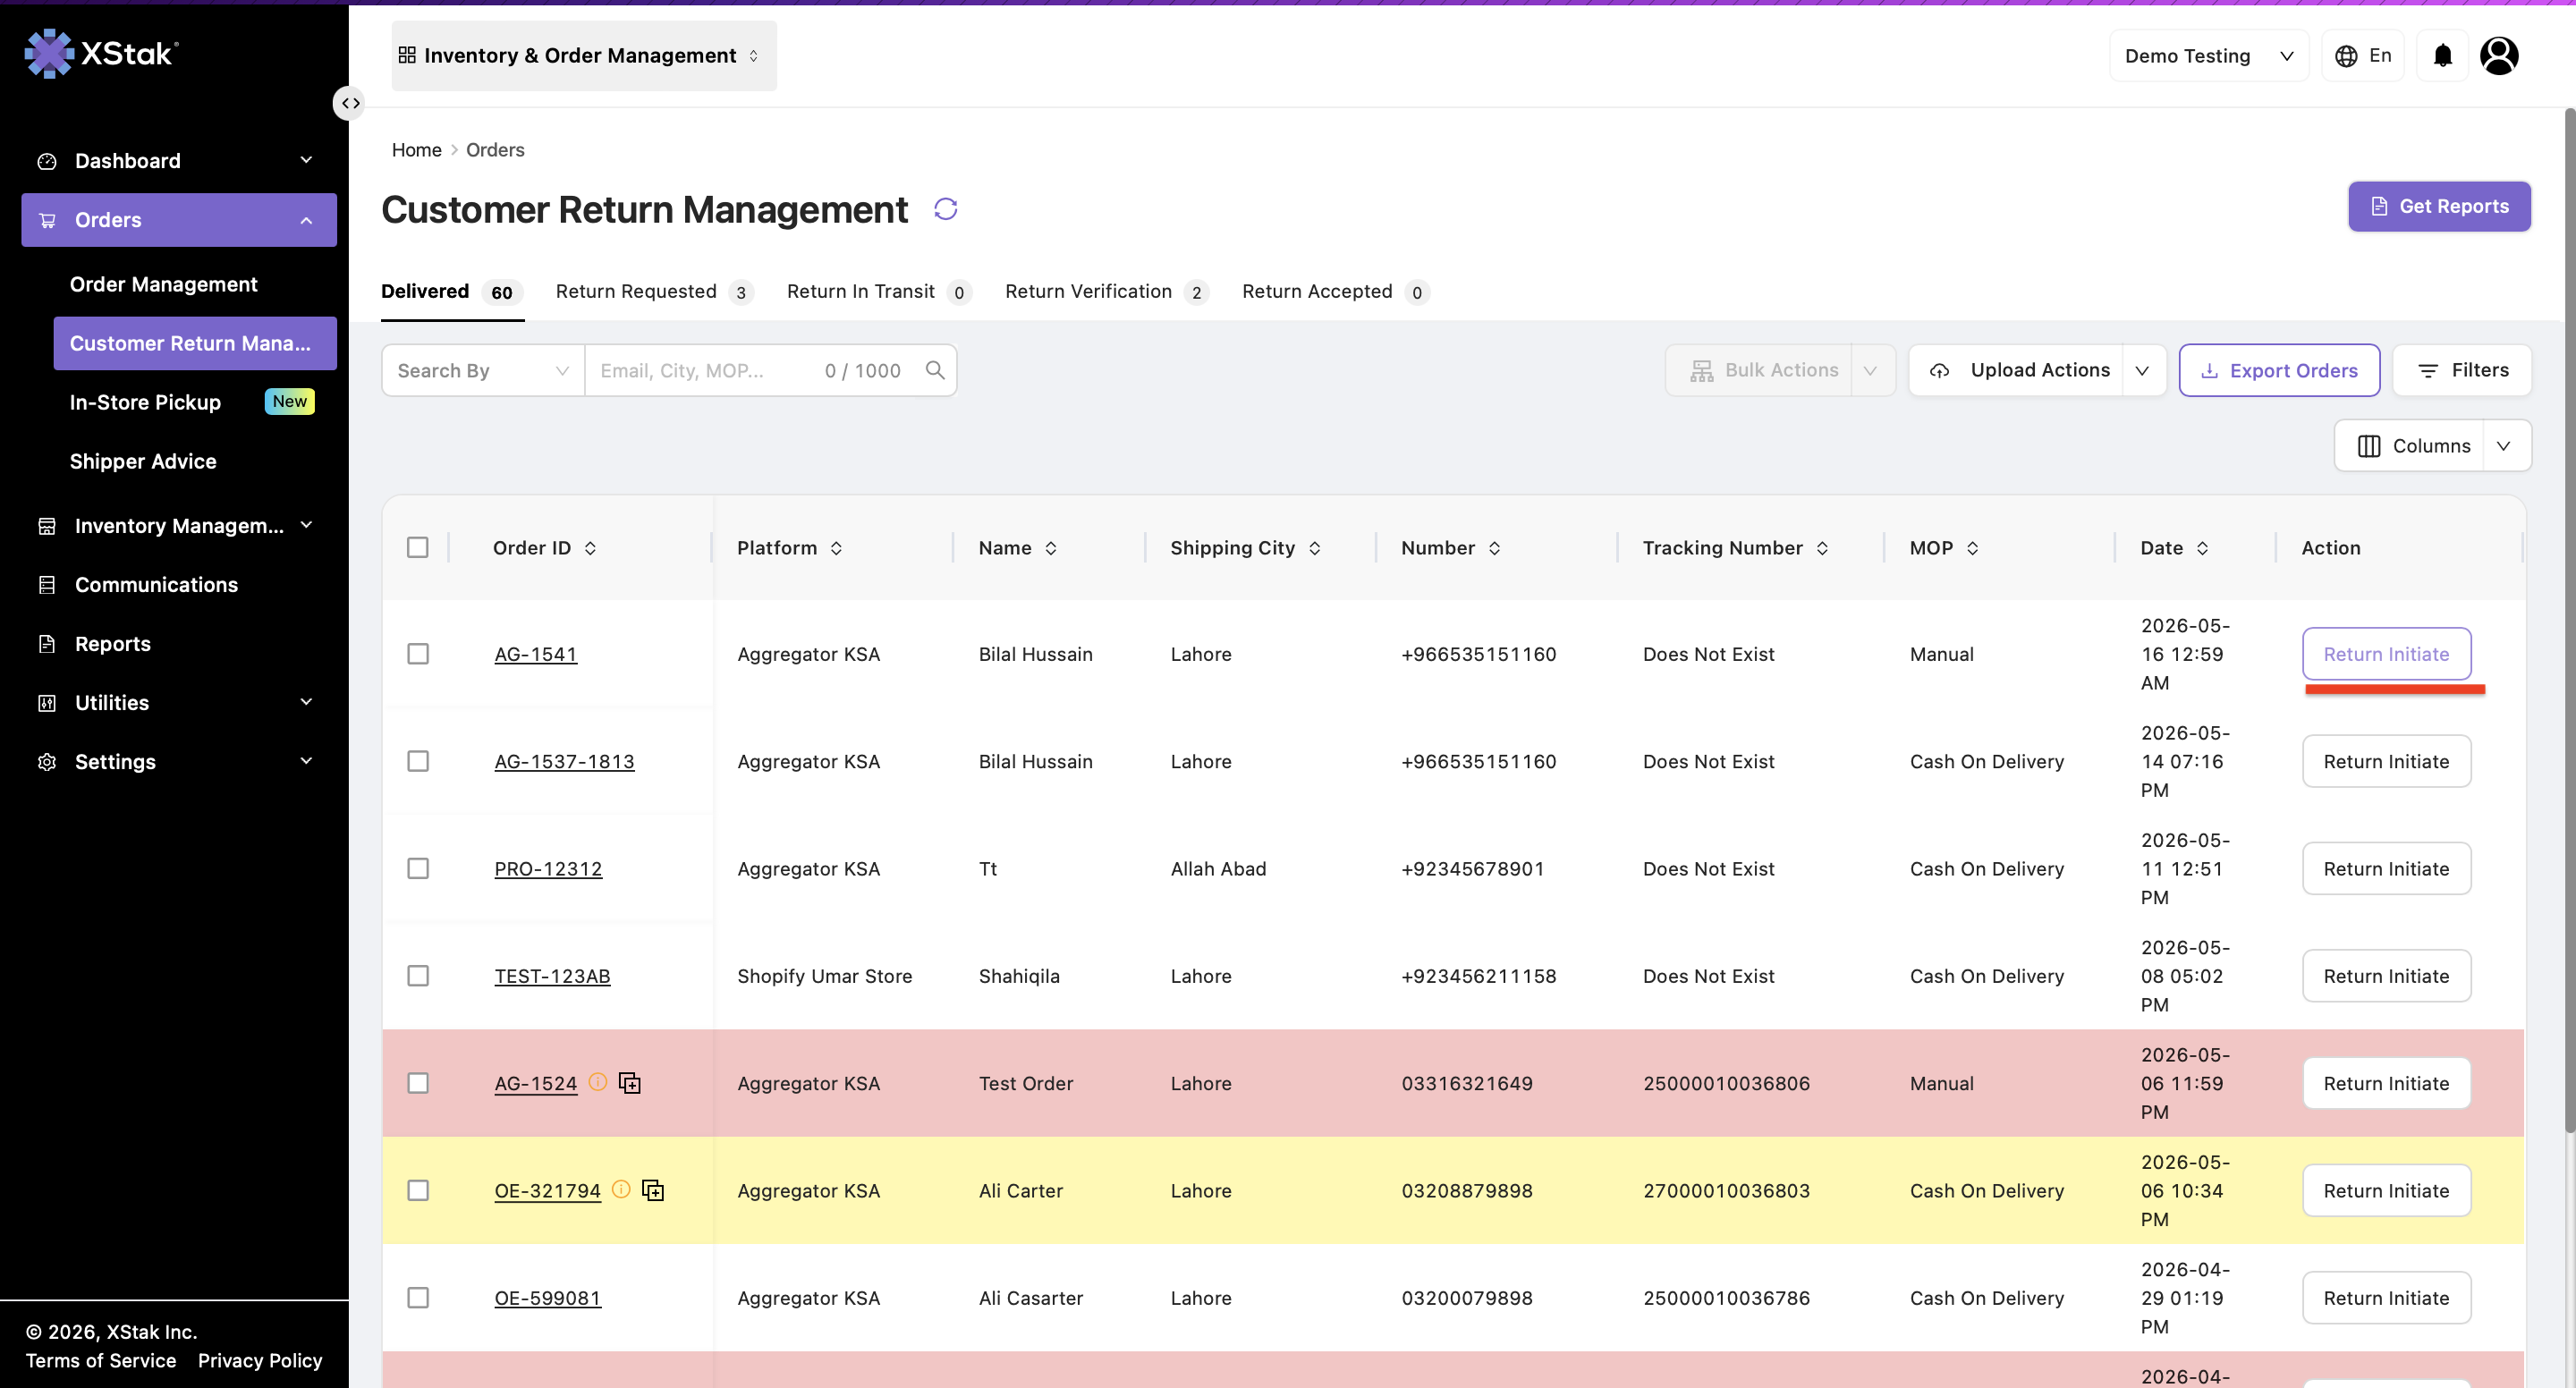
This action opens the Return Request Form where the return details must be completed.
Step 3: Complete the Return Request Form
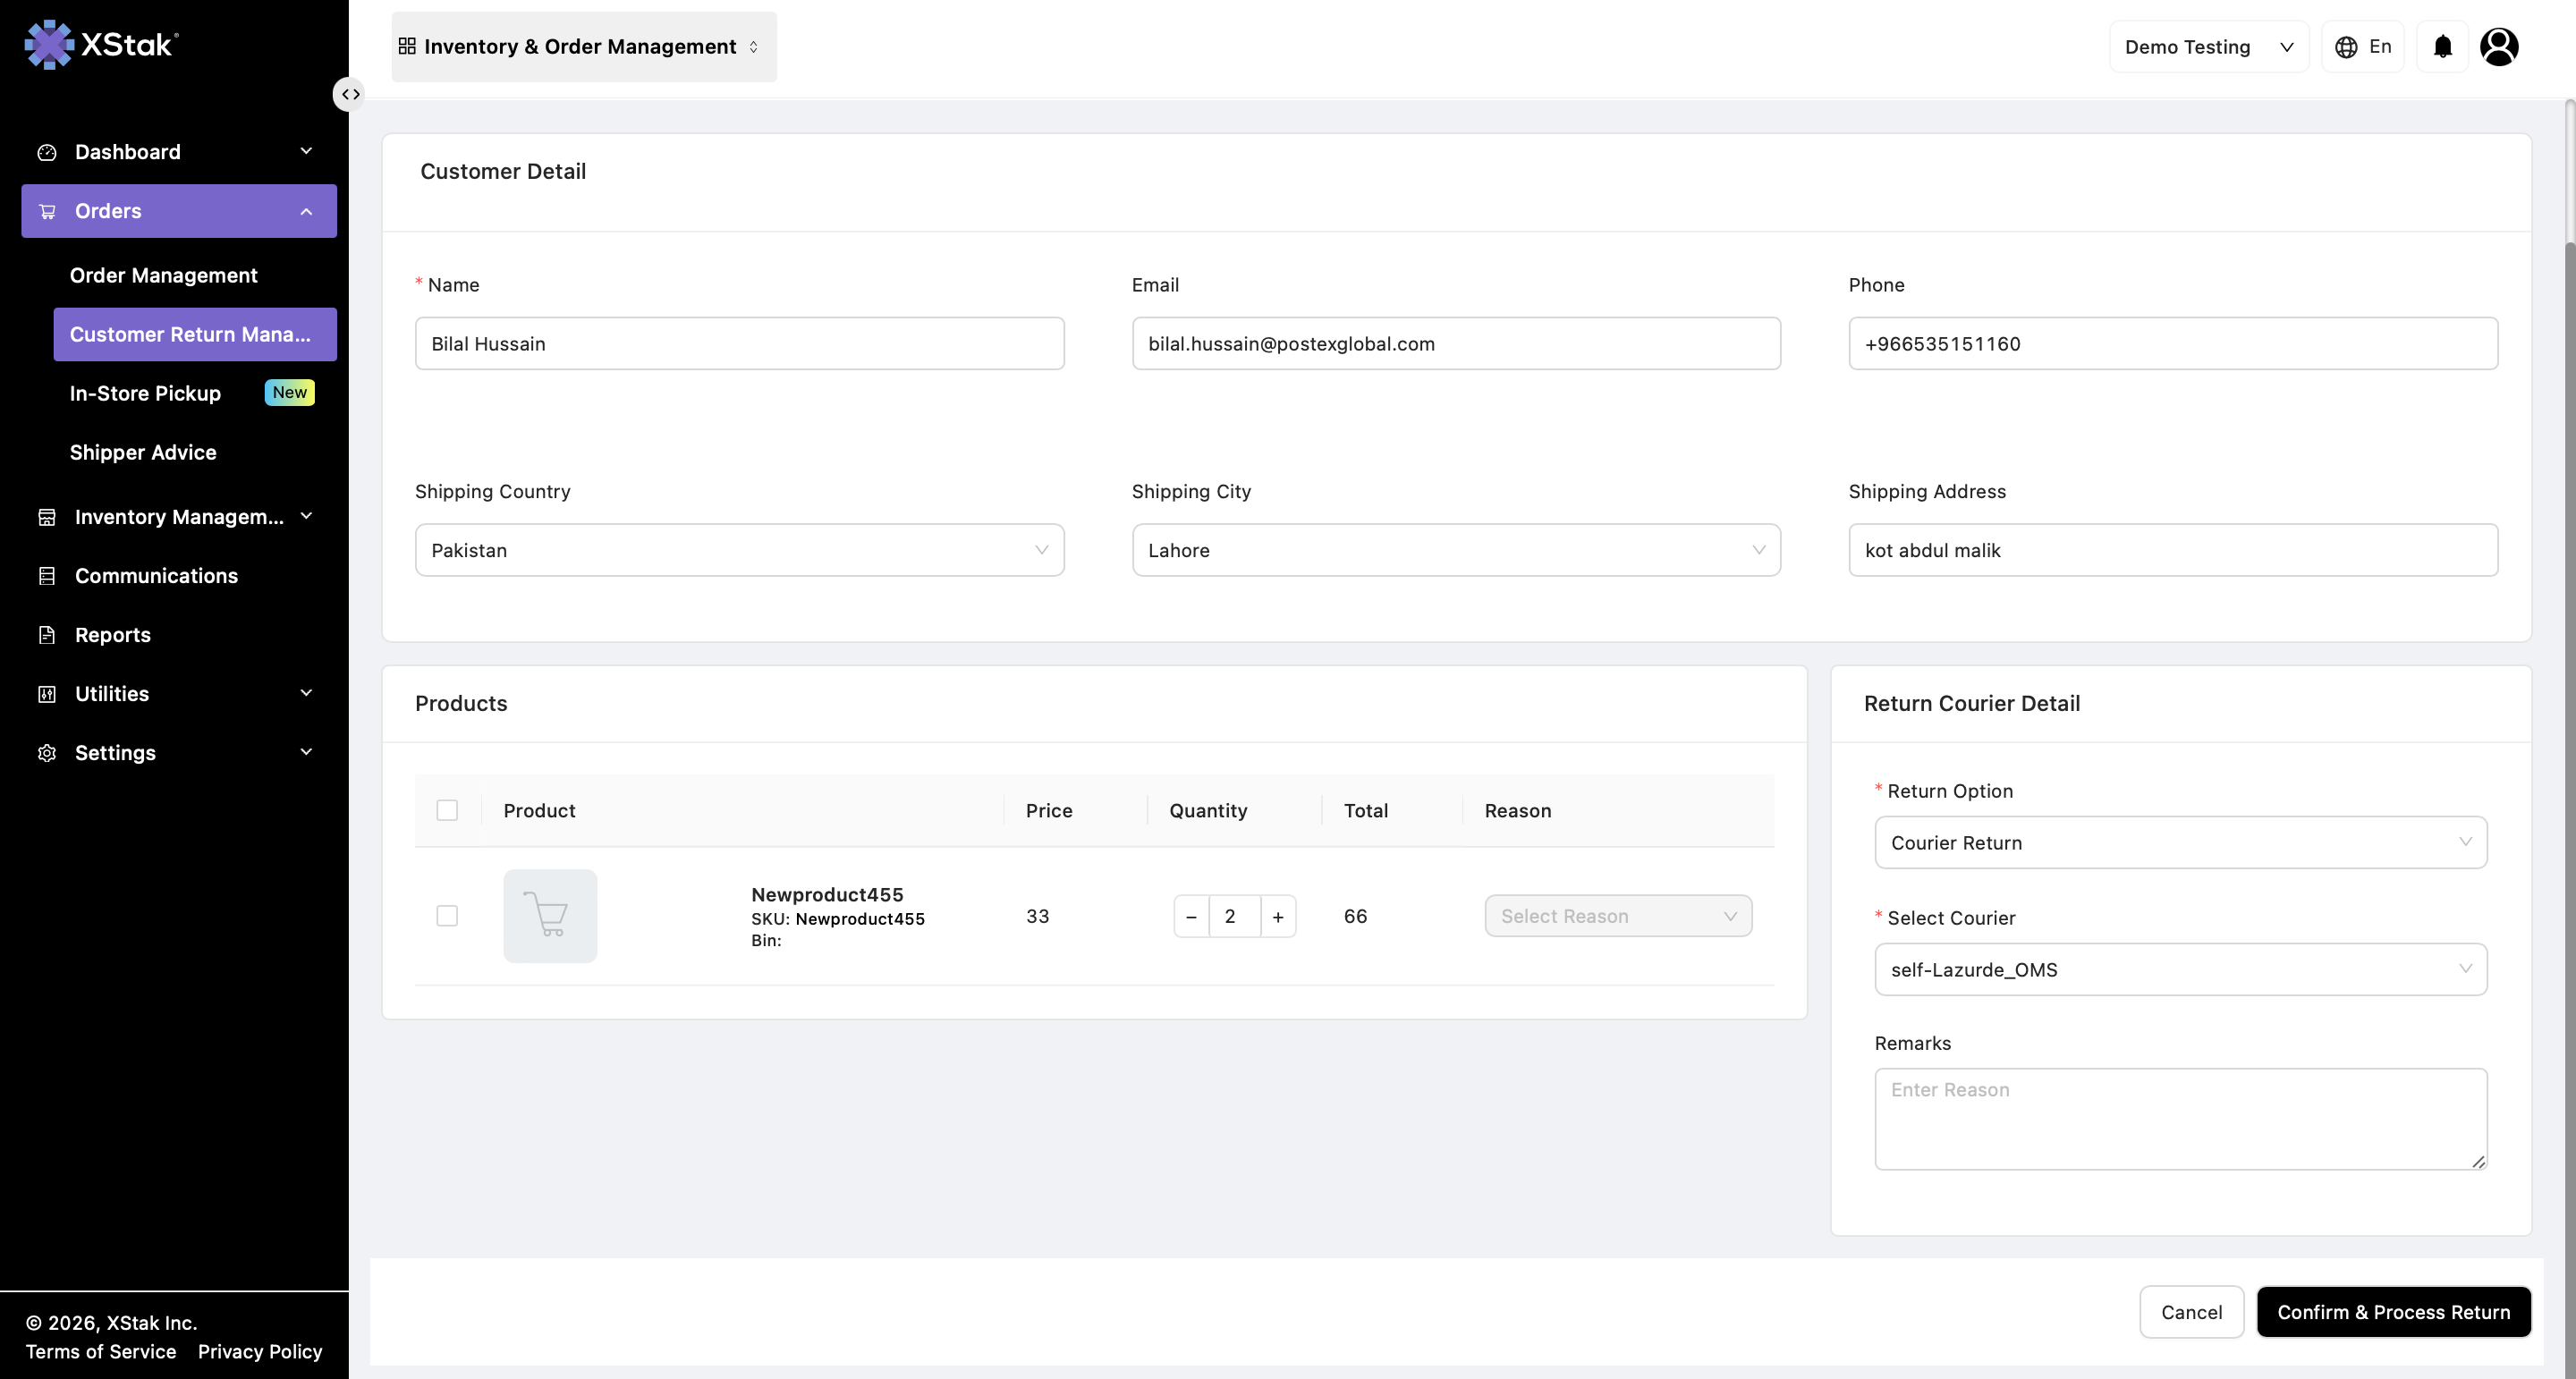
Fill in all required sections carefully before processing the return.
3.1 Customer Details
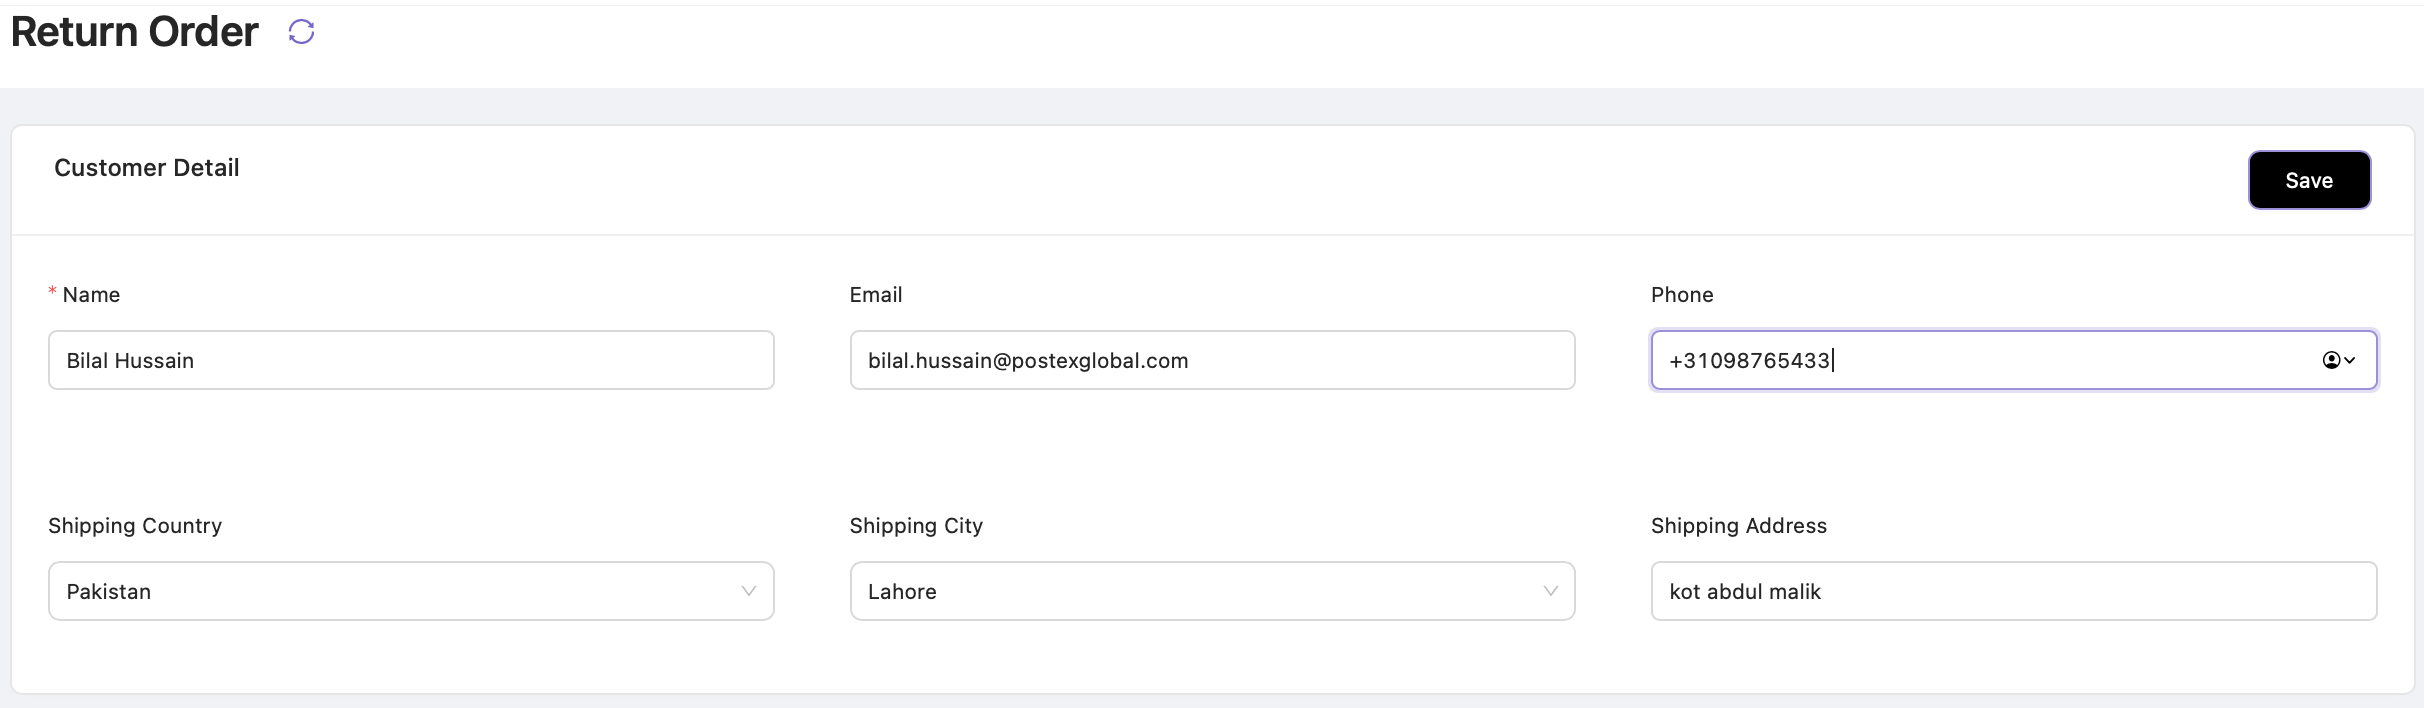
Review the customer information displayed on the page, including:
-
Customer Name
-
Contact Number
-
Delivery Address
Note:
All customer details are automatically pre-populated in the Customer Details section based on the original order information. These fields are editable, so if the customer wants to change the return pickup or receiving address, you can simply update the required details and save the changes before processing the return request.
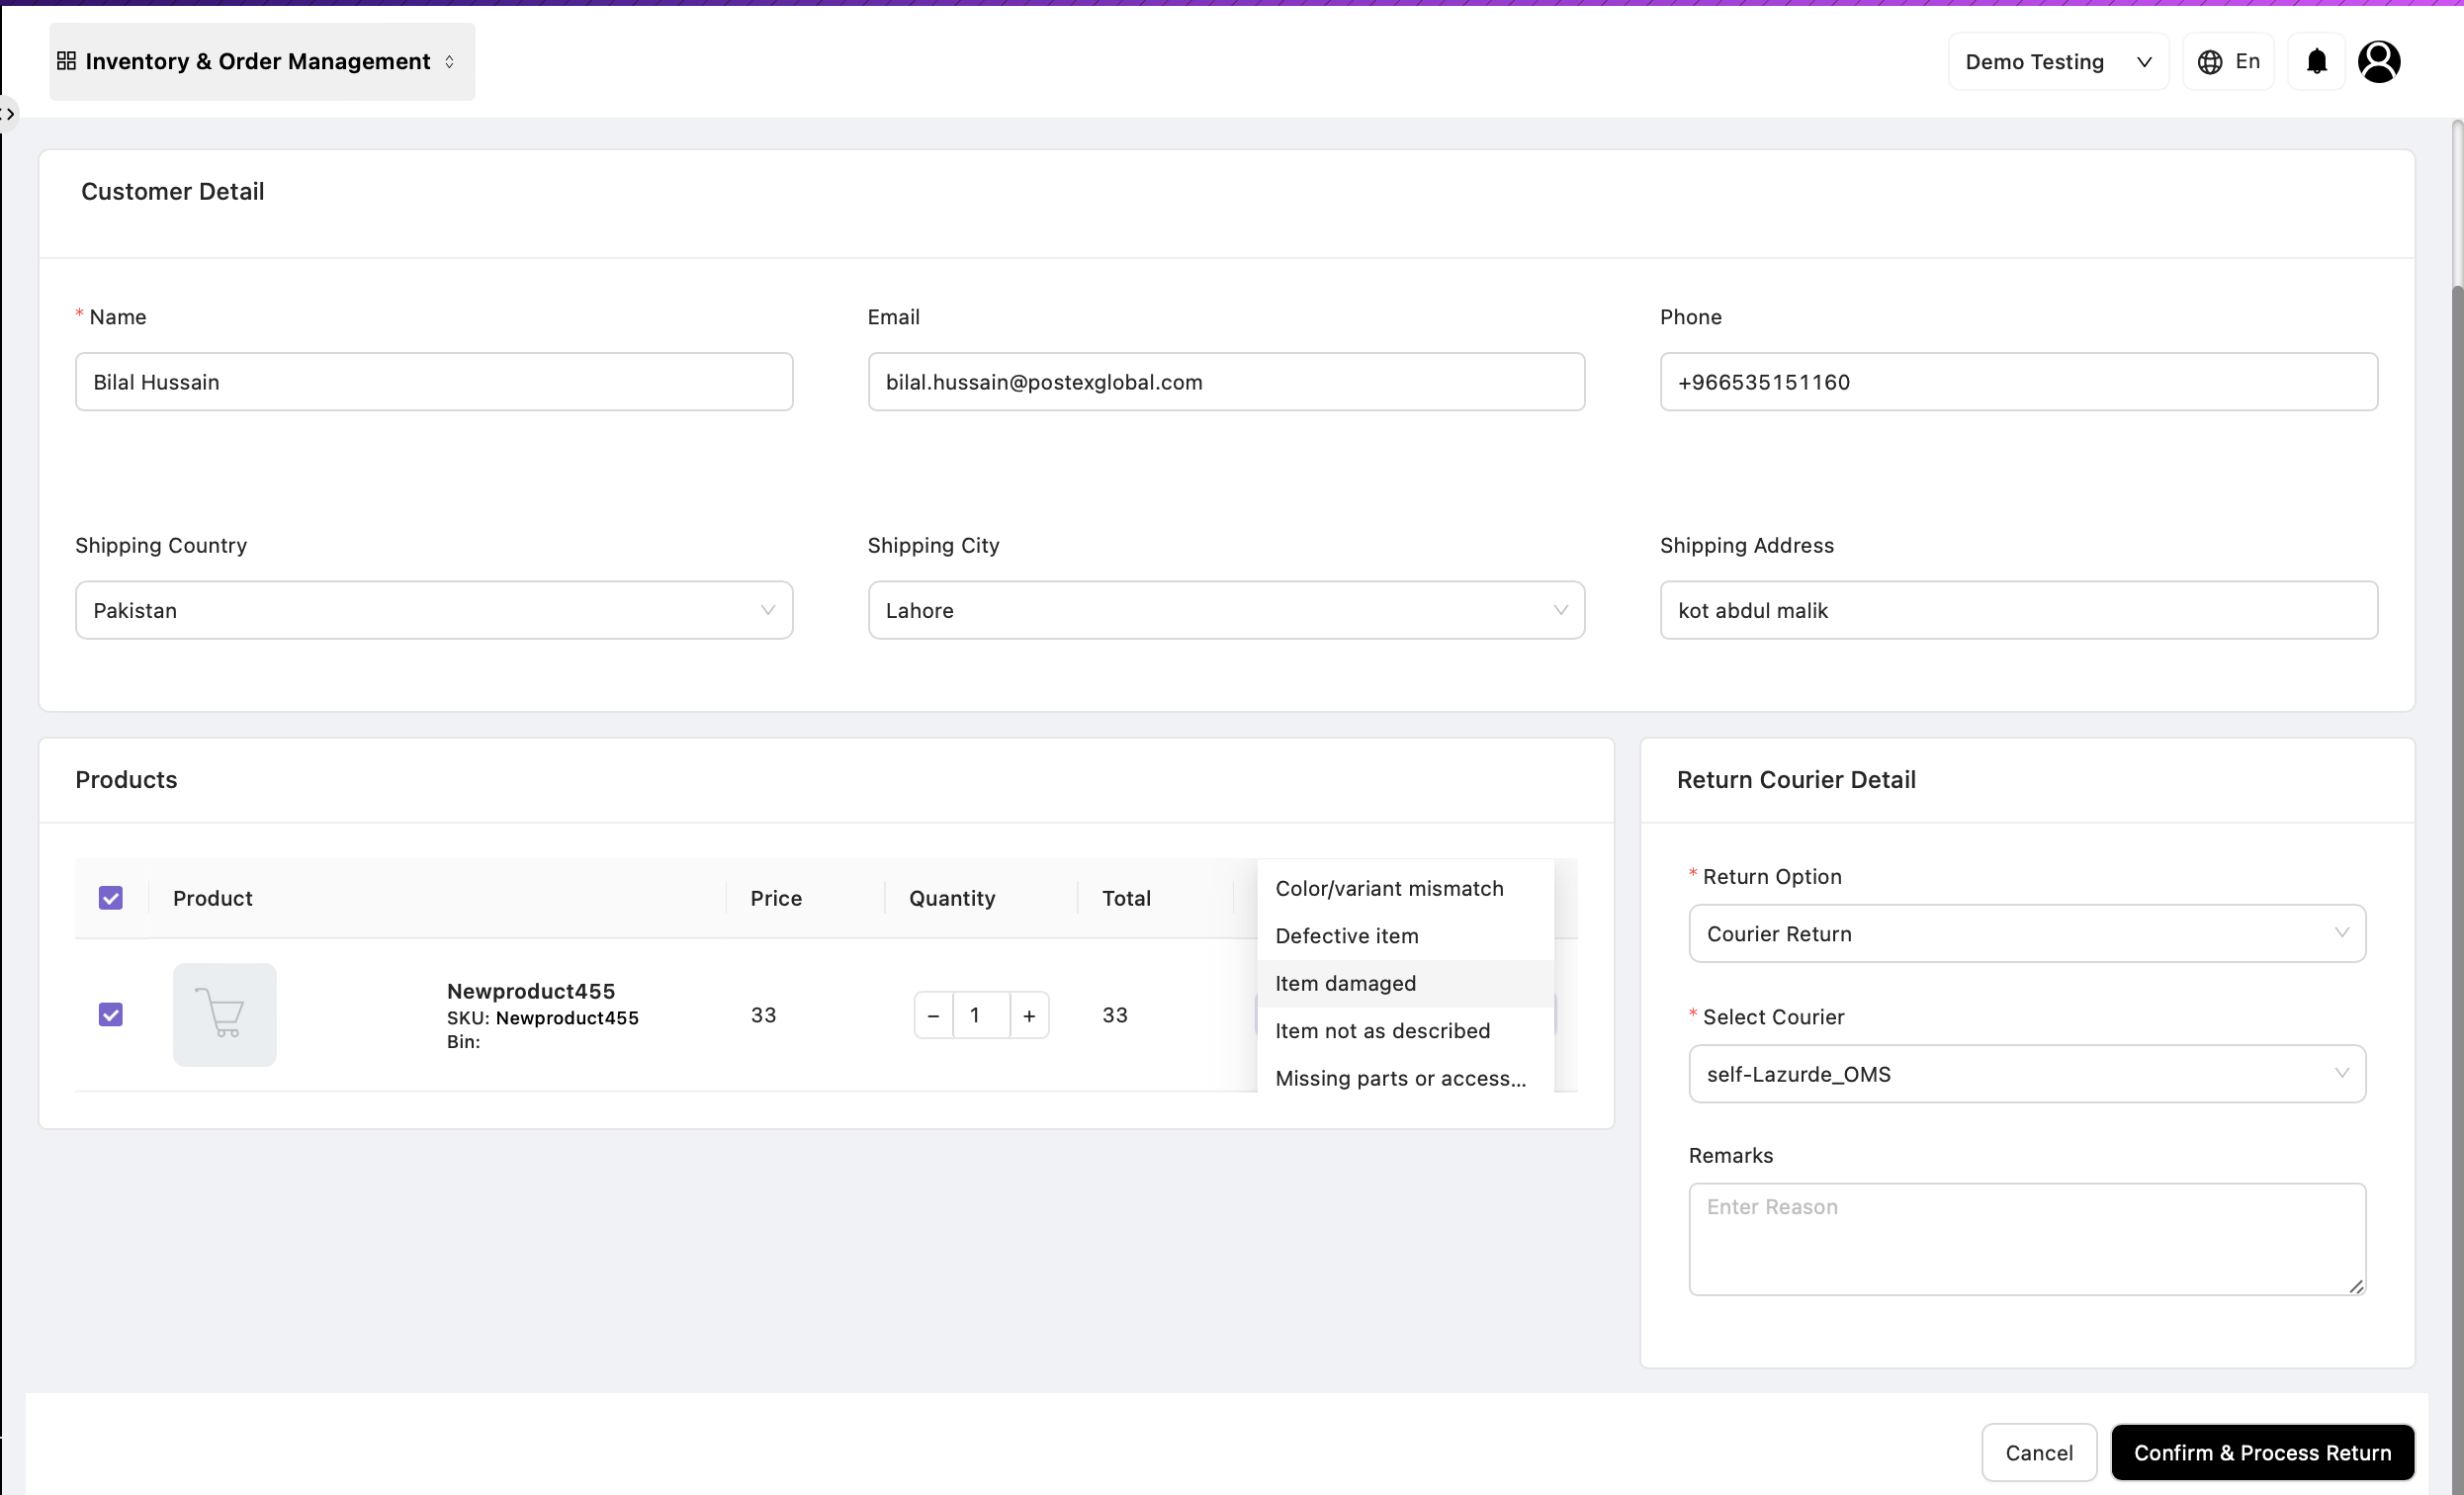
3.2 Product Selection
All products that were successfully delivered in the selected order are automatically displayed in the Product Details section.
Select Products for Return
-
If the customer wants to return all delivered products, use the bulk selection option to select all items simultaneously.
-
If the customer wants to return only specific items, individually select the required product(s).
Update Quantity
-
Enter the quantity for each product being returned.
-
The system will automatically adjust the product totals, quantities, and return amount accordingly based on the selected items and quantities.
Ensure that the selected products and quantities match the actual customer return request before proceeding.
Select Return Reason
Once the products are selected:
-
Choose the appropriate Return Reason from the dropdown menu.
-
This ensures that all return-related information and operational details are properly recorded and saved within the return request.
3.3 Return Courier Details
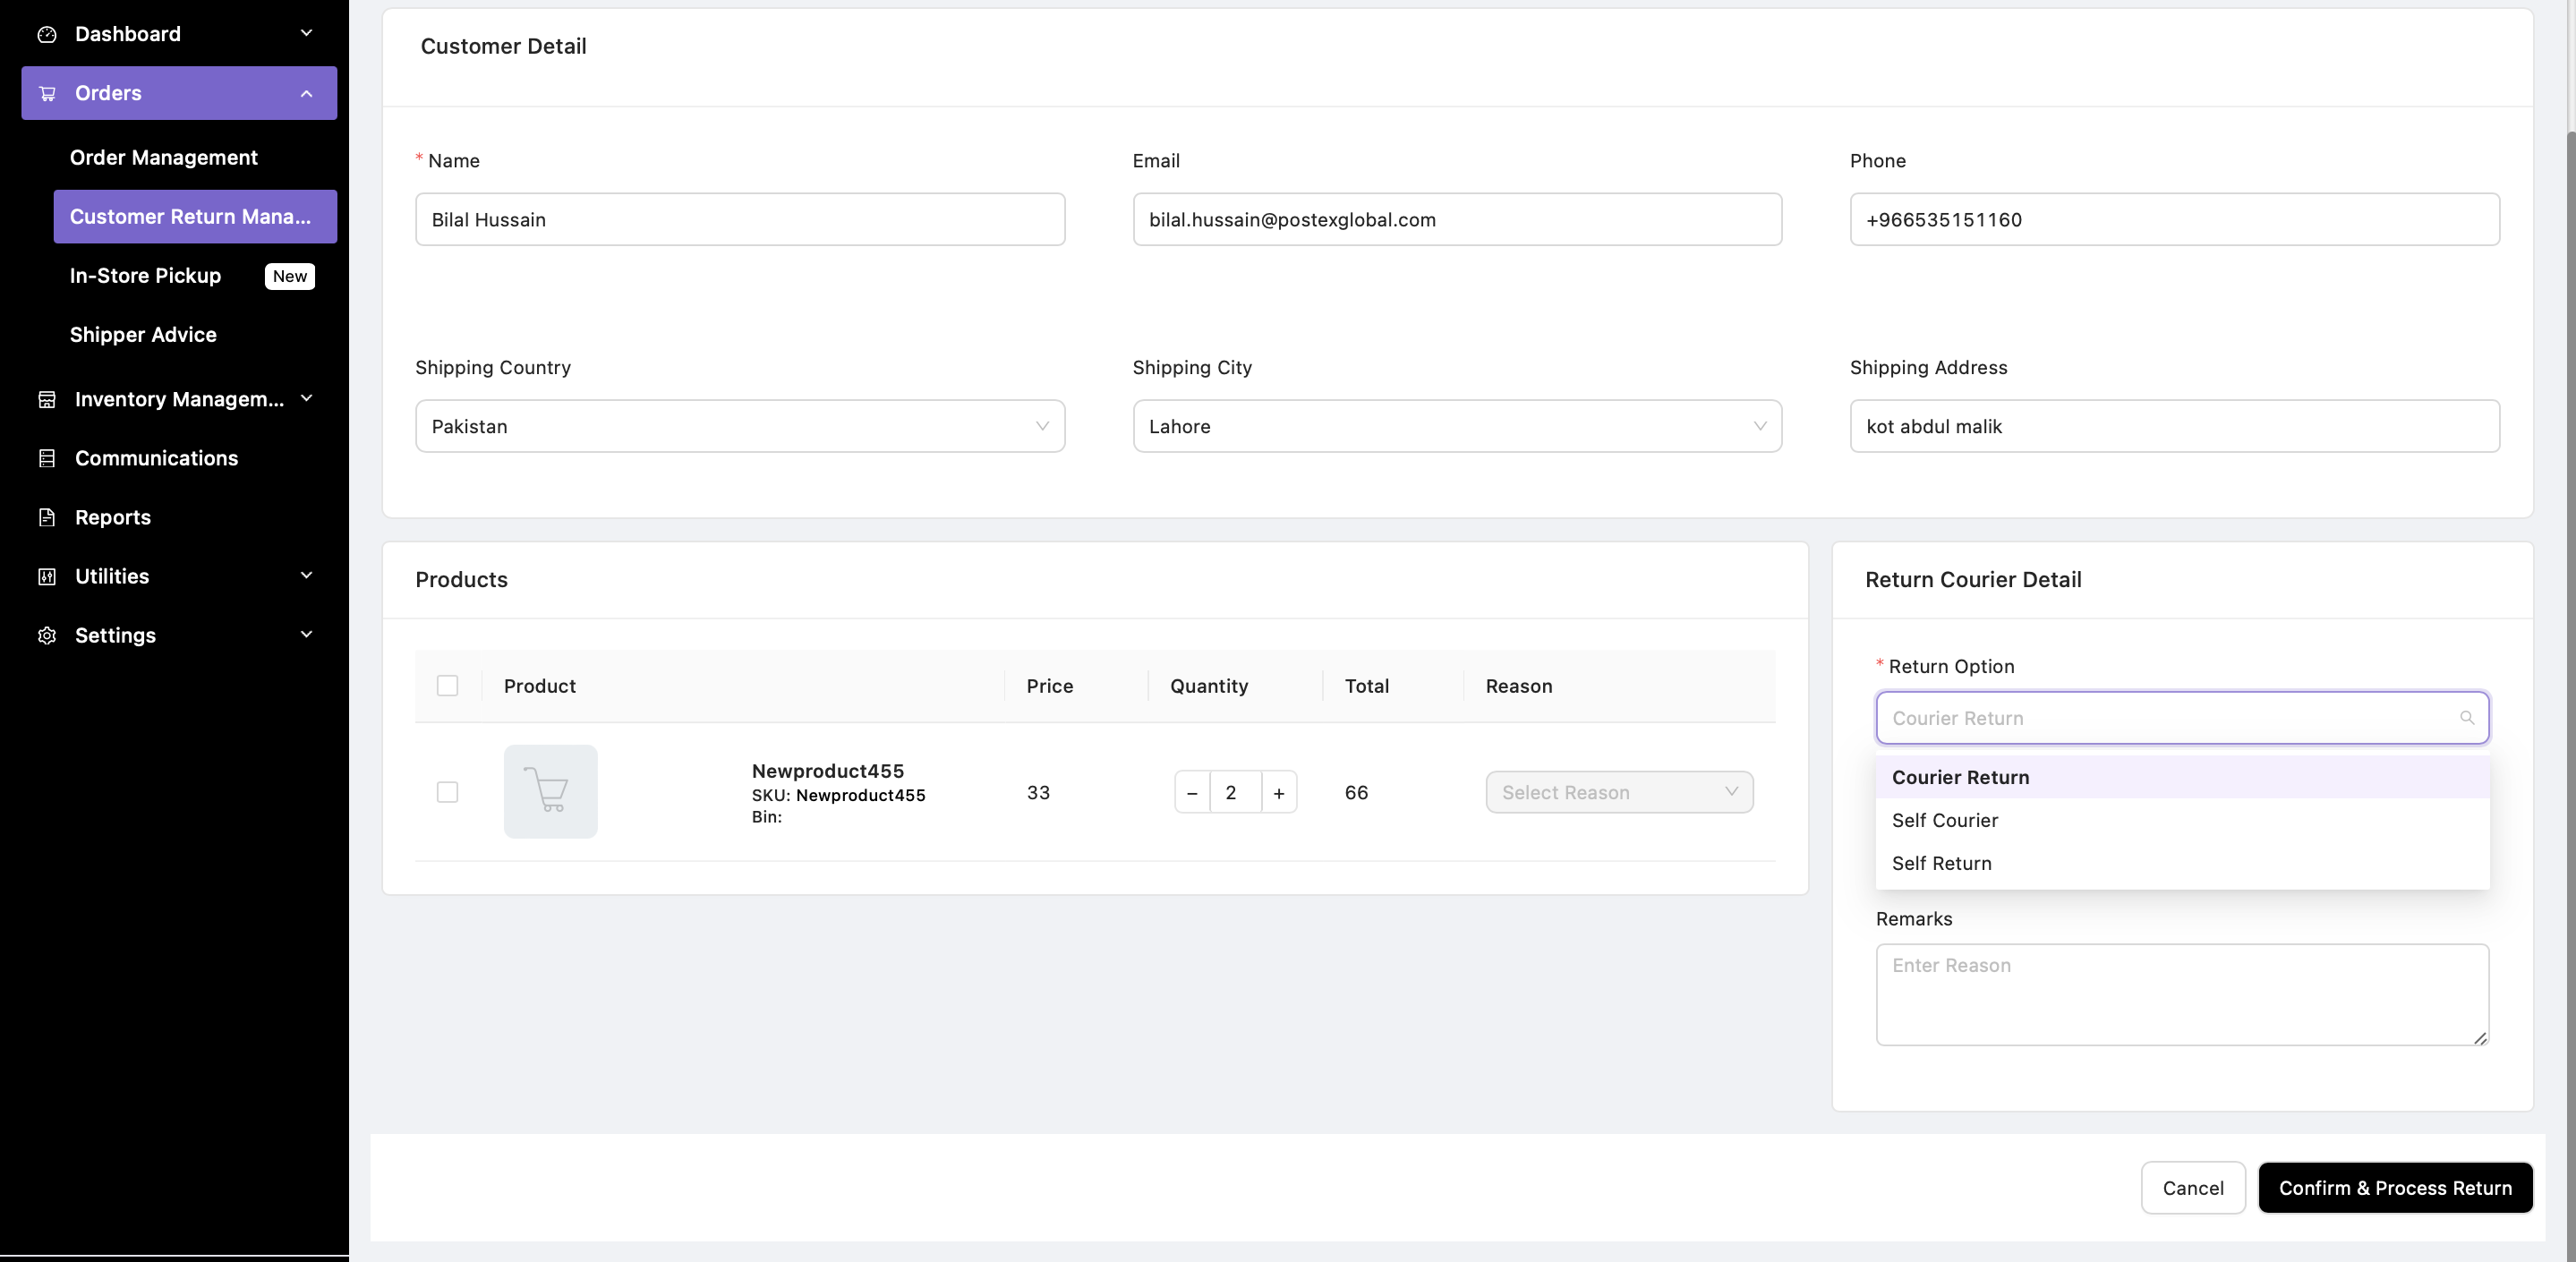
After selecting the products and return reason, navigate to the Return Courier Details section and choose the appropriate Return Option.
There are three available return methods:
-
Courier Return
-
Self Courier
-
Self Return
The required fields will vary depending on the selected return option.
Option 1 — Courier Return
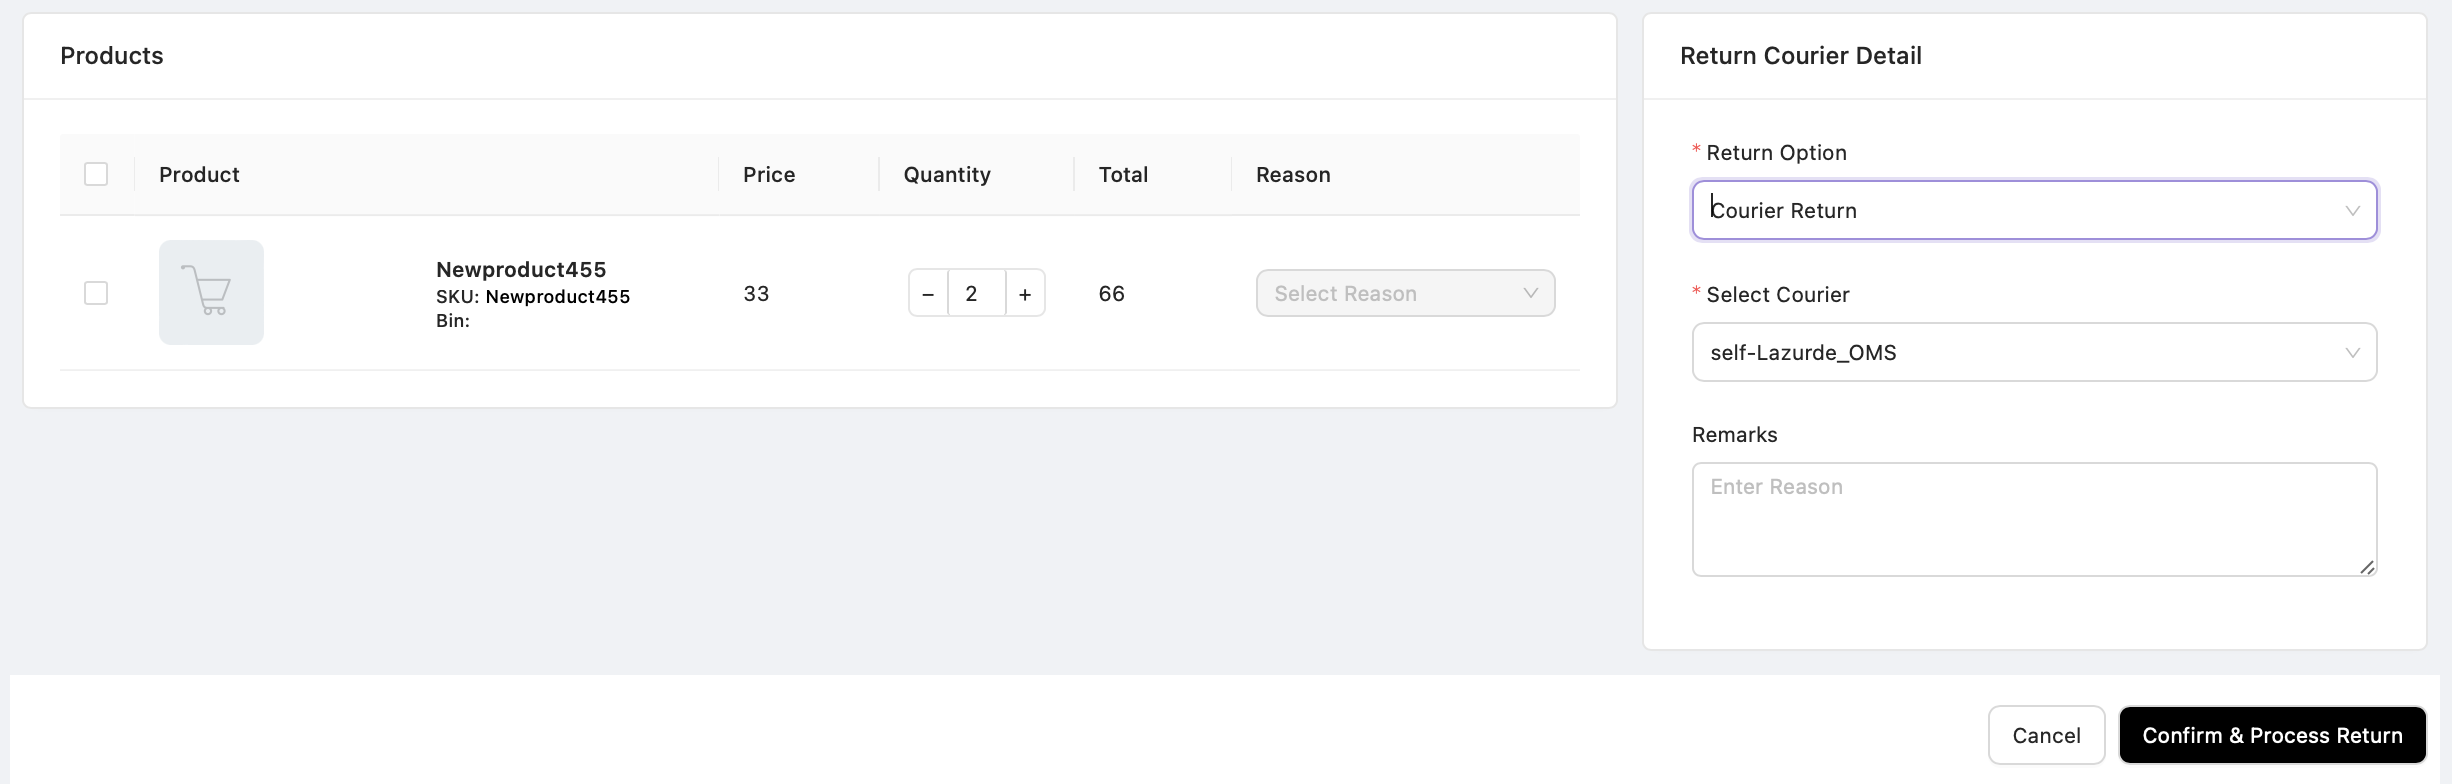
Select Courier Return when the return pickup will be handled through an integrated courier partner.
Complete the following fields:
Select Courier
-
Choose the courier from the dropdown list.
-
All enabled and configured couriers will be available for selection.
-
Select the courier through which you want the return shipment to be received.
Remarks
Add any instructions, notes, or courier-related remarks for the return order.
Option 2 — Self Courier
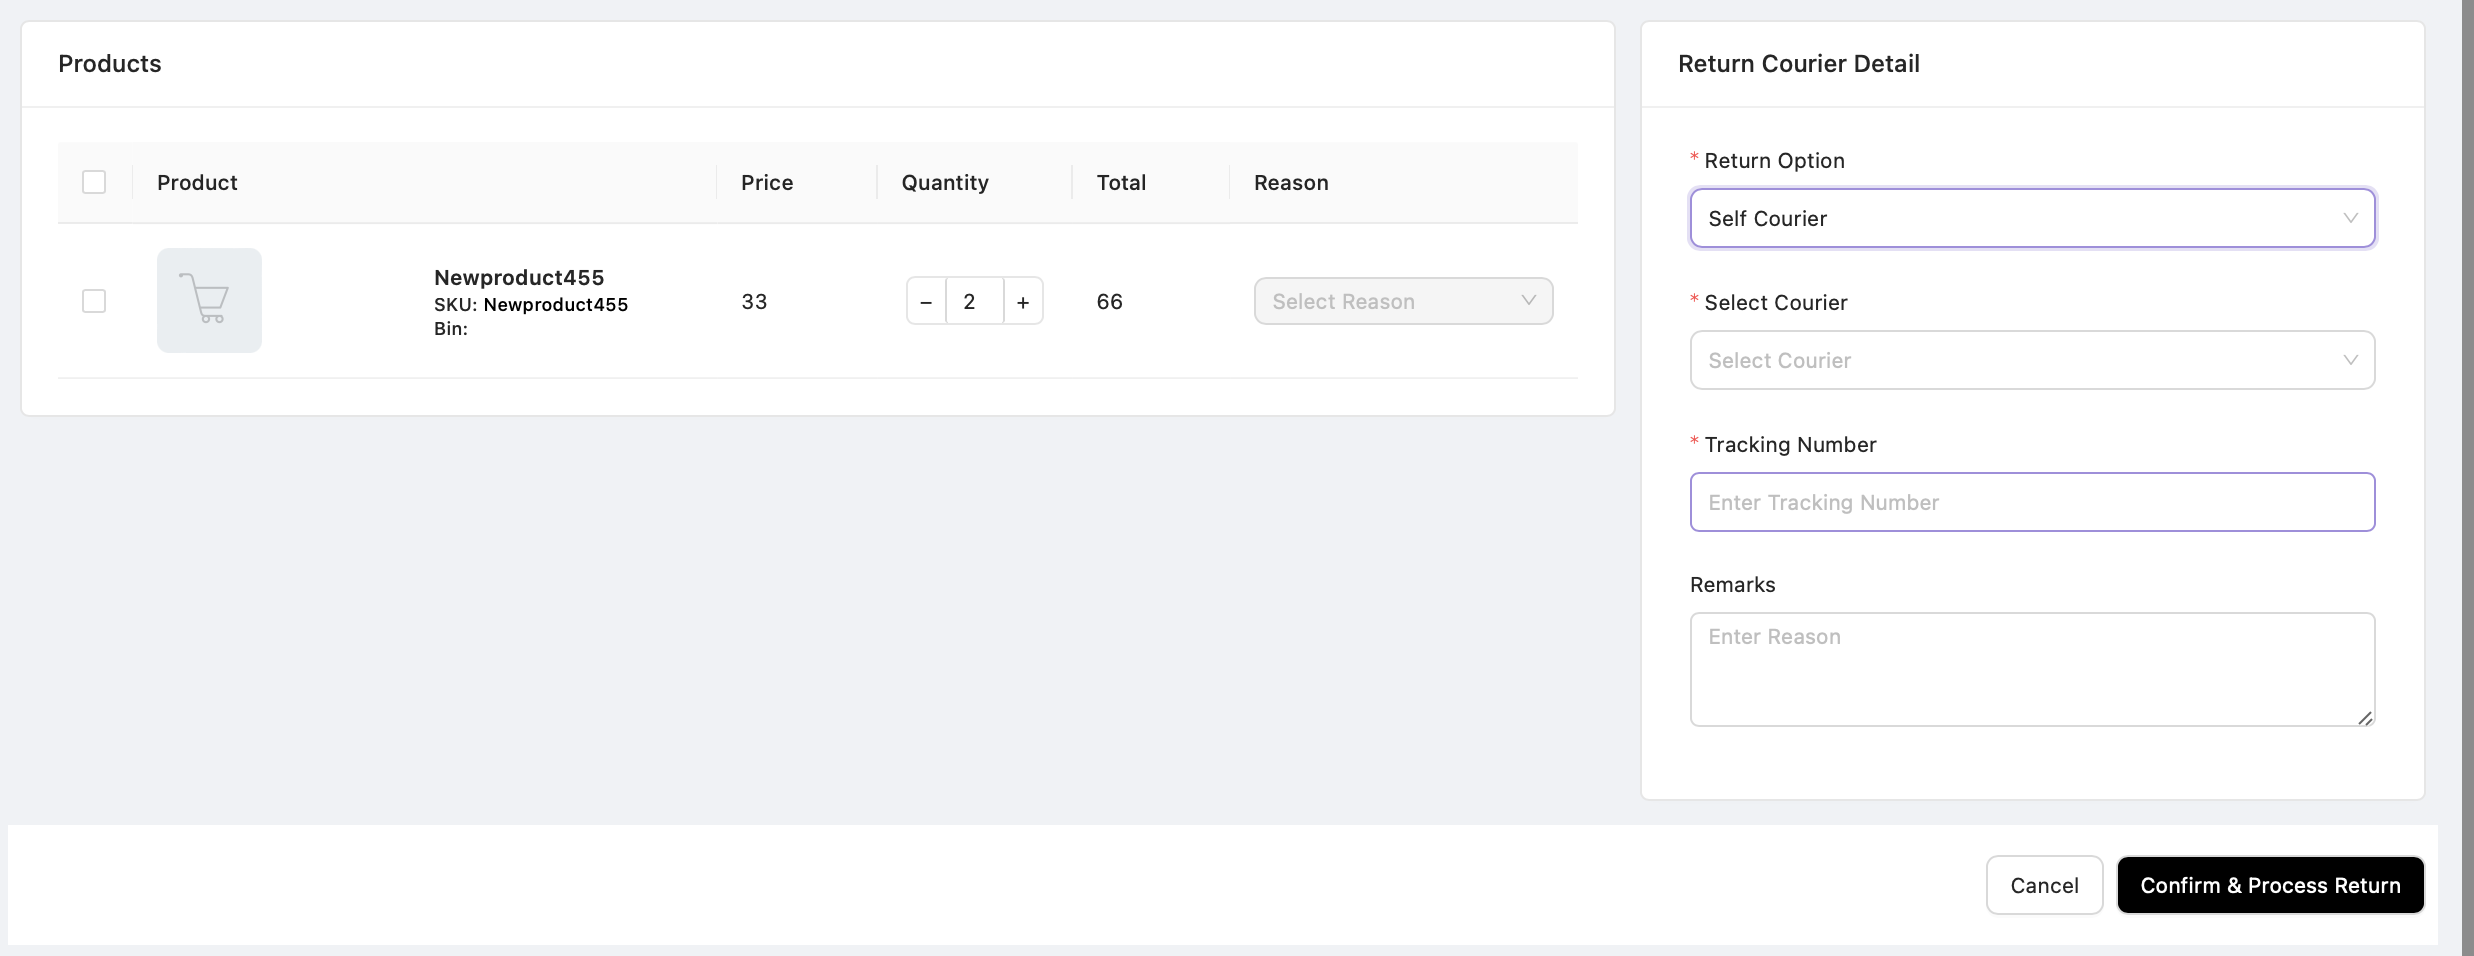
Select Self Courier when the customer arranges and ships the return using their own courier service.
Complete the following fields:
Return Option
Select Self Courier.
Select Courier
Choose the courier used by the customer from the dropdown list.
Tracking Number
Enter the courier tracking number provided for the shipment.
Remarks
Add any additional comments or return-related instructions.
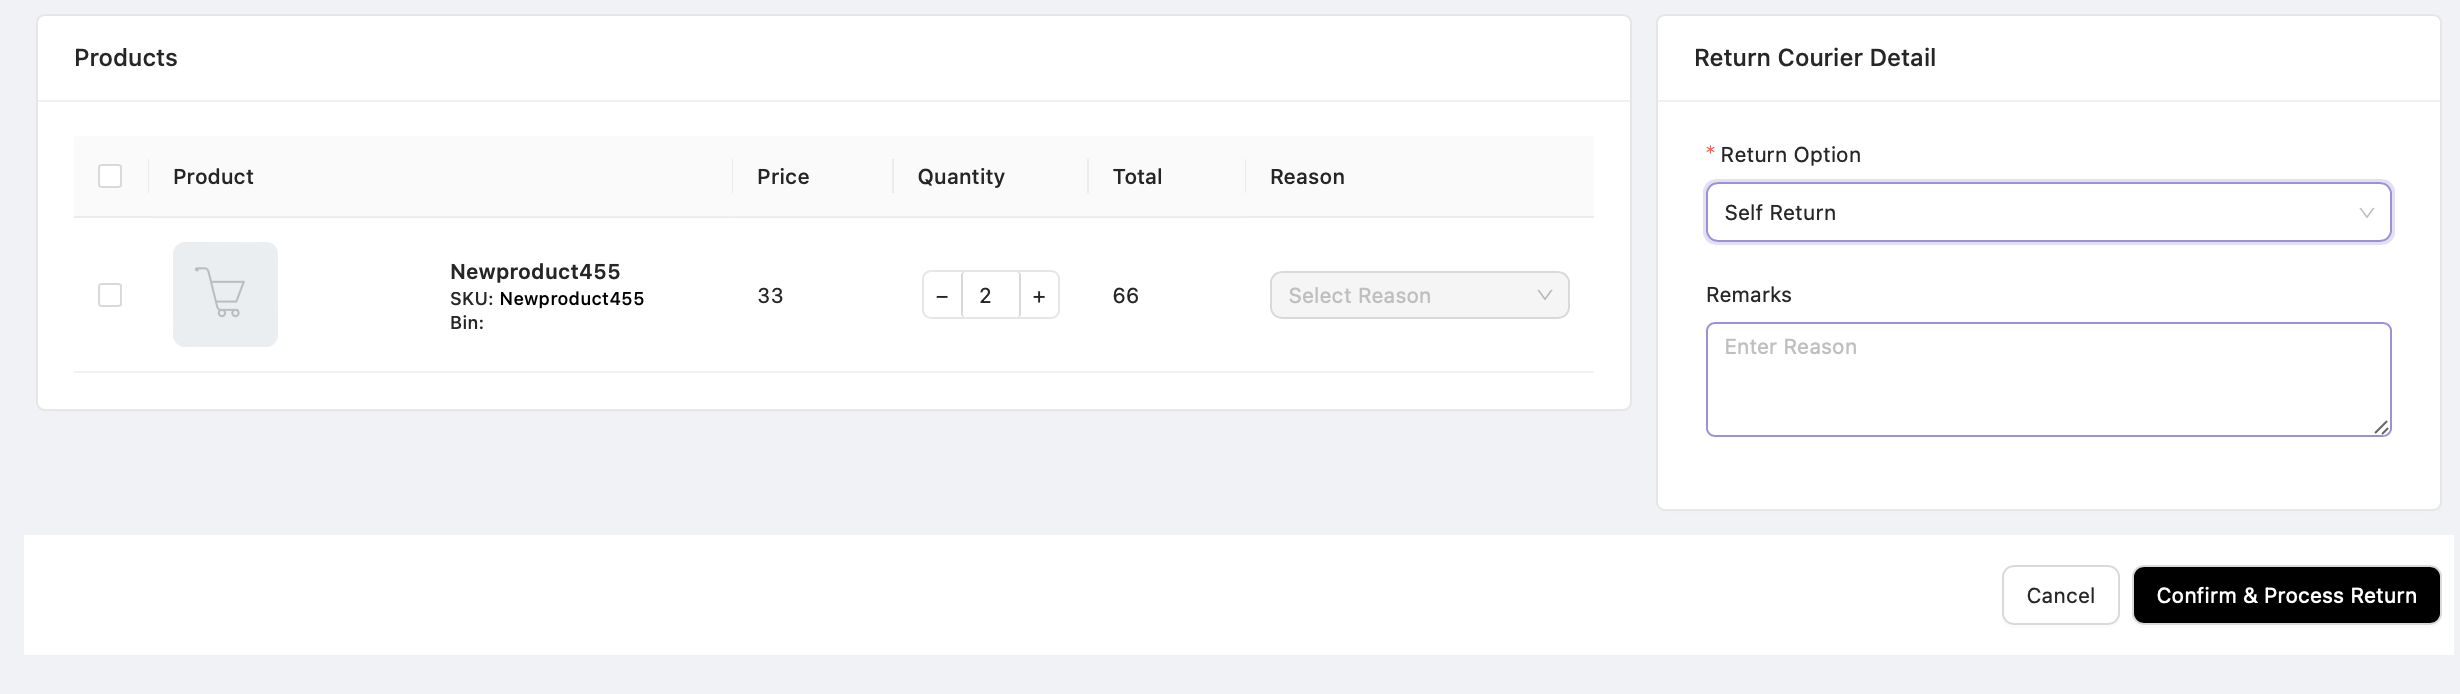
Option 3 — Self Return
Select Self Return when the customer will return the item independently without using a courier arranged through the system.
For this option, only the following field is required:
Remarks
Add any necessary notes or return instructions.
No courier details or tracking information are required for Self Return.
3.4 Confirm and Process the Return
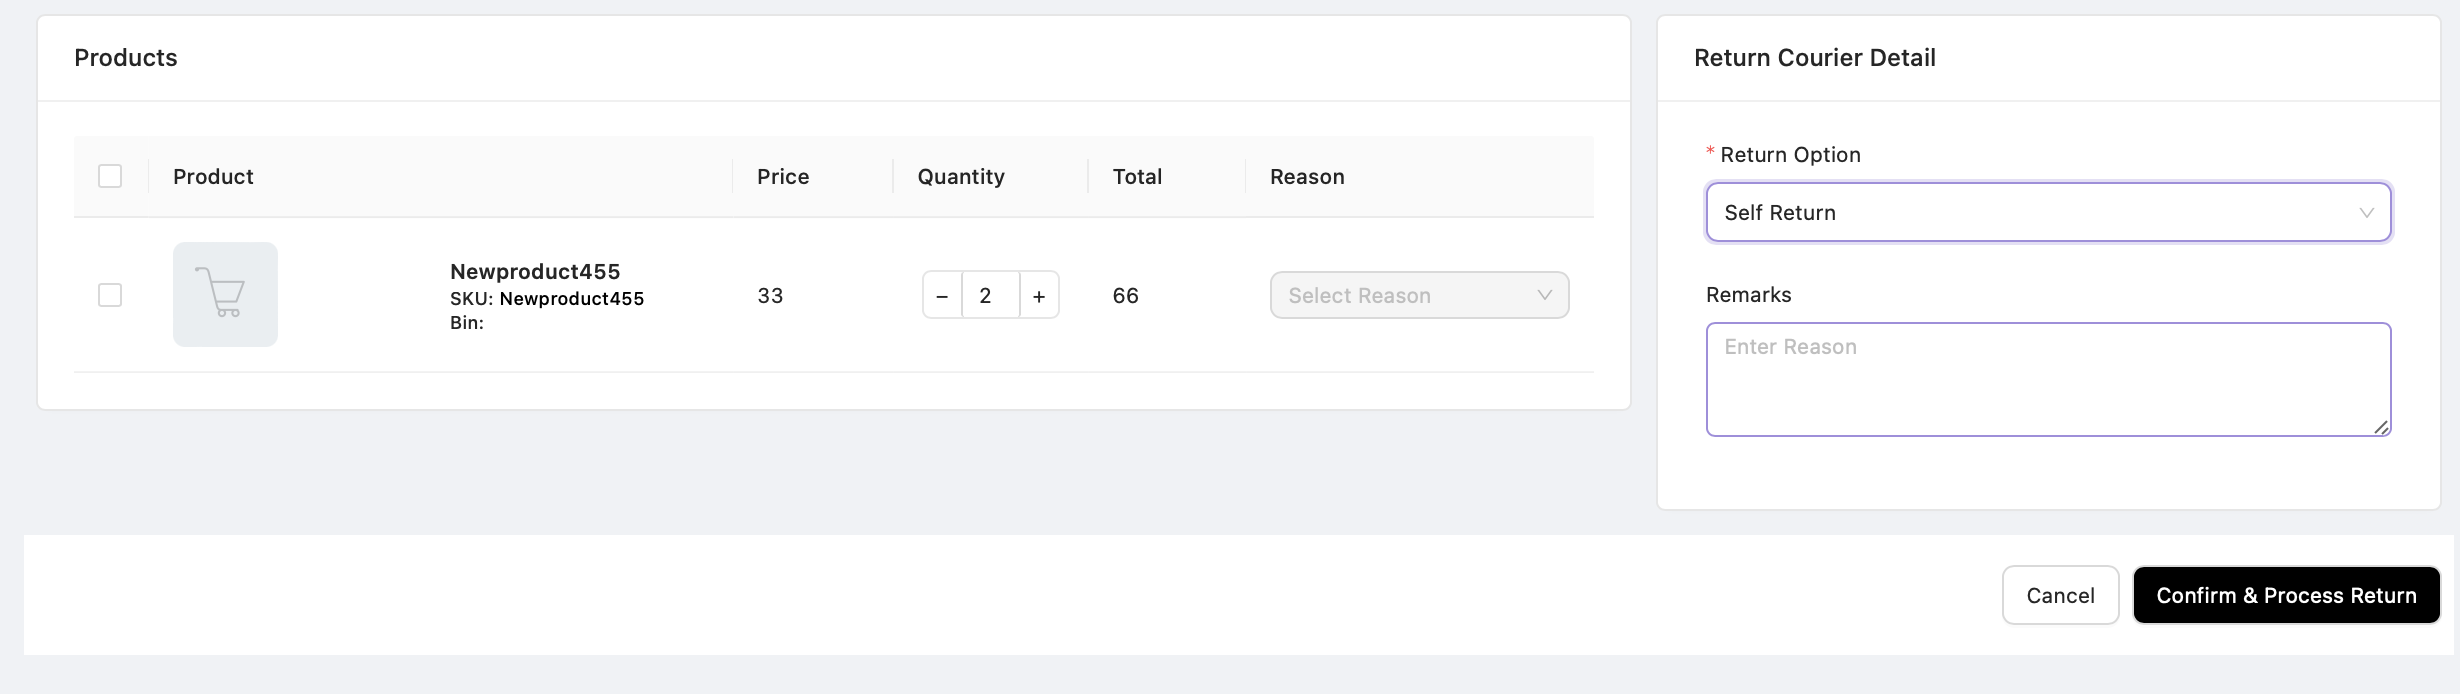
Once all required details are completed:
-
Review the entered information.
-
Click Save & Confirm to submit the return request.
After successful submission:
-
The return request will be initiated.
-
The order will automatically move to the Return Requested tab.
-
This provides clear visibility that a return request has been created and is awaiting review or further processing.