
Cluster Management enables businesses with multiple locations and sales channels to manage inventory distribution in a controlled, efficient, and channel-specific way.
A cluster is a configurable group of locations that can be linked to one or more sales channels.
This ensures that:
-
Inventory uploaded for any location within the cluster contributes only to that cluster.
-
The OutFinal (the final inventory file pushed to sales channels) is calculated based solely on the inventory of locations assigned to that specific cluster.
-
Inventory visibility becomes clear, isolated, and channel-specific, preventing accidental overstocking, underselling, or stock conflicts across channels.
Cluster management is essential for brands using:
-
Multiple warehouses
-
Separate local & international inventory pools
-
Retail + online shared inventory
-
Region-wise stock allocation
-
Testing environments for inventory
Key Rules of Clusters
-
One Sales Channel → One Cluster
A sales channel cannot belong to more than one cluster. -
One Location → One Cluster
A location can only be assigned to a single cluster. -
OutFinal Calculation
Only the locations inside the selected cluster will contribute inventory to the associated sales channel. -
Fully Editable
Cluster names, assigned locations, and channel assignments can be updated anytime.
How to Add a New Cluster
Step 1: Navigate to the Cluster Section
-
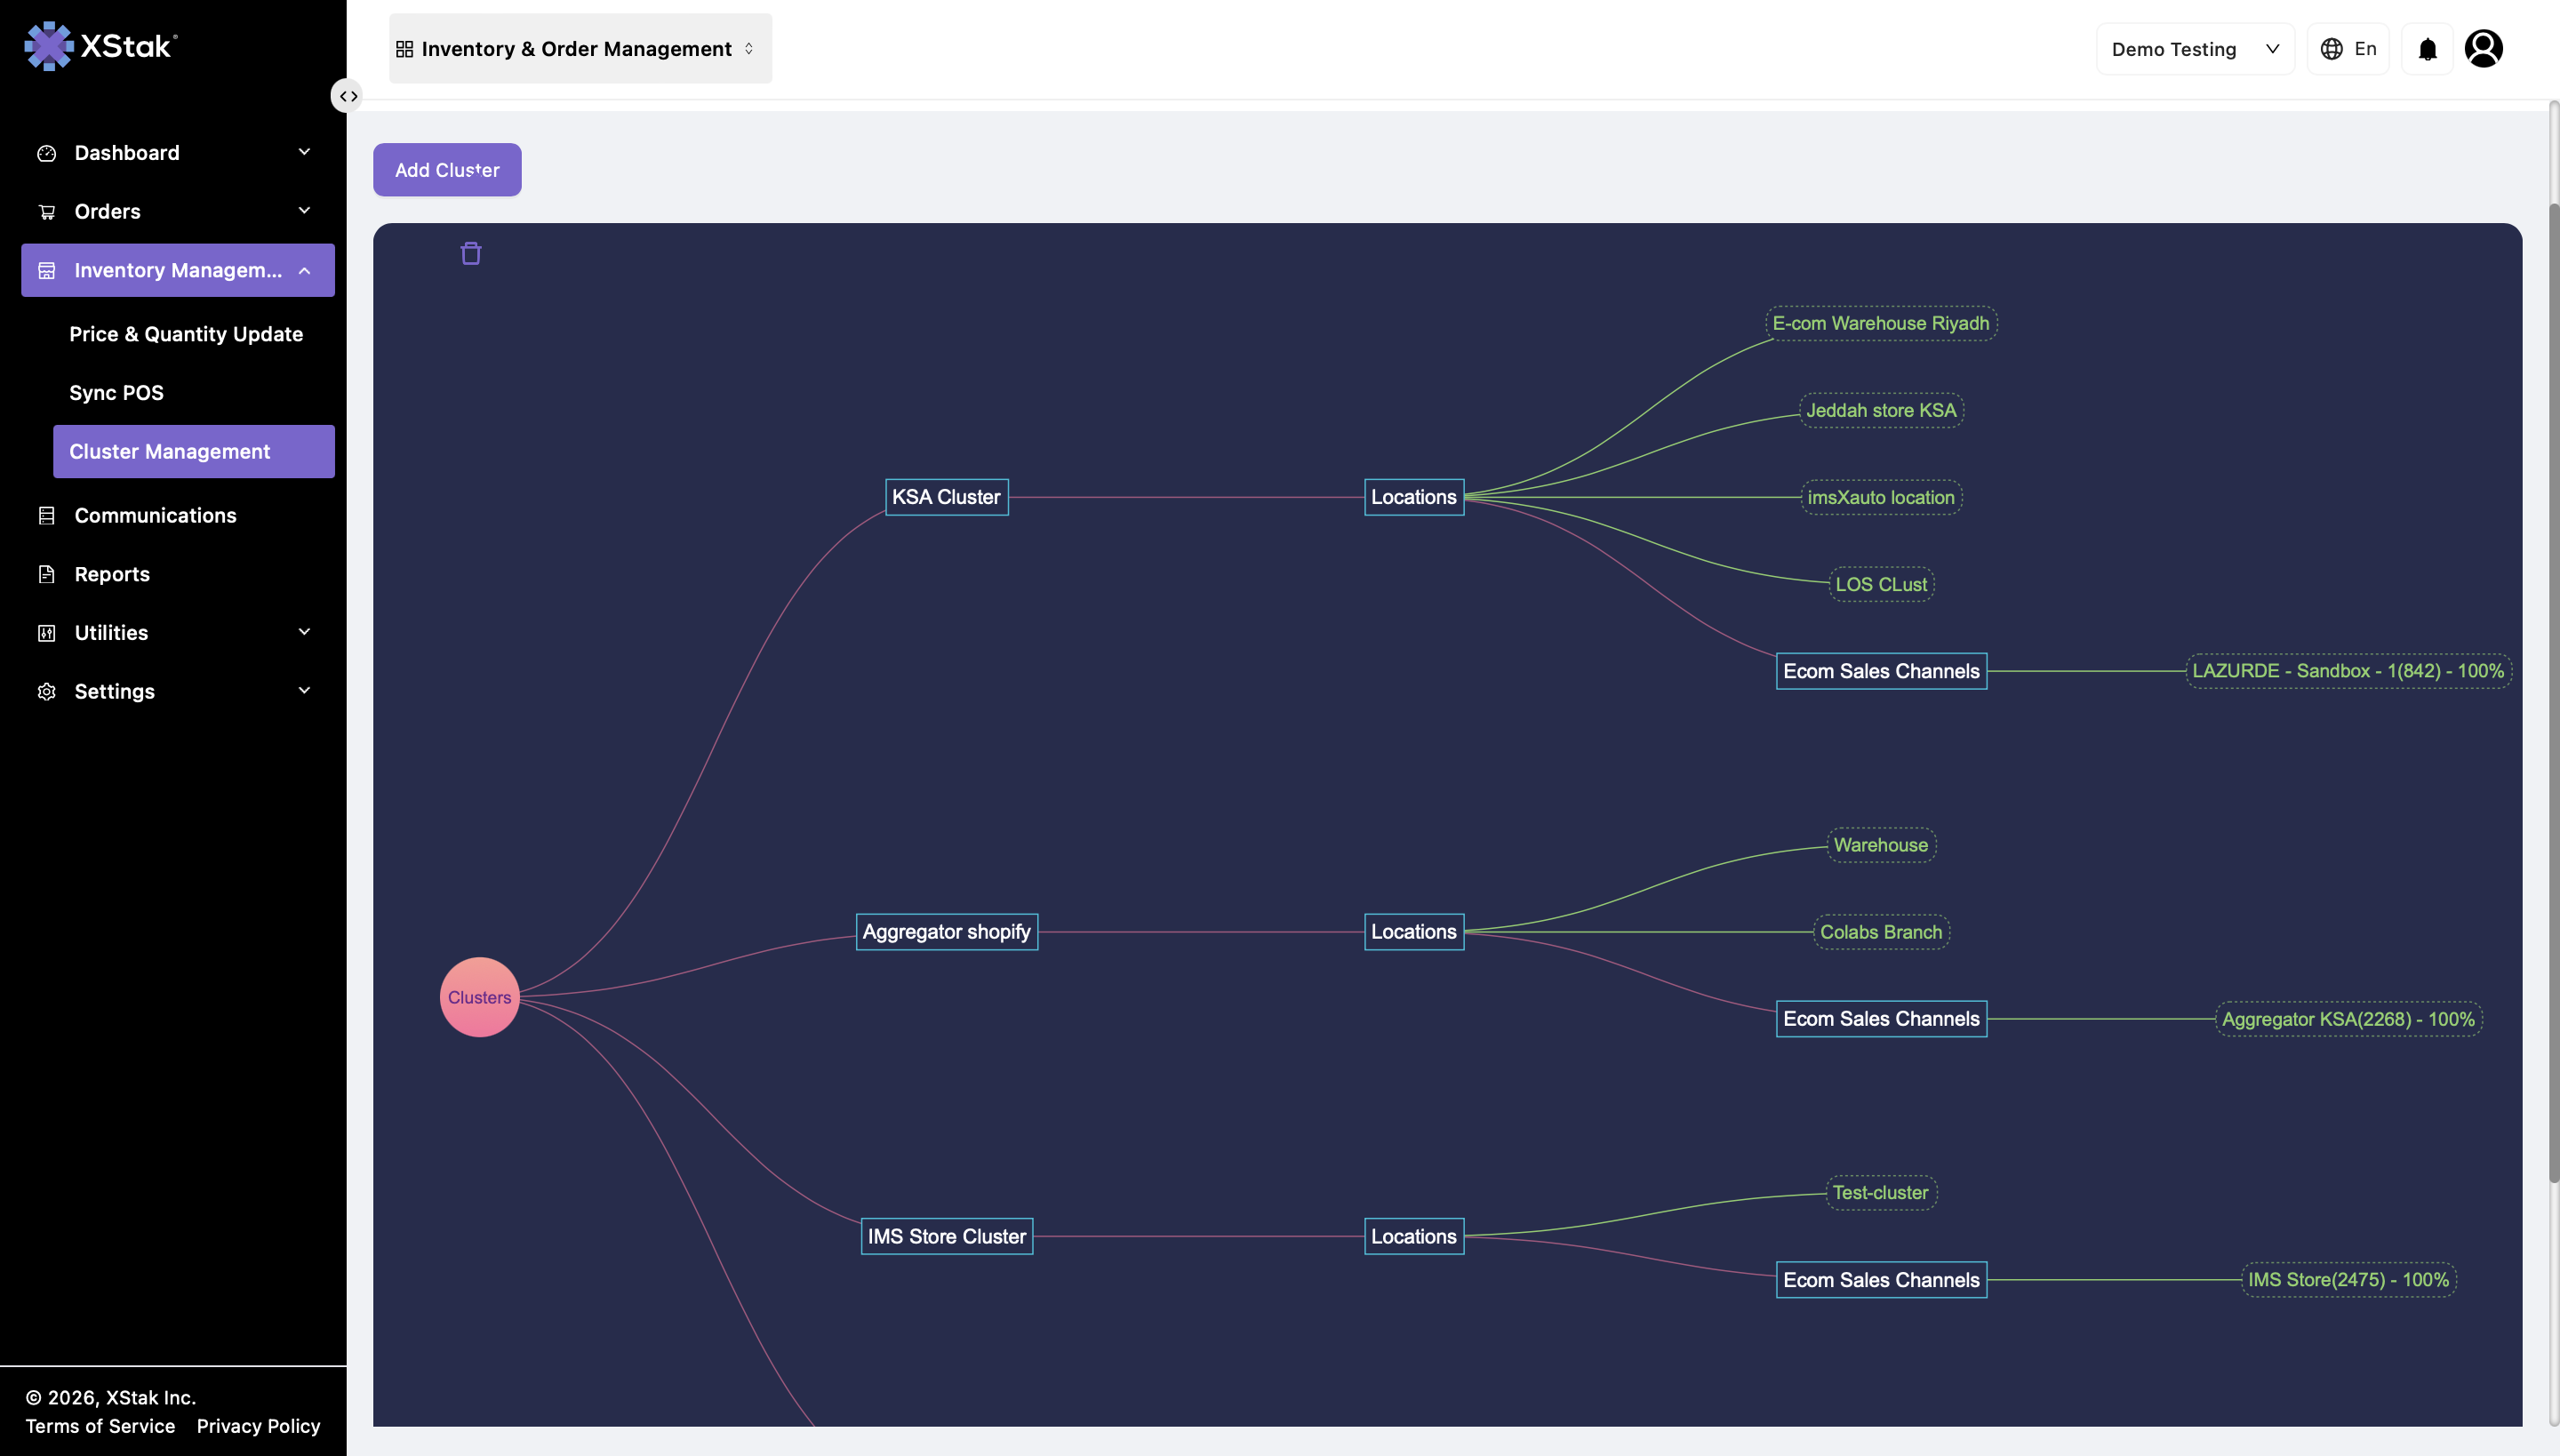
Open the Inventory Management tab from the sidebar.
-
A new option labeled Clusters will appear.
Step 2: Add a New Cluster
Click the Add Cluster button to begin the cluster creation process.

Step 3: Configure the New Cluster
You will be prompted to enter configuration details:
-
Cluster Name
Provide a unique and identifiable name. -
Select Locations
Choose one or multiple locations that will be part of this cluster.
Only available locations (not part of any other cluster) will be selectable. -
Assign Sales Channel(s)
Link the cluster to one or more existing sales channels. Only channels that are not already assigned to another cluster will be available for selection.
Step 4: Example of Cluster Creation
For demonstration:
-
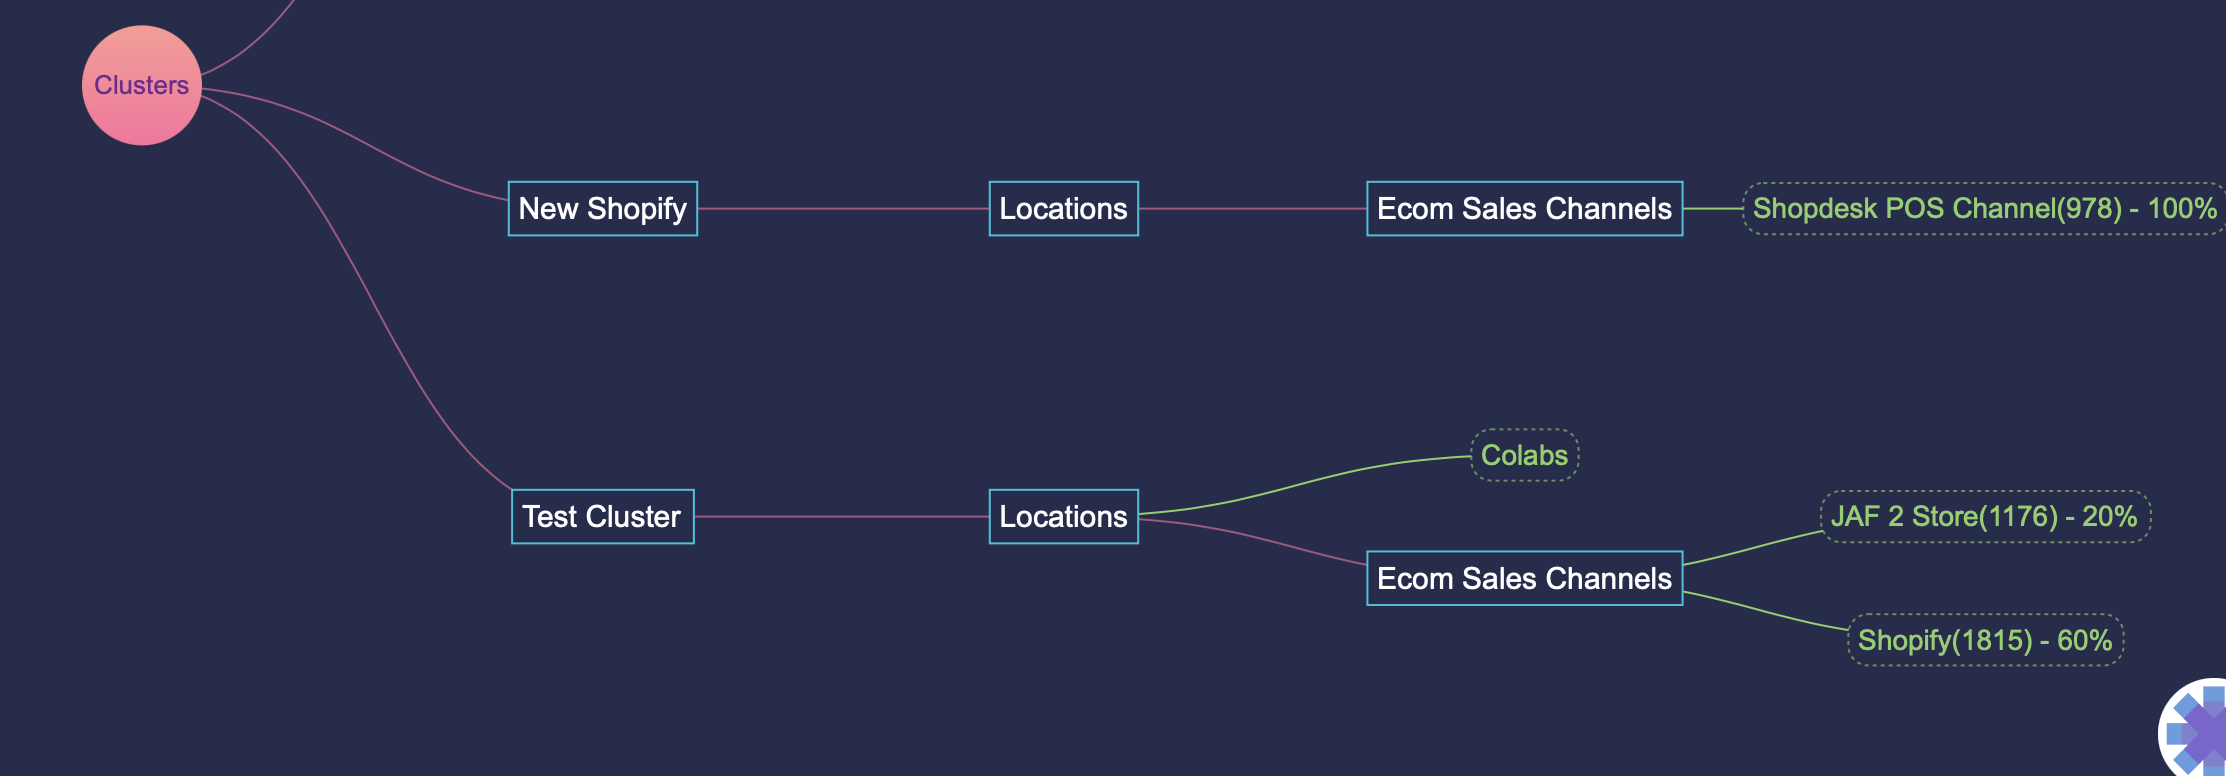
Cluster Name: Test Cluster
-
Assigned Locations: Colabs
-
Assigned Channel: JAF 2 store, Shopify
-
Brand Channel ID: 1176, 1815
Step 5: Cluster Overview
After creating clusters, the system displays a visual diagram showing:
-
All clusters
-
Their assigned locations
-
Their connected sales channels
Important Note:
Once a sales channel is assigned to a cluster, it becomes unavailable for assignment to any other cluster unless it is first removed from the existing cluster.
Step 6: Location Assignment Restrictions
Each location can belong to only one cluster at a time.
Example:
-
If Test-cluster is already added to Cluster Demo, it cannot be reused in another cluster.
Step 7: Editing Cluster Configurations
All cluster configurations can be modified anytime by clicking the Edit icon:
-
Change cluster name
-
Add or remove locations
-
Reassign sales channels
-
Update structure as requirements evolve

Step 8: Cluster Diagram Indicators
The cluster visualization panel uses color-coded indicators:
|
Indicator |
Description |
|---|---|
|
Red |
Disabled location |
|
Orange |
Location with fulfillment turned off |
|
Green / Default |
Active location with fulfillment enabled |
These indicators help teams quickly evaluate operational readiness across clusters.
Operational Use Cases
|
Use Case |
Cluster Implementation |
|---|---|
|
Marketplace inventory separated from website |
Create a dedicated cluster for each channel |
|
Testing new Shopify integration |
Assign only test locations to a test cluster |
|
Multiple warehouses |
Create regional clusters (e.g., North, South) |
|
High-volume sale events |
Temporarily move selected warehouse inventory to event-specific clusters |
Troubleshooting
|
Issue |
Reason |
Resolution |
|---|---|---|
|
Cannot add sales channel |
Channel already assigned to another cluster |
Remove from previous cluster |
|
Location not visible |
Already part of another cluster |
Edit previous cluster and unassign |
|
Wrong OutFinal pushed |
Incorrect cluster assignment |
Review cluster configuration |
|
Inventory mismatch |
Fulfillment off or location disabled |
Check color-coded indicators |