
The Couriers section is where you connect courier accounts to OMS. After a courier is added and activated, OMS can automatically book shipments through that courier’s API.
Step 1: Access the Couriers Section
-
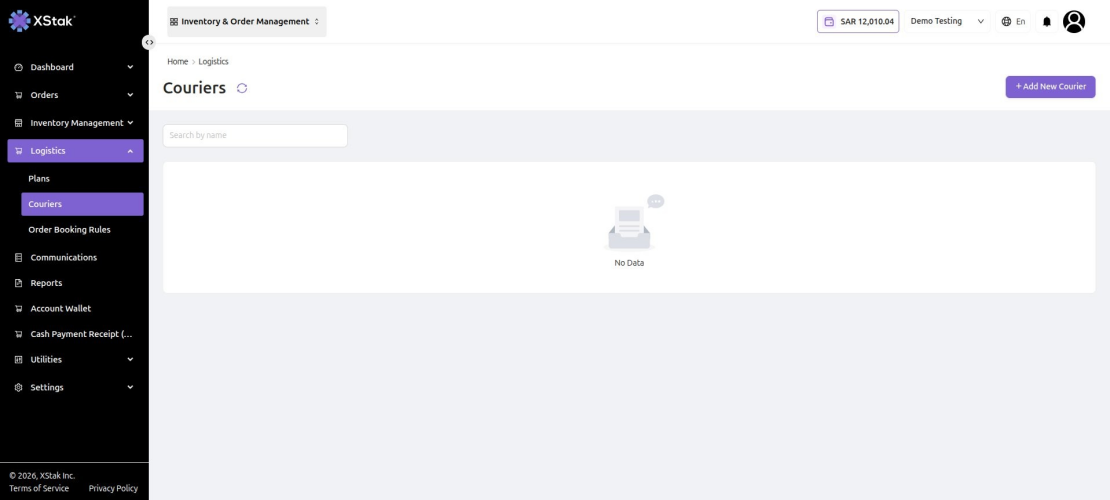
Click on Logistics from the left sidebar.
-
Select Couriers from the submenu.
If no couriers have been added yet, the list will display No Data.
-
Use the Search by name bar to find an existing courier.
Step 2: Add a New Courier
-
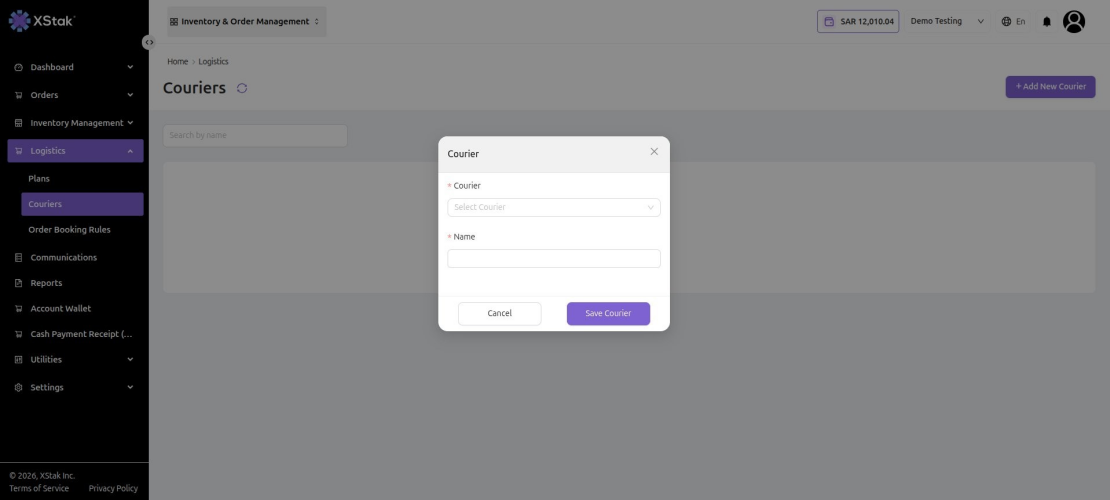
Click the + Add New Courier button in the top-right corner.
-
A Courier dialog will appear.
-
Click the Courier dropdown and select the courier you want to integrate.
The following couriers are available in the dropdown:
AHL, Ajex, Aramex, Aymakan, Barq, Barqraftar, BlueEx, BlueEx v2, Bosta, C3X, Call Courier, Cheetay, COLDT, Courier X, Daraz, Dayer, Deliverist, DEX, DHL, DHL Export, DoDeliver, Fastcoo, FastEx Daewoo, FedEx, FedEx International, Flow Express, Leopard, PackGo, PostEx, PostEx Partner, TCS, TCS v2, Transcorp, Tranzo, Trax, UPS, Vendor Logistics
-
Enter a display name for the courier in the Name field.
-
Fill in the courier-specific credentials that appear based on your selection (see details below).
-
Click Save Courier to save the configuration.
|
The credentials required in the form vary depending on which courier you select. All API keys, passwords, and tokens are available from your courier's merchant portal. |
Courier Setup: TCS v2
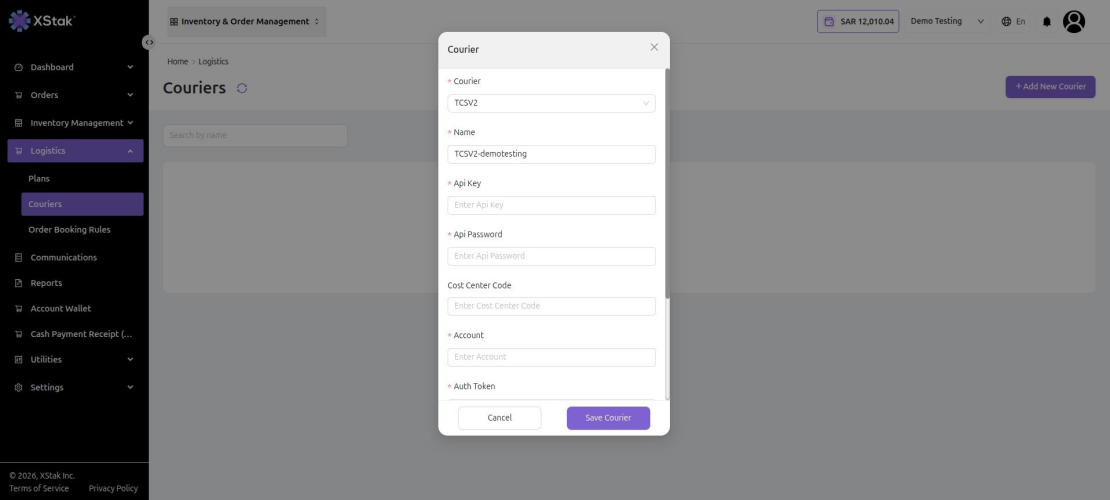
When TCS v2 is selected from the Courier dropdown, the following fields will appear:
|
Field |
Description |
|
Courier * |
Select TCS v2 from the dropdown. |
|
Name * |
Enter a display name (e.g., TCS-MainAccount). |
|
API Key * |
Enter the API Key from your TCS merchant portal. |
|
API Password * |
Enter the API Password from your TCS merchant portal. |
|
Cost Center Code |
Enter your Cost Center Code (if applicable). |
|
Account * |
Enter your TCS Account identifier. |
|
Auth Token * |
Enter the Auth Token provided by TCS. |
|
Access Token * |
Enter the Access Token provided by TCS. |
|
Print Type * |
Select label format: 3 Copies Per Page, 6×4 Label, or Single Copy Per Page. |
TCS v2 courier configuration form
-
Once all fields are filled, toggle Enable to On to activate the courier.
-
Click Save Courier.
Courier Setup: Leopard
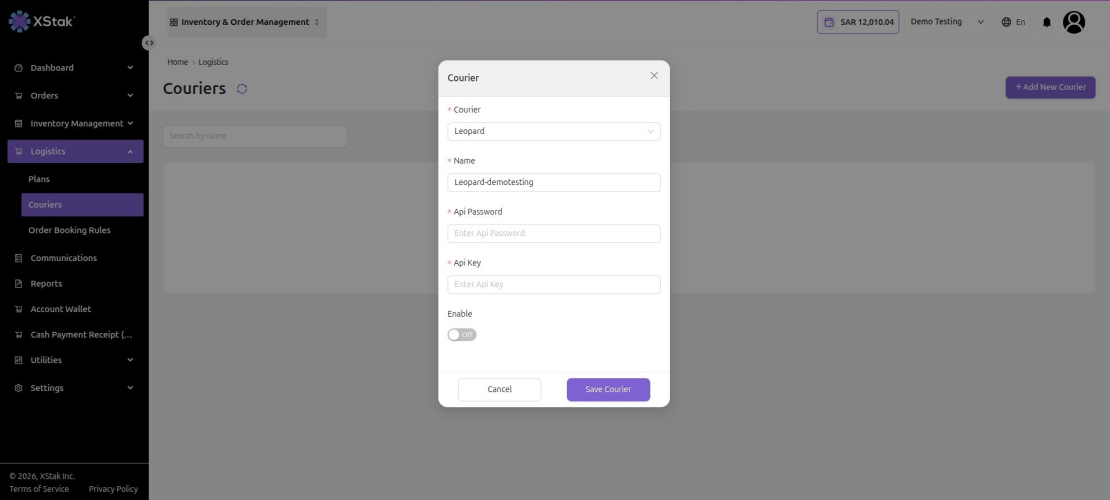
When Leopard is selected, the following fields will appear:
|
Field |
Description |
|
Courier * |
Select Leopard from the dropdown. |
|
Name * |
Enter a display name (e.g., Leopard-Main). |
|
API Password * |
Enter the API Password from your Leopard merchant portal. |
|
API Key * |
Enter the API Key from your Leopard merchant portal. |
|
Enable |
Toggle On to activate this courier after saving. |
Leopard courier configuration form
-
Toggle Enable to On.
-
Click Save Courier.
|
ℹ️ All required credentials (API Key, API Password) are available from the Leopard merchant portal. |
Courier Setup: BlueEx
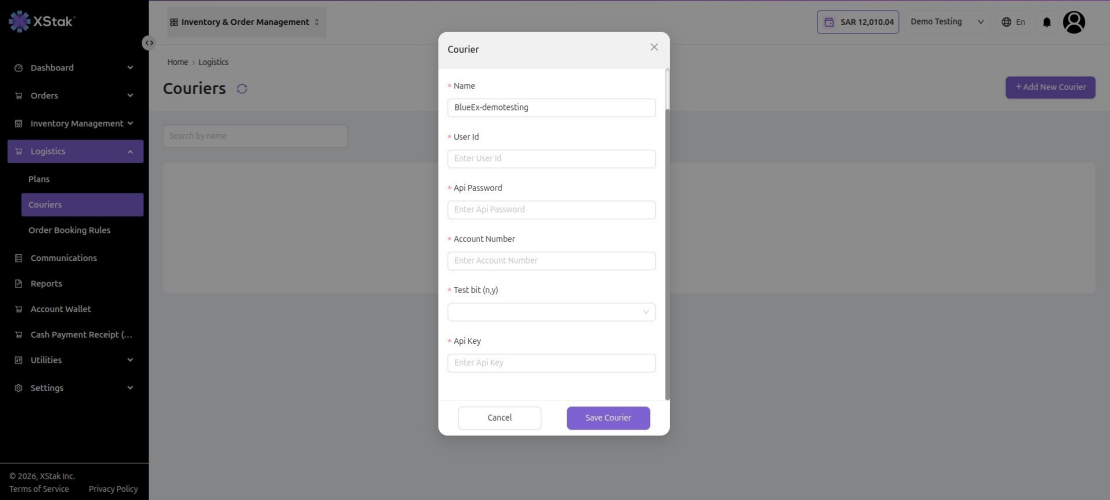
When BlueEx is selected, the following fields will appear:
|
Field |
Description |
|
Courier * |
Select BlueEx from the dropdown. |
|
Name * |
Enter a display name (e.g., BlueEx-Main). |
|
User ID * |
Enter the User ID from your BlueEx merchant portal. |
|
API Password * |
Enter your API Password. |
|
Account Number * |
Enter your BlueEx Account Number. |
|
Test Bit (n,y) * |
Select n for live mode or y for test/sandbox mode. |
|
API Key * |
Enter the API Key from your BlueEx merchant portal. |
BlueEx courier configuration form
-
Click Save Courier once all fields are filled.
|
ℹ️ All required credentials are available from the BlueEx merchant portal. |
Courier Setup: PostEx
PostEx operates at the merchant level — a single integration covers all shipments under your merchant account.
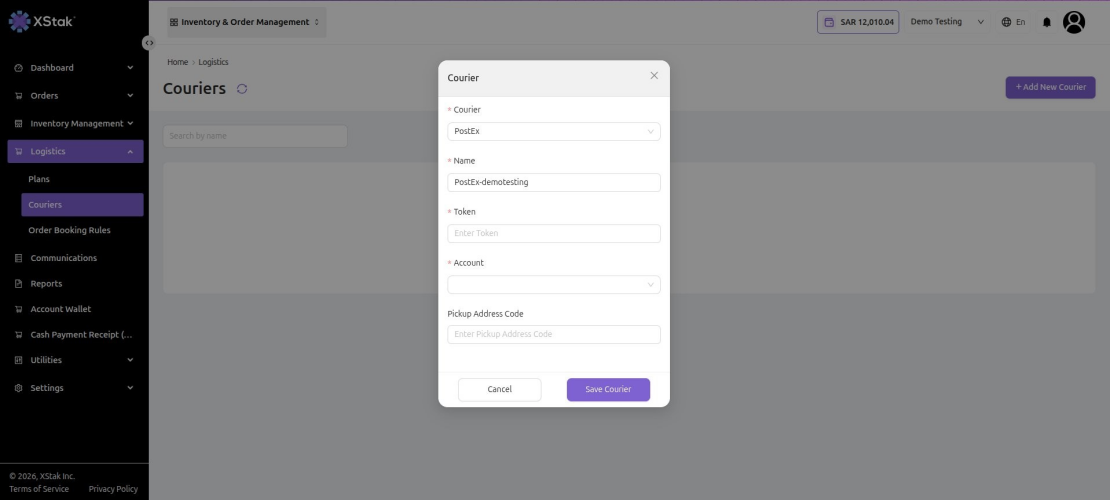
When PostEx is selected, the following fields will appear:
|
Field |
Description |
|
Courier * |
Select PostEx from the dropdown. |
|
Name * |
Enter a display name (e.g., PostEx-Main). |
|
Token * |
Enter the API Token from your PostEx merchant portal. |
|
Account * |
Select your merchant account from the dropdown. |
|
Pickup Address Code |
Enter your Pickup Address Code (available from PostEx portal). |
PostEx courier configuration form
-
Click Save Courier.
|
ℹ️ PostEx works at the merchant level — one integration covers all your orders under the same merchant account. |
Courier Setup: PostEx Partner
PostEx Partner differs from PostEx in that pickups are managed per location rather than per merchant account. This allows different fulfillment locations to have separate pickup addresses.
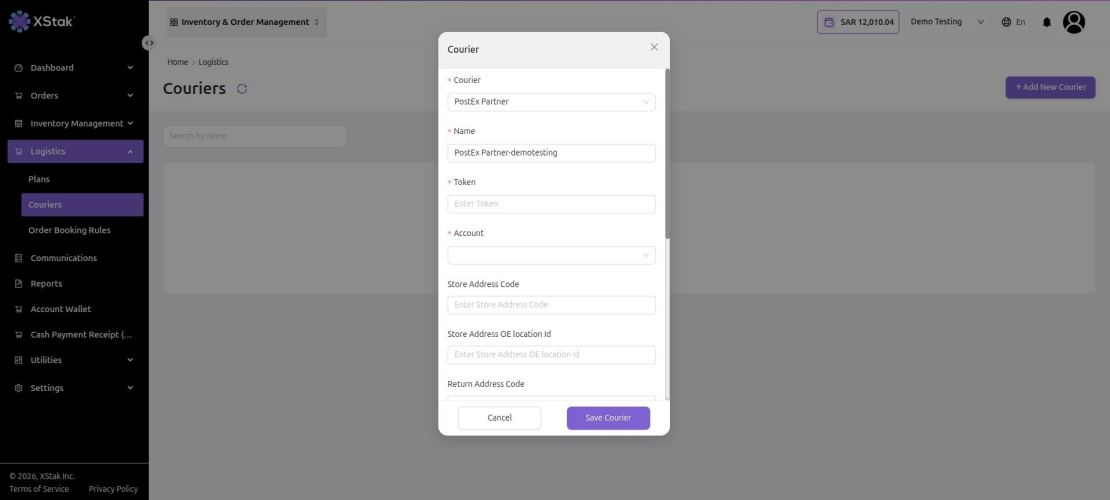
When PostEx Partner is selected, the following fields will appear:
|
Field |
Description |
|
Courier * |
Select PostEx Partner from the dropdown. |
|
Name * |
Enter a display name (e.g., PostEx-Partner-Lahore). |
|
Token * |
Enter the API Token from your PostEx portal. |
|
Account * |
Select your merchant account from the dropdown. |
|
Store Address Code |
Enter the Store Address Code for the pickup location. |
|
Store Address OE Location ID |
Enter the OMS Location ID that maps to this store address. |
|
Return Address Code |
Enter the Return Address Code for this location. |
PostEx Partner courier configuration form — top section
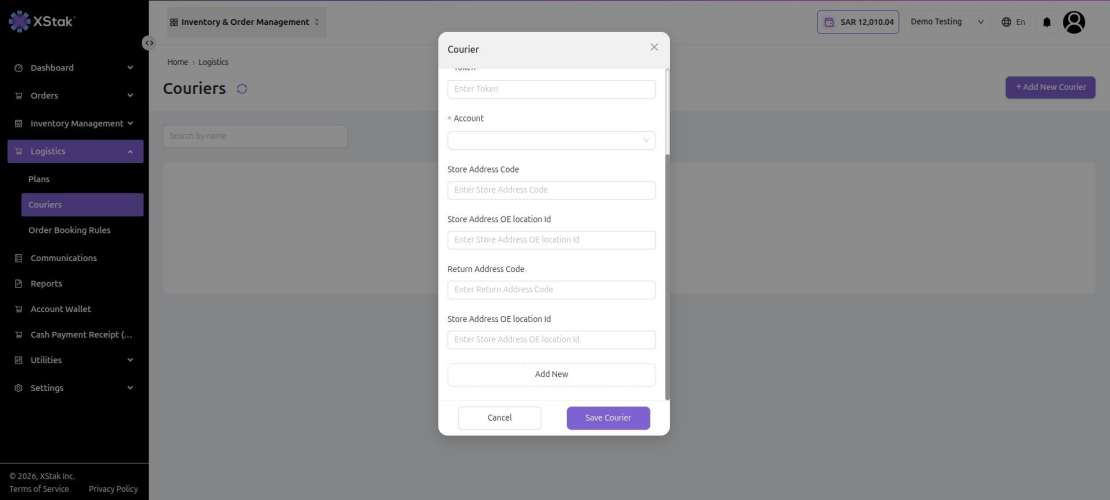
PostEx Partner courier configuration form — additional location fields
-
To add multiple pickup locations, click Add New and enter the Store Address Code and Store Address OE Location ID for each additional location.
-
Click Save Courier once all locations have been configured.
|
Difference between PostEx and PostEx Partner:
|