How to Enable and Set Up XStak OMS on Shopify
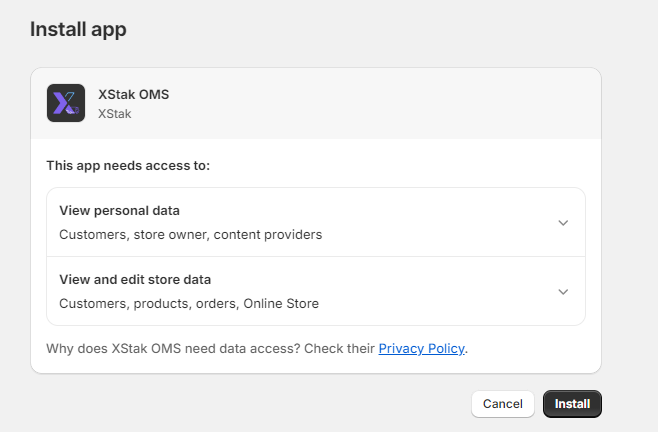
Step 1: Install the App
After initiating the installation of the XStak OMS app, you will be redirected to the Shopify app installation page.
Click on the "Install" button to proceed.
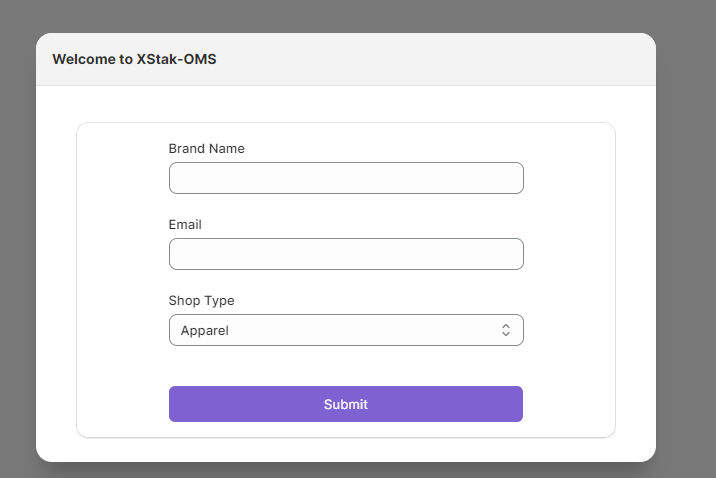
Step 2: Enter Store Details
Once the app is installed, you will be redirected to the XStak OMS app.
Enter the required store details after clicking Get Started:
Brand Name
Store Email Address
Shop Type
Step 3: Activate Your Account
After entering your store details, you will receive an account activation email at the provided store email address.
Click on the "Activate Account" link in the email.
You will be redirected to the "Update Password" screen.
Update your password.
Step 4: Configure XStak OMS
Return to the XStak OMS Shopify app.
Copy your Account ID and Email Address.
Click on "Redirect to OMS."
Paste the copied Account ID and Email Address into the respective fields.
Enter your updated password and log into XAP.
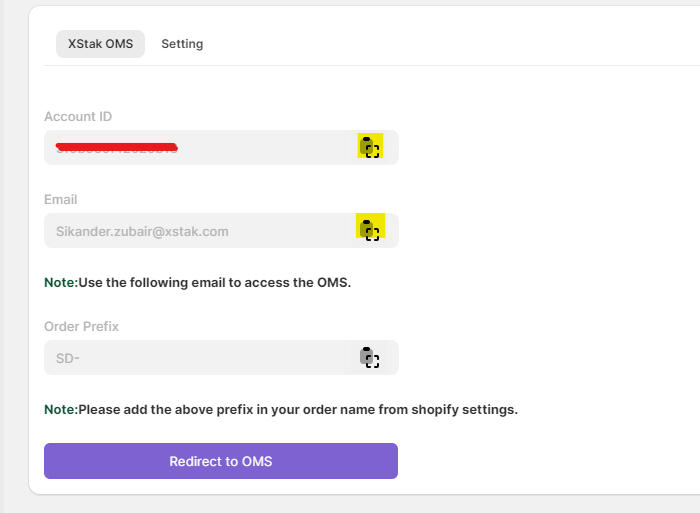
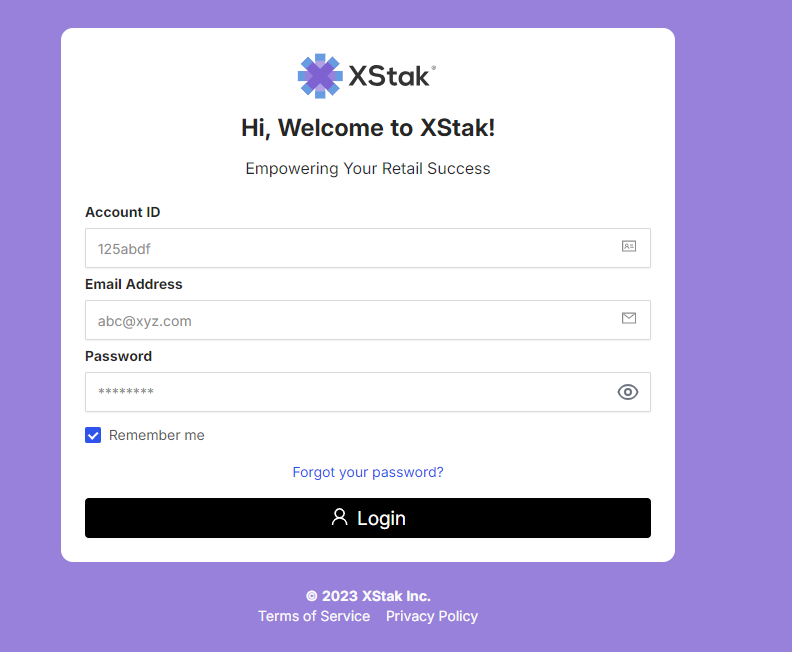
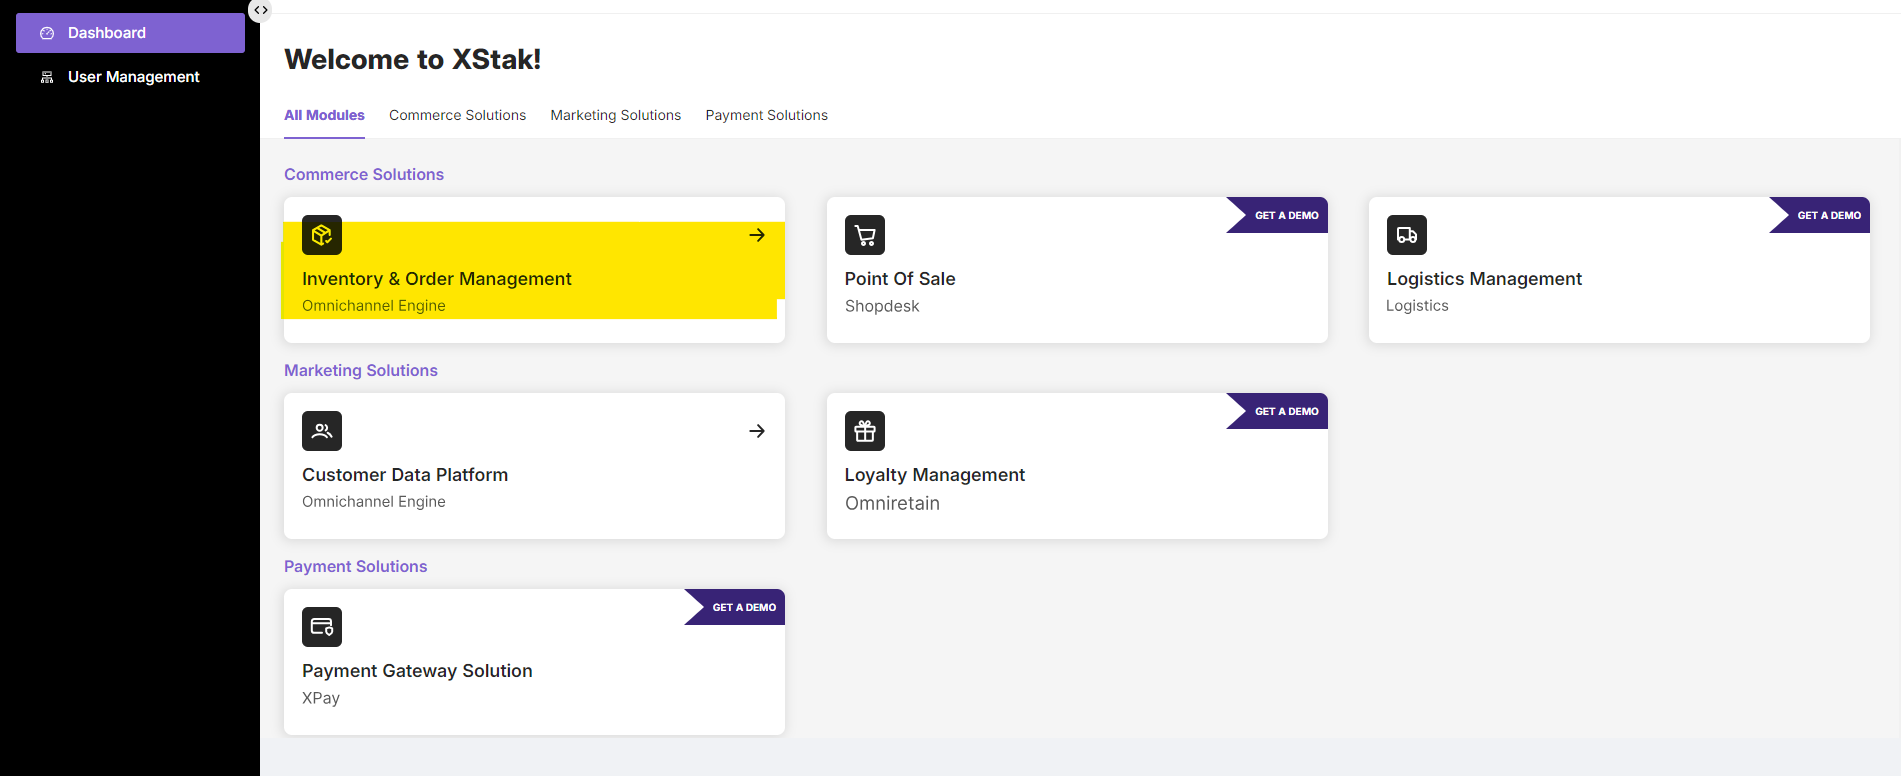
You will be redirected to the XAP XStak Portal.
Select the "Inventory and Order Management" option.
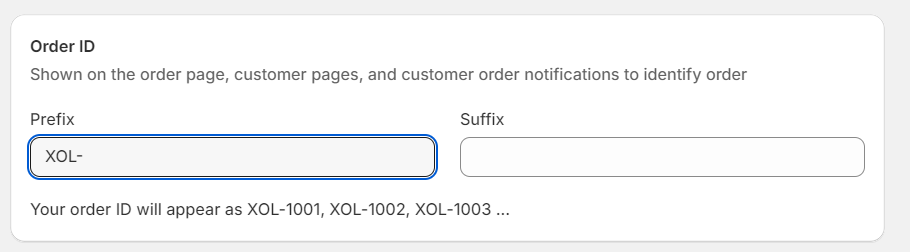
Step 5: Set Up Order Prefix in Shopify
Return to the XStak OMS Shopify app and copy the order prefix.
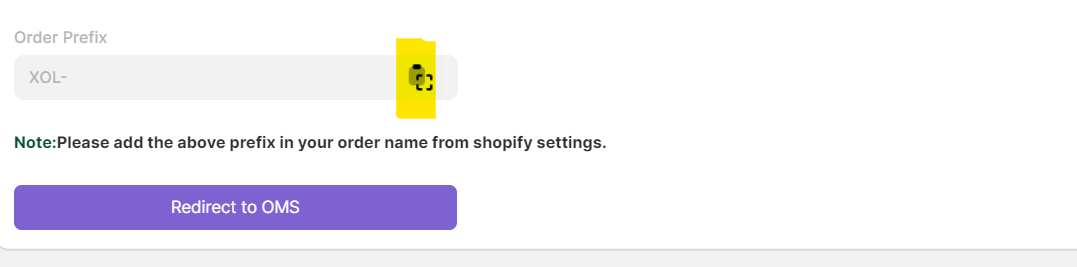
Go to your Shopify settings page.
In the general settings, scroll down to the "Order ID" section.
Paste the copied Order Prefix.
Save the changes.