
-
Introduction: In this tutorial, we will be seeing what settings to save against the label printer to create the ideal barcode for your printer that is properly scannable.
-
Please note that the longer the SKU, the larger the Label sticker size should be to avoid any scanning issues later on.
-
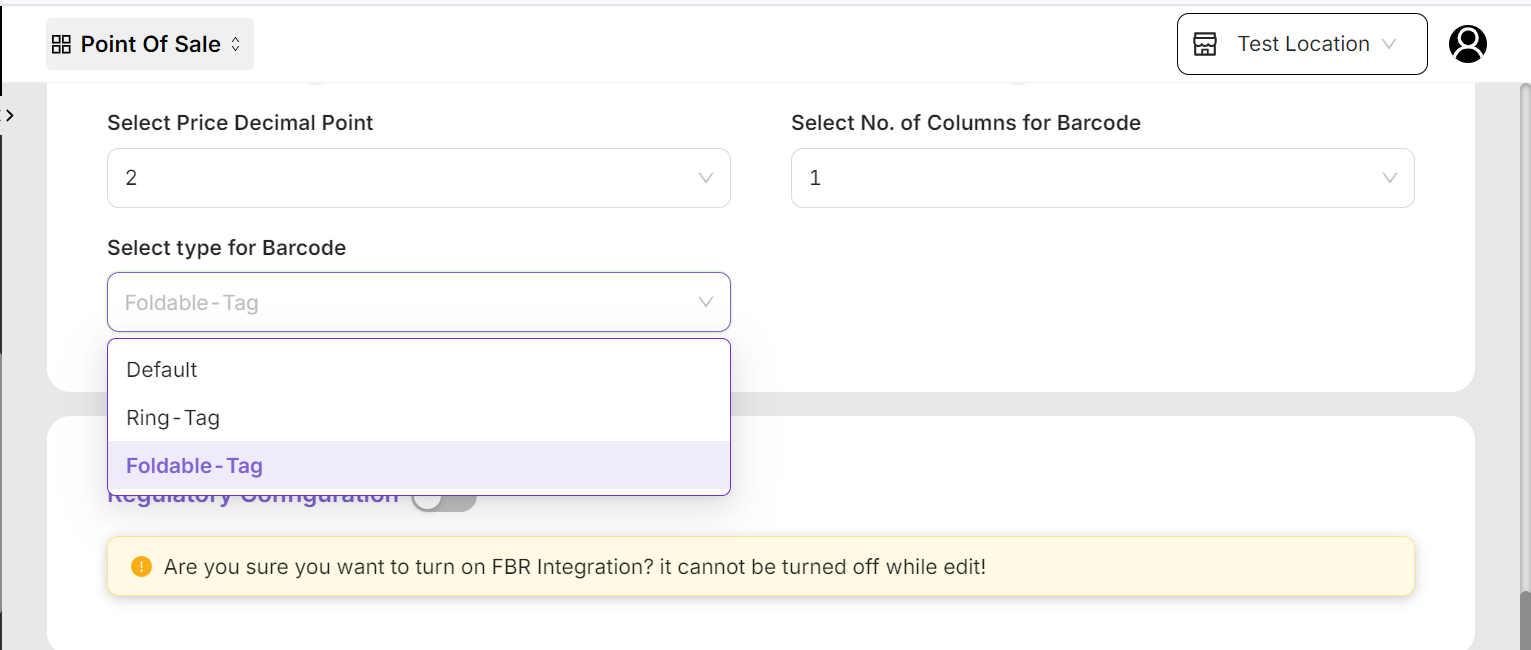
Select the of barcode you want to generate from the setup page. We have 3 settings:
i) Default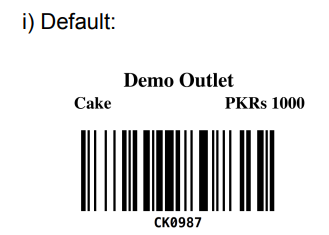
ii) RIng Barcode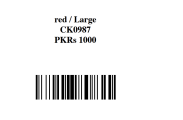
iii) Foldable tag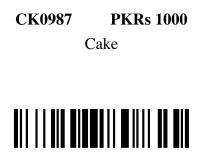
3. You can make these settings against the outlet settings under setup. Please refer to screenshot 1.1 below.
-
You can also generate your own custom template of barcodes against each individual product, (please refer to How to Articles for more information).
-
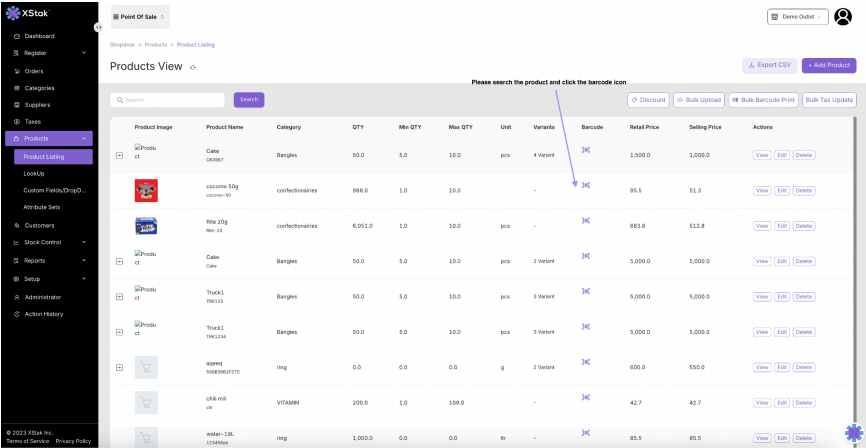
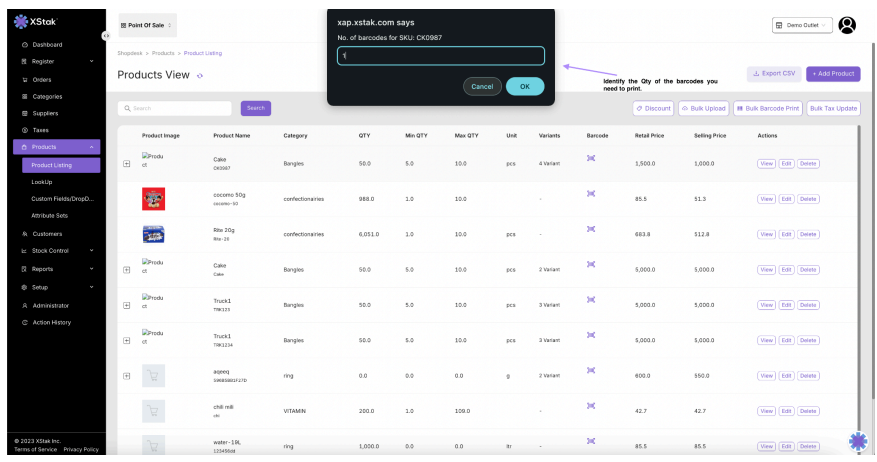
The Barcode can be generated via our product listings page on Shopdesk POS. You can generate the barcode and identify the qty you want to print. Please see screenshot 2.1 & 2.2 Below.
3. Printer settings:
-
There are 2 settings that need to be conducted, please ensure the settings are exactly as per the screenshots below.
-
The only changes should be against the Label Sizes.
i) Settings under Advanced printer preferences:
a) Search for your printer “settings” under the “system settings”. -
Select the Label printer. (NOT EPL) & Click “Manage”
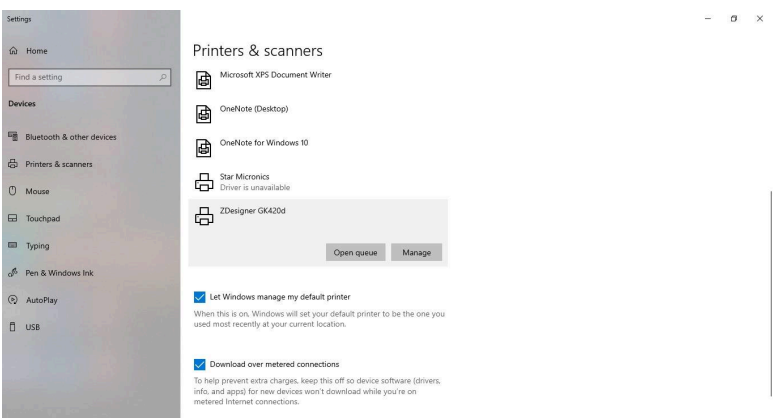
b) Click on “printer properties” & follow the same settings as shown in the screenshots below. Please follow the exact printer properties to avoid any discrepancies.
-
Once changed please press “ok”.
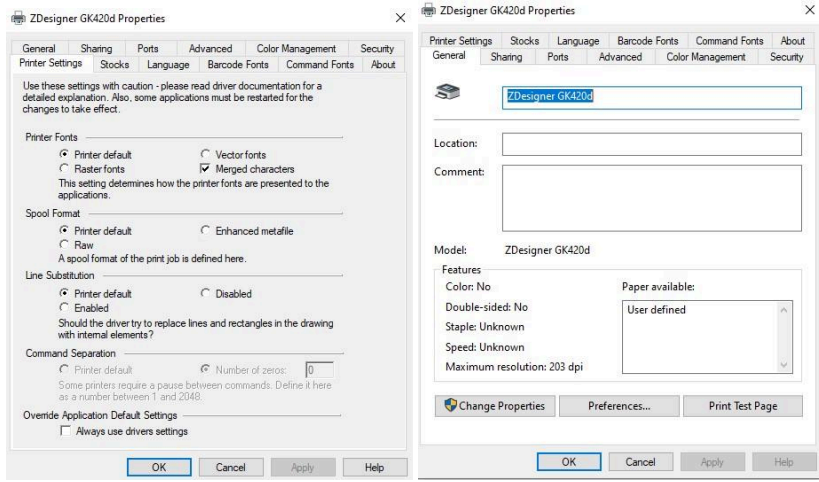
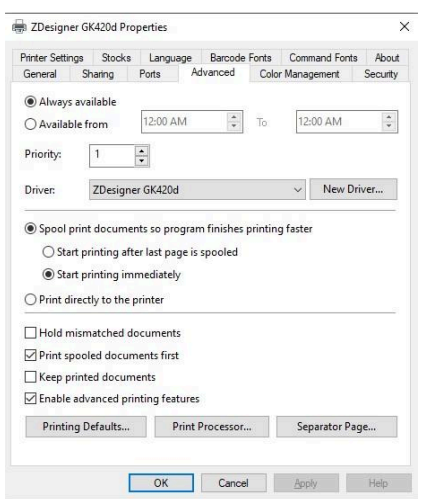
c) Click on “printing preferences” & follow the same settings as shown in the screenshots below. Please follow the exact printer properties to avoid any discrepancies.
-
Once changed please press ok.
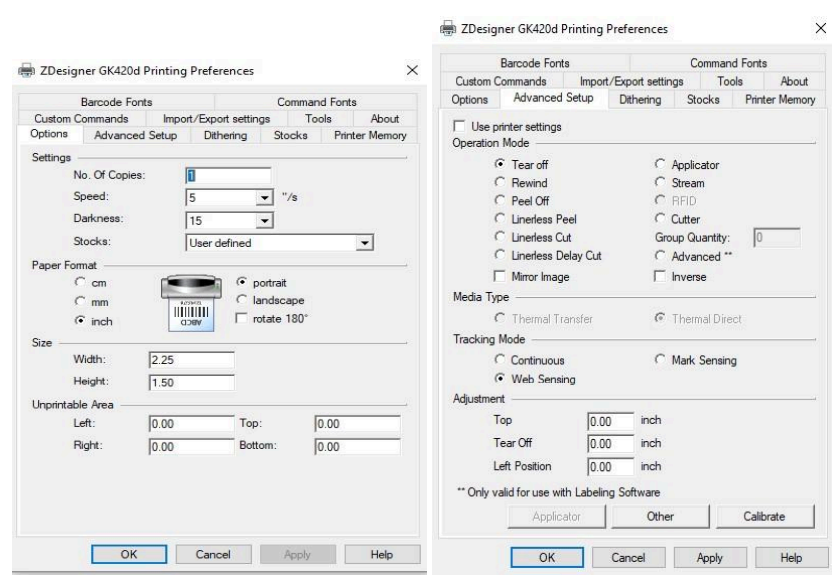
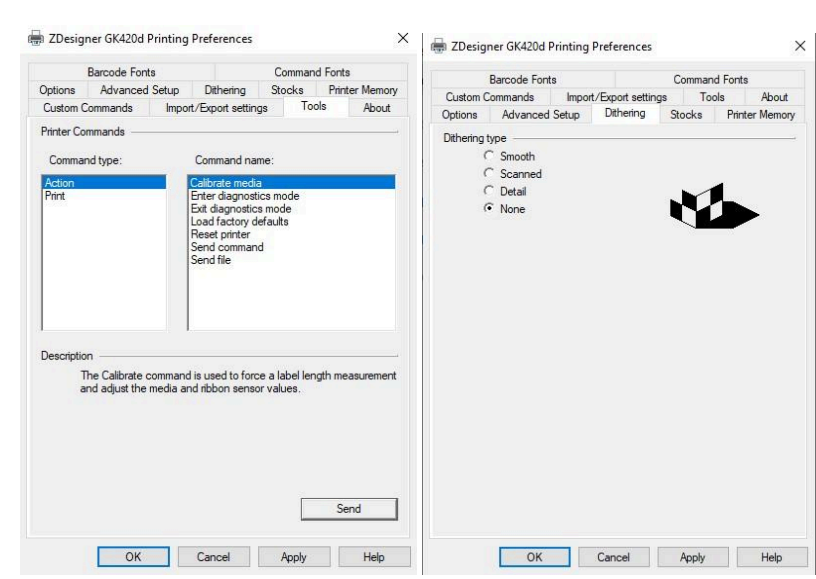
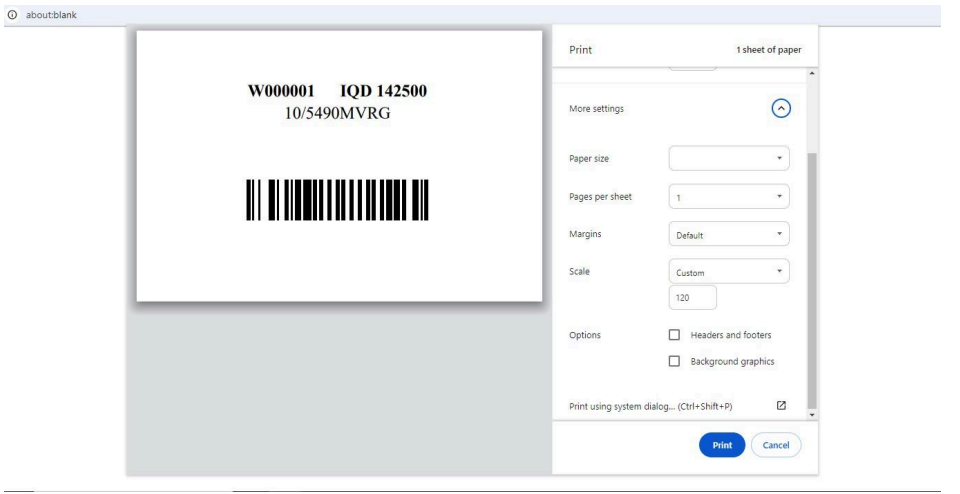
ii) Browser Printer Settings:
-
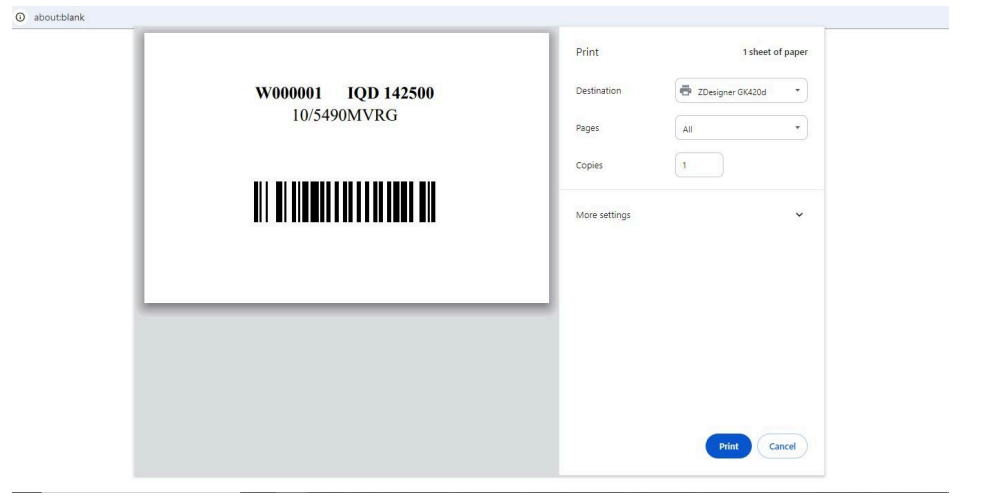
When you trigger the printer to send commands to the printer please follow the exact settings shown in the Screenshots below.
-
Please note the scale has to be increased or decreased depending on SKU and Label Siz