Order Scan feature
Orders Scan Feature in Pending Dispatch Tab
Open the Pending Dispatched Tab and locate the Scan button.
To enable scanning mode, click on the Scan button or Double Scan Order barcode
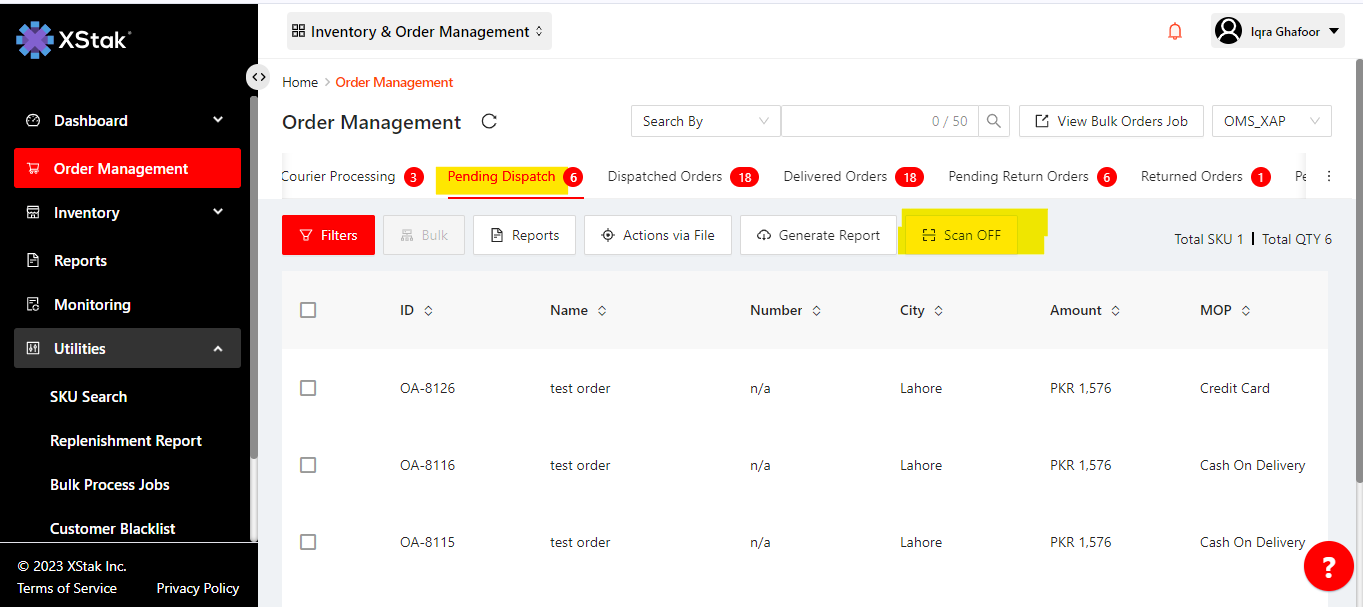
If the Scan button is already active, scan the order ID barcode once.
If the Scan button is inactive, scan the order ID barcode twice. (scan button will be auto-activated)
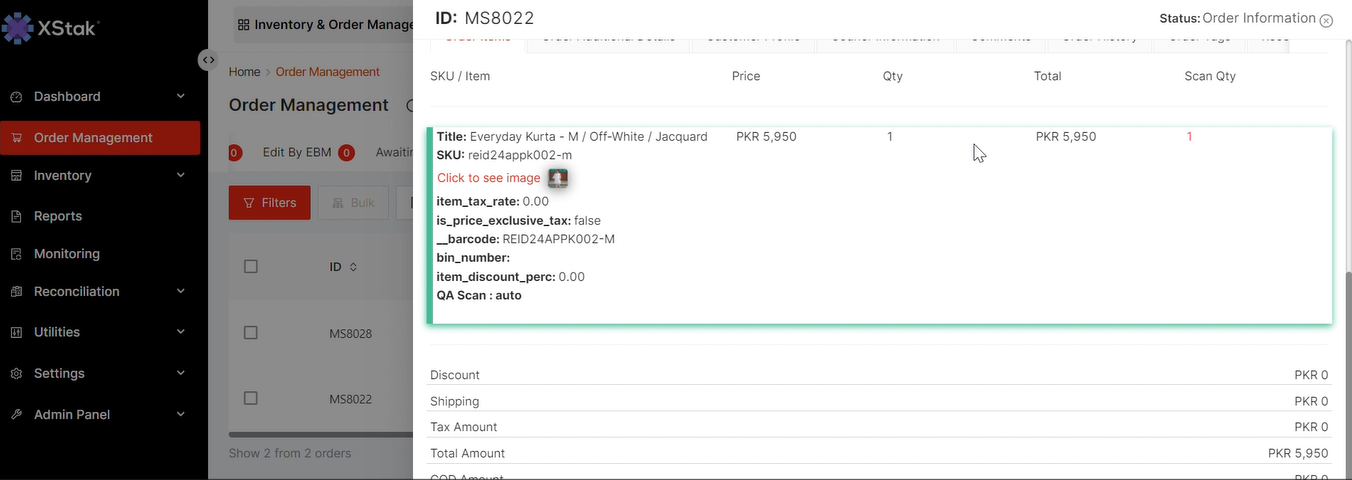
After scanning the Order ID barcode, the order details will be displayed on the screen.
When items are fully scanned, a green indicator appears (whether through automatic or manual scanning), and the attribute "QA Scan: Auto" will be appended to each line item.
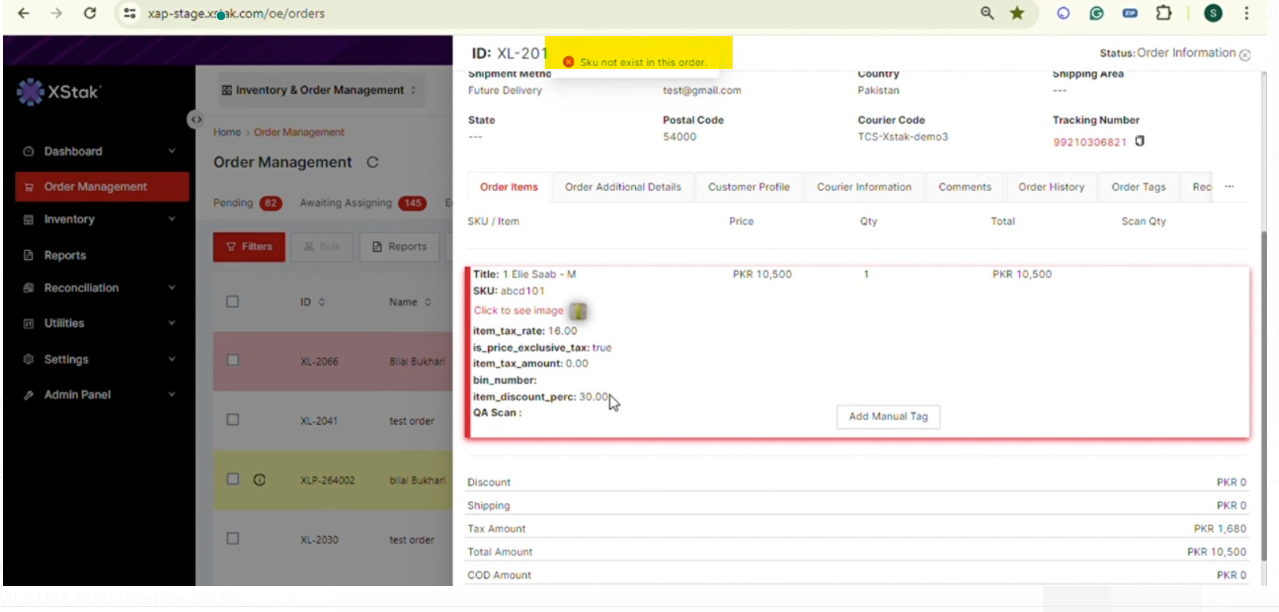
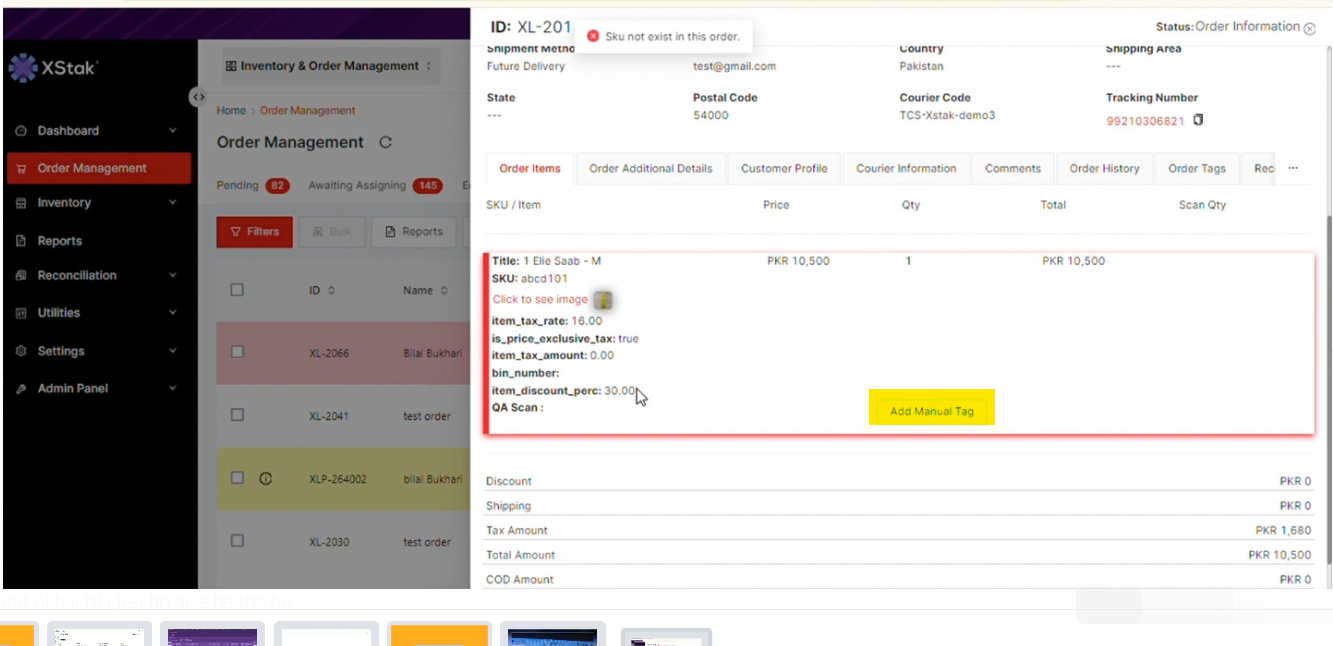
Alternatively, you can click on "Add Manual Tag," which will add the attribute "QA Scan: Manual" under each line item.
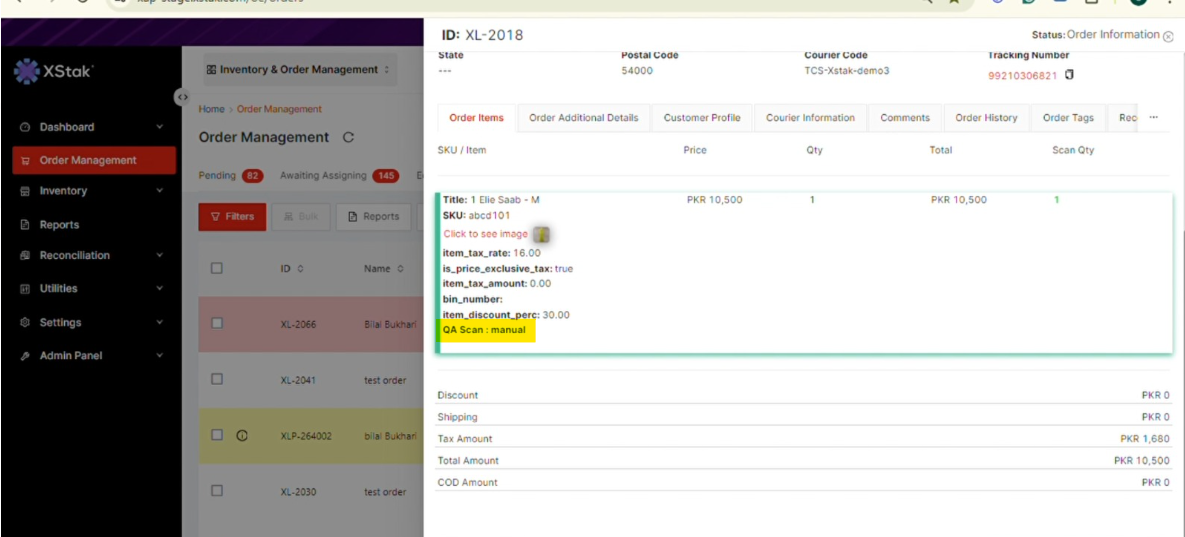
If you have multiple identical SKUs, you need to scan each of them separately, according to the number of SKUs.
Once all SKUs have been scanned manually or using a scanner, click on the "Save tag" button at the bottom of the page.
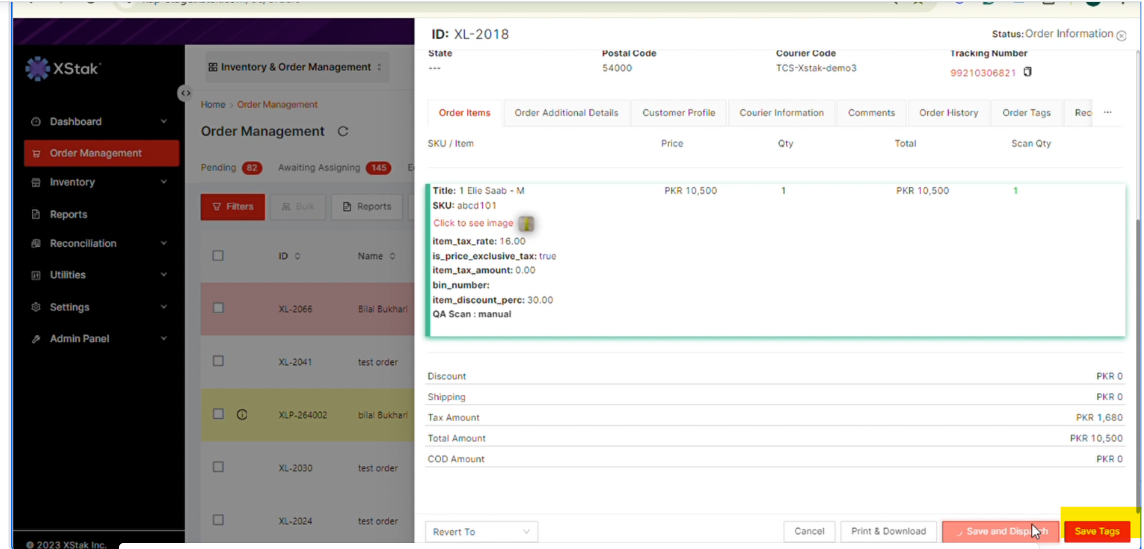
The “Save Tags” Button and “Save & Dispatch” button now appear only when the order is completely scanned
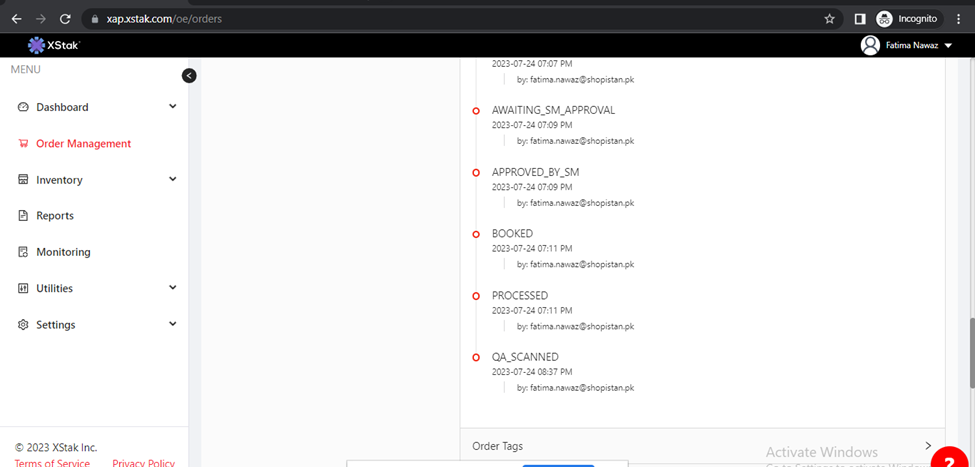
Now, open the Order History, where you will find a comprehensive log of all actions performed on that order and the associated user ID.
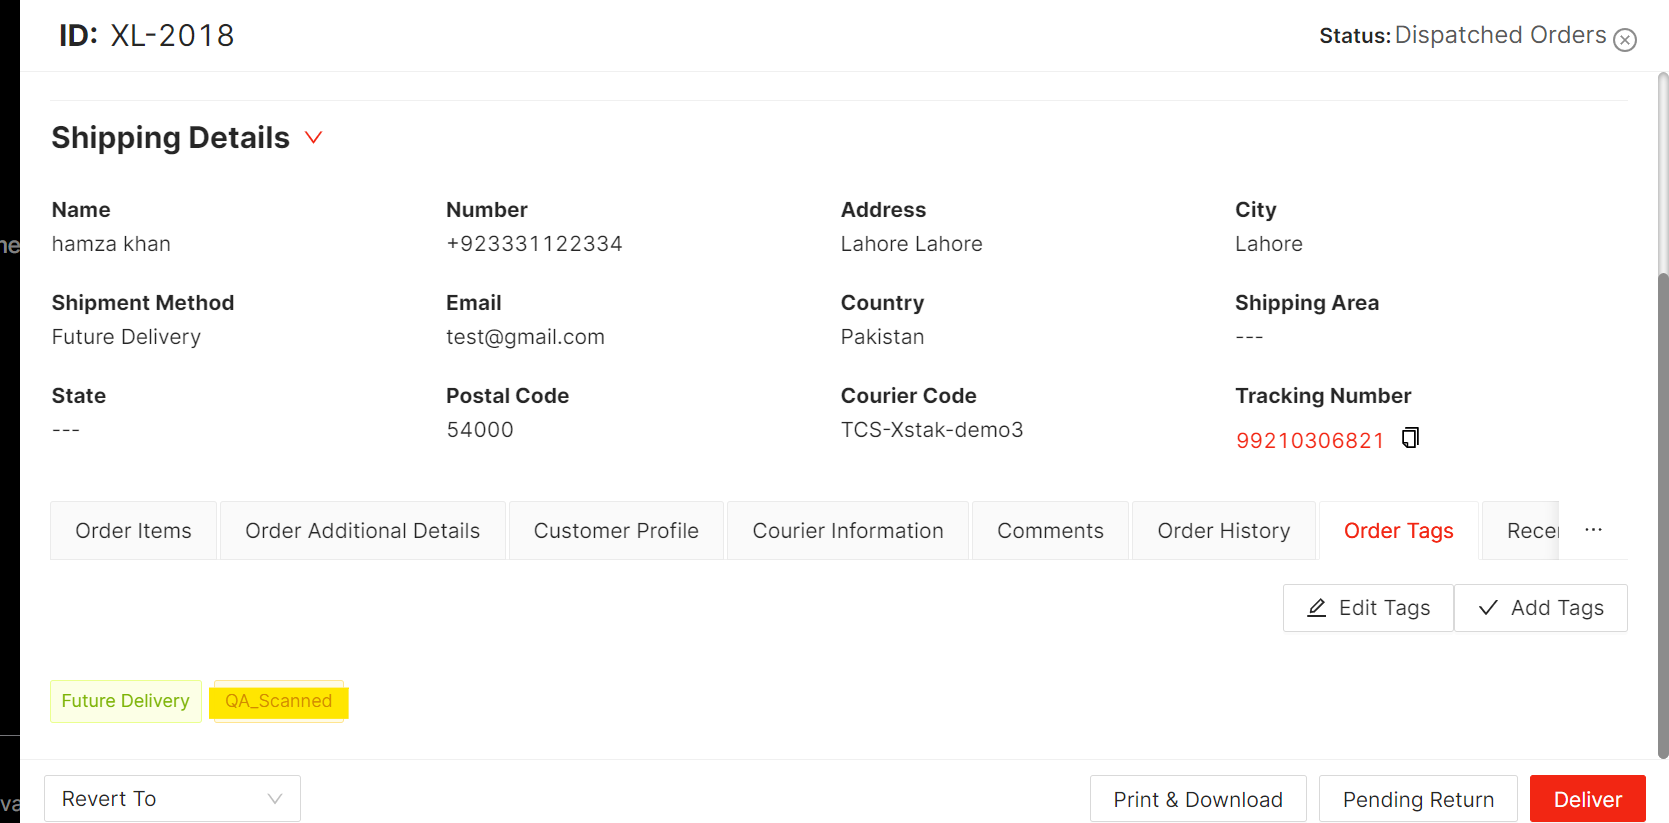
9- To view the QA_SCANNED tag, expand the “Order Tag” accordion.
Now the Dispatch button renamed to "Save and Dispatch"
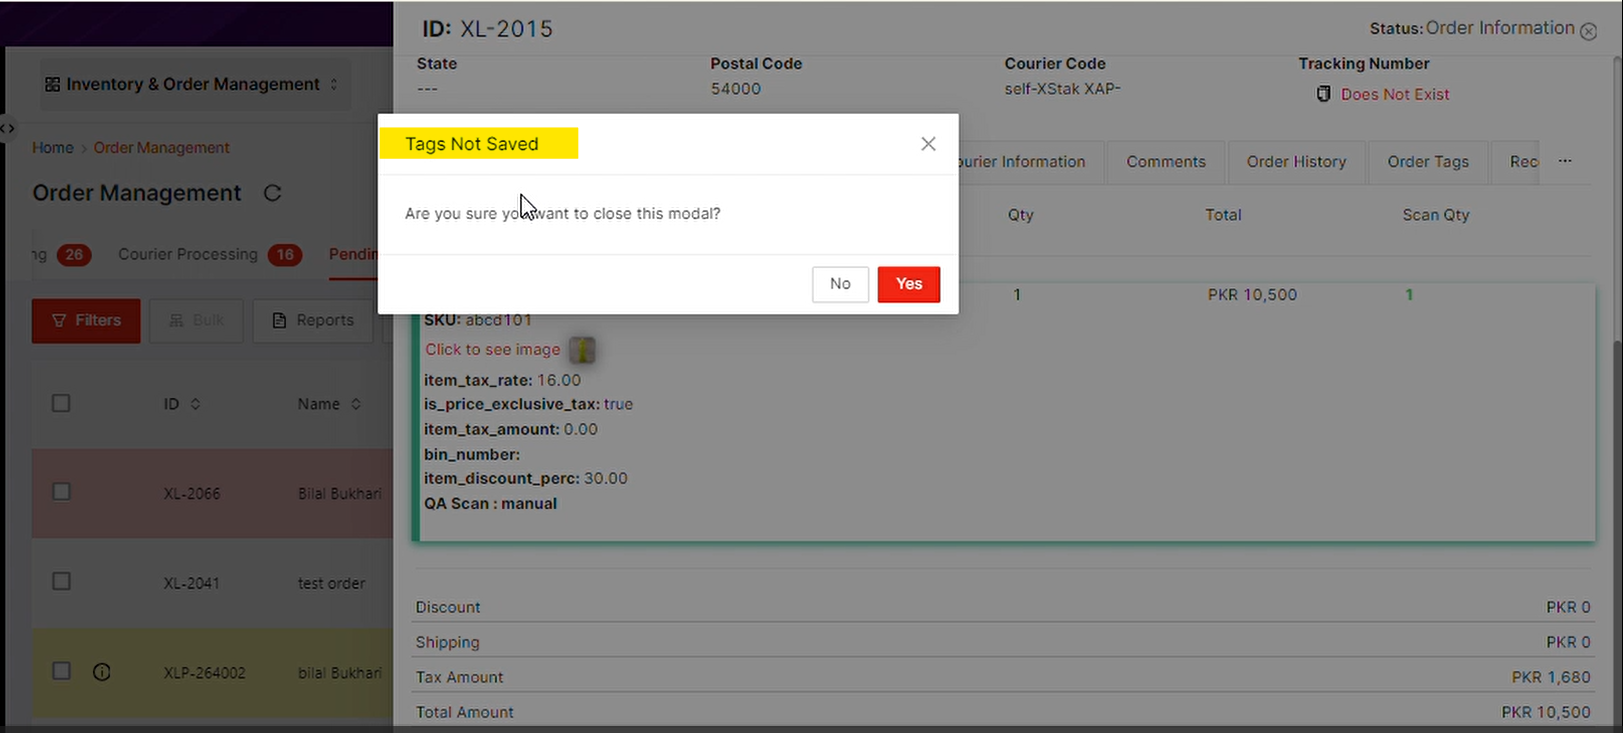
If you scan all SKUs but forget to click the 'Save Tag' button and instead directly click the 'Save and Dispatch' button to close the order, a message will be displayed indicating 'Tags Not Saved'.
The Dispatched Order tab will display all relevant information, including the Order History and Order Tag accordioning, just like in the Pending Dispatch tab.
If an order is in the Dispatched tab or in the wrong tab → displays an error message
If an invalid SKU is scanned that is not in the order, it will show: 'SKU not exist in this order.'