Location
How to Use the Locations Module in OMS
Step 1: Access the Locations Module
Click on the Settings module from the sidebar.
Select Locations from the dropdown menu.
Step 2: Overview of the Locations Module
The Locations module provides complete visibility and control over all fulfillment locations integrated with OMS.
Brands can view and manage every aspect of their operational locations from a single interface.
You can view the following details for each location:
Location ID
Location Name
City
Location Code
Enable/Disable Toggle
Halt Toggle
Online/Offline Toggle
Location Users (Add/Remove users for each location)
Edit Icon (to update location details)
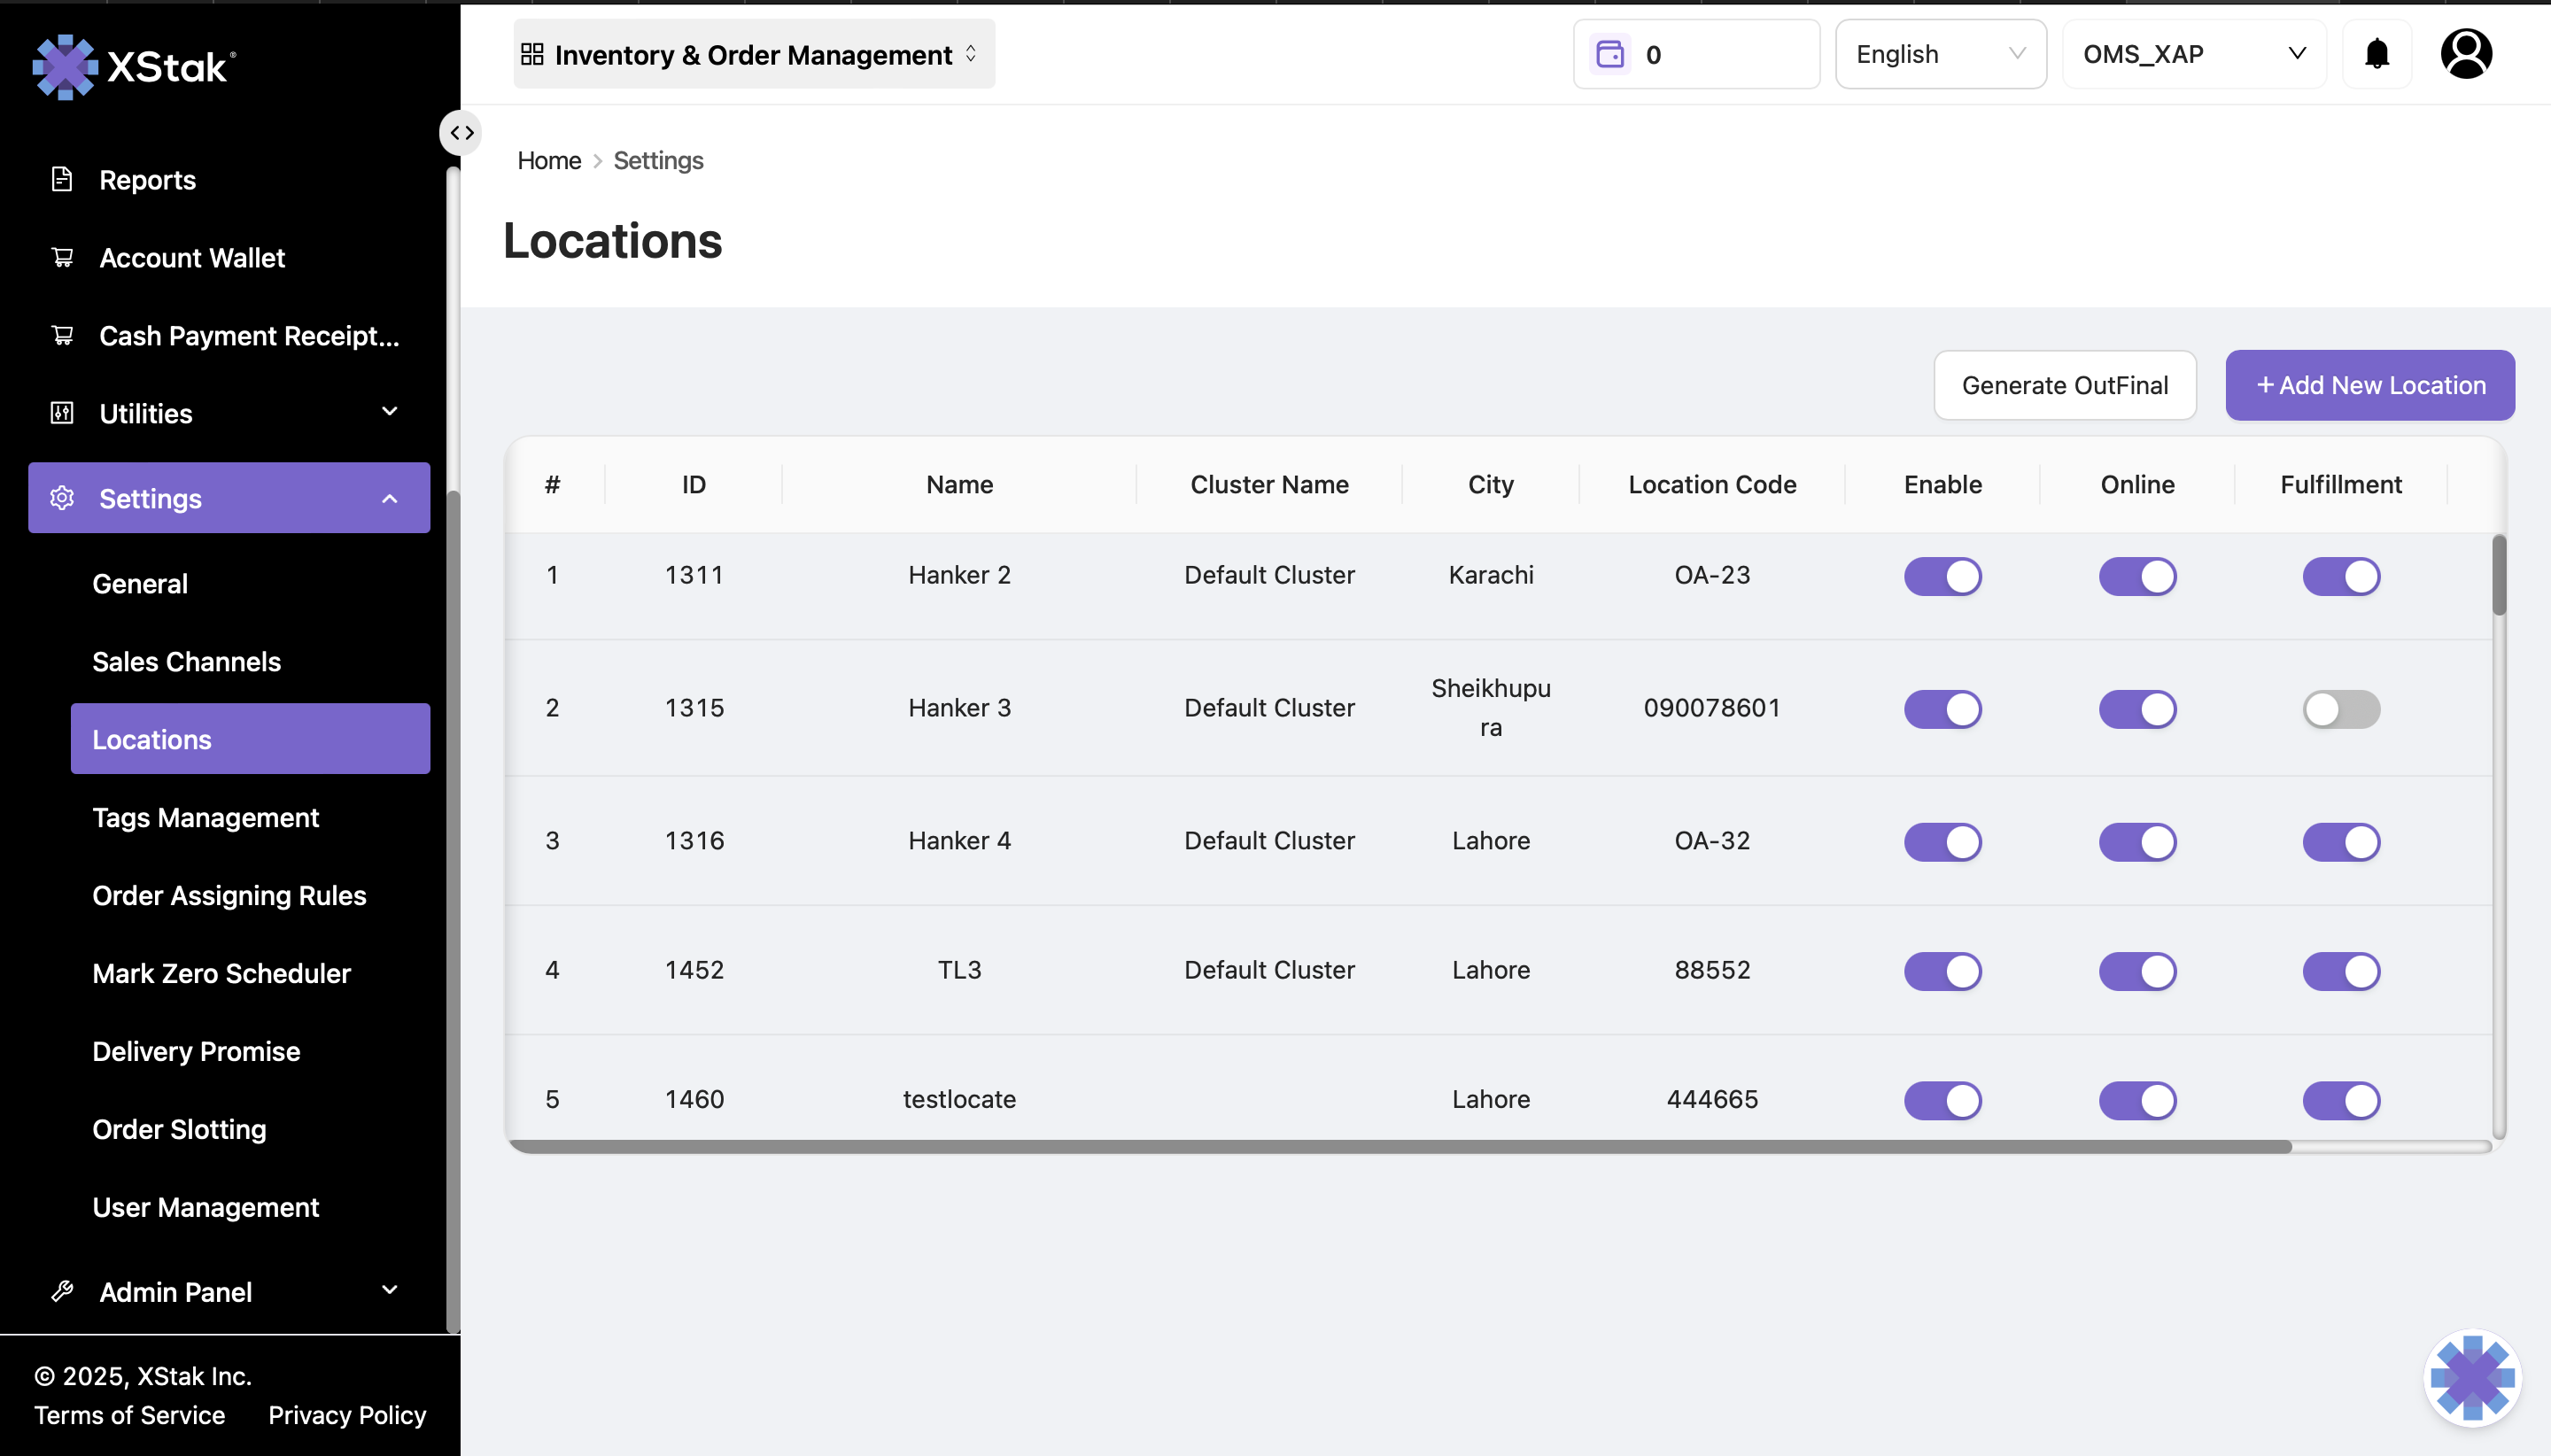
This helps brands quickly understand how many locations they have added and the status of each one.
Step 3: Adding a New Location
To add a new fulfillment location:
Click on Add New Location.
Fill in the required details:
Location Name
Location Buffer
Location Code
Email
Phone
Location Address
City
Country
Click Save to create the new location.
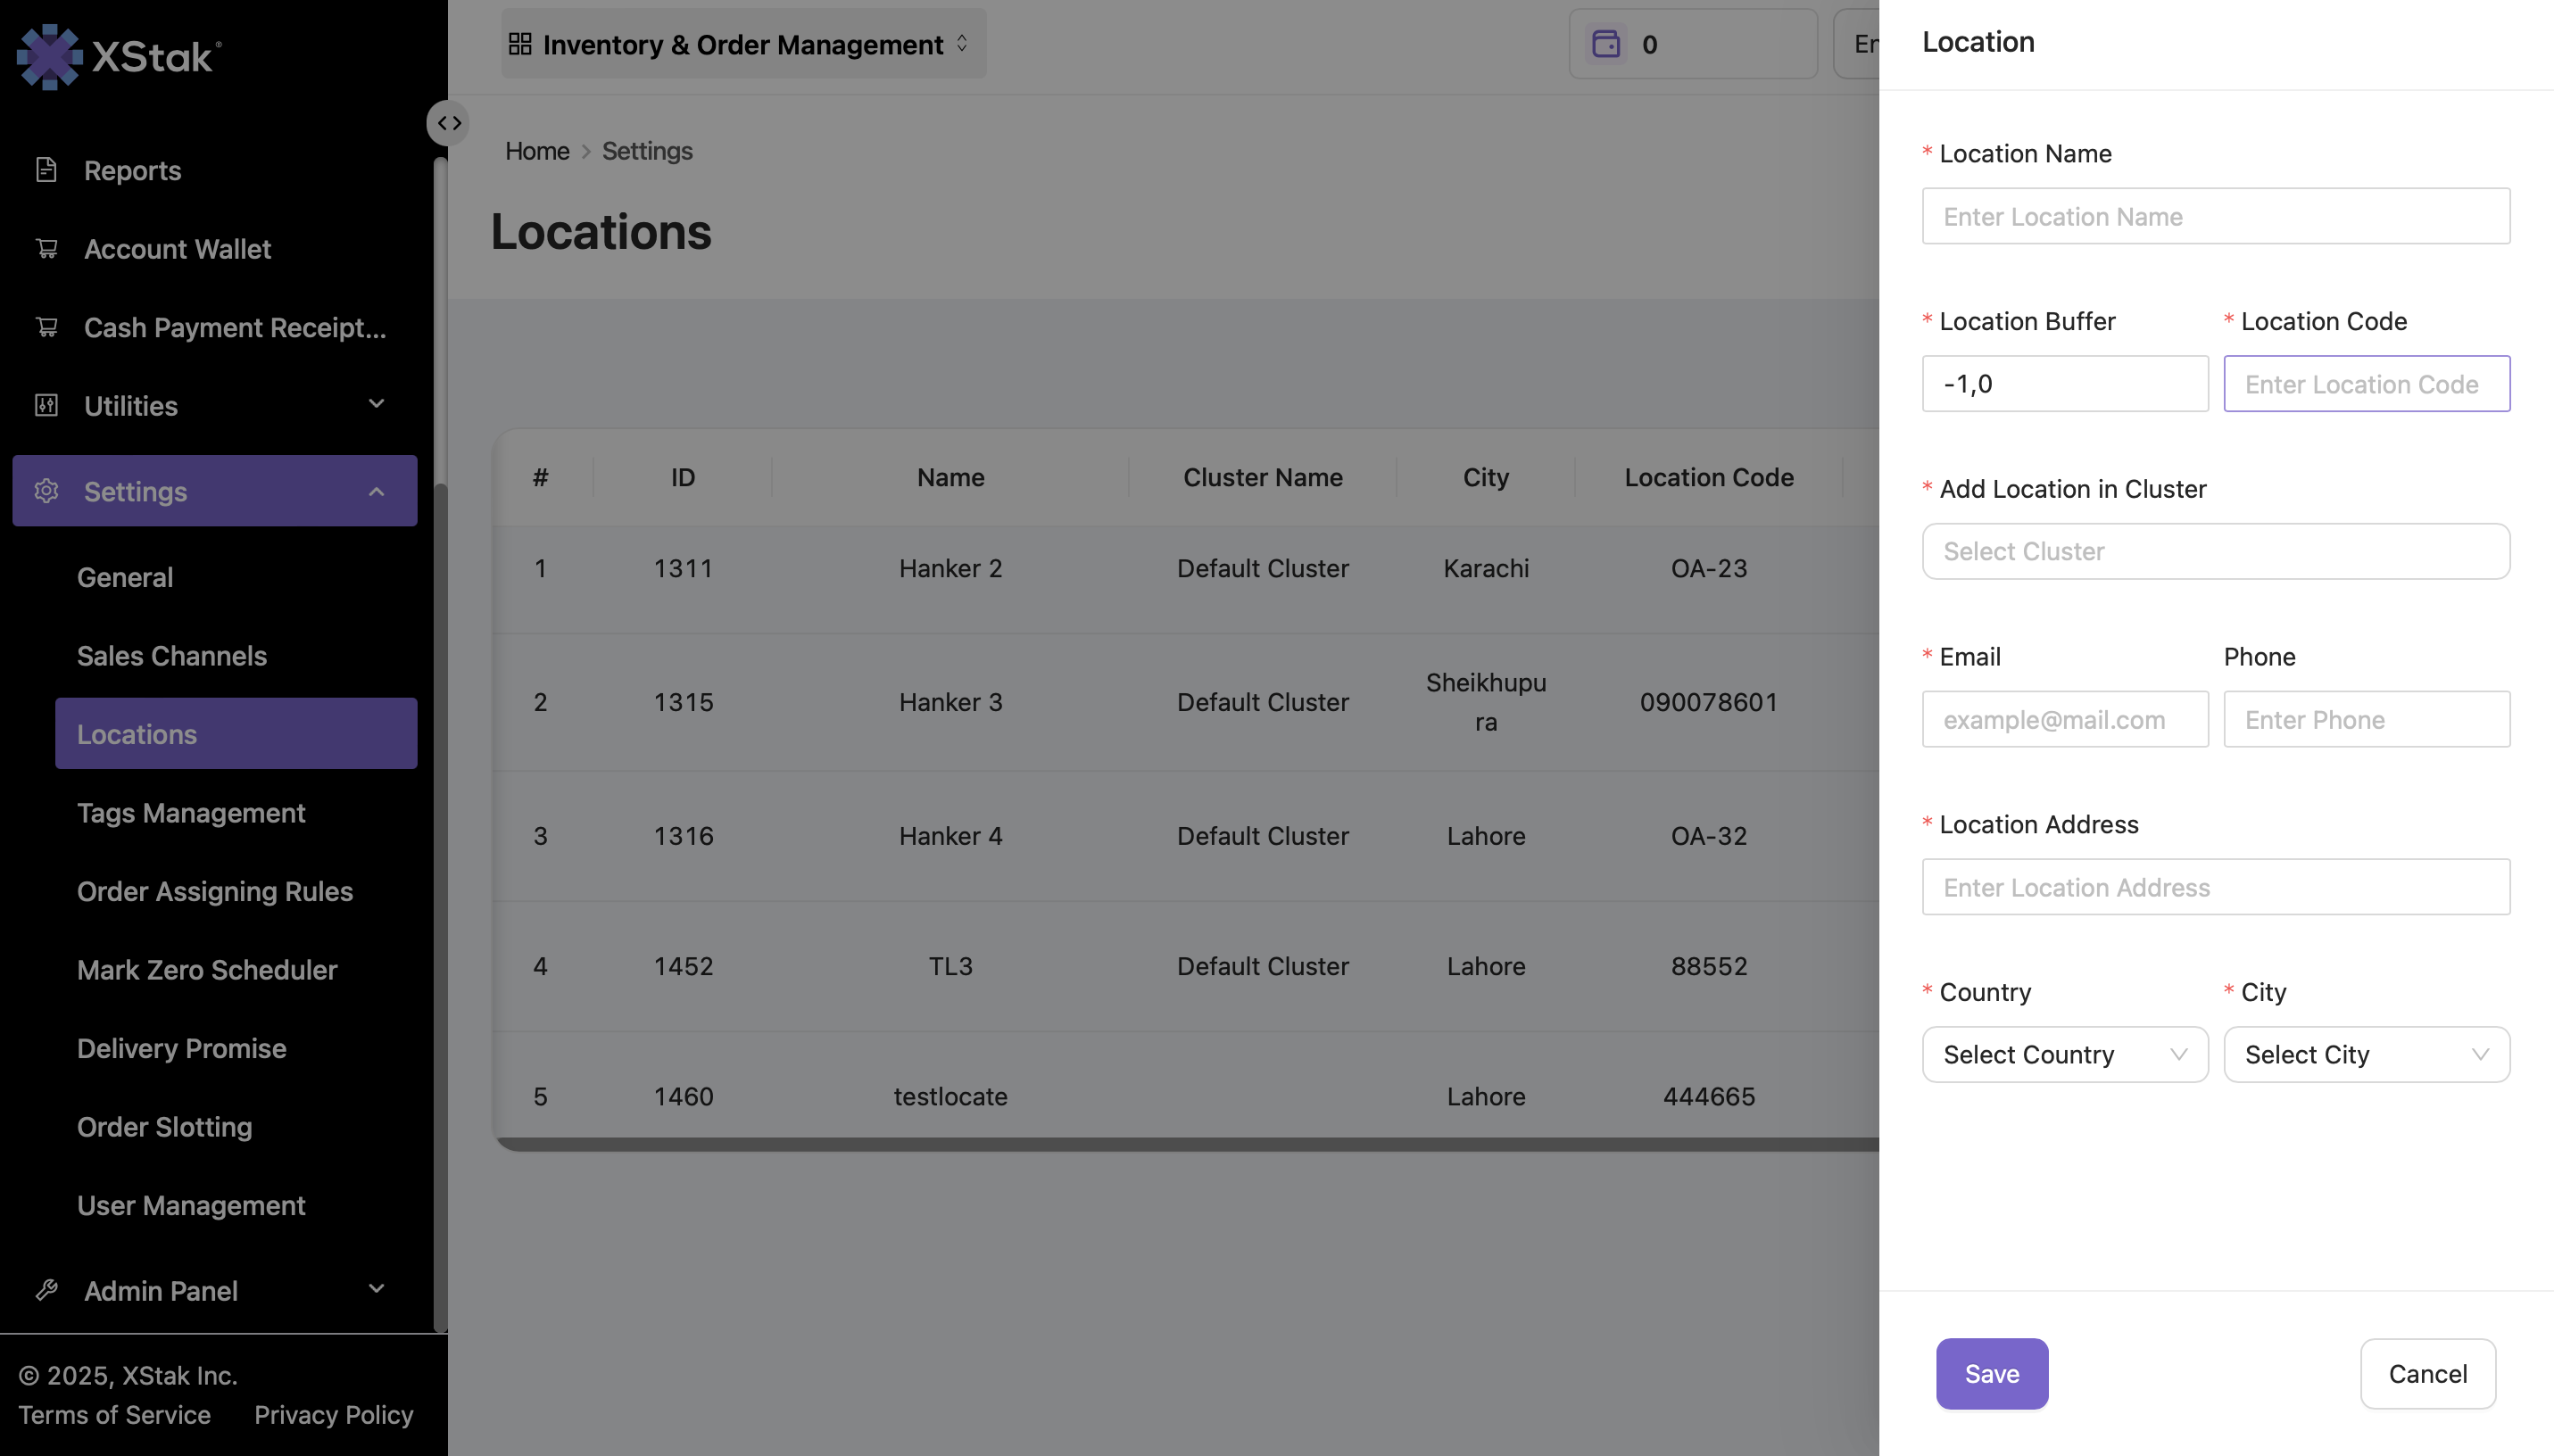
This ensures the location becomes fully operational within OMS.
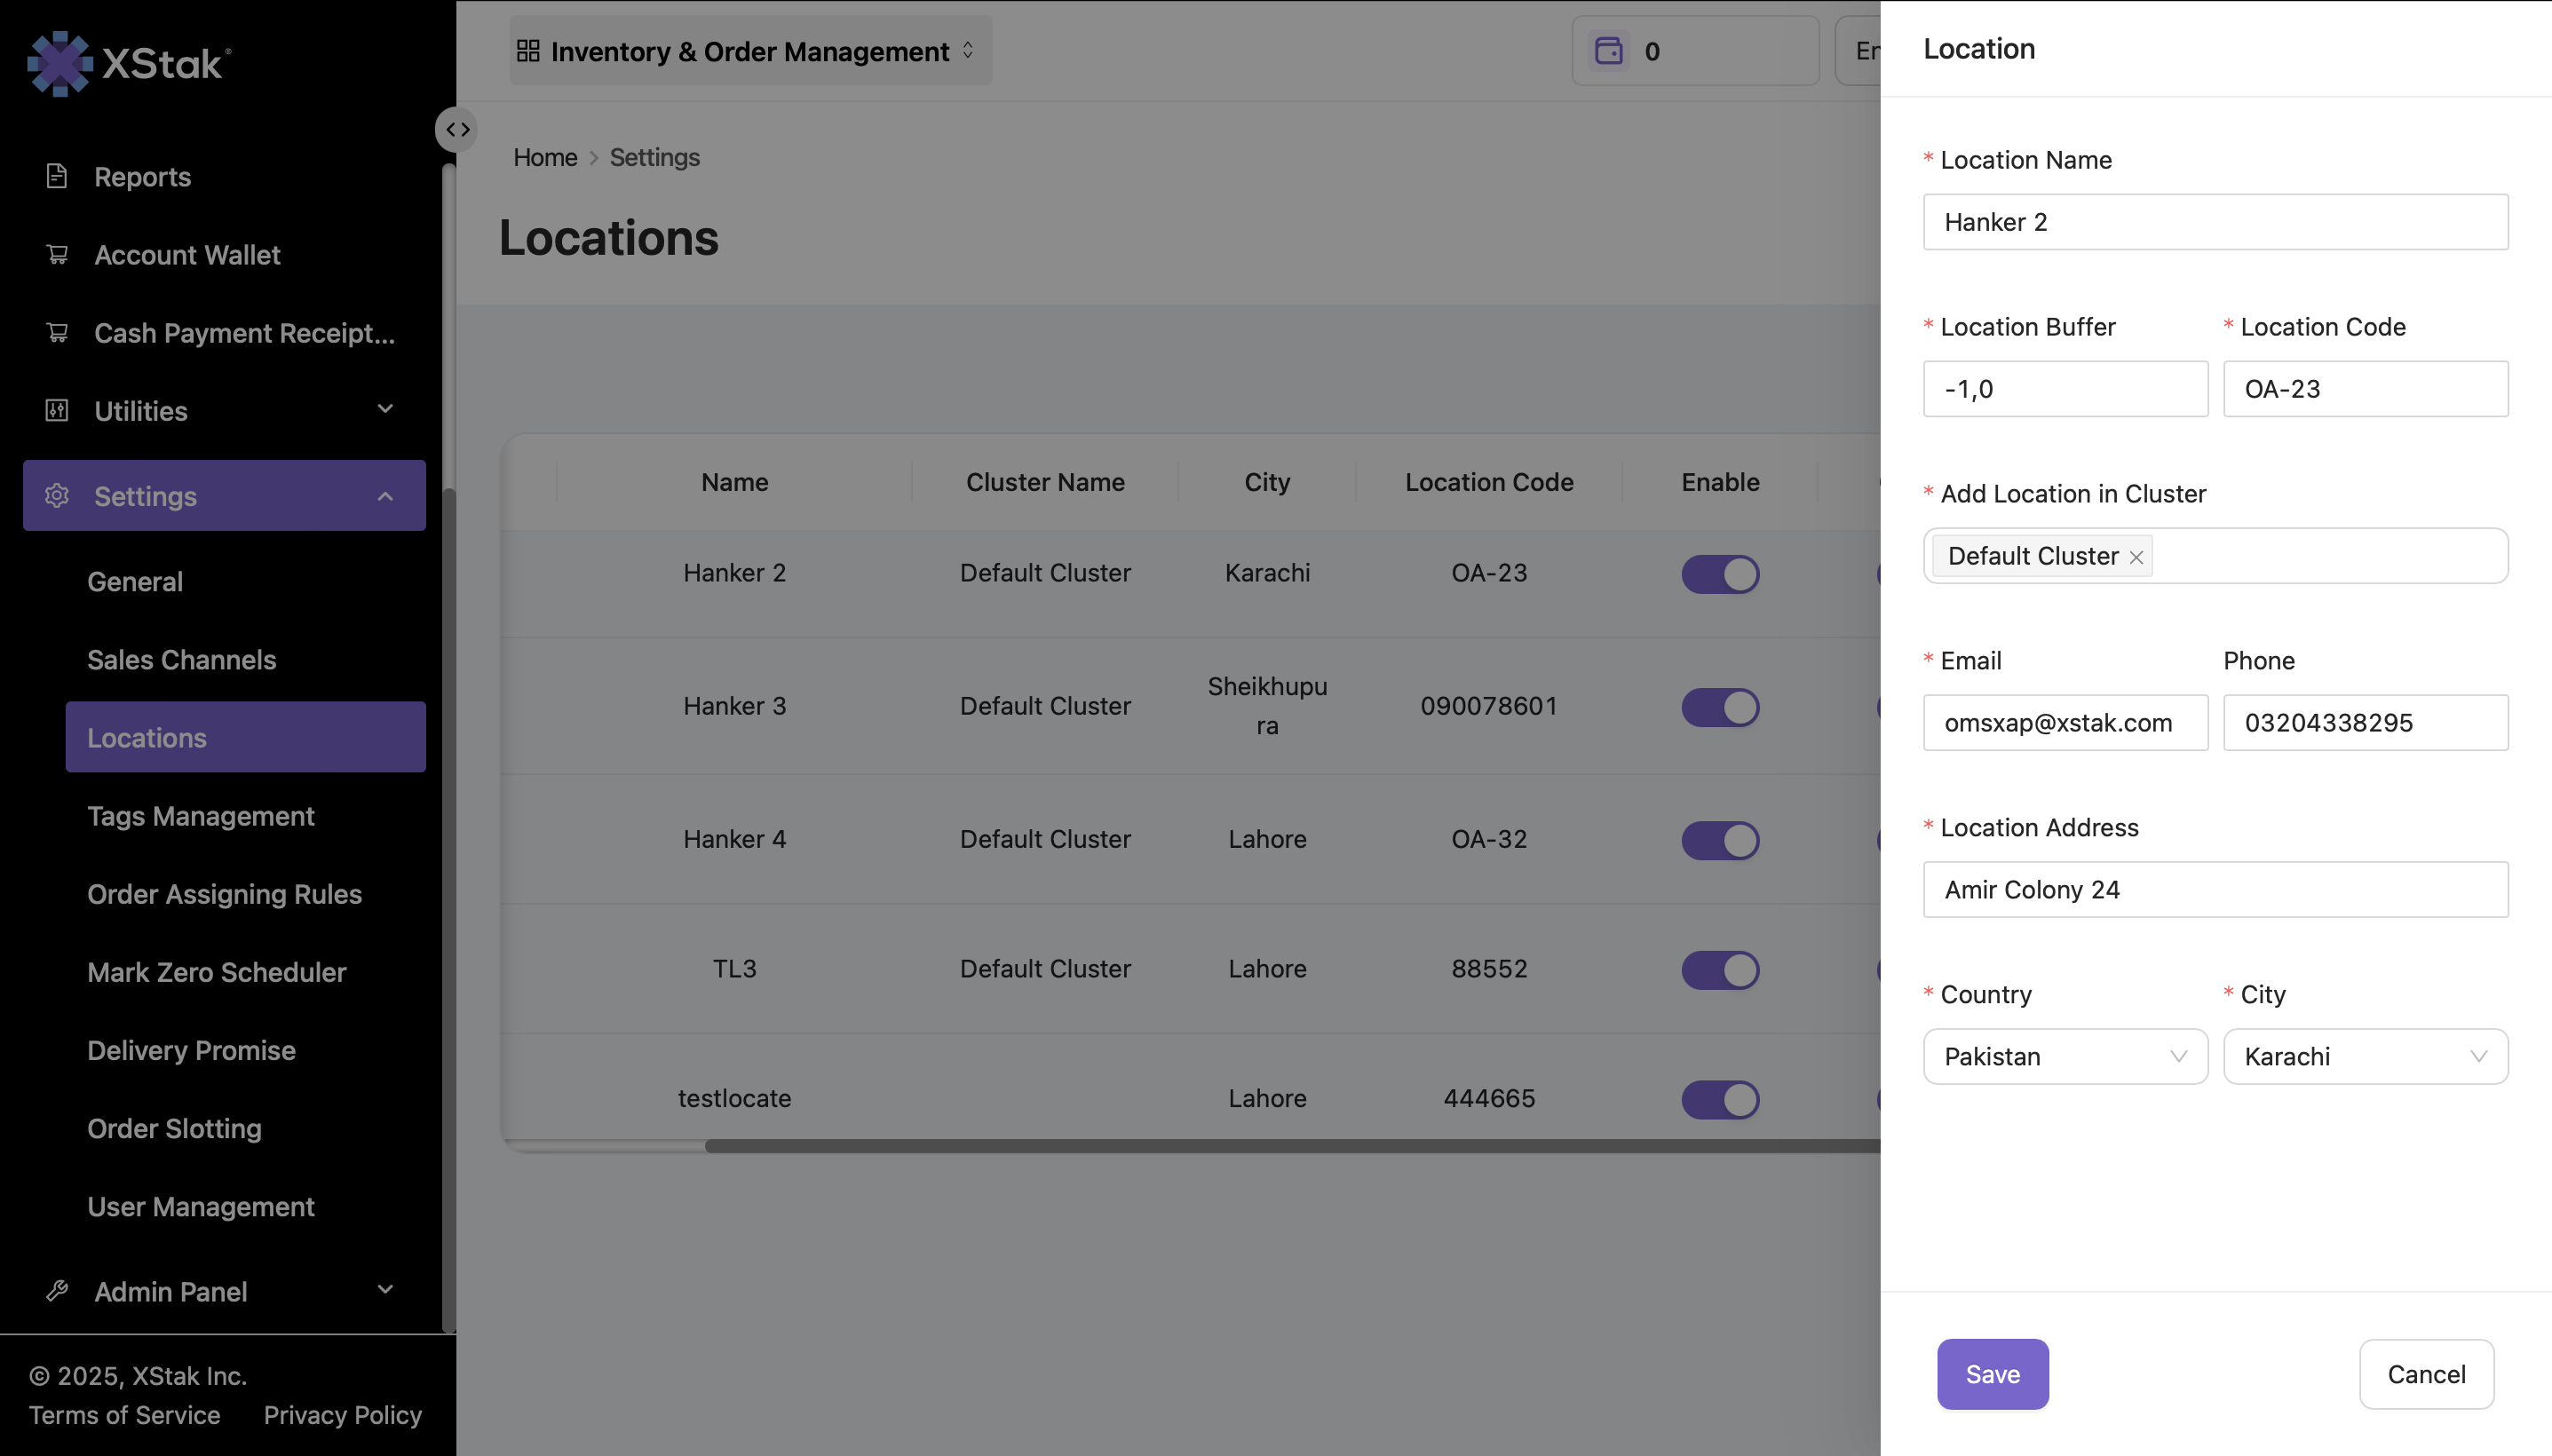
Step 4: Editing an Existing Location
To update any details of an existing location:
Click the Edit icon beside the location.
Modify the necessary fields.
Click Save to apply the changes.
Understanding Location Controls
1. Enable Toggle
Enable → The location is active and can fulfill orders.
Disable → The location will not be used for order fulfillment.
Inventory updates (Price/Quantity/Stock) will also not affect a disabled location.
This is useful when a location is temporarily non-operational.
2. Online Toggle
This toggle decides whether inventory from a location should be visible to sales channels.
Online → Inventory is pushed to sales channels.
Offline → Inventory remains hidden from sales channels.
Brands use this feature to manage rush-hours or sale spikes.
Example:
If online locations run out of inventory, brands can bring additional stock from offline locations to continue order fulfillment without overselling.
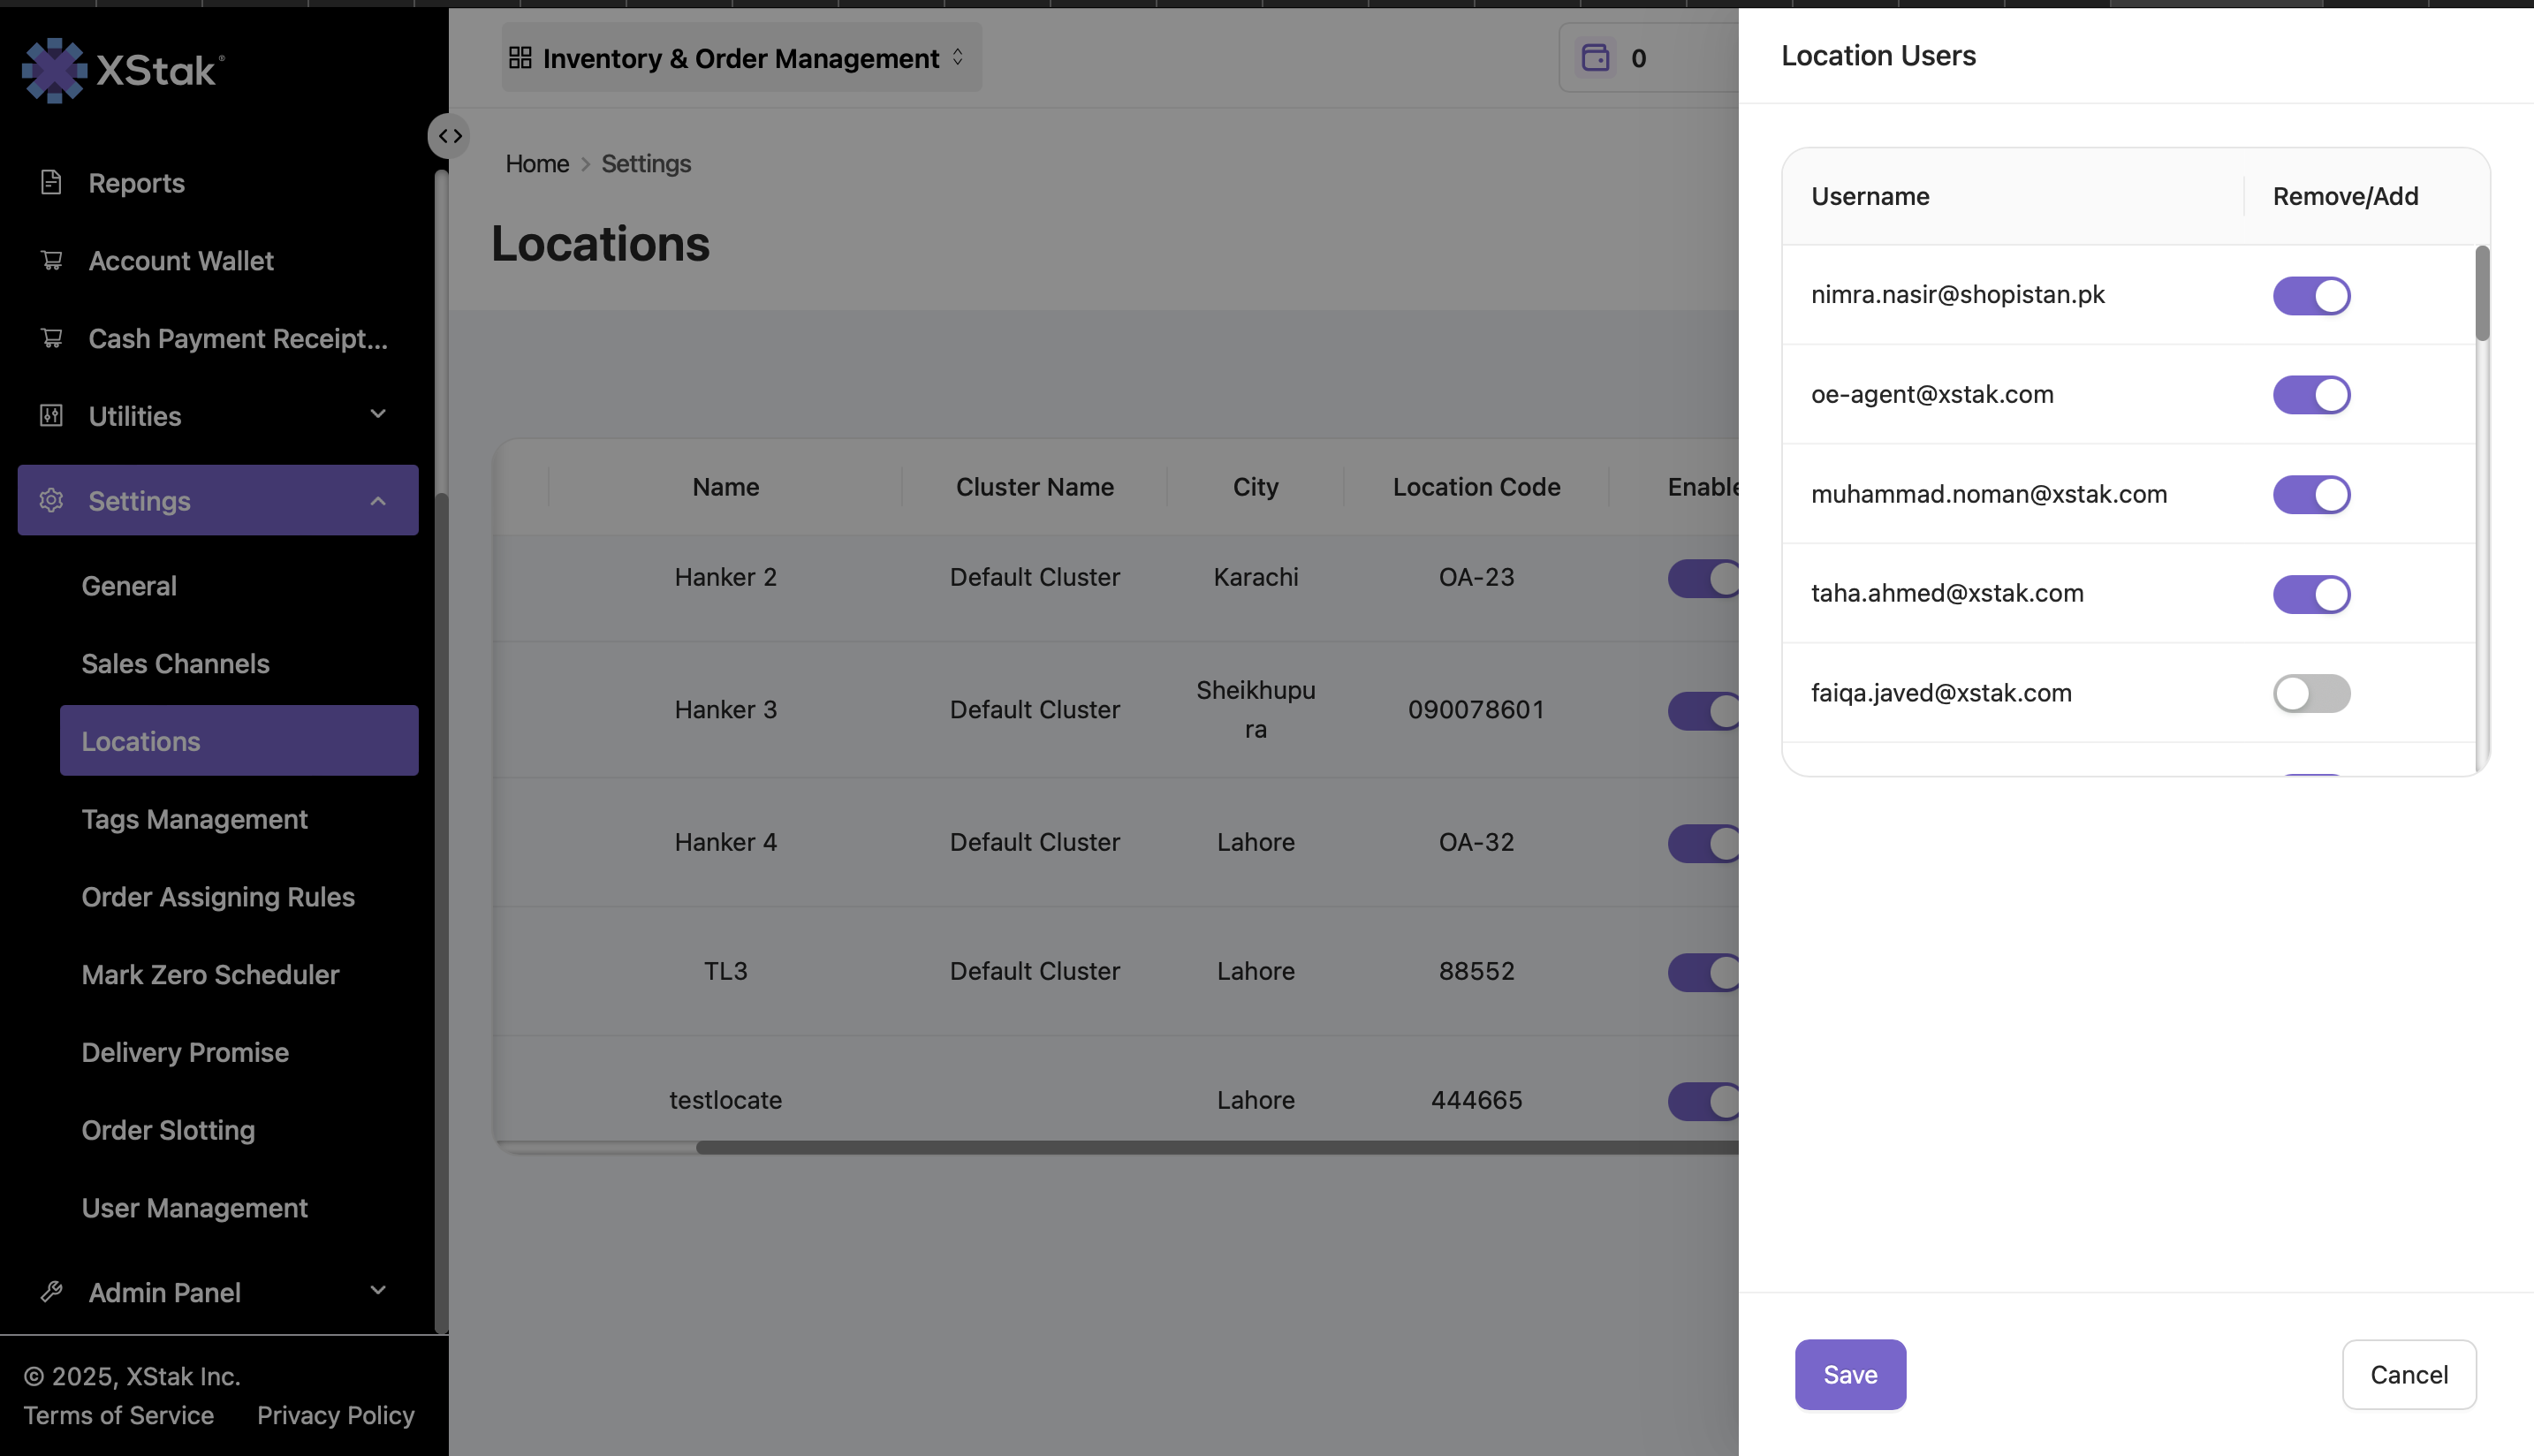
3. Location Users
Each location can have multiple associated stakeholders (email users).
From this section, you can:
View all assigned user emails
Enable/Disable email users as needed
This helps manage who receives updates, alerts, and notifications for each specific location.