
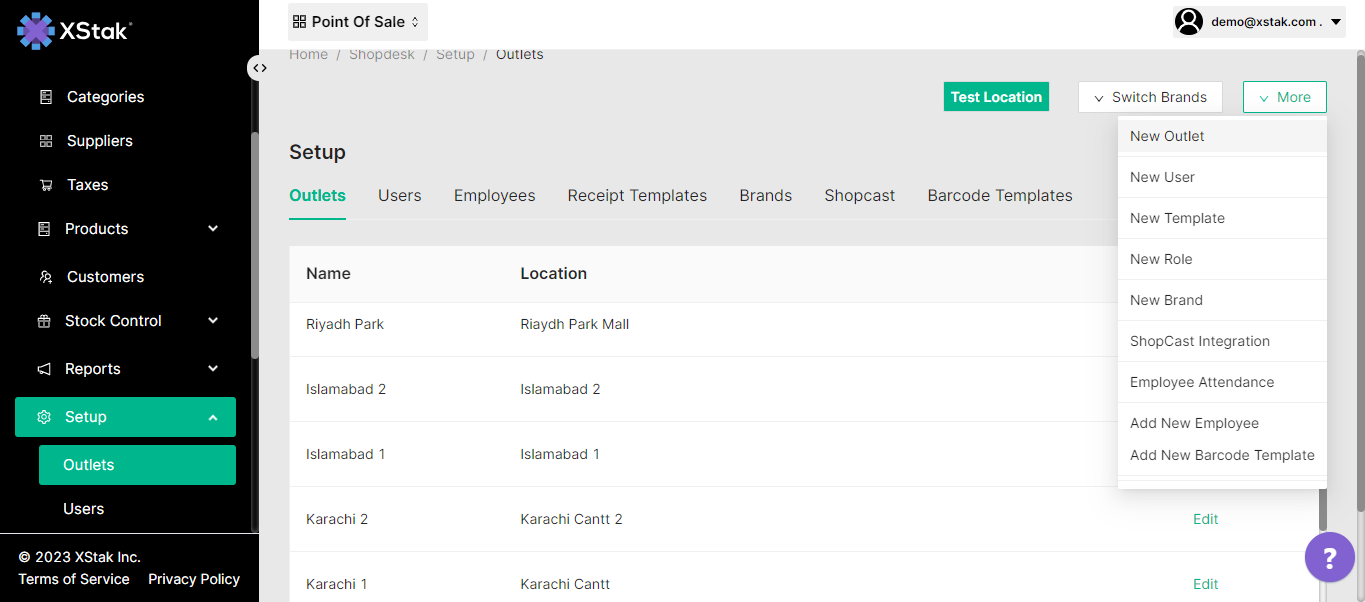
-How to Add/Edit an Outlet
Steps for Adding a new Outlet.
Click on Setup from the sidebar
Select the Outlets option from the dropdown
Click on More (drop down) at the right top corner
Select the New Outlet option
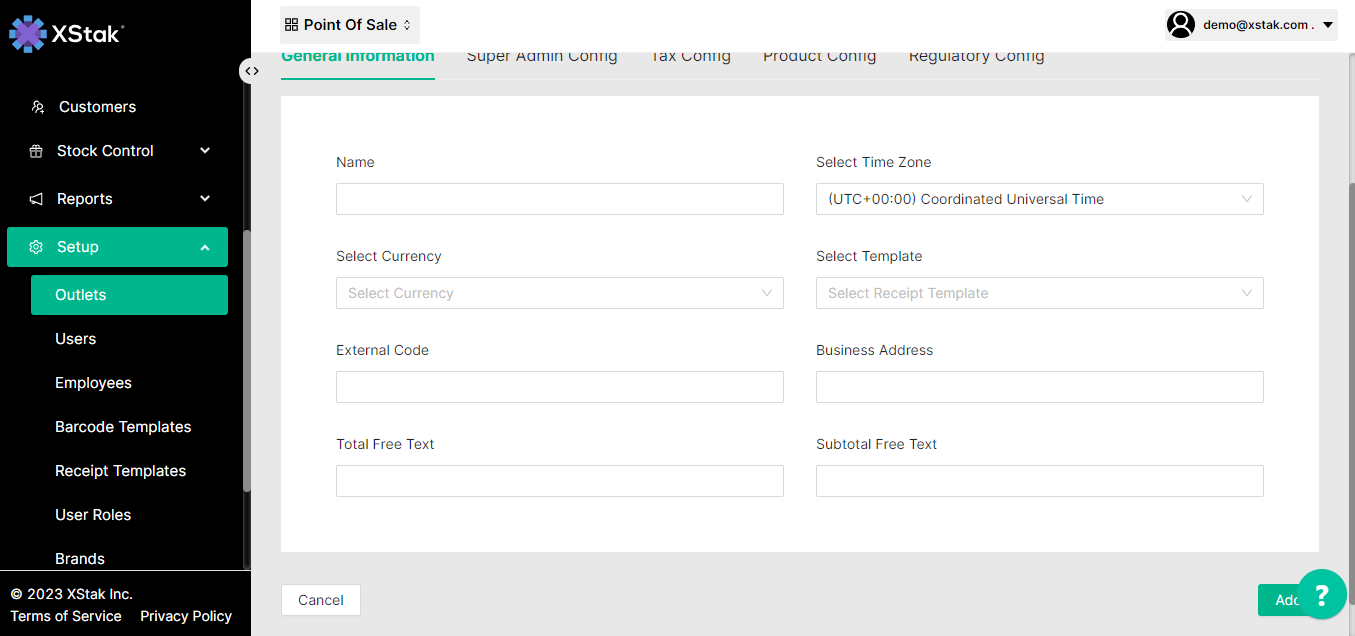
5. Enter Name of the outlet
6. Select Time Zone(according to your country)
7. Select the Currency
8. select Receipt Template. (If it created, and you want to use the same template, then you have to select it from the dropdown.)
9. Enter External Code (It is a random number we have to enter here)
10. Enter business Address of your Outlet.
11. Enter Total free Tax , Subtotal free Tax ((These are not mandatory fields, if you want to change anything on your invoice you must enter text here)
12. Click on the Add button to Add the Outlet.
Steps for Editing an Outlet.
Click on Setup from the sidebar.
Select the Outlets option from the dropdown.
Click on the Edit button against which you want to edit the Outlet.
Edit the details and click on the Update button.
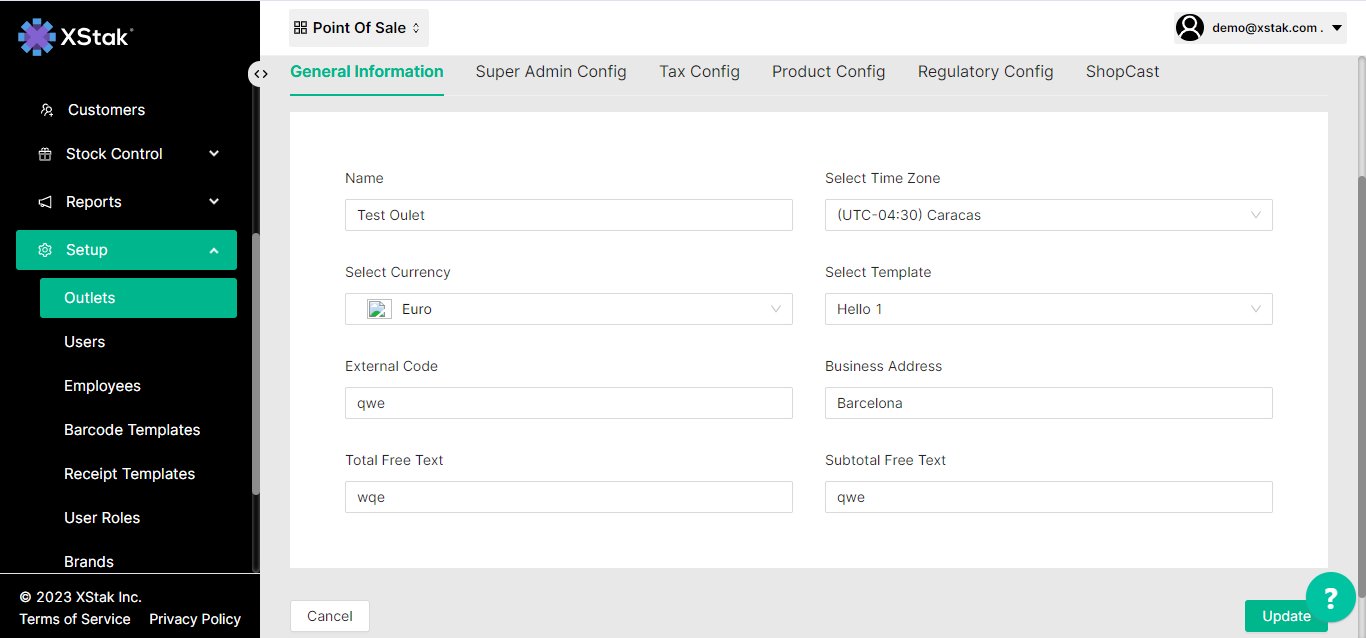
Note: If you want to edit the OE Settings for the Outlet, scroll down the same screen, edit the details and click on the Save button.