Hierarchy module
Select the Hierarchy menu to set up and manage the structure of your LMS. Hierarchy allows you to design custom levels (e.g. clubs, partners, stores, etc.) that fit your needs and align with your goals.
Every LMS will have at least two levels, the Program and a Club.
LMS gives you the freedom to create up to seven additional levels and add tiers within levels so that your LMS can grow and change with your business.
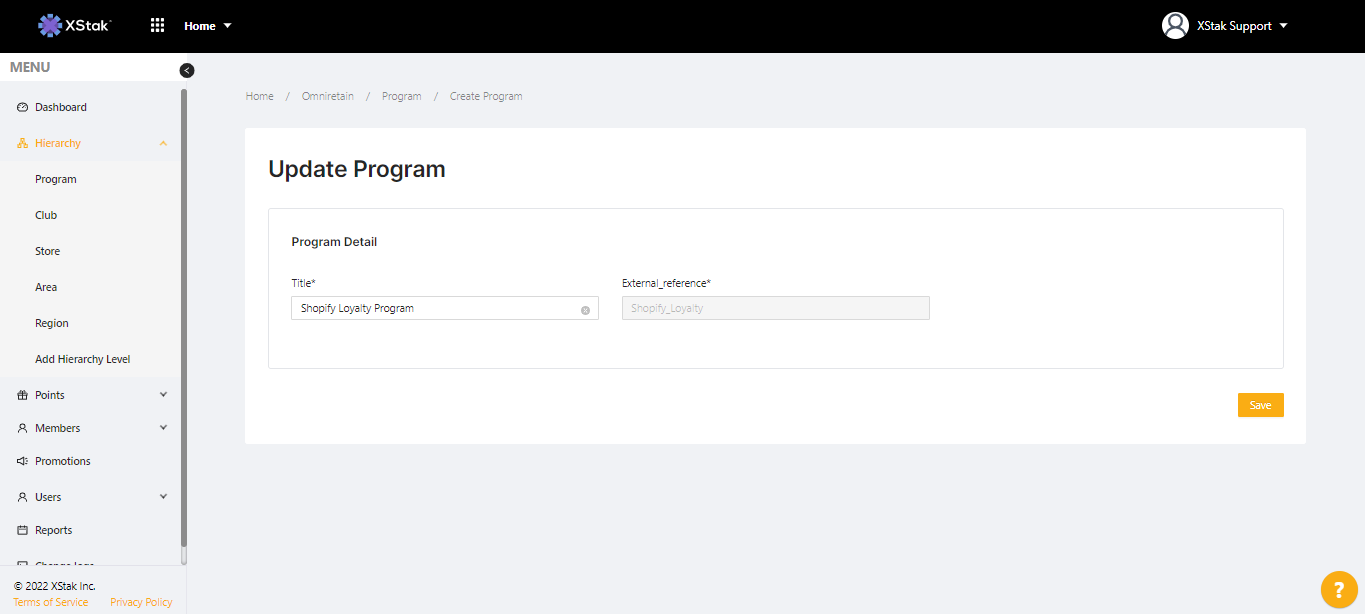
Program:
To begin setting up your LMS account, click the Hierarchy menu in the left column and select Program. The program level controls two fundamental attributes of your LMS:
Title - the name of the program; it’s recommended to make the program name the same as the company name
External reference - a unique name you can use to distinguish the program from any clubs or tiers you create
Note: once the Program Details have been set up, they cannot be changed.
Club:
The Club level is where you define most of the attributes for your LMS. To set up the Club level, click Club under Hierarchy in the left column.
Click the Add Club button at the top of the page to create a new Club, or click on one of the Clubs you’ve created previously to edit it.
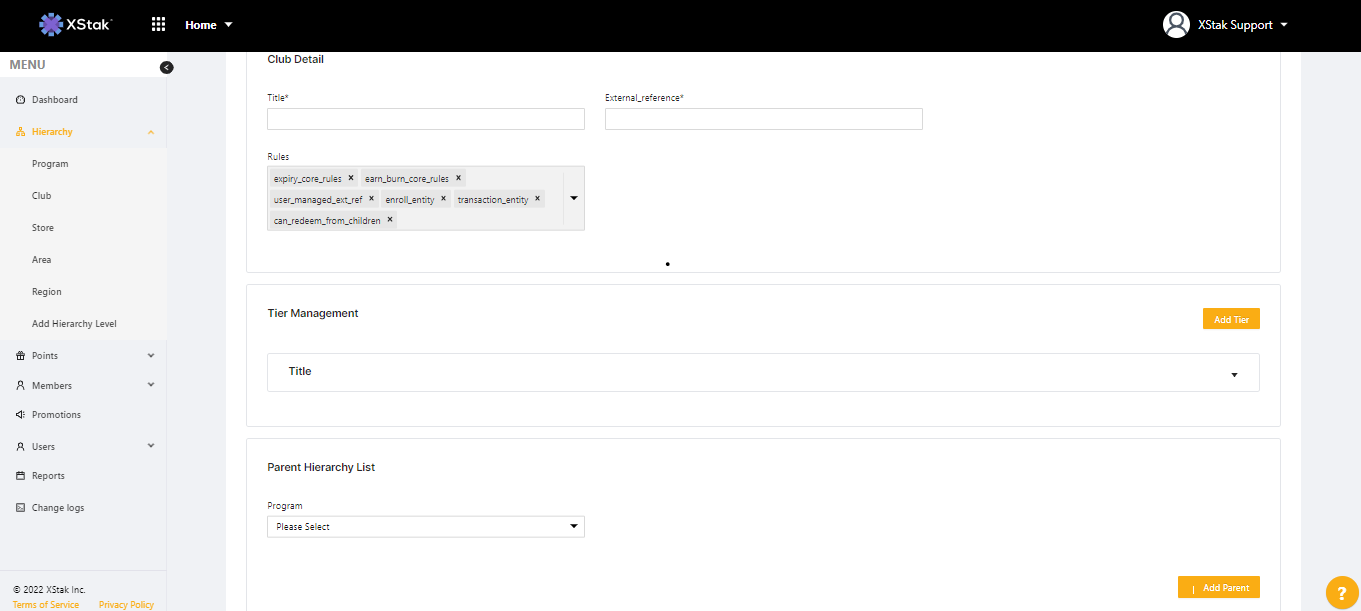
Club Detail:
The Club Detail section has two fields for every club:
Title - the name of the Club
External reference - a unique name you can use to distinguish the club from any other programs, clubs, or tiers you create
In addition, the Club Detail section shows the Rules for the club, which are created in the Rule Builder.
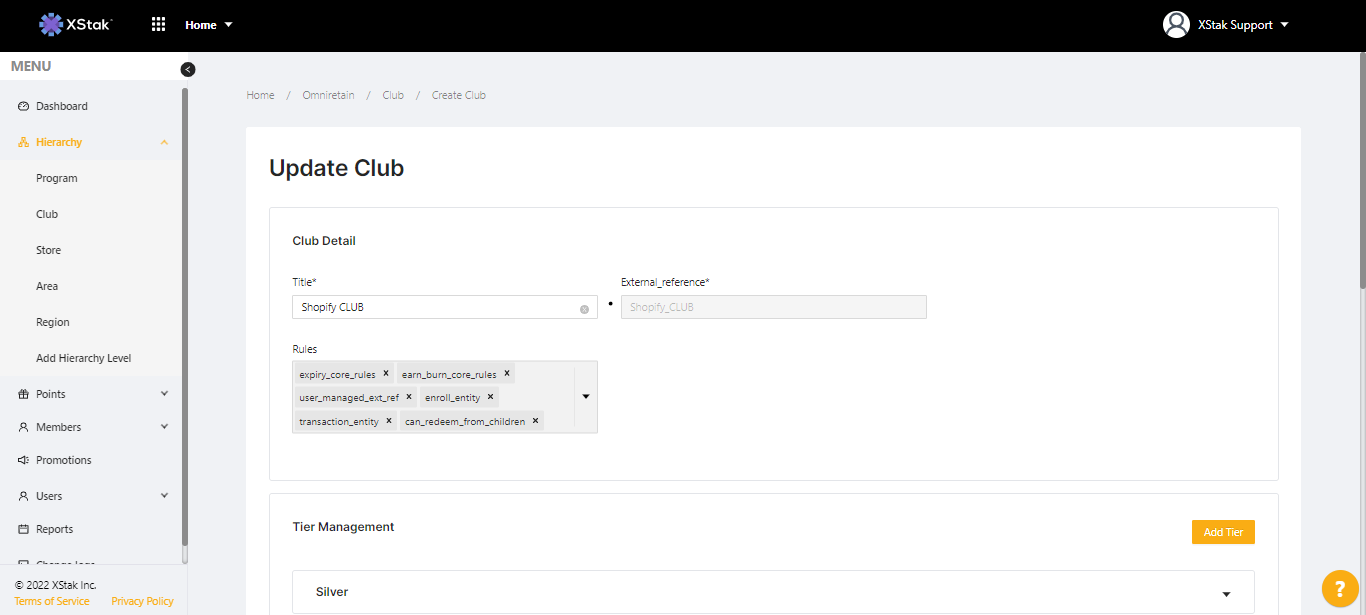
Tier Management
Tier Management allows you to define rewards and points for a club, set the criteria a member must meet in order to qualify for a tier, and write tier rules.
Click the Add Tier button to create a new tier, or click on the name of an existing Tier to edit it.
Fill out the following information in the main Tier Management section:
Tier Name - name of the loyalty system Tier (e.g., Black, Silver, Gold)
External Reference - a unique name you can use to distinguish the club from any other programs, clubs, or tiers you create
Bin Number (optional) - similar to credit and debit cards ability to define the first 4 digits of the loyalty card number (e.g., 8888, 4242)
Global ranking - the tier’s ranking out of all the tiers you have created across all clubs
Local ranking - this specific tier’s ranking out of all the tiers in this club
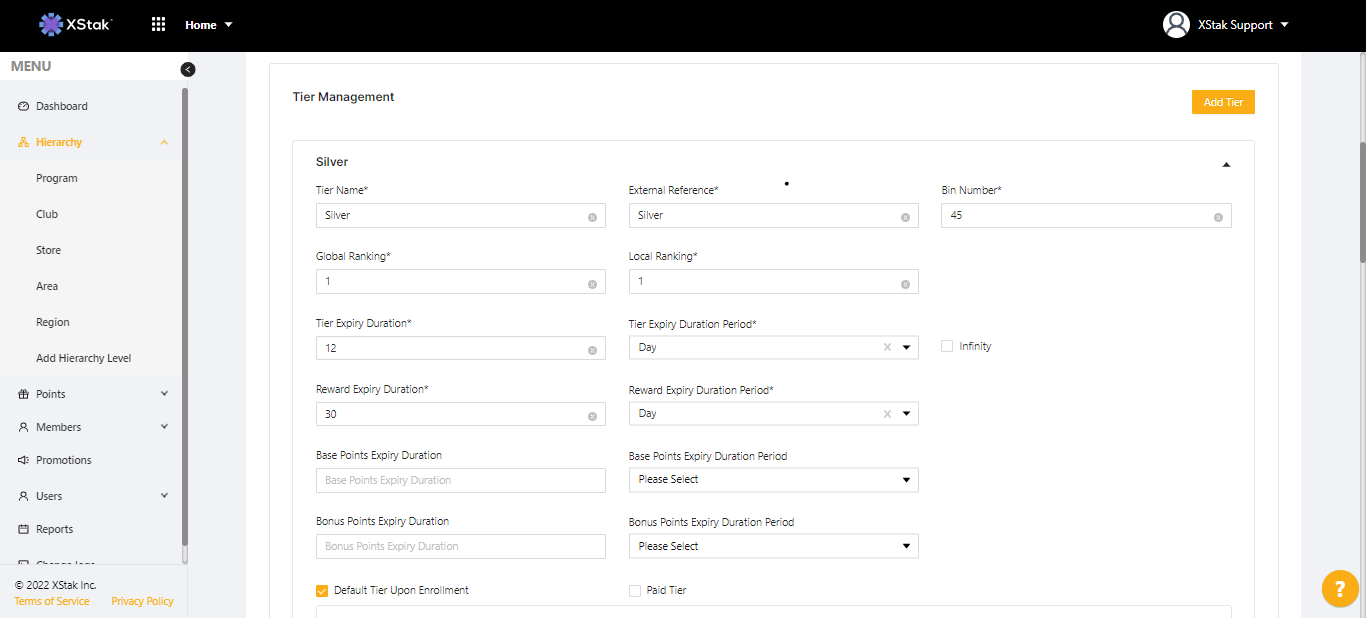
The following fields have an associated Expiry Duration Period field that allows you to choose its duration before it expires; whether Year, Month, or Day.
Tier Expiry Duration - the amount of time the Tier lasts before it ends. If the Tier does not have an end date, check the Infinity checkbox.
Reward Expiry Duration - the amount of time a member’s rewards will last before they expire
Base Points Duration - the amount of time points earned on regular transactions last before they expire
Promotional Points Duration - the amount of time points last when they are earned on events defined by the promotion builder and earned as promotional points
Bonus Points Duration - the amount of time points last when they are earned on events defined by the promotion builder and earned as bonus points
Entity Specific Points Duration - the amount of time points last when they are earned on events defined by the promotion builder and earned as entity points (e.g.: points earned at specific entity level in the Hierarchy, like a store or club)
Use the Default Tier Upon Enrollment and Paid Tier checkboxes to designate the current tier as entry-level and/or paid. Any tier can be a Paid tier if members need to pay a subscription fee in order to sign up.
Note: Payment processing for a paid tier must come from the external application. LMS APIs can be used to map the payment, but it does not process the payment.
Click the Remove button to delete a tier.
Core Rules:
Use the Earning Rule fields to define how many points a member earns for each dollar they spend. Use the Redemption Rule fields to set how many points equal $1USD when they’re redeemed.
These rules are automatically imported to any child club you create. For example, if you use the Add Level feature to create a store that is a child of a club you’ve created, it will have the same points earning and redemption rules as defined in the parent club. See the Add Level section for more information.

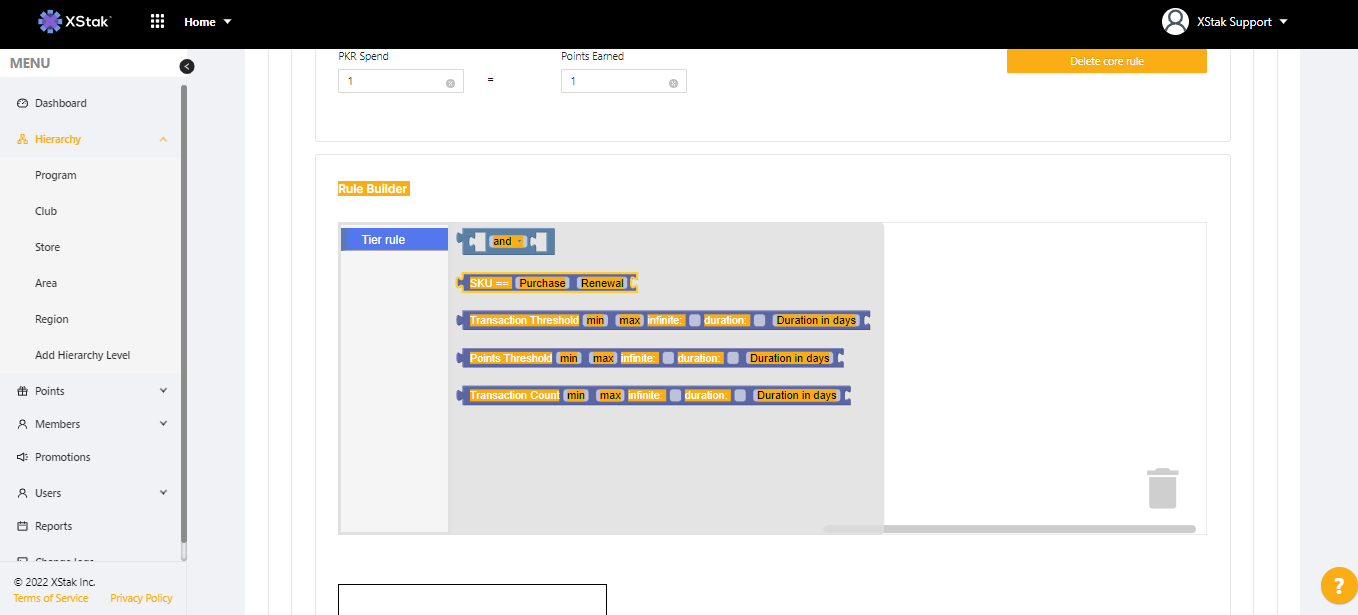
Rule Builder:
The Rule Builder is a drag-and-drop menu that lets you create “if this, then that” statements to further configure additional rules. Rule attributes are displayed as blocks, each containing different operators and variables. The majority have two things in common: an operator and a variable.
Operators allow for equals to and greater/lesser than statements:
== - the value on the left is equal to the value on the right
!= - the value on the left is not equal to the value on the right
>= - the value on the left is greater than or equal to the value on the right
<= - the value on the left is less than or equal to the value on the right
There are five total rule blocks, each with different variables. Click the Tier rule button to the left of the drag and drop menu to begin using the rule builder.
And - Joins two rule blocks together. Use the dropdown menu to choose between and or or. If two rule blocks are joined by and, a member must meet the criteria in both statements. If two rule blocks are joined by or, a member-only has to meet one of them.
SKU - Enter an SKU and check the duration box and enter a duration in days for a specific time period.
Transaction Threshold - Enter the minimum and maximum transaction threshold values. Check the infinite box if there is no time limit. Check the duration box and enter a duration in days for a specific time period.
Points Threshold - Enter the minimum and maximum points thresholds. Check the infinite box if there is no time limit. Check the duration box and enter a duration in days for a specific time period.
transaction_count - Enter the minimum threshold value. Check the infinite box if there is no time limit. Check the duration box and enter a duration in days for a specific time period.
To delete a rule block you’ve added, click on it to select it, and then click the trash icon in the bottom right.
Parent Hierarchy:
While creating a Club you will select ADD CLUB,
From there you can select the parent of the Club. When you’re done, click the Add Parent button at the bottom right.
Program Core Rules:
After you select a parent program, its rules will appear in the Program Core Rules. These are a copy of the rules as you set them up at the Club level. You can make adjustments to them here or leave them as-is.
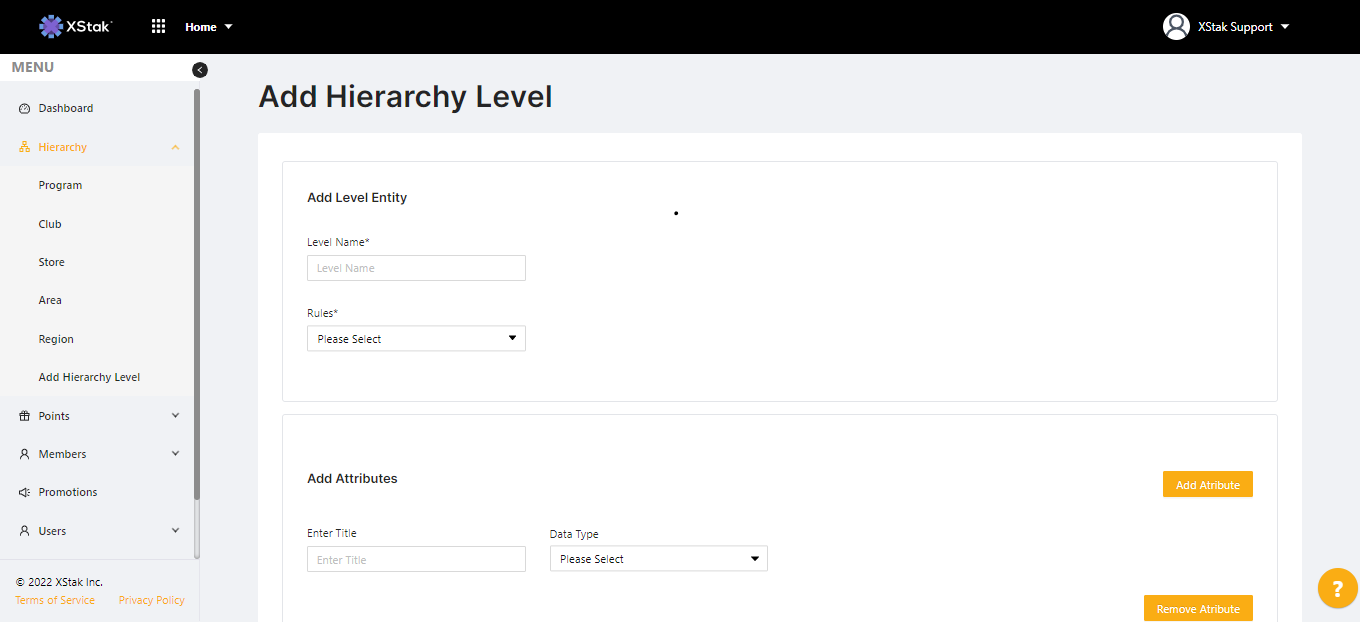
Add Hierarchy Level
The Program and Club levels exist as defaults in every Member account. But in many instances, a business may want to create additional levels. For example, a department store could create levels for their men’s, women’s, and children’s clothing departments. Another example could be creating a separate level for each of a local restaurant’s five locations. The Add Level menu allows you to create custom levels that match your business’s structure.
Click Add Level to begin.
In the Add Level Entity fields, give the new level a name, and select a set of rules you have created previously at the club level.
The fields under Add Attributes are custom fields for internal use.
use the Add Attribute and Remove buttons to set the number of fields
When you’re finished, click Submit. The new level will appear beneath Program and Club in the left-hand column under Hierarchy for further customization.