Price & Quantity Update
The Price & Quantity Update section of the Inventory Module allows merchants to manage product pricing, stock availability, and channel-level inventory synchronisation through file uploads and job monitoring.
This module consists of four components:
Upload File
Price Update Status
Location Inventory Update Status
Sales Channel Update Status
Each section is explained below with a clear workflow for Price Upload, Quantity Upload, and Job Monitoring.
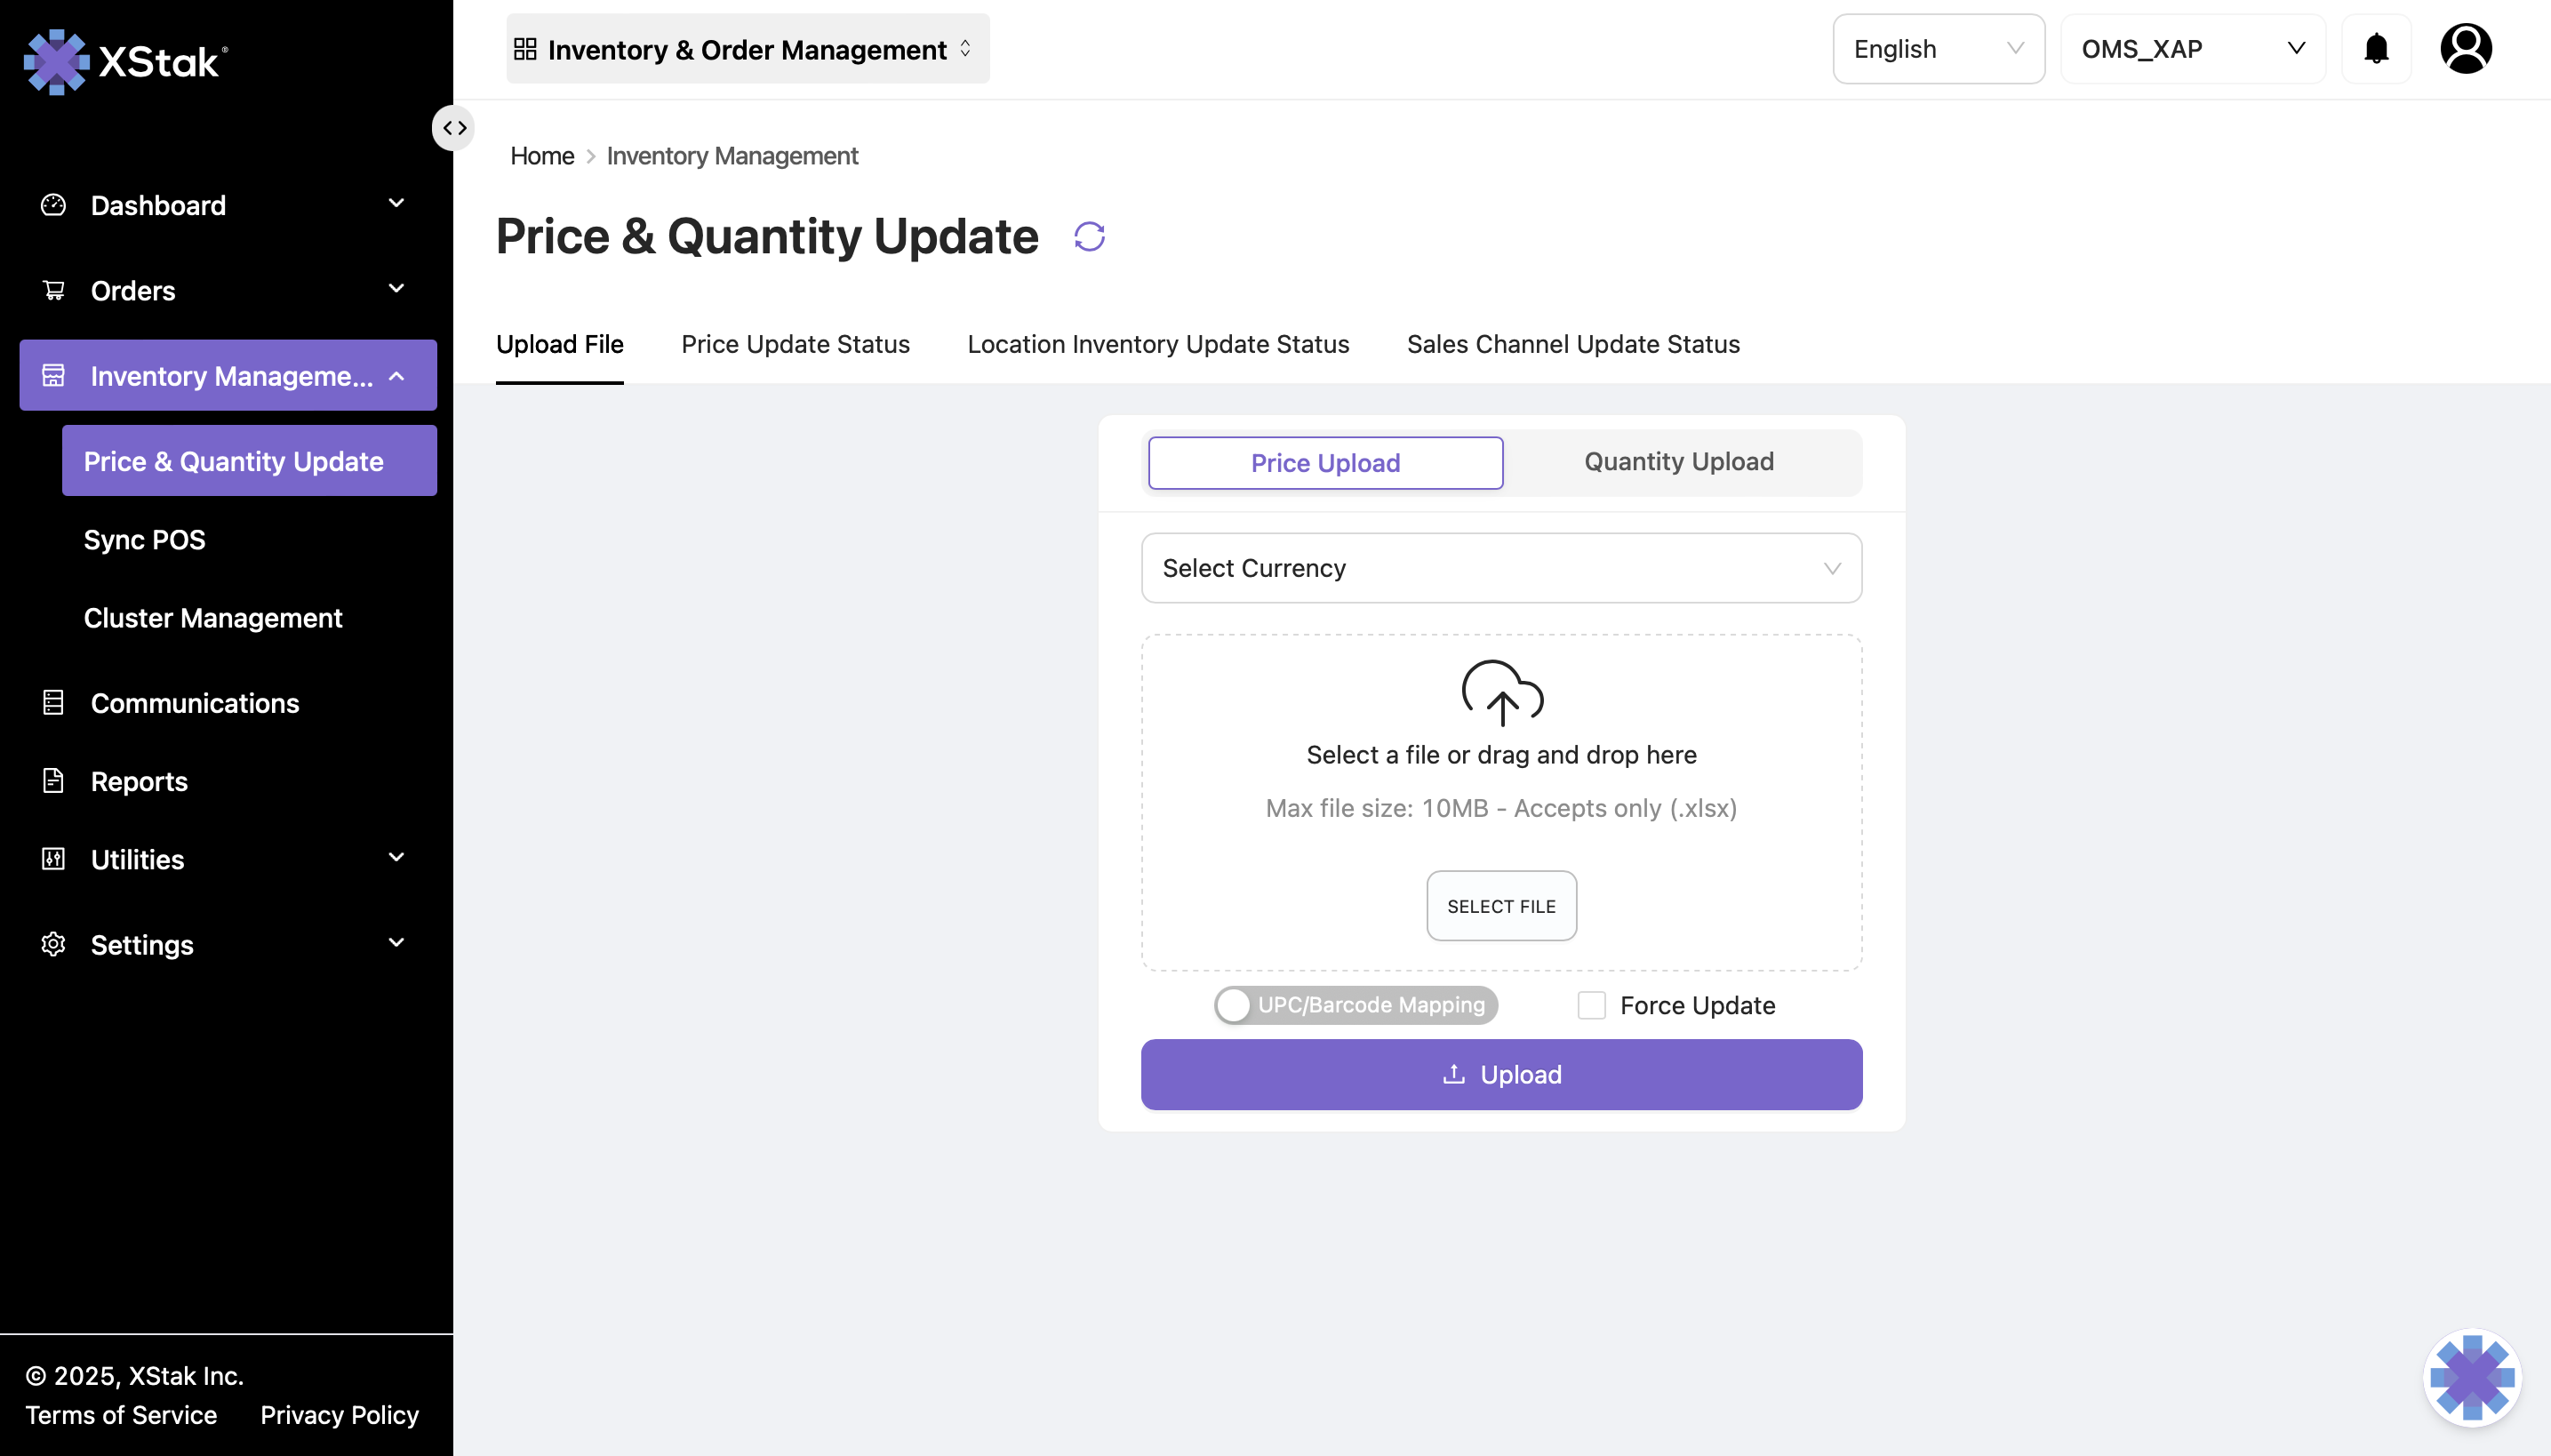
A. Upload File
1. Price Upload Workflow
Purpose
Used to update Selling Price and Special (Discounted) Price for SKUs across your sales channels.
Steps
Step 1: Open Inventory Module
From the sidebar, click Inventory.
Select Upload File.
Choose Price Upload.
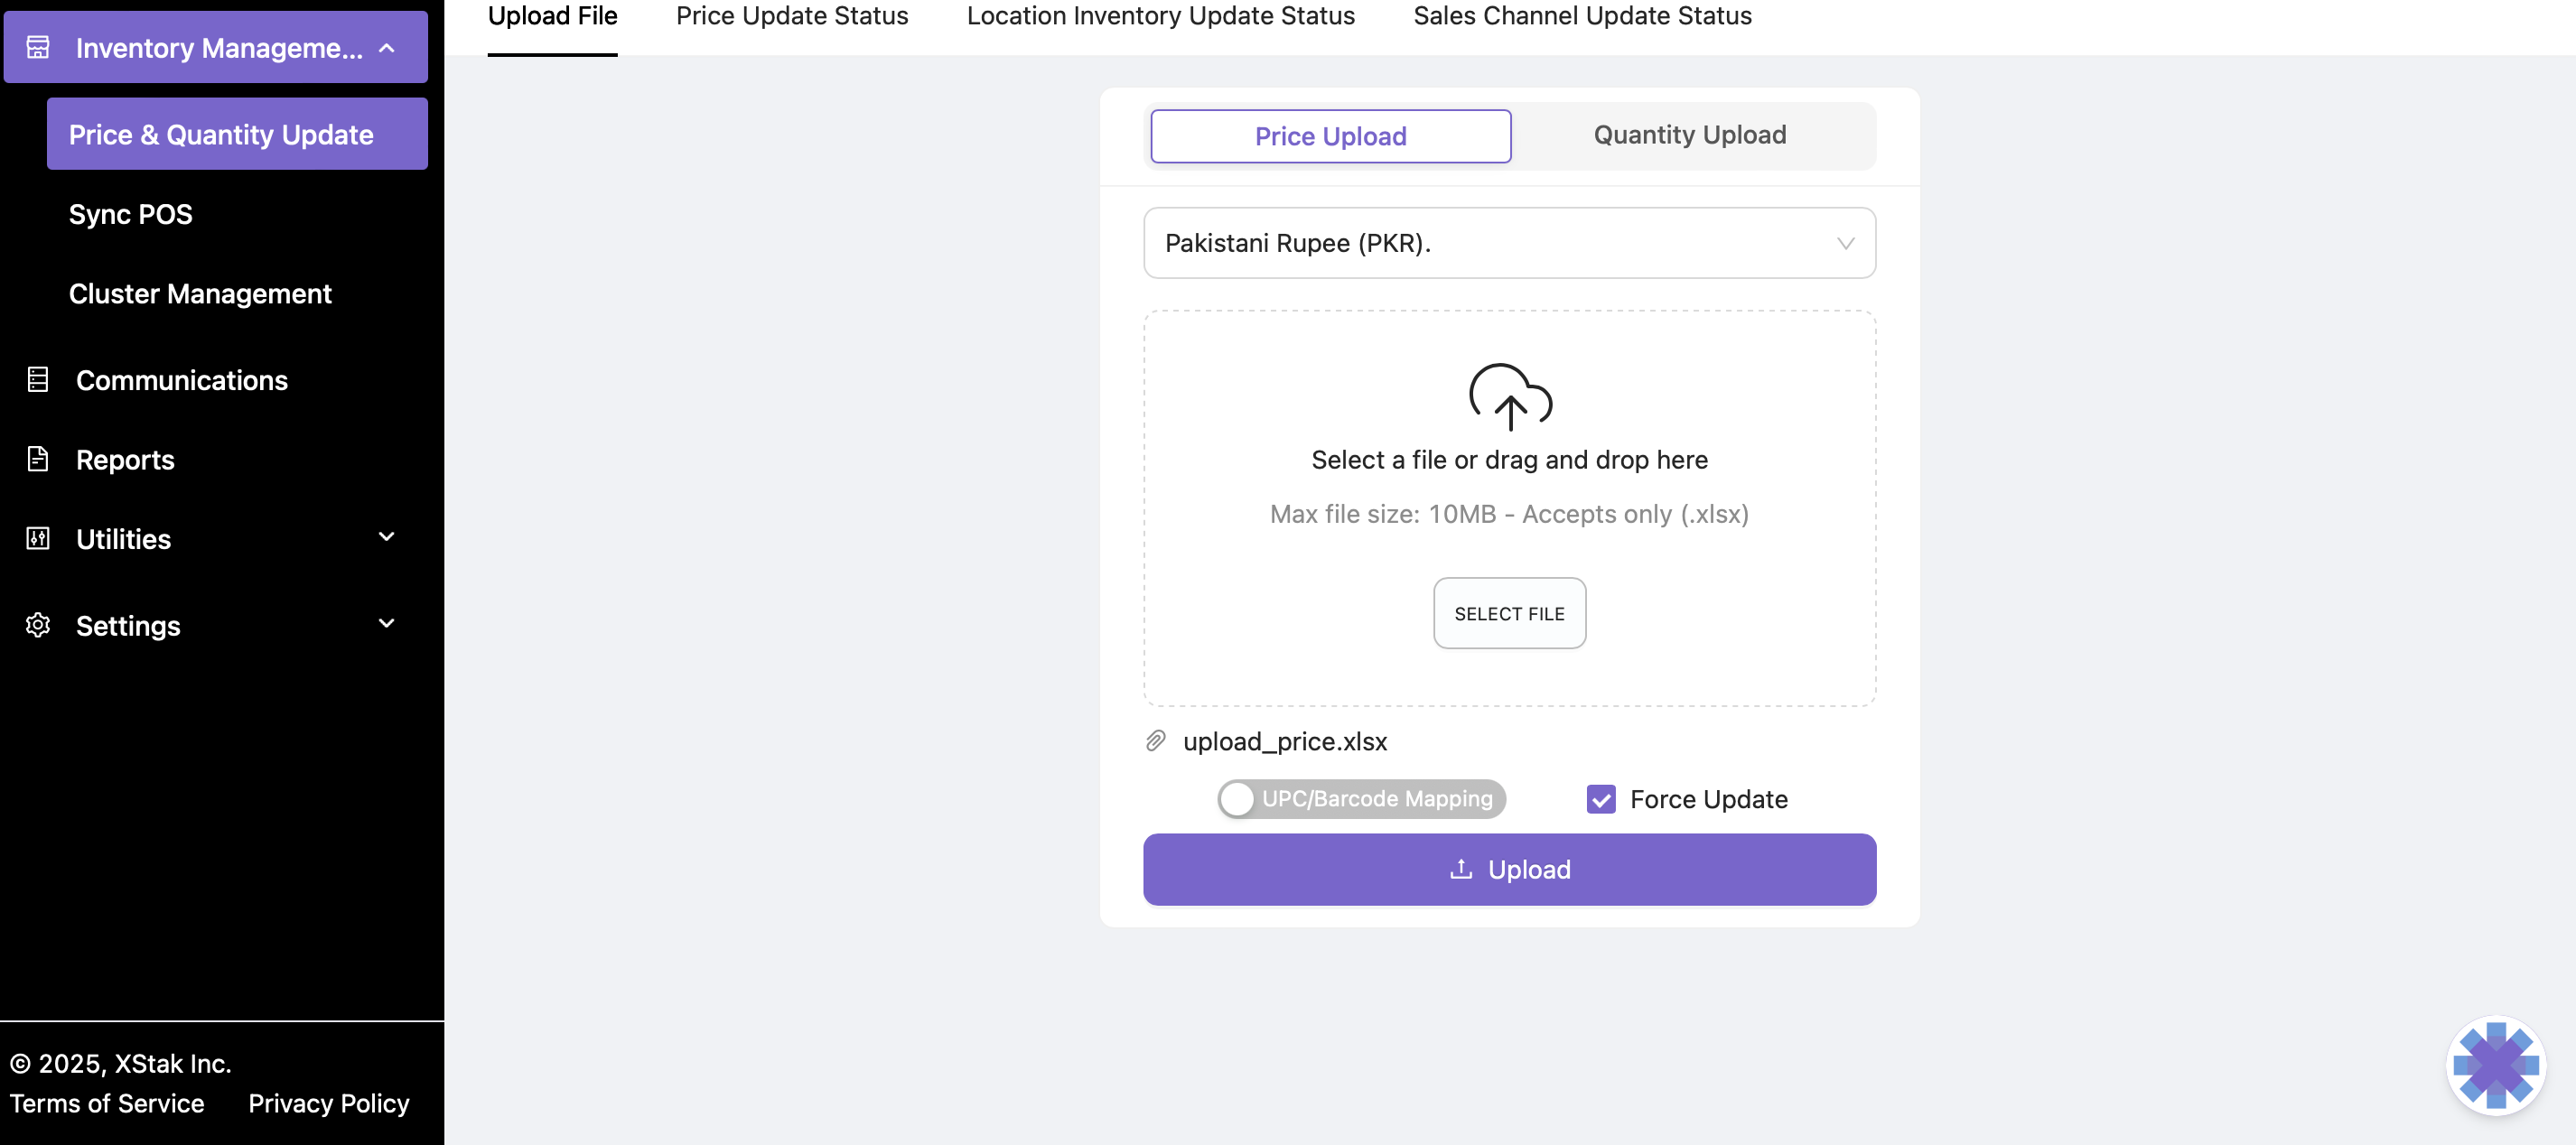
Step 2: Select Store Currency
Choose the correct currency from the dropdown (e.g., PKR for a local Shopify store).
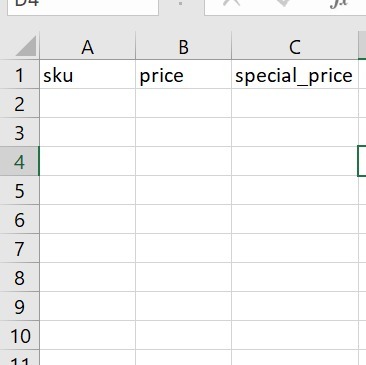
Step 3: Prepare Your File
Your Excel file must contain the following columns:
Column | Description |
|---|---|
sku | Unique product SKU |
price | Selling price (regular price) |
special_price | Discounted price (If no discount, repeat the value of price) |
Ensure the file is saved in Excel Workbook (.xlsx) format.
Sample File Format :
Step 4: Upload the File
Click Select File and choose your prepared file.
Enable Force Update (recommended to overwrite old pricing).
Click Upload File to submit.
Step 5: Monitor the Status
Navigate to Price Update Status to review:
Success/failure of the job
Total processed SKUs
Any errors encountered
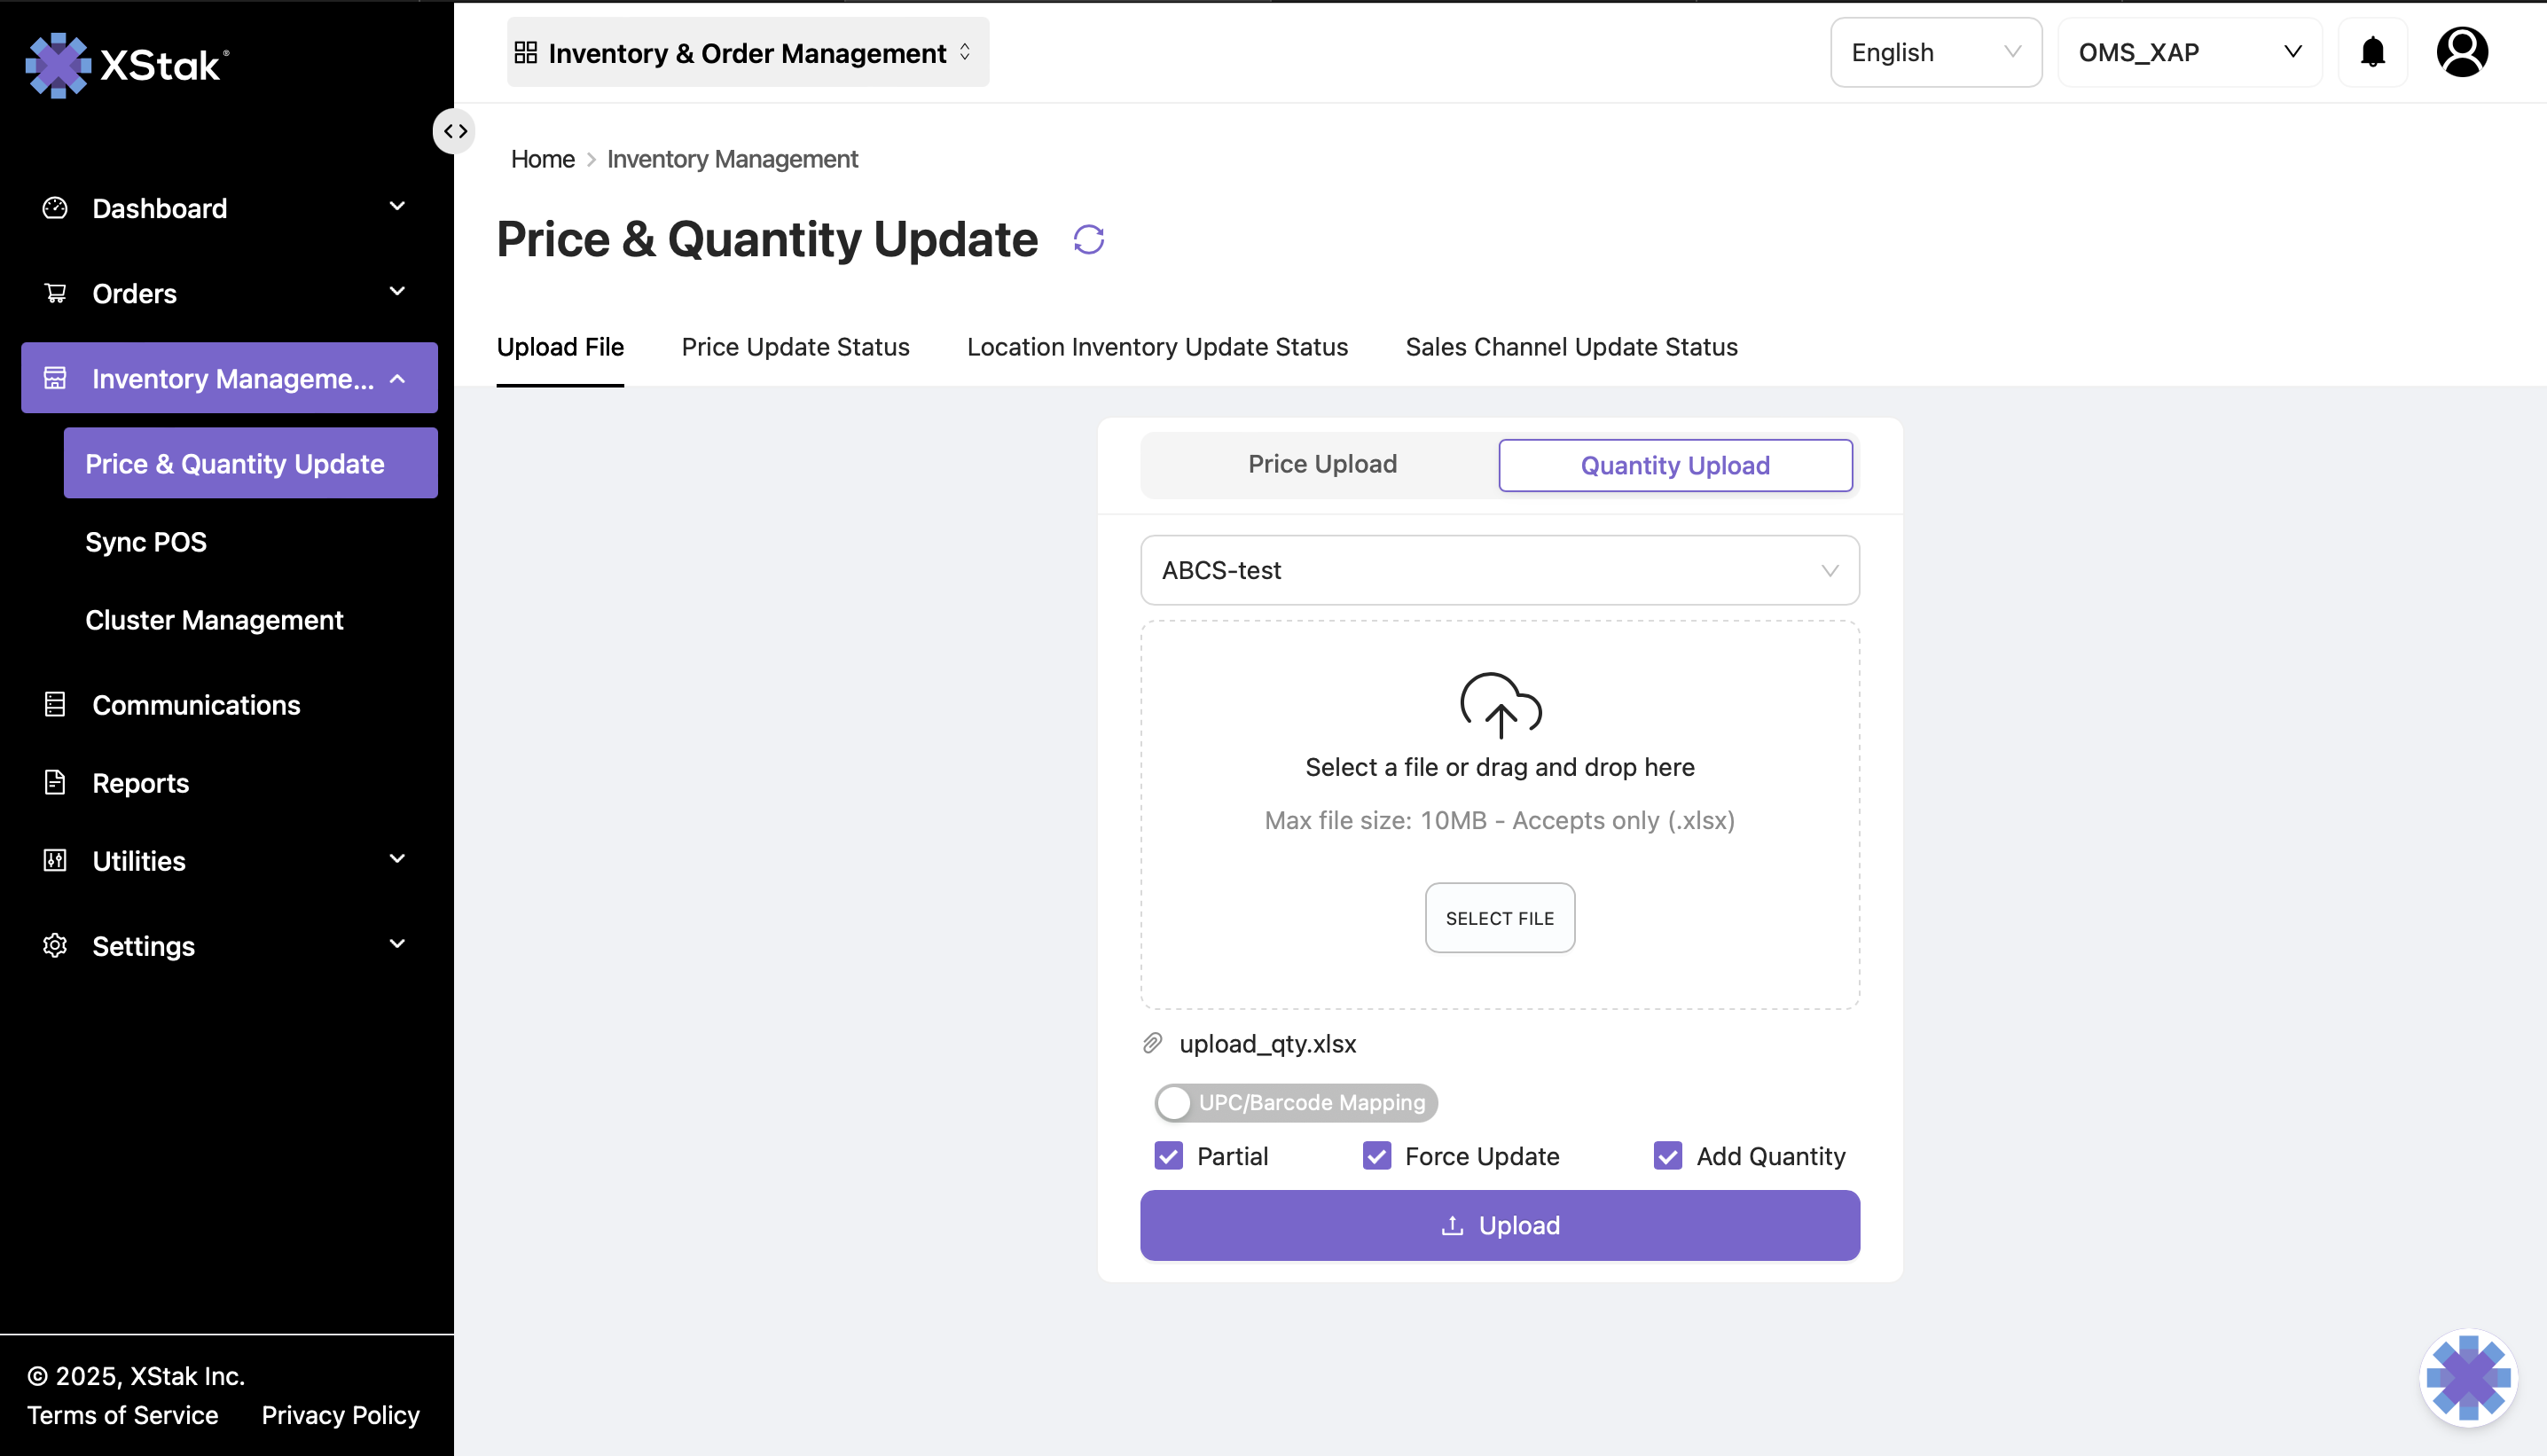
2. Quantity Upload Workflow
Purpose
Used to update available stock against a specific location.
Steps
Step 1: Open Quantity Upload
Go to Inventory → Upload File.
Select Quantity Upload.
Step 2: Select Location
Choose the relevant location from the dropdown.
Quantity will be updated only for the selected location.
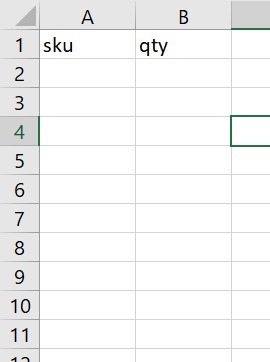
Step 3: Prepare Your File
Your Excel file must contain:
Column | Description |
|---|---|
sku | SKU for which quantity needs to be updated |
quantity | New stock quantity |
Save as Excel Workbook (.xlsx).
Sample File Format :
Step 4: Upload the File
Click Select File → Choose your file.
Enable these options before uploading:
Option | Purpose |
|---|---|
Partial Update | Ensures only the provided SKUs are updated. Unmentioned SKUs remain unchanged. |
Force Update | Overwrites existing quantities. |
Add Quantity (optional) | Adds the uploaded quantity to the existing stock instead of replacing it. |
Important Notes
If Partial Update is unchecked → All SKUs not in the file will be reverted to 0 stock.
If Add Quantity is unchecked → OE replaces quantity instead of adding.
Step 5: Upload
Click Upload File.
Price updates will sync across all connected sales channels.
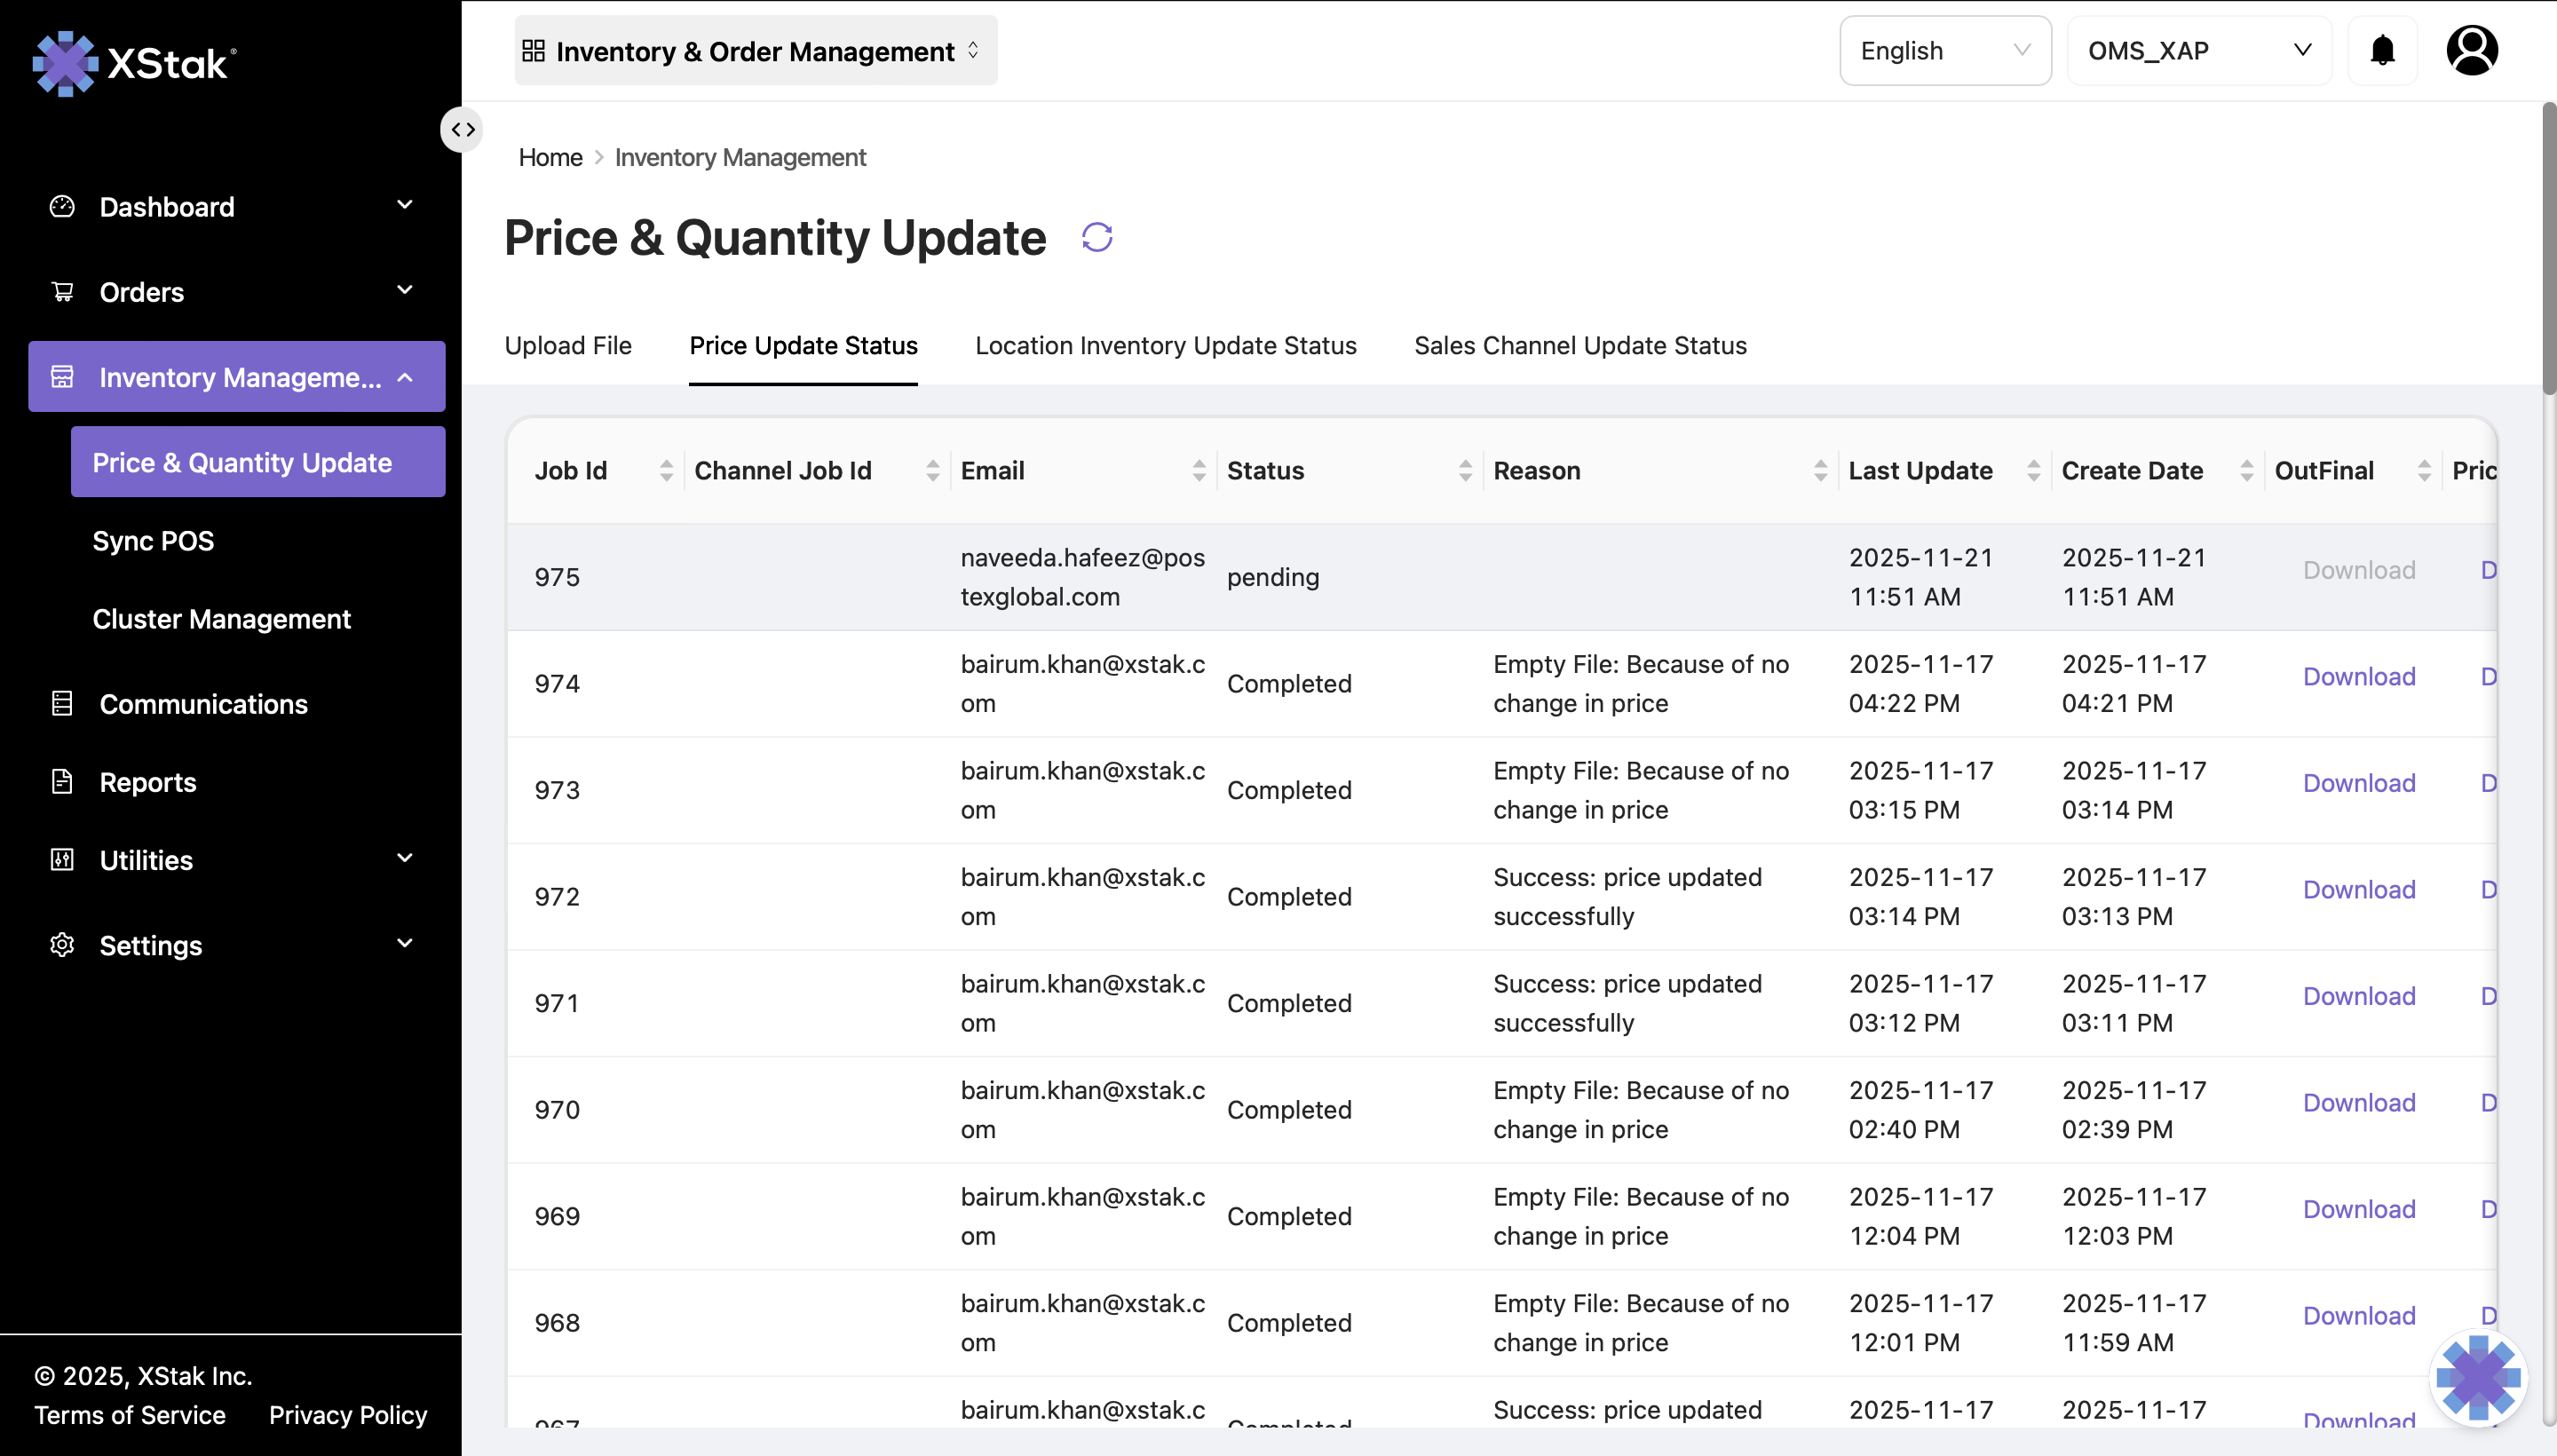
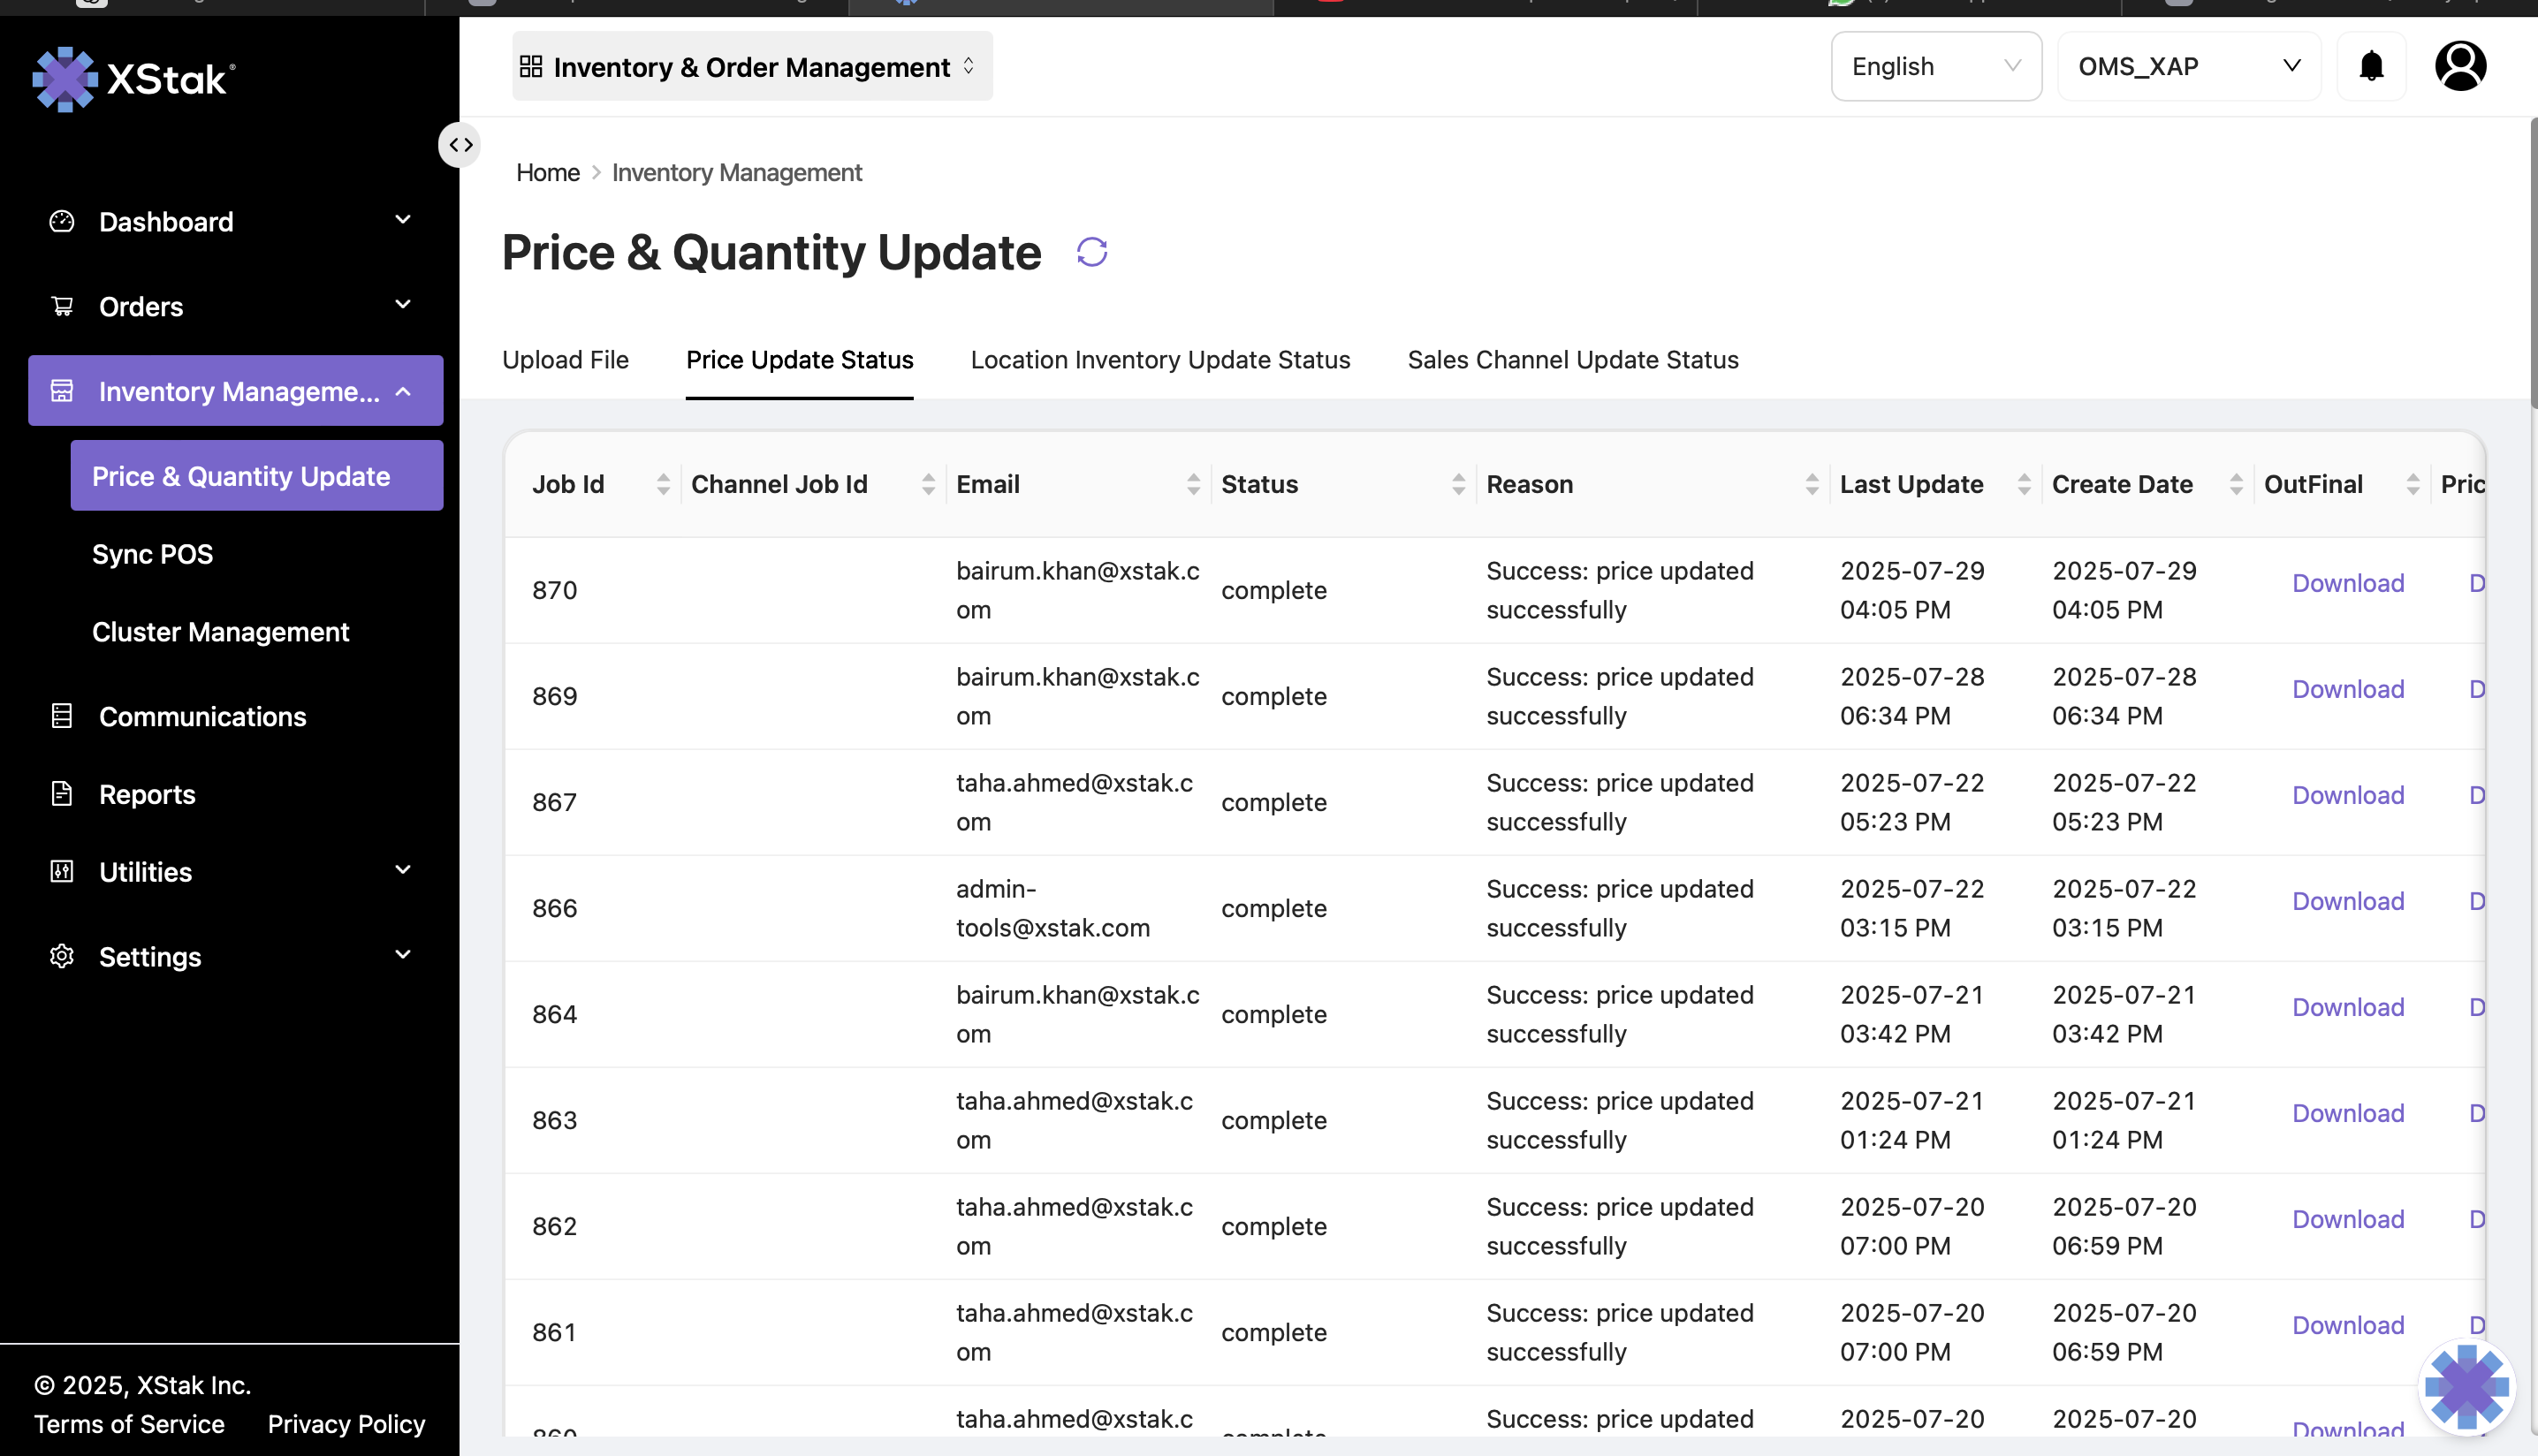
B. Price Update Status
Purpose
To review the results of all Price Upload jobs.
In this section, you can:
Track execution status of recent price updates
Identify rejected or failed SKUs
Download files for review or audit
C. Location Inventory Update Status
Purpose
Shows job logs for Quantity Upload performed for specific locations.
In this section, you can:
View quantity update jobs location-wise
Monitor success/failure of updates
Download output files
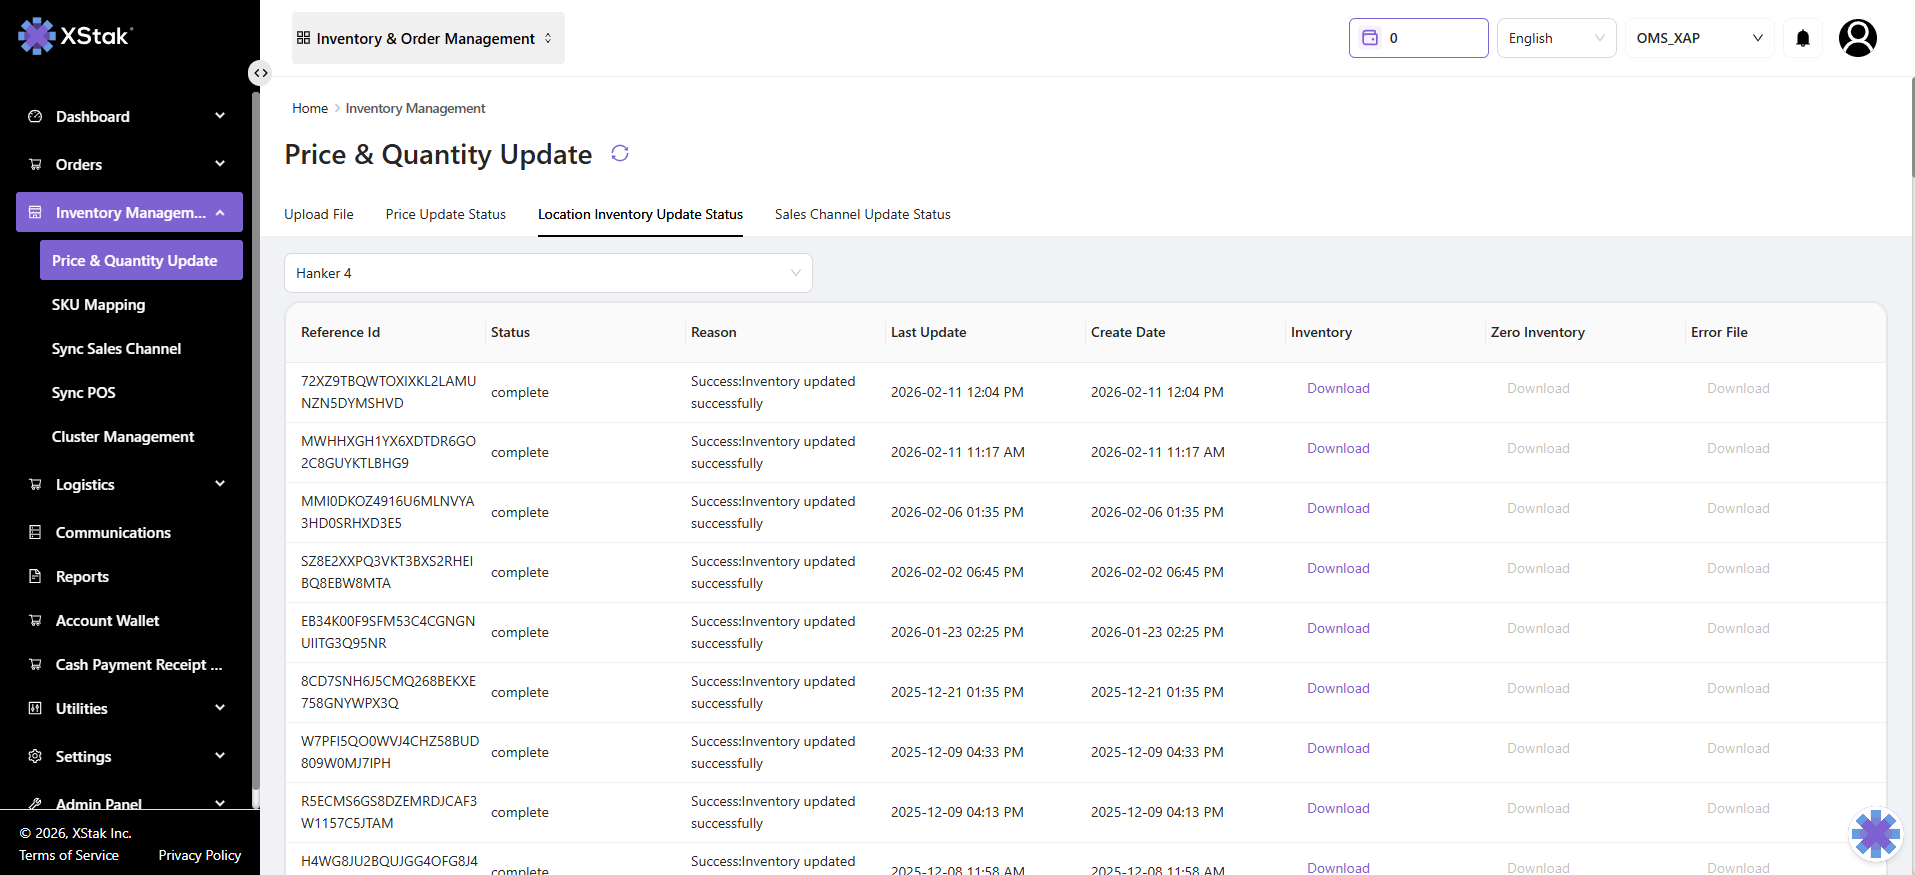
This helps validate stock synchronization for each warehouse/store.
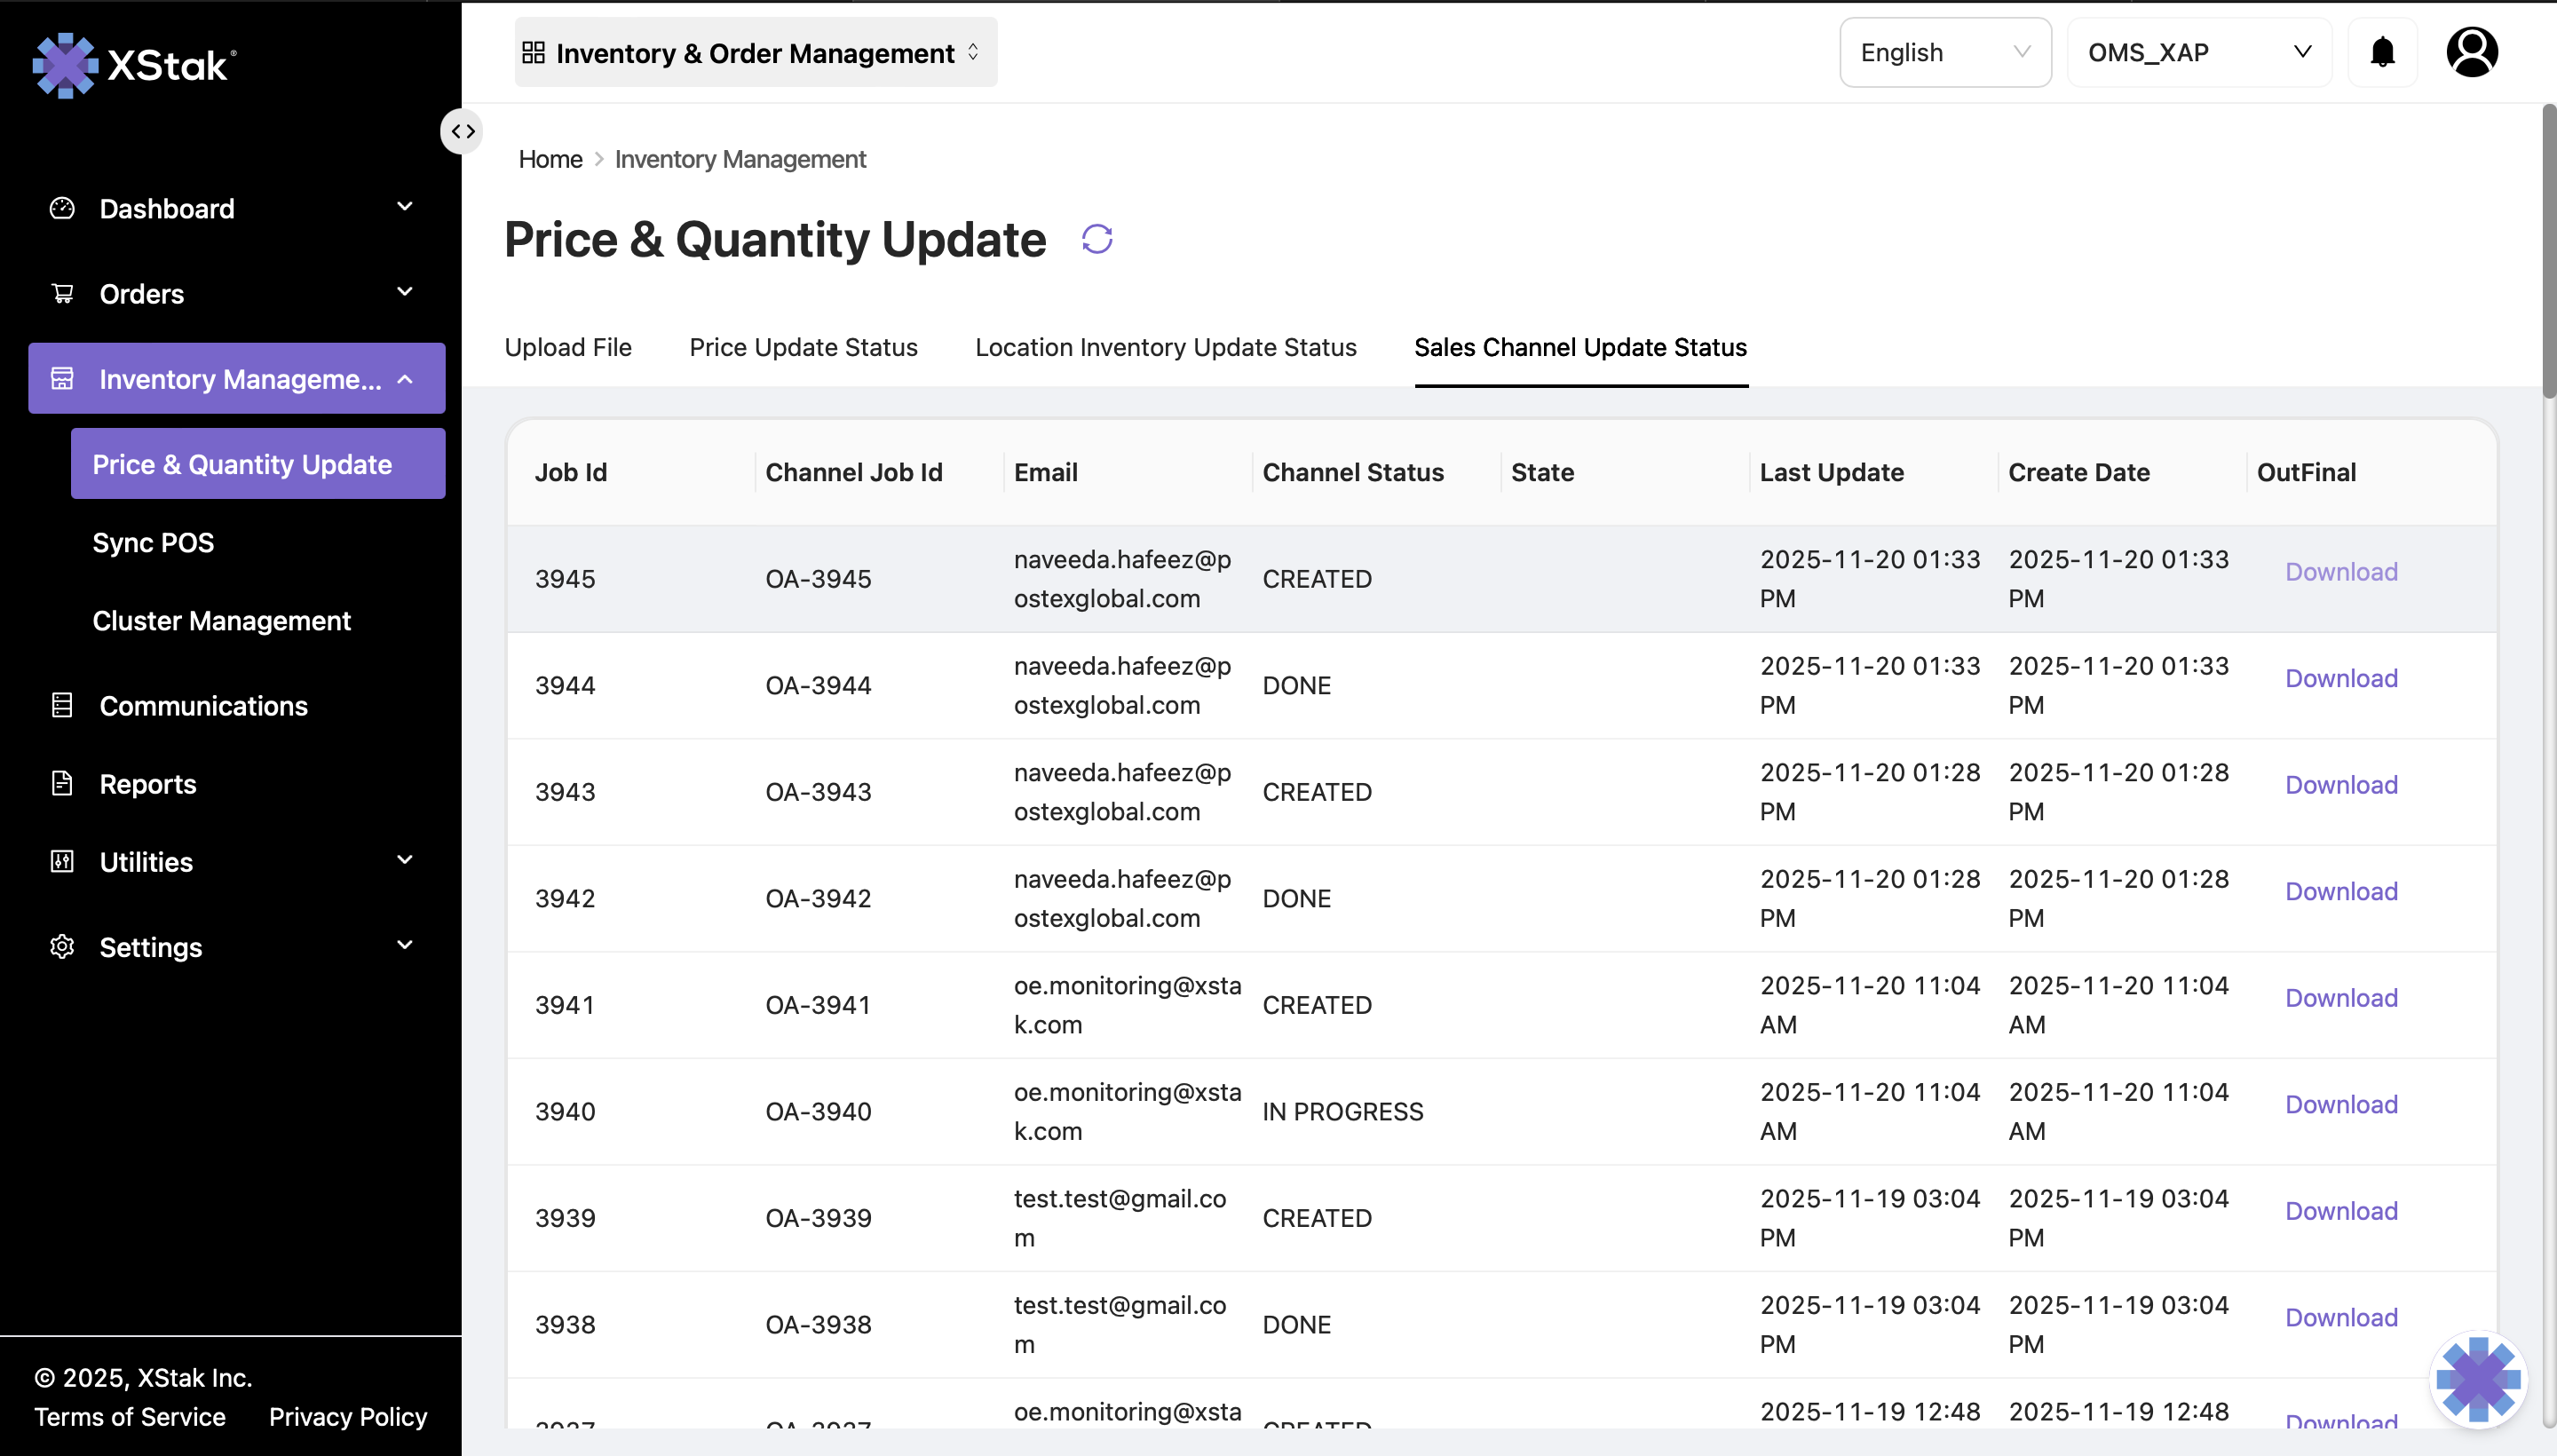
D. Sales Channel Update Status
Purpose
Monitors inventory update sync jobs pushed from OMS to each sales channel (e.g., Shopify, WooCommerce, Magento).
Features in this Panel
Field | Description |
|---|---|
Job ID | Unique identifier of the inventory sync job |
Channel ID | Identifies which sales channel update was sent to |
Performed By | Email of the user who initiated the job |
Status | Shows success/processing/failed status |
Last Updated / Created Date | Timestamp for audit trail |
Download OutFinal | Download the final file that OMS sent to the channel |
The OutFinal file helps users verify the exact file that was pushed to the channel.