How to add Clusters
What is a Cluster?
A cluster is a group of locations that can be assigned to one or more sales channels. This allows users with multiple sales channels to manage inventory more flexibly. When inventory is uploaded to a location, the system calculates the OutFinal based on the inventory within the cluster, rather than all locations. This means the OutFinal value sent to a sales channel only includes the inventory from locations within the assigned cluster.
stepwise instruction to Add cluster:
Step 1 Navigate to the Clusters Section
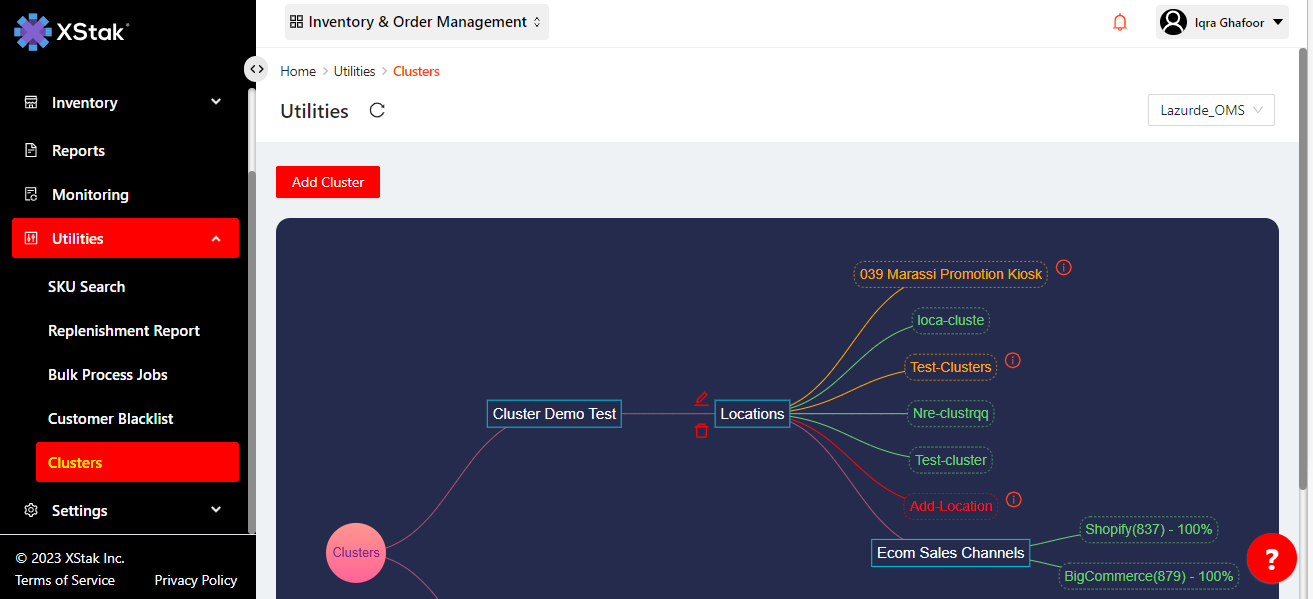
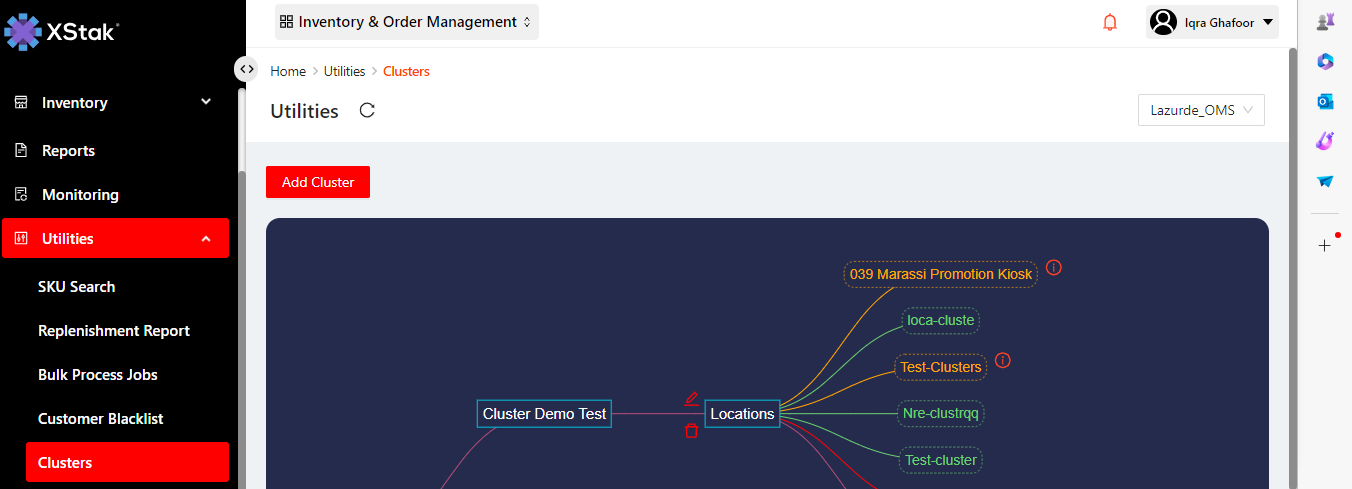
Go to the Utilities tab.
A new option named Clusters will be visible.
Step 2 : Add a New Cluster
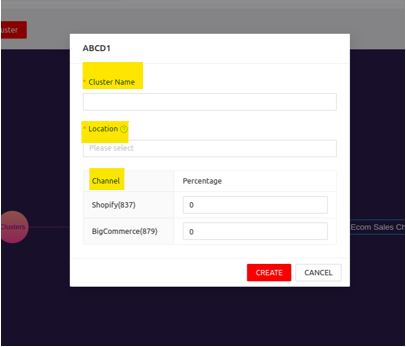
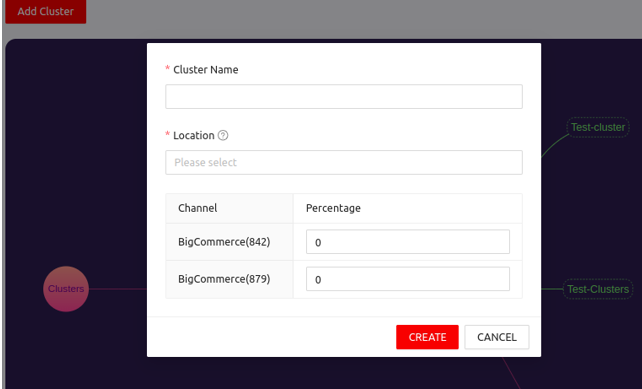
Click the Add Cluster button to initiate the creation of a new cluster.
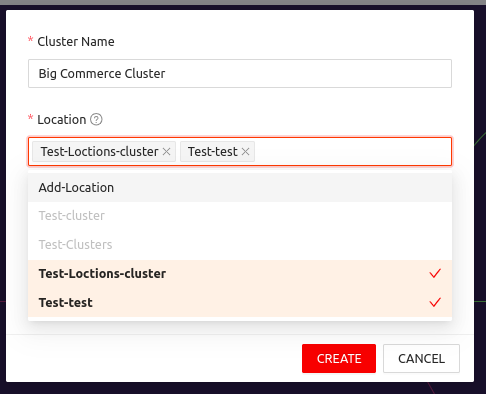
Step 3 Configure the New ClusterEnter the name of the cluster.
Specify the location(s) to assign to the cluster.
Select the sales channel(s) from your existing channels to assign to the cluster.
Step 4: Example of Cluster Creation
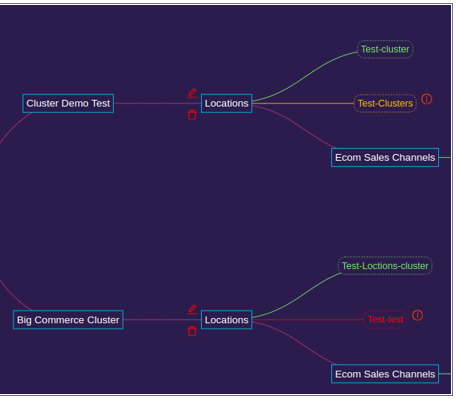
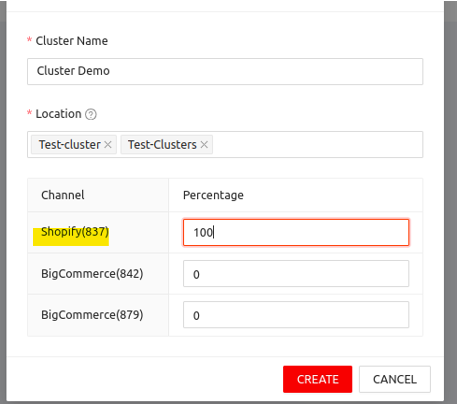
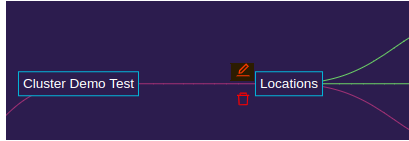
For demonstration, we have created a cluster named Cluster Demo.
The locations assigned to this cluster are Test-cluster and Test-Clusters.
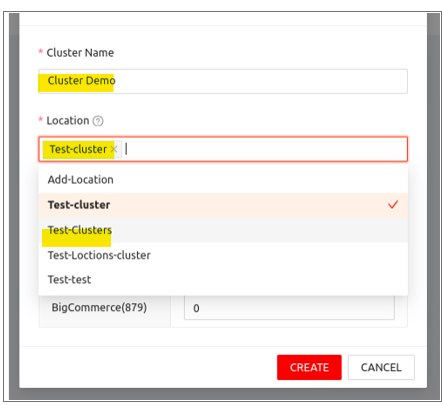
The sales channel assigned is Shopify, with a brand channel ID of 837.
Step 5: Cluster Overview
The graph represents all your clusters, the locations assigned to them, and the connected sales channels.
Each sales channel can only be connected to one cluster.
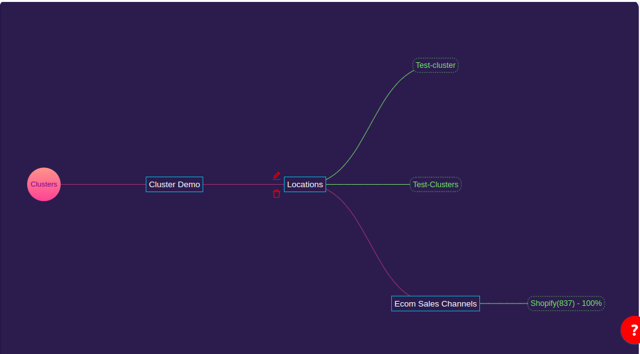
For example, after creating Cluster Demo, the Shopify cluster with brand channel ID 837 is no longer visible for assignment.
Step 6: Location Assignment Restrictions
Each location can only be assigned to one cluster.
As Test-cluster belongs to Cluster Demo, it cannot be used for another new cluster.
Step 7: Editing Cluster Configurations
All configurations can be edited post-creation by clicking the edit icon.
Step 8: Cluster Diagram Indicators
The diagram will represent all locations:
Disabled locations are shown in red.
Locations with fulfillment off are displayed in orange.