
Cluster Management
Cluster Management module allows businesses with multiple locations and multiple sales channels to manage inventory distribution in a controlled and efficient manner.
A cluster is a configurable group of locations that can be linked to one or more sales channels.
This ensures that:
Inventory uploaded for any location within the cluster contributes only to that cluster.
The OutFinal (the final inventory file pushed to sales channels) is calculated based solely on the inventory of locations assigned to that specific cluster.
Inventory visibility becomes clear, isolated, and channel-specific, preventing accidental overstocking, underselling, or stock conflicts across channels.
Cluster management is essential for brands using:
Multiple warehouses
Separate local & international inventory pools
Retail + online shared inventory
Region-wise stock allocation
Testing environments for inventory
Key Rules of Clusters
One Sales Channel → One Cluster
A sales channel cannot belong to more than one cluster.One Location → One Cluster
A location can only be assigned to a single cluster.OutFinal Calculation
Only the locations inside the selected cluster will contribute inventory to the associated sales channel.Fully Editable
Cluster names, assigned locations, and channel assignments can be updated anytime.
How to Add a New Cluster (Step-by-Step)
Step 1: Navigate to the Cluster Section
Open the inventory management tab from the sidebar.
A new option labeled Clusters will appear.
Step 2: Add a New Cluster
Click the Add Cluster button to begin the cluster creation process.

Step 3: Configure the New Cluster
You will be prompted to enter configuration details:
Cluster Name
Provide a unique and identifiable name.Select Locations
Choose one or multiple locations that will be part of this cluster.
Only available locations (not part of any other cluster) will be selectable.Assign Sales Channel(s)
Link the cluster to one or more existing sales channels.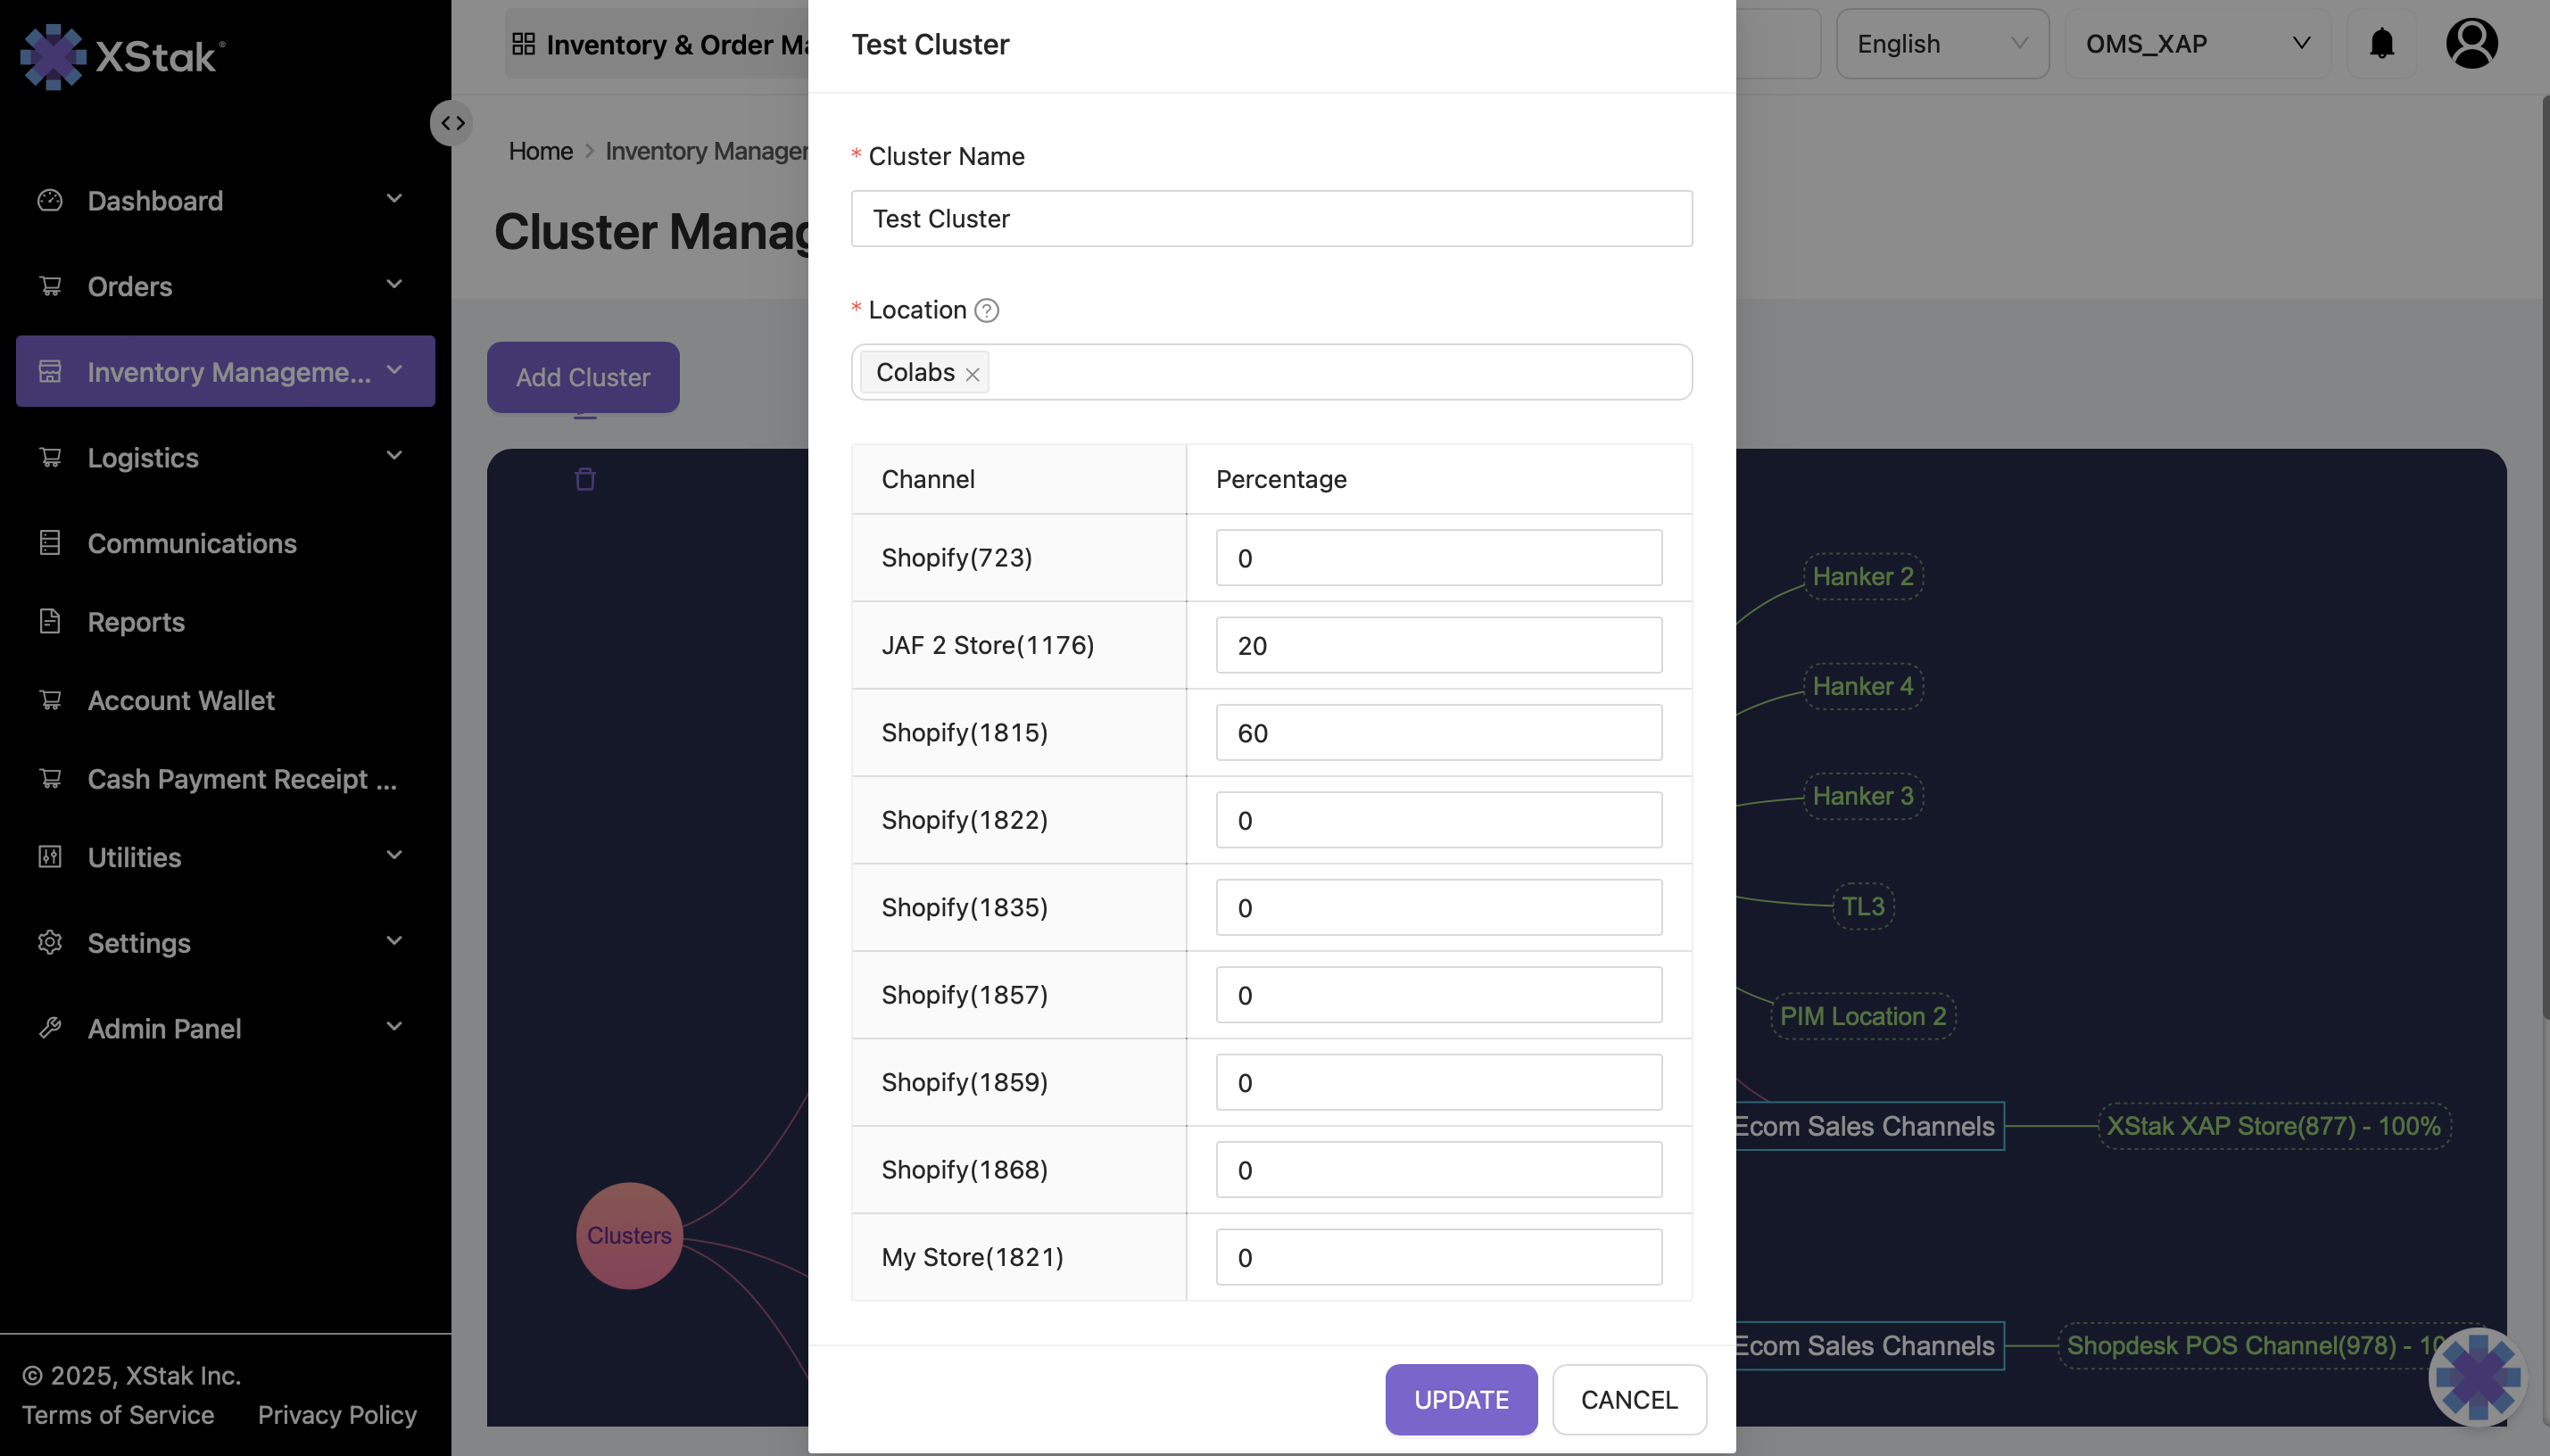
Step 4: Example of Cluster Creation
For demonstration:
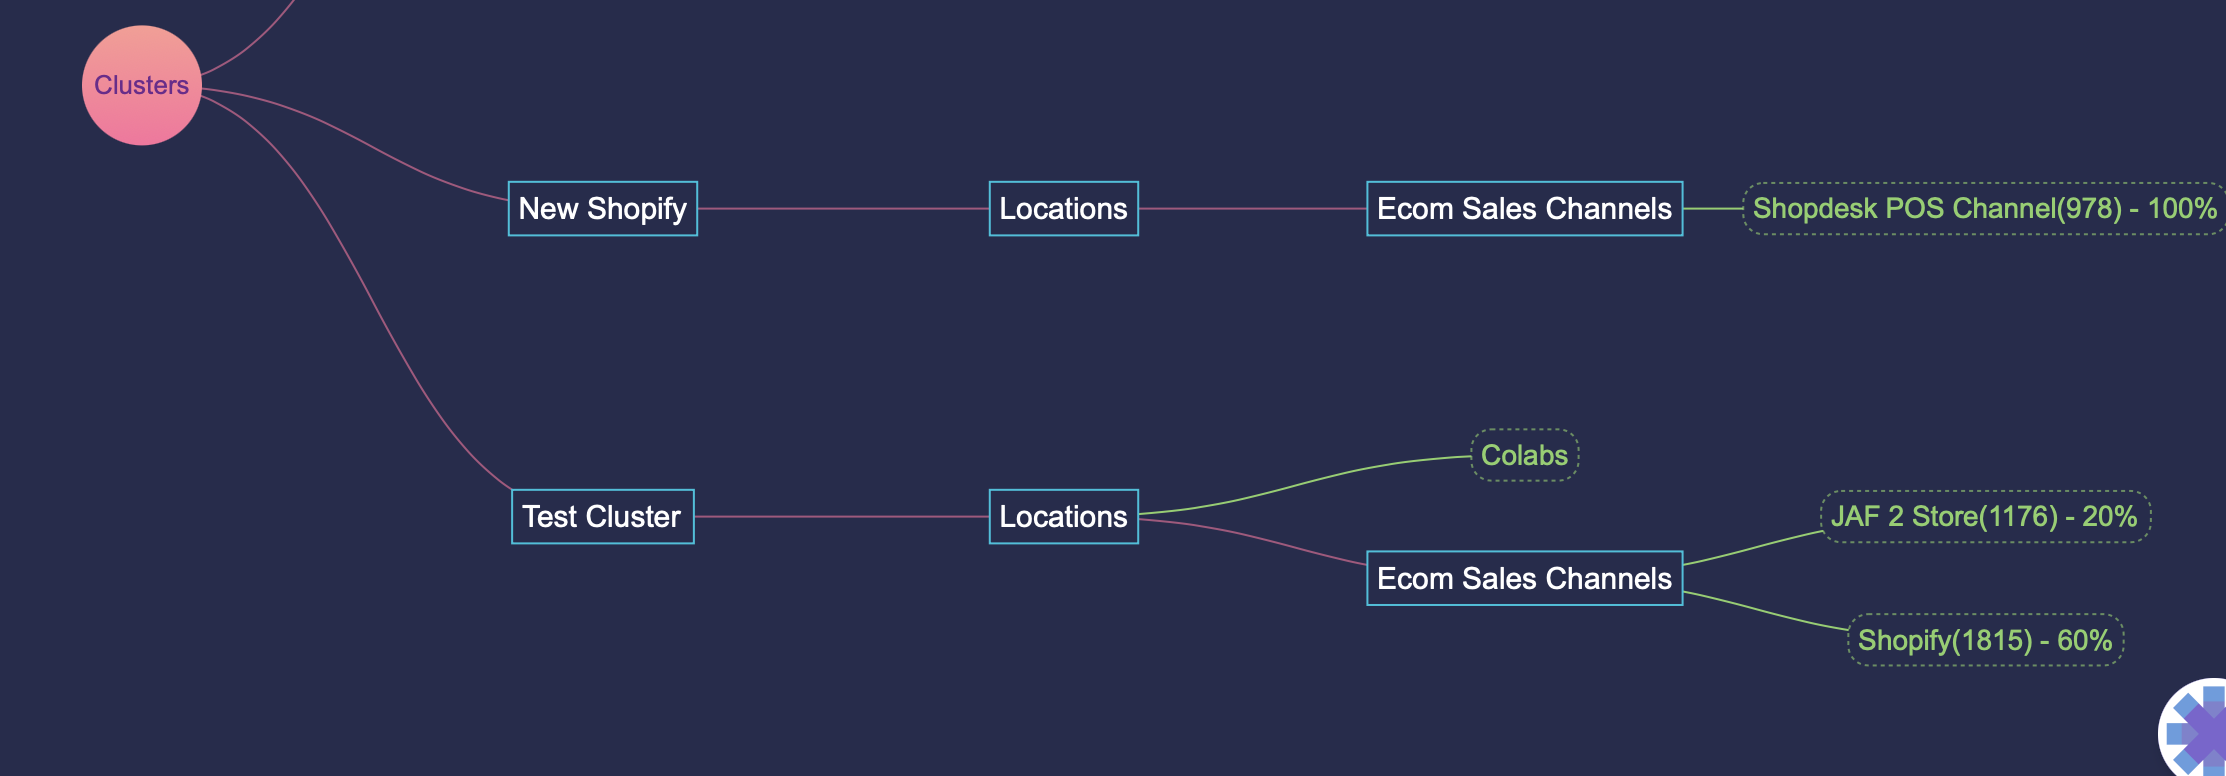
Cluster Name: Test Cluster
Assigned Locations: Colabs
Assigned Channel: JAF 2 store , Shopify
Brand Channel ID: 1176 , 1815
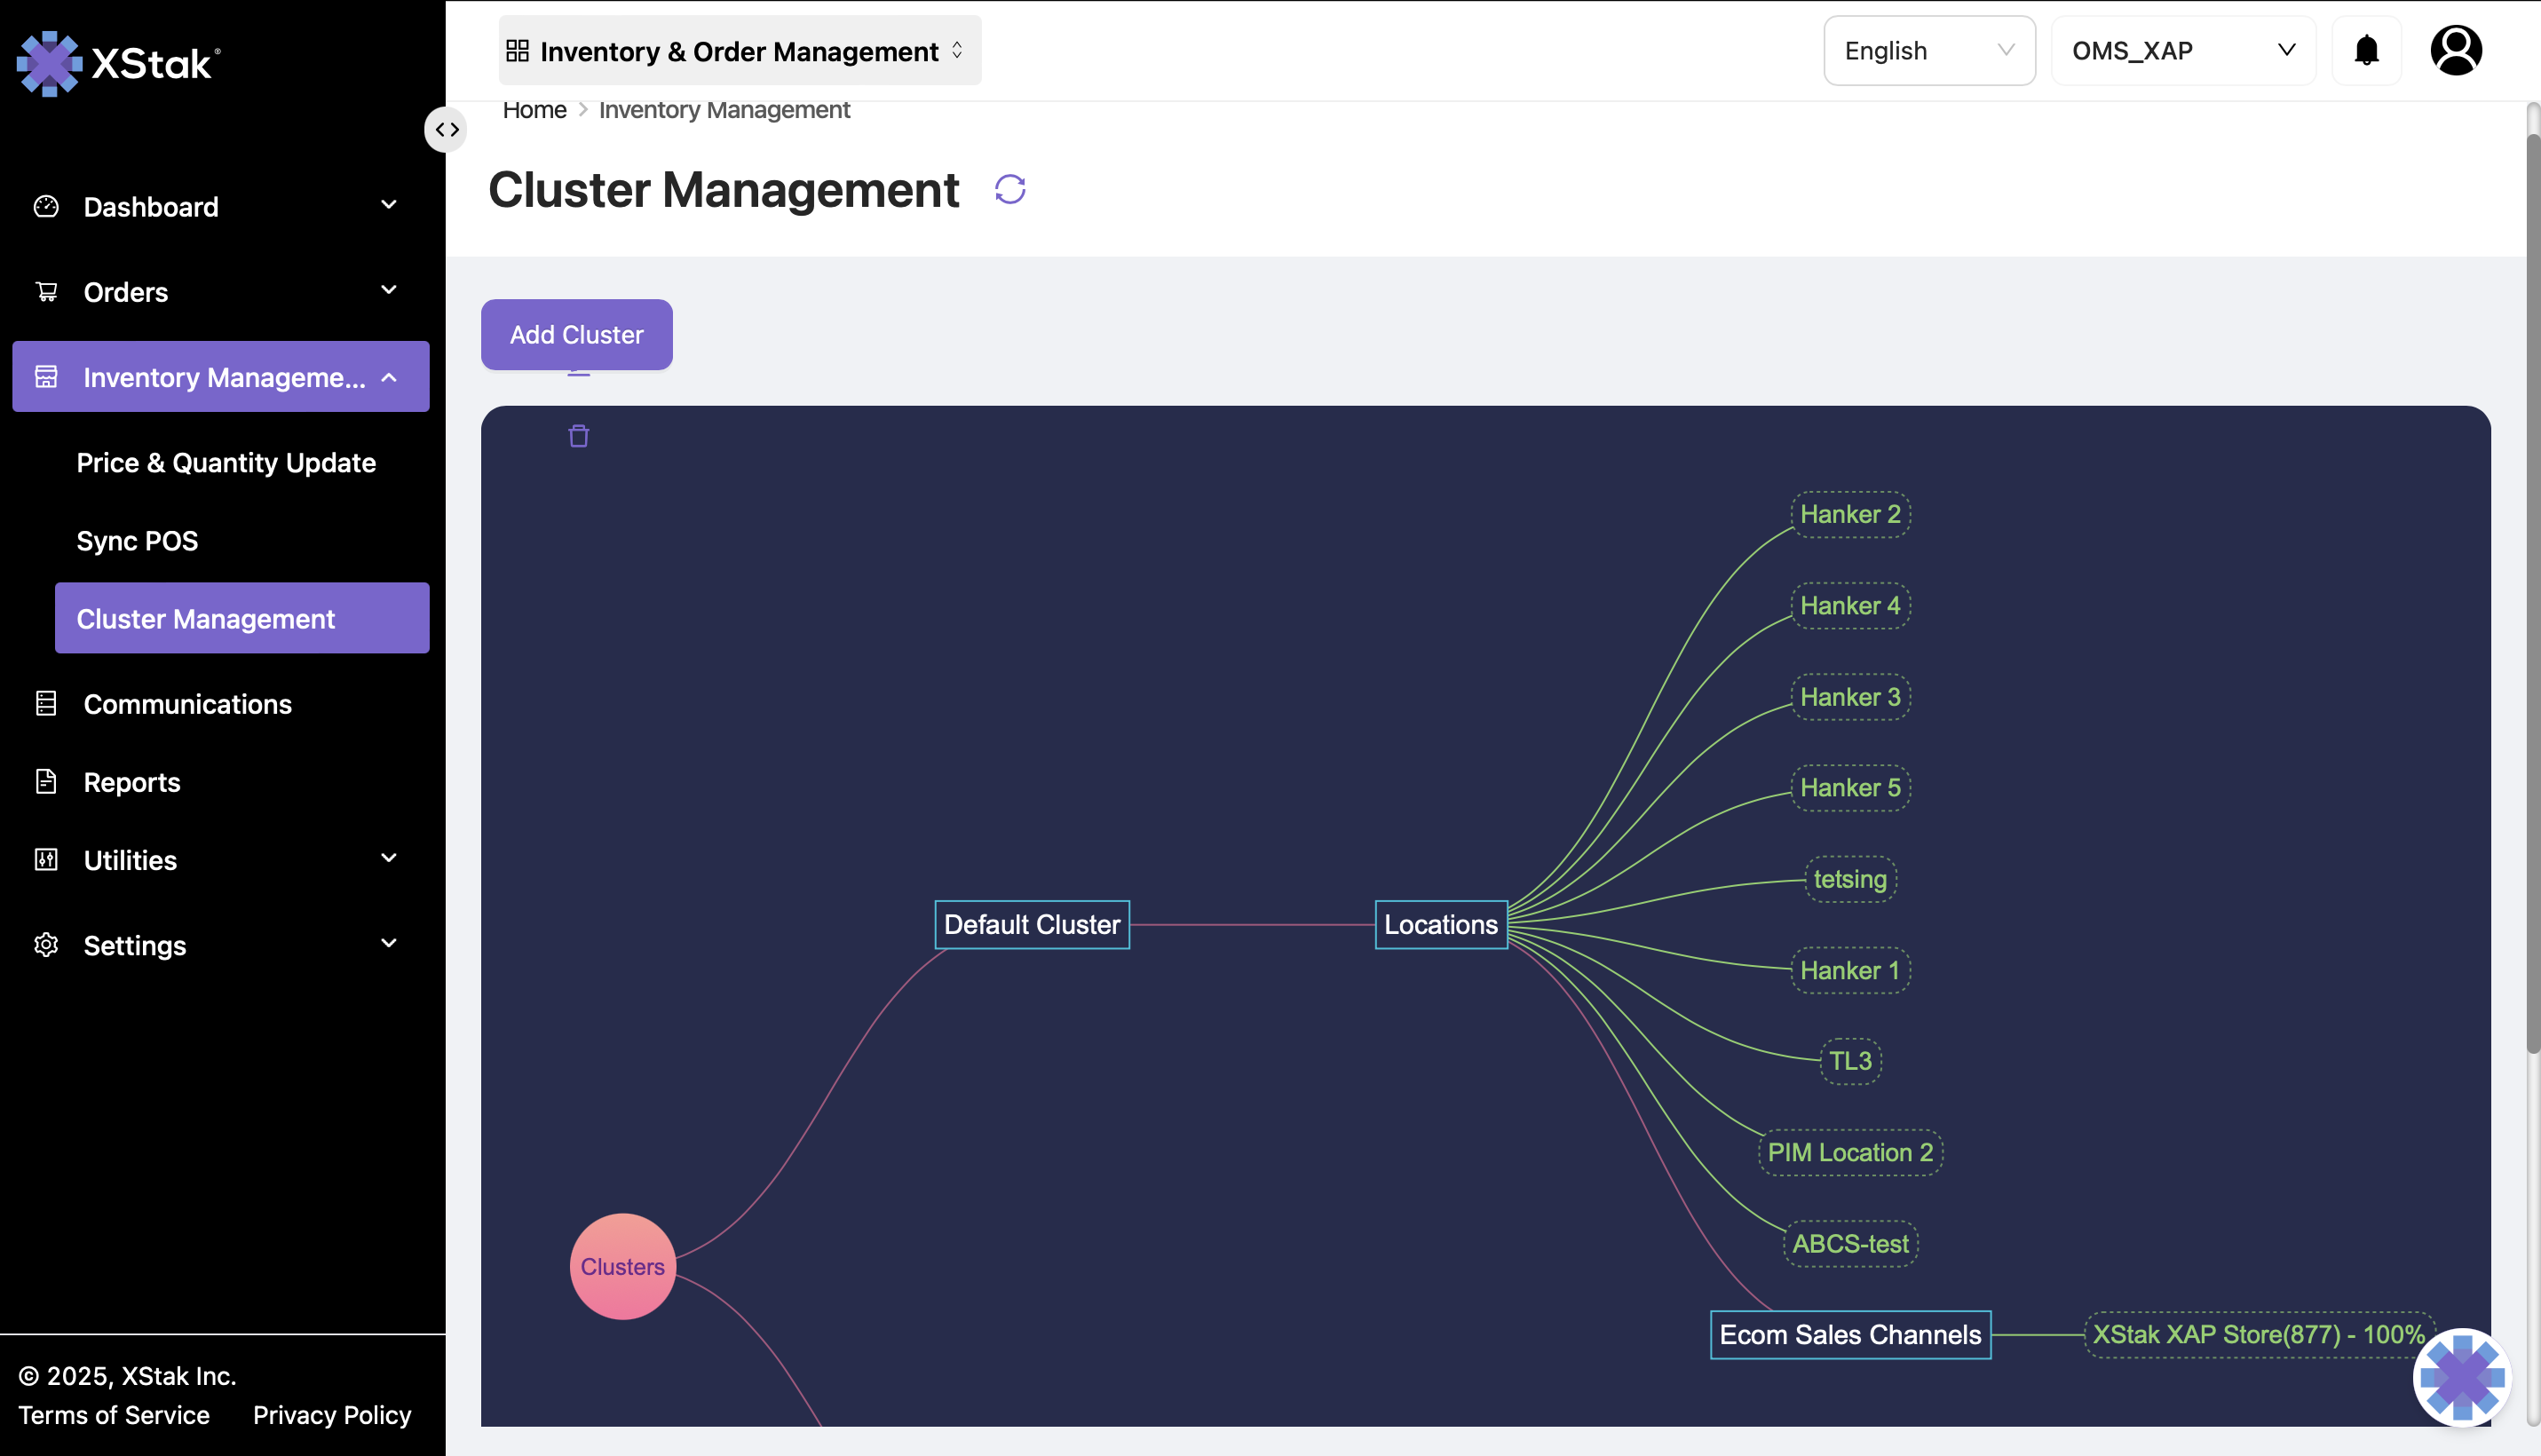
Step 5: Cluster Overview
After creating clusters, the system displays a visual diagram showing:
All clusters
Their assigned locations
Their connected sales channels
Important Note:
Once a sales channel is assigned to a cluster, it becomes unavailable for assignment elsewhere.
Step 6: Location Assignment Restrictions
Each location can ONLY belong to one cluster.
Example:
If Test-cluster is already added to Cluster Demo, it cannot be reused in another cluster.
Step 7: Editing Cluster Configurations
All cluster configurations can be modified anytime by clicking the Edit icon:
Change cluster name
Add or remove locations
Reassign sales channels
Update structure as requirements evolve

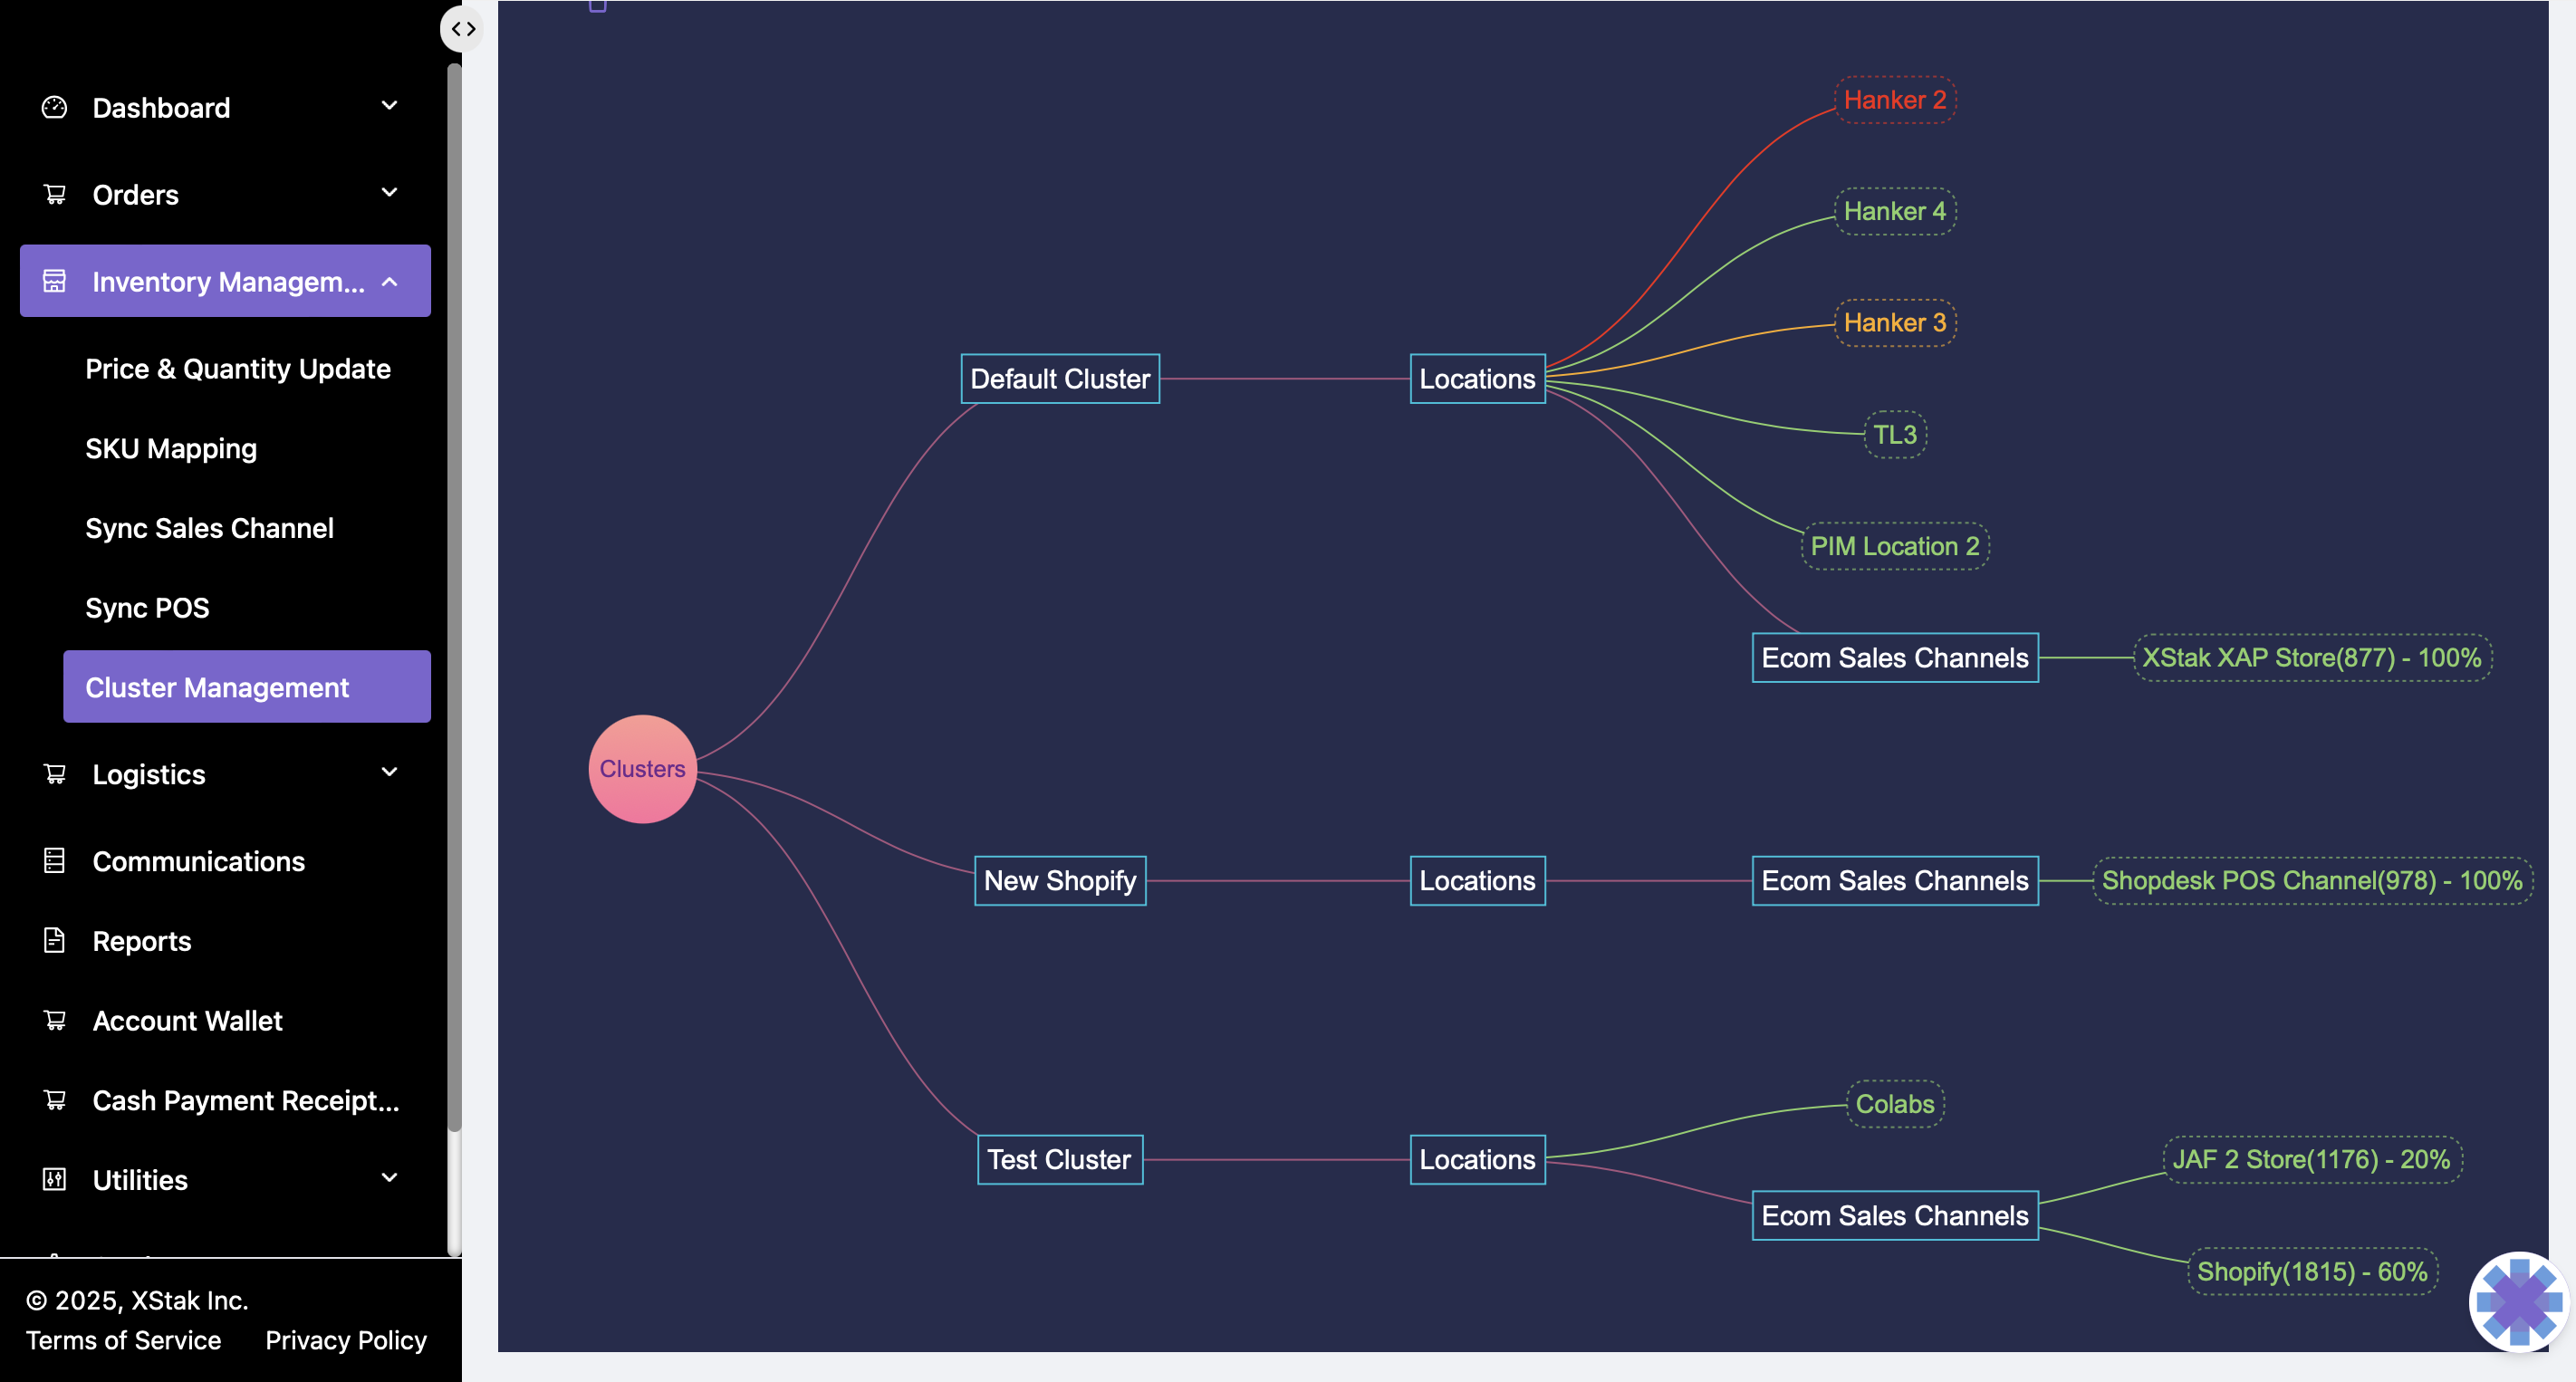
Step 8: Cluster Diagram Indicators
The cluster visualization panel uses color-coded indicators:
Indicator | Description |
|---|---|
Red | Disabled location |
Orange | Location with fulfillment turned off |
Green / Default | Active location with fulfillment enabled |
These indicators help teams quickly evaluate operational readiness across clusters.
Operational Use Cases
Use Case | Cluster Implementation |
|---|---|
Marketplace inventory separated from website | Create a dedicated cluster for each channel |
Testing new Shopify integration | Assign only test locations to a test cluster |
Multiple warehouses | Create regional clusters (e.g., North, South) |
High-volume sale events | Temporarily move selected warehouse inventory to event-specific clusters |
Troubleshooting
Issue | Reason | Resolution |
|---|---|---|
Cannot add sales channel | Channel already assigned to another cluster | Remove from previous cluster |
Location not visible | Already part of another cluster | Edit previous cluster and unassign |
Wrong OutFinal pushed | Incorrect cluster assignment | Review cluster configuration |
Inventory mismatch | Fulfillment off or location disabled | Check color-coded indicators |